Author: Amanda Girard

  • On Paddington

    On Paddington

    Overview

    Paddington Bear is a fictional character who was created by British author Michael Bond in 1958. He is a small bear from “darkest Peru” who travels to London, England, where he is found at Paddington Station by the Brown family. The Brown family takes him in and becomes his adoptive family, and Paddington quickly becomes a beloved member of the community. He is known for his love of marmalade sandwiches, his distinctive blue coat and red hat, and his polite and friendly nature. The character of Paddington Bear has appeared in numerous books, television shows, and films, and has become a beloved icon of British culture.

    His story is often seen as a celebration of kindness, acceptance, and cultural exchange.

    Original Context

    Michael Bond’s Paddington Bear can be seen as a reflection of UK attitudes to immigration in the 1950s, a time when the country was undergoing significant social and economic changes, including an increase in immigration from former British colonies.

    In the story, Paddington Bear is an immigrant from “darkest Peru” who arrives in London with nothing but his suitcase and a label around his neck that reads “Please look after this bear. Thank you.” His arrival in the UK is met with curiosity, confusion, and sometimes hostility from the people he meets. However, over time, Paddington’s polite and friendly nature endears him to the people around him, and he becomes an accepted member of the community.

    This reflects the attitudes towards immigration in the UK during the 1950s, which were often marked by a mix of curiosity, suspicion, and hostility towards newcomers. Many people were wary of the influx of immigrants from former colonies, which they saw as a threat to their jobs, their culture, and their way of life. However, as immigrants like Paddington Bear settled into the UK and contributed to the economy and society, they gradually became accepted members of the community.

    The story of Paddington Bear can also be seen as a commentary on the challenges and opportunities that immigrants face when moving to a new country. Through Paddington’s experiences, the author Michael Bond highlights the importance of kindness, acceptance, and cultural exchange in creating a welcoming and inclusive society.

    Overall, Michael Bond’s Paddington Bear can be seen as a reflection of the changing attitudes towards immigration in the UK during the 1950s. While there were many challenges and obstacles to be overcome, the story of Paddington Bear highlights the importance of acceptance, understanding, and cultural exchange in building a diverse and vibrant society.

    Contemporary Reading

    The story of Paddington Bear, like any work of literature, can be interpreted and read differently by contemporary audiences who are more polarized on issues of immigration and identity.

    Some readers may view Paddington Bear as a positive representation of immigration and cultural diversity, while others may see him as a problematic example of cultural appropriation or an unrealistic portrayal of the immigrant experience.

    On one hand, contemporary audiences who are more polarized on issues of immigration and identity may appreciate the positive message of acceptance and inclusion in the story of Paddington Bear. The character of Paddington represents an outsider who is initially met with suspicion and mistrust, but through his kind and polite nature, he is able to win over the people around him and become an accepted member of the community.

    This message of acceptance and understanding may resonate with those who advocate for a more welcoming and inclusive society.

    On the other hand, contemporary audiences who are more polarized on issues of immigration and identity may view the story of Paddington Bear as an unrealistic and idealized portrayal of the immigrant experience. Some may argue that the character of Paddington is a cultural stereotype of an exotic, childlike foreigner who is embraced by the dominant culture.

    Others may argue that the story glosses over the real challenges and obstacles that immigrants face when moving to a new country, such as language barriers, discrimination, and cultural misunderstandings.

    Overall, the story of Paddington Bear can be read and interpreted in different ways by contemporary audiences who are more polarized on issues of immigration and identity.

    While some may appreciate the positive message of acceptance and inclusion in the story, others may view it as an idealized or problematic portrayal of the immigrant experience.

    The Dichotomy of Paddington

    Dichotomies are often used to categorize and understand different aspects of the world, but they can also be controversial and oversimplified, as they do not always capture the full complexity of a particular phenomenon or idea.

    The dichotomy between Paddington Bear and cultural responses to UK immigration lies in the differing ways in which the fictional character of Paddington Bear is perceived and the complex and often controversial attitudes towards immigration in the UK.

    On one hand, Paddington Bear is a beloved children’s book character who is widely recognized and adored in the UK and around the world. His story is one of adventure and acceptance, and his immigrant status is presented in a lighthearted and endearing way.

    He is often portrayed as a friendly and polite bear who wants to fit in and make a home in the UK, and his experiences are relatable to many immigrants who have faced the challenges of adapting to a new culture.

    On the other hand, UK immigration policy and cultural responses to immigration can be more complex and contentious. Some people believe that immigration has a negative impact on the economy, society, and culture of the UK, and may be resistant to welcoming newcomers.

    Others argue that immigration is a valuable part of the UK’s history and identity, and that diversity and multiculturalism should be celebrated.

    The dichotomy between Paddington Bear and cultural responses to UK immigration highlights the difference between fictional portrayals of immigrants and the complex realities of immigration policies and attitudes.

    While Paddington Bear is a charming and lovable character, real-life immigrants may face challenges and obstacles when seeking to establish themselves in the UK.

    Lessons from Paddington

    The lesson of Paddington Bear for a contemporary audience is one of acceptance, kindness, and cultural exchange. Paddington’s story can teach us about the challenges and opportunities that come with immigration and the importance of building inclusive communities.

    In the story, Paddington is initially an outsider who is met with curiosity and sometimes hostility by the people around him. However, through his polite and friendly nature, he is able to win over the people around him and become an accepted member of the community. This message of acceptance and understanding is particularly relevant in today’s society, where issues of immigration and identity are often polarizing.

    Paddington’s love of marmalade sandwiches and other British traditions also highlights the importance of cultural exchange and the richness that comes from embracing diverse cultures. His story can serve as a reminder of the importance of understanding and celebrating different cultures, and the positive impact this can have on our communities.

    Overall, the lesson of Paddington Bear for a contemporary audience is one of acceptance, kindness, and cultural exchange, and the importance of building inclusive communities where everyone is valued and respected.

    It is important to acknowledge these complexities and work towards creating a welcoming and inclusive society for all.

    In any case, it is important to respect immigration laws and procedures to avoid legal consequences, however, it is worth noting that Paddington Bear is a fictional character, the scenario presented is hypothetical.

    But in the Real World..

    Under section 24 of the Immigration Act 1971, it is a criminal offence for an individual to enter the UK without leave or to overstay their period of leave in the UK. This offence is punishable by up to six months in prison. If Paddington Bear did indeed enter the UK without proper documentation and deliberately avoided the immigration authorities, he would be considered an illegal entrant and could be prosecuted for this offence under the Immigration Act 1971.

  • Lovecraftian Cinema

    Lovecraftian Cinema

    “In his house at R’lyeh dead Cthulhu waits dreaming.”

    H.P. Lovecraft, “The Call of Cthulhu”

    “Filming something scary is incredibly difficult because you are dealing with something intangible. Fear is in the mind’s eye, not on the screen.”

    John Carpenter

    Introduction

    H.P. Lovecraft’s stories are the stuff of nightmares, filled with cosmic horror and unspeakable terrors that lurk just beyond the threshold of our understanding.

    For years, filmmakers have struggled to adapt his works to the screen, as the very nature of Lovecraftian horror makes it almost impossible to capture visually. The unknown and incomprehensible cannot be easily portrayed, and the fear of the unseen is difficult to convey in a visual medium.

    Despite these challenges, a number of filmmakers have attempted to bring Lovecraft’s stories to life on the big screen, each one exploring the themes of madness, otherness, and the terror that lies just beyond our comprehension.

    Through the use of practical effects, creative cinematography, and expert storytelling, these films offer a glimpse into the world of Lovecraftian horror, where the true horror lies not in the monsters themselves, but in our own limitations as human beings.

    The Deep Ones (2020)

    “The Deep Ones” is a 2020 horror science fiction film that takes inspiration from H.P. Lovecraft’s classic 1931 novel “The Shadow over Innsmouth”. Written and directed by Chad Ferrin, the film follows a young couple, Alex and Petri, who rent a cottage on a remote island for a romantic getaway. However, their plans are derailed when they discover that the island’s residents are all members of a secretive cult that worships the Deep Ones, a race of fish-like creatures from Lovecraft’s mythology.

    As Alex and Petri become entangled in the cult’s machinations, they soon discover that the Deep Ones are not merely a myth, but a very real and dangerous force that threatens to consume them both. The film explores themes of alienation, otherness, and the dangers of blindly following tradition, all hallmarks of Lovecraft’s writing.

    Critically, “The Deep Ones” has received mixed reviews. Some critics have praised the film for its atmosphere, cinematography, and commitment to Lovecraft’s themes, while others have criticized its slow pacing and lack of scares. Additionally, some viewers have taken issue with the film’s use of Lovecraft’s mythology, arguing that it simplifies and sanitizes the author’s more problematic views on race and ethnicity.

    Overall, “The Deep Ones” is a solid effort that will likely appeal to fans of Lovecraft’s work and cosmic horror in general. While it may not be the definitive adaptation of “The Shadow over Innsmouth”, it does offer an interesting take on the source material and raises thought-provoking questions about the nature of fear and the unknown.

    Underwater (2020)

    “Underwater” is a science fiction horror film that takes place in a deep-sea mining facility called the Kepler 822 Station. The story follows a group of researchers, led by engineer Norah Price (Kristen Stewart), who must fight for survival after an earthquake damages the station and unleashes a group of monstrous creatures from the depths of the ocean. As they attempt to escape to the surface, the team faces a series of terrifying obstacles, including dwindling oxygen, pressure problems, and the creatures that stalk them at every turn.

    Underwater is a thrilling and intense science fiction horror film that takes the claustrophobia of films like Alien and The Abyss and brings it to the depths of the ocean. The movie is anchored by Kristen Stewart’s powerful performance as Norah, a tough and resourceful engineer who leads the team in their desperate bid for survival. The film also features an excellent supporting cast, including Vincent Cassel as the gruff captain of the Kepler 822 Station and T.J. Miller as the wisecracking Paul, who provides some much-needed comic relief.

    Director William Eubank does an excellent job of building tension and creating a sense of dread throughout the film, and the underwater setting provides a unique and haunting backdrop for the action. The monsters themselves are suitably terrifying, with the film gradually revealing more about their origins and motivations as the story unfolds. The film’s visual effects are also impressive, with the underwater scenes and creature designs feeling both realistic and otherworldly.

    Underwater is an excellent science fiction horror film that delivers on both thrills and scares. It’s a well-crafted and entertaining movie that should appeal to fans of the genre, and Kristen Stewart’s standout performance is worth the price of admission alone.

    Cold Skin (2017)

    “Cold Skin” is a 2017 science fiction-horror film based on the novel of the same name by Albert Sánchez Piñol. Directed by Xavier Gens, the film follows a young man named Friend who arrives on a remote island in the Antarctic to work as a weather observer. He soon discovers that the island is home to strange, amphibious humanoid creatures who emerge from the ocean each night to attack the island’s human inhabitants.

    Friend takes refuge in a lighthouse with the island’s only other resident, a grizzled old man named Gruner. Despite their initial mistrust of one another, the two men must work together to defend themselves against the creatures, who seem to be increasing in number and ferocity with each passing night. As the two men struggle to survive, they also begin to unravel the mystery of the creatures’ origins and their purpose on the island.

    Critically, “Cold Skin” has received mixed reviews. Some critics have praised the film for its atmospheric visuals, eerie sound design, and strong performances from its two leads. Others, however, have criticized the film for its uneven pacing, inconsistent tone, and lack of character development. While it may not be a perfect adaptation of Piñol’s novel, it does offer a compelling exploration of themes such as isolation, xenophobia, and the nature of humanity.

    Overall, “Cold Skin” is a visually stunning and thought-provoking film that appeals to fans of Lovecraftian horror and science fiction.

    One of the most significant themes in the film is the idea of humanity’s insignificance in the face of vast and incomprehensible cosmic forces.

    The film’s setting on a remote island in the Antarctic emphasizes the isolation and vulnerability of the human characters, who are completely cut off from the rest of the world. As they struggle to survive against the amphibious humanoid creatures that emerge from the ocean each night, they are forced to confront the fact that their existence is inconsequential in the grand scheme of things.

    The creatures themselves are also reminiscent of Lovecraft’s creations, such as the Deep Ones in “The Shadow over Innsmouth.” Like those creatures, the amphibious beings in “Cold Skin” represent a threat to humanity’s sense of order and security, embodying the idea that there are incomprehensible and malevolent forces in the universe that cannot be controlled or understood.

    Another Lovecraftian theme in the film is the idea of the unknown and the unexplainable. The creatures and their origins are never fully explained or understood, adding to their mystery and otherworldly nature. This element of the unknown also extends to the human characters, who are often forced to confront their own fears and limitations in the face of the creatures’ onslaught.

    “Cold Skin” also explores the theme of madness, which is a common element in Lovecraft’s work. As the film progresses, the characters’ sanity begins to unravel as they struggle to come to terms with the creatures and the implications of their existence. This descent into madness underscores the idea that there are some things in the universe that are simply beyond human comprehension or understanding.

    Innsmouth (2015)

    “Innsmouth” is a short horror film that takes inspiration from H.P. Lovecraft’s “The Shadow over Innsmouth.” The film is directed by Izzy Lee, who also co-wrote and co-produced it with Francesco Massaccesi.

    The film follows a young woman named Izzy (played by Tristan Risk) who travels to the town of Innsmouth in search of her estranged father. She soon discovers that the town is shrouded in mystery and terror, with its inhabitants harboring dark secrets and ancient rituals.

    As Izzy delves deeper into the town’s history, she begins to unravel the truth about her family and the sinister forces that have been lurking in Innsmouth for generations. With the help of a local woman named Ruth (played by Diana Porter), Izzy must confront the horrors of the town and escape before it’s too late.

    “Innsmouth” is a well-crafted and atmospheric horror film that effectively captures the eerie and unsettling tone of Lovecraft’s writing. The film’s use of practical effects and practical makeup is particularly impressive, creating a sense of physicality and tangible dread that is often missing in contemporary horror films.

    The performances are also strong, with Tristan Risk and Diana Porter delivering nuanced and believable portrayals of their characters. The film’s pacing is brisk and engaging, with a sense of escalating tension that builds to a thrilling and satisfying climax.

    Overall, “Innsmouth” is a compelling and well-executed horror film that is sure to delight fans of Lovecraftian horror and indie cinema alike. It’s a testament to the creativity and skill of its filmmakers, and a must-watch for anyone looking for a spooky and atmospheric horror experience.

    The Cthulhu (2007)

    “The Cthulhu” is a 2007 horror film directed by Dan Gildark, loosely based on the H.P. Lovecraft story “The Shadow Over Innsmouth.” The film follows Russell Marsh, a gay man who returns to his hometown of Astoria, Oregon, to attend his mother’s funeral. As he reconnects with his estranged father and childhood friends, he begins to experience strange and disturbing visions, and soon discovers that his family and the town are hiding dark secrets.

    The film is a slow-burn horror story that is more concerned with psychological terror than jump scares or gore. It tackles themes of sexual identity, repression, and Lovecraftian cosmic horror in a thoughtful and engaging way. The performances are strong, particularly Jason Cottle as Russell Marsh, who delivers a nuanced and understated portrayal of a man struggling to come to terms with his past and his sexuality.

    The film’s visual style is also impressive, with its moody cinematography and eerie, dreamlike imagery adding to its overall sense of unease. The use of Lovecraftian imagery and themes is effective, and the film does a good job of capturing the author’s unique brand of horror.

    While “The Cthulhu” may not be for everyone, particularly those who prefer more straightforward horror fare, it is a well-crafted and thought-provoking film that is sure to leave a lasting impression on viewers. It is a worthy addition to the Lovecraftian horror canon and is a must-see for fans of the author and the genre.

    The Call of Cthulhu (2005)

    For a long time, it was believed that the original story could not be adapted into a film. However, the creators of the 2005 adaptation of “The Call of Cthulhu” came up with the innovative idea of making it a silent film, and their passion for the project resulted in favorable reviews and multiple awards.

    “The Call of Cthulhu” is a 2005 independent silent film adaptation of H.P. Lovecraft’s famous short story of the same name. The film is directed by Andrew Leman and produced by Sean Branney, and was made with the intention of recreating the look and feel of silent horror films from the 1920s.

    The film follows the story of a young man named Francis Thurston, who becomes fascinated with the legend of the ancient and malevolent entity known as Cthulhu. As he delves deeper into the legend, he uncovers a vast conspiracy of cultists who worship Cthulhu and are working to bring about his return to the world.

    The film is shot entirely in black and white and features minimal dialogue, relying instead on visual storytelling and a haunting original score by Troy Sterling Nies. The filmmakers use a variety of silent film techniques, such as intertitles, camera angles, and exaggerated facial expressions, to create a sense of unease and foreboding throughout the film.

    “The Call of Cthulhu” is a faithful and effective adaptation of Lovecraft’s classic tale, capturing the sense of dread and cosmic horror that is a hallmark of his writing. The use of silent film techniques adds to the overall sense of otherworldliness and helps to create a haunting and unsettling atmosphere. The film is a must-see for fans of Lovecraft and horror in general, and is a testament to the enduring power of the author’s work.

    Dagon (2001)

    “Dagon” is a 2001 horror film directed by Stuart Gordon and based on the H.P. Lovecraft story “The Shadow Over Innsmouth.” The film follows Paul Marsh, a young man who becomes stranded with his girlfriend Barbara and their friends in a small fishing village called Imboca, which is inhabited by strange, fish-like creatures.

    As they try to escape, they soon discover that the townspeople are worshipping Dagon, an ancient sea god, and are willing to sacrifice the outsiders in order to appease him. The group is quickly forced into a fight for their lives as they try to uncover the dark secrets of the town and its inhabitants.

    “Dagon” is a gory and unsettling horror film that is faithful to Lovecraft’s original story. The film creates a palpable sense of dread and paranoia as the characters are trapped in a town where nothing is as it seems. The creature designs are both eerie and disturbing, with the inhabitants of Imboca being portrayed as grotesque hybrids of human and sea creature.

    The film’s cinematography and score also contribute to its overall sense of unease, with the use of shadows and dimly lit sets creating a foreboding atmosphere. The performances of the cast are solid, with Ezra Godden delivering a convincing portrayal of the increasingly desperate and traumatized protagonist.

    Overall, “Dagon” is a highly effective horror film that captures the essence of Lovecraft’s work while also providing plenty of scares and thrills. It is a must-see for fans of Lovecraftian horror and is a testament to the enduring power of the author’s work.

    Cthulhu (2000)

    Cthulhu is a 2000 Australian low budget horror film that was directed, produced, and written by Damian Heffernan. It based on two Lovecraft stories, “The Thing on the Doorstep” and “The Shadow Over Innsmouth”.
    It was screened at the Melbourne Underground Film Festival and showed on Australian TV as part of their Australian content quota obligations, and later had international distribution.

    It concerns a student that discovers that his best friend has become involved in a cult intent on raising Cthulhu.

    Call of Cthulhu (~1995 ?)

    Edward Pierce is a fictional private investigator created by the American author and game designer, Keith Herber. Pierce appears in a number of Lovecraftian tabletop role-playing games and stories set in the 1920s, including the popular game Call of Cthulhu.

    In the game, Pierce is a skilled investigator who often finds himself drawn into dark and dangerous supernatural mysteries. He is described as a veteran of World War I, a former member of the Boston Police Department, and a man with a troubled past. Despite his flaws, Pierce is a competent and determined investigator who is often able to unravel the mysteries he encounters and foil the nefarious plans of cultists and other supernatural entities.

    Pierce is a well known and loved character among fans of Lovecraftian horror and is often cited as one of the most iconic and well-developed player characters in the Call of Cthulhu tabletop game. His adventures have been adapted into numerous novels and short stories, and he remains a popular and enduring figure in the world of Lovecraftian horror.

    There is possibly (I am convinced i have seen it) a short fanfic VHS shot film called “Call of Cthulhu” which follows an Edward Pierce like a private investigator in 1920s Boston, as he investigates the mysterious death of an entire family on an island off the coast of Massachusetts. As Pierce delves deeper into the case, he discovers that the family was part of a cult devoted to the worship of an ancient and powerful creature known as Cthulhu. Pierce has to confront his own sanity as he unravels the mysteries surrounding Cthulhu and its followers, all while trying to stay alive in a world filled with dark forces beyond his comprehension.

    Played seriously, but on a very low budget with uncredited actors, it is similar to several adaptations of Lovecraft’s works that feature private investigators and detectives in a similar vein to Pierce in the 1990s. For example, John Trent in “In the Mouth of Madness” (1994), John Murdoch in “Dark City” (1998), and John March in “The Resurrected” (1991) all investigate dark and supernatural mysteries that share similarities with the investigations undertaken by Pierce.

    Cthulhu Mansion (1992)

    “Cthulhu Mansion” (1992) is a Spanish horror film directed by Juan Piquer Simón. The film follows a group of young people who are invited to stay in a mansion located in the countryside, unaware of the horrors that await them. As they explore the mansion, they uncover a dark history involving a cursed book and the evil deity Cthulhu, whose power threatens to consume them all.

    The film’s plot is a loose adaptation of H.P. Lovecraft’s “The Case of Charles Dexter Ward” and incorporates elements of the author’s broader mythos. While the film’s low budget is evident in its production values, it still manages to create a creepy and unsettling atmosphere through its use of eerie music and atmospheric lighting.

    The performances in “Cthulhu Mansion” are generally solid, with standout performances from Frank Finlay as the creepy Dr. Marlowe and Luis Fernando Alvés as the mysterious and sinister Sandel. The film also benefits from its creative use of practical effects, which help to bring some of the more grotesque and surreal elements of Lovecraft’s work to life.

    While “Cthulhu Mansion” may not be a masterpiece, it is an entertaining and campy horror film that will appeal to fans of Lovecraft and classic horror. It may not be the most faithful adaptation of the author’s work, but it is a fun and unique addition to the Lovecraftian horror canon.

    The Call (1967)

    The Call was a 1967 horror film directed and produced by Orson Welles and starring Anthony Perkins as the narrator. The film follows the story of a young man, Francis Wayland Thurston (Perkins), who discovers a mysterious cult devoted to the worship of an ancient god known as Cthulhu. After uncovering evidence of strange rituals and dark secrets, Thurston embarks on a quest to uncover the truth behind the cult’s activities.

    The film begins with Thurston receiving a package from his recently deceased great-uncle, George Gammell Angell. Inside the package is a collection of notes and documents that tell the story of an ancient cult devoted to Cthulhu, an evil god from another dimension. As he reads through the documents, Thurston discovers that the cult is planning to summon Cthulhu from his slumber in order to bring about chaos and destruction.

    Thurston travels to New England in search of more information about the cult and its plans. Along the way, he meets several people who have had dream encounters with Cthulhu or are connected to him in some way. He also discovers evidence of strange rituals being performed by members of the cult in order to summon Cthulhu.

    Eventually, Thurston finds himself face-to-face with a manifestation of Cthulhu himself. In a desperate attempt to save humanity from destruction, Thurston manages to banish Cthulhu back into his slumber. The film ends with Thurston, clearly now insane, babbling his reflections on his experience and warning others not to meddle with forces beyond their understanding.

    The Call – A forgotten Classic ?

    Orson Welles had a long and difficult history of getting his films financed and made. His first major film, Citizen Kane, was famously taken away from him by the studio and re-edited without his input. This experience left him with a deep distrust of Hollywood studios, which made it difficult for him to get any of his subsequent projects off the ground.

    In the late 1960s, Welles attempted to make a film adaptation of H.P. Lovecraft’s short story “The Call of Cthulhu”. He wrote a script and tried to get it financed by various Hollywood studios, but all of them rejected it due to its unconventional subject matter and lack of commercial appeal. Welles was also unable to secure financing from independent sources, as he had done with some of his previous projects.

    Ultimately, Welles was unable to get the project off the ground and it remained unmade until 1966 when it was finally adapted into a low-budget independent film. The struggles that Welles faced in trying to get “The Call” made are indicative of the difficulties he faced throughout his career in getting his projects financed and produced.

    The total budget assigned by the studio to Welles’ project was a measly $200,000. Orson Welles was, however a legend in the business who was prepared to go through great lengths to find additional money to make his film. Unfortunately, Welles was unable to secure enough funding from traditional sources and had to resort to other methods in order to finance the project, this involved significant artistic compromises.

    One of the first steps Welles took was to approach his friends and contacts for financial assistance. He asked them for donations, loans, or any other form of support they could provide. This allowed him to raise some money but it wasn’t enough for the entire production budget. He then turned to private investment firm in order to raise additional funds. Through this scheme, he was able guarantee loans and reach out to a wider non-hollywood audience and successfully raised enough money for the film’s production costs.

    Welles also sought out private investors who were willing to put up their own money in exchange for a share of the profits from the film’s release. He managed to find several investors who were willing to take a risk on his project and provided him with the necessary funds he needed.

    Finally, Welles also looked into alternative financing options such as pre-sales and tax incentives. Pre-sales involve selling off distribution rights before the film is even completed in order to generate revenue that can be used for production costs.

    Tax incentives are government programs that provide filmmakers with financial assistance in exchange for certain requirements being met during production or post-production stages of filmmaking.

    By taking advantage of these options, Welles was able to secure just about enough money for “The Call” without having to rely solely on traditional sources of funding.

    The film not was really not intended to be a low-budget horror movie, rather a psychological study of a mans singular descent into madness after “The Call”.

    During the production, Welles had creative differences with the studio over the direction of the film. He wanted to make a more artistic and experimental version of the story, while the studio wanted a more traditional horror movie. This led to disagreements between Welles and the studio, which ultimately resulted in him losing control over the some of creative decisions on the project.

    The role of George Gammell Angell, in the flashback scenes was played by the veteran actor Dean Boland who died of an heart attack during production, further tied the production up in claims of legal negligence leading it to be regarded as cursed production.

    Welles had to call in favours from his friends. As a result, Anthony Perkins’ performance as the narrator in the film was unique and memorable for a number of reasons.

    From what we known form the few surviving recordings, he used a very distinct voice that was both soothing and eerie at the same time. His delivery was also very precise and measured, which added to the overall atmosphere of the film. Additionally, his narration was often delivered in a poetic manner, which gave it an almost dream-like quality. He was able to convey a wide range of emotions through his performance, from fear and dread to hope and optimism. All of these elements combined to make Anthony Perkins’ performance as the narrator in the film truly unforgettable.

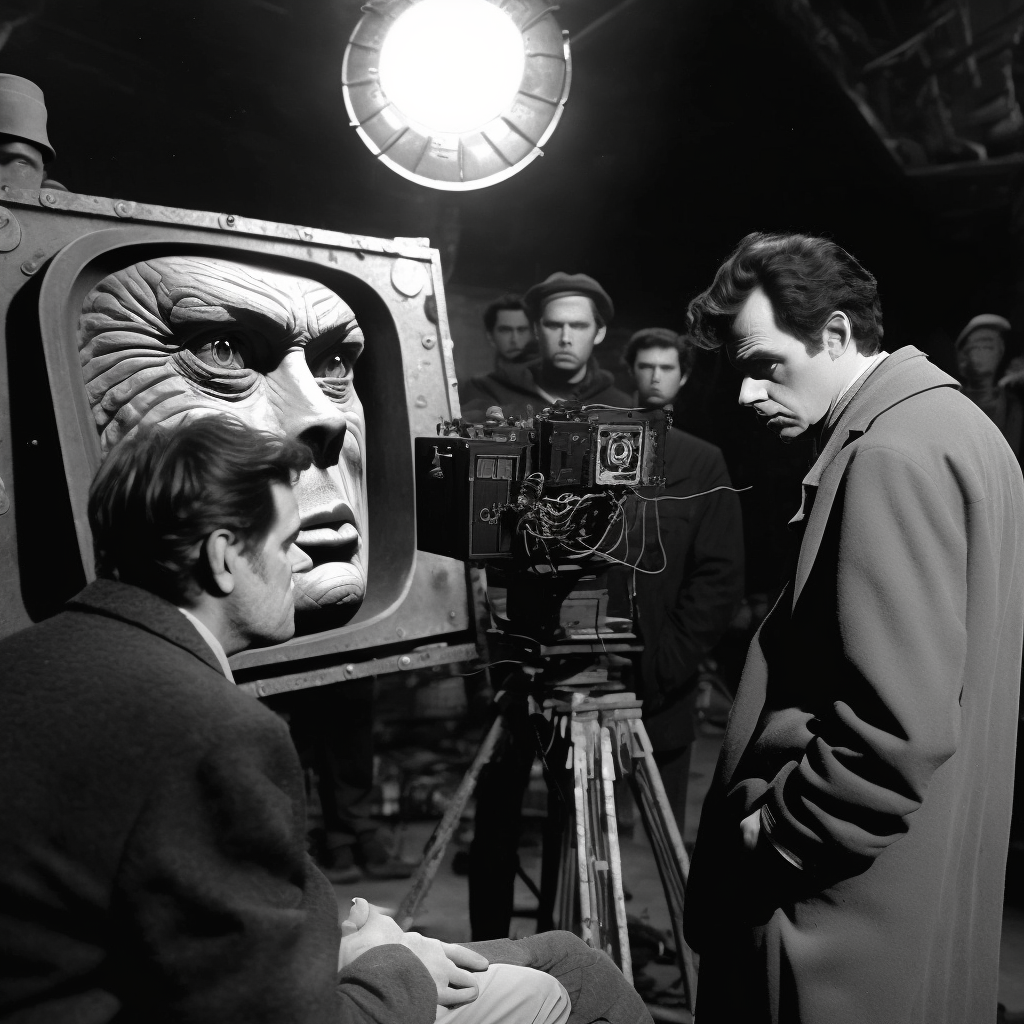
    The creature and effects for the 1968 version of Call were designed by special effects artist, Wah Chang. Chang used a combination of stop-motion animation and puppetry to create the iconic Cthulhu creature seen it the dreams sequences.

    To make Cthulhu look large and to scale on the screen, Chang used a combination of techniques. He created a full-scale puppet of Cthulhu that was operated by several puppeteers. This puppet was then filmed in front of a blue screen, allowing it to be composited into the film’s scenes. To give the creature more depth and texture, Chang also used stop-motion animation to animate its tentacles and other features.

    Chang chose to make Cthulhu look like an octopus because he wanted to capture the Lovecraftian horror of the creature. As Octopuses are often seen as mysterious creatures that lurk in the depths of the ocean, which made them an ideal choice for representing Cthulhu’s alien nature, the many tentacles that can be animated using stop-motion techniques, making them easier to work with than other creatures.

    To finish the film, Welles had to go through great lengths in order to find additional funds for “The Call”, which distracted him from direction. This led to delays in production and a lack of resources, resulting in a final product that was deemed unsatisfactory by the studio. but ultimately failed to get funds for distribution.

    The bitter irony was that Welles of course lost the rights to his film due to a number of factors. The production was plagued by financial issues, with Welles unable to secure enough funding to complete the project and had to cut scenes and make do with stock footage.

    Unfortunately, the film only made its debut in 1968 at the San Francisco International Film Festival. “The Call” was not well-received by critics or audiences, who lambasted the incoherent plotting and ridiculous looking monster effects. This caused it to be pulled d and was never released in widely theatres.

    It saw some limited showings in mid-west theatres as a filler feature, leaving young theatre goers with either strange experience, later half remembered, or just forgotten with all the other B Movies of the era. It is estimated that the film has made around $1 million, certainly not enough to sustain it. It was quickly forgotten, prints disappeared into the ether of dead films. As a result, Welles lost eventually lost all hits rights to the film and it forgotten, out of circulation for decades. Even through all the home video crazes and revivals in horror fandom, it was never subsequently released on home video.

    Orson Welles hard work would of course eventually pay off as a partial, degraded print of “The Call” surfaced on the internet in 2016.

    The subsequent recovery efforts, pain staking restoration and legal wrangling over studio rights are documented else where. The film is remastered Blue Ray and features commentary from visual effects artist Chang and retired costume designer Abigail Waite. The hype arounds the limited edition release meant that it went on to become one of the most sort after and critical successful horror films revivals, with copies of the film exchanging hands well over its l very high RRP. If one pops upon ebay, be sure to grab it. “The Call” Joins Welles other unfinished projects including his short lived in the equally strange “The Man in the High Castle”. The Call is reconsidered a a minor classic today.

    The Haunted Palace (1963)

    “The Haunted Palace” is a 1963 horror film directed by Roger Corman and starring Vincent Price. While the title may suggest that the film is based on the Edgar Allan Poe poem of the same name, it is actually an adaptation of the H.P. Lovecraft novella “The Case of Charles Dexter Ward.”

    The film follows Charles Dexter Ward, a man who inherits a mansion in the small town of Arkham that was once owned by his ancestor, Joseph Curwen, a notorious warlock who was burned at the stake. As Ward and his wife explore the mansion, they begin to experience strange and frightening visions, and it becomes clear that Curwen’s evil presence still lingers in the town.

    “The Haunted Palace” is a stylish and atmospheric horror film that benefits greatly from the presence of Vincent Price, who gives a typically charismatic and creepy performance. The film’s sets and costumes are also impressive, creating a convincing and immersive world that feels like a Lovecraftian nightmare come to life.

    While the film does deviate from Lovecraft’s original story in certain aspects, it still manages to capture the essence of the author’s work, with themes of madness, occultism, and ancient evil permeating throughout. The film’s climactic finale is particularly effective, with Price delivering a memorable and chilling monologue that cements his status as a horror icon.

    Overall, “The Haunted Palace” is a highly entertaining horror film that successfully blends the styles of Roger Corman and H.P. Lovecraft, resulting in a unique and memorable viewing experience. It is a must-see for fans of both the director and the author, as well as anyone looking for a creepy and atmospheric horror film from the 1960s.

  • Translating Instructions

    Translating Instructions

    Instructions

    My Notes on translating Software Instructions from English to Arabic.

    Guidelines

    Here are some guidelines for writing simple technical instructions with translations to Arabic, along with some common issues with interpretation:

    Keep sentences short and simple. Use short, concise sentences that are easy to read and understand. Avoid using complex or technical terms that may be difficult to translate accurately.

      Use active voice. Use active voice to make the instructions more clear and direct. Passive voice can be confusing and make it difficult for the reader to understand what actions to take.

      Provide visual aids. Include screenshots, diagrams, or other visual aids to supplement the instructions. Visual aids can help readers understand the steps more easily, even if they don’t understand the text.

      Avoid idiomatic expressions and slang. Avoid using idiomatic expressions or slang that may not translate well. Instead, use simple and clear language that is easy to understand.

      Check translations for accuracy. When translating to Arabic, make sure to check for accuracy and context. Arabic is a complex language with many dialects and nuances, so it’s important to ensure that the translations are clear and accurate.

      Consider cultural differences. Be aware of cultural differences that may affect the interpretation of the instructions. For example, gestures, symbols, or colours may have different meanings in different cultures, so it’s important to be sensitive to these differences.

      Common Issues

      Some common issues with interpretation when translating to Arabic include:

      Different dialects. Arabic is spoken in many countries and regions, each with their own dialects and variations. This can make it difficult to translate instructions that are universally understood.

      Right-to-left script. Arabic is written from right to left, which can be confusing for readers who are not used to this script.

      Different grammatical structures. Arabic has a different grammatical structure than English, which can make it difficult to translate sentences accurately.

      Cultural references. Some cultural references or idiomatic expressions may not translate well, or may require additional explanation to be understood by readers from different cultures.

        By following these guidelines and being aware of common issues with interpretation, you can create clear and effective technical instructions that are easily understood by readers in Arabic-speaking countries.

        Note: Arabic is a complex language with many dialects, so the pronunciation may vary depending on the dialect. The pronunciation provided here is a general guide based on Modern Standard Arabic. and has been generated using Computer based Translation Software. 

        Verbs

        Here is a table of some common verbs found in technical instructions for software.

        EnglishArabicPronunciation
        Downloadتحميلtahmeel
        Installتثبيتtathbeet
        Runتشغيلtashghil
        Openفتحfath
        Editتعديلta’adeel
        Saveحفظhifdh
        Closeإغلاقighlaq
        Configureتكوينtakween
        Connectاتصالitisal
        Selectاختيارikhtiyar
        Clickالنقرan-niqr
        Typeكتابةkitabah
        Pressالضغطadh-dhughth
        Enterإدخالidkhal
        Confirmتأكيدta’keed
        ExitخروجKhorooj
        Double-clickانقر مزدوجًاEnqar muzdawjan
        Drag and dropسحب وإفلاتSahb wa Iflat
        CopyنسخNuskha
        PasteلصقLasq
        UndoتراجعTaraajuh
        RedoإعادةI’aadah
        Save asحفظ باسمHifdh bism
        Zoom inتكبيرTakbir
        Zoom outتصغيرTasghir

        Nouns

        Here is a table of some common nouns found in technical instructions for software.

        EnglishArabicPronunciation
        Softwareبرنامجbarnamaj
        Installationالتثبيتaltathbeet
        Configurationالتكوينaltakween
        Databaseقاعدة البياناتqa’ida al-bayanat
        Fileملفmalf
        Folderمجلدmajalad
        Directoryدليلdalil
        Userمستخدمmustakhdim
        Passwordكلمة السرkalimat al-sir
        Settingsإعداداتi’adadat
        Connectionاتصالitisal
        Buttonزرzar
        Menuالقائمةal-qa’imah
        Errorخطأkhata’
        Backupالنسخ الاحتياطيal-nuskhh al-ahtiyati

        Instructions

        Here is a table with some common technical phrases:

        EnglishArabicArabic Pronunciation
        Type your username and passwordكتابة اسم المستخدم وكلمة السرkitabah ism al-mustakhdim wakalimat al-sir
        Press Enter to continueالضغط على إدخال للمتابعةadh-dhughth ‘ala idkhal lilmutaba’ah
        Download the softwareتحميل البرنامجTahmeel al-barnamej
        Download the installerتحميل المثبتtahmeel al-muthbit
        Run the installerتشغيل برنامج التثبيتTashghil barnamaj al-tathbit
        Run the setupتشغيل الإعدادtashghil al-i’adad
        Select the desired optionاختيار الخيار المطلوبikhtiyar al-khiyar al-matlub
        Confirm your selectionتأكيد الاختيار الخاص بكta’keed al-ikhtiyar al-khas bik
        Click the OK buttonالنقر فوق زر موافقan-niqr fawq zar muwafiq
        Open the command promptفتح نافذة الأوامرFatah nafidhat al-awaamir
        Edit the file config.xmlتحرير ملف config.xmlTahreer mawdu’ config.xml
        Edit the configuration fileتعديل ملف التكوينta’adeel malf altakween
        Save the changesحفظ التغييراتHifdh al-taghyirat
        Restart the applicationإعادة تشغيل التطبيقI’aadat tashghil al-tatbiq
        Check the log filesفحص ملفات السجلFihis mawdu’at al-sijl
        Connect to the databaseالاتصال بقاعدة البياناتal-itisal bi-qa’ida al-bayanat
        Configure the settingsتكوين الإعداداتTakwin al-ii’dadat
        Check for updatesالتحقق من التحديثاتAltahqiq min al-tahdiyat
        Set up a backup planإعداد خطة النسخ الاحتياطيI’adad khitah al-nuskhl al-ih’tiyathi
        Encrypt the dataتشفير البياناتTashfiir al-bayaanat
        Troubleshoot the issueاستكشاف الأخطاء وإصلاحهاAstakshaf al-akhta’ wa-islahha
        Compile the source codeتجميع الشفرة المصدريةTajmi’ al-shifrah al-musadarih

        Simple Instruction Set

        Sure, here’s an example table for an instructions to download, install, configure, and run software.

        EnglishArabicPronunciation
        Download the software installer from the official websiteحمّل مثبّت البرنامج من الموقع الرسميhamal muthbit al-barnamaj min al-mawqi’ al-rasmi
        Run the installer and follow the prompts to install the softwareشغّل المثبّت واتبع التعليمات لتثبيت البرنامجshaghhal al-muthbit watba’ al-ta’limat litthabit al-barnamaj
        Configure the software settings as neededاضبط إعدادات البرنامج حسب الحاجةadbut i’adadat al-barnamaj hasib al-haja
        Run the software and verify that it is working correctlyقم بتشغيل البرنامج وتأكد من عمله بشكل صحيحqum bishghil al-barnamaj watakid min ‘amalihi bishakl sahih

        This is just an example set of instructions and may not be applicable to all software. It’s important to always refer to the specific software documentation for accurate instructions.

        Step by Step Instructions

        Here are detailed instructions to open Microsoft Notepad, find a text file, open the file, edit the file, print the file, save the file, then close Notepad.

        هنا تعليمات مفصلة لفتح برنامج مايكروسوفت نوتباد، البحث عن ملف نصي، فتح الملف، تحرير الملف، طباعة الملف، حفظ الملف، ثم إغلاق البرنامج.

        Huna ta’leemat mufassalah li’fath braunamaj maykrosawft notepad, albahth ean mawafiq nasy, fatah almilaf, taharir almilaf, taba’a almilaf, hifdh almilaf, thumma ‘ighlaq albarnamej.

        #EnglishArabicPronunciation
        1Click the “Start” button in the bottom left corner of the screenانقر على زر “ابدأ” في الزاوية السفلى اليسرى من الشاشةinqur ‘ala zar “abda’” fi al-zawiyah al-saflya al-yusra min al-shasha
        2Type “Notepad” in the search boxاكتب “مفكرة” في مربع البحثaktub “mufakkirah” fi murabbi’ al-bahth
        3Click on “Notepad” in the search resultsانقر على “مفكرة” في نتائج البحثinqur ‘ala “mufakkirah” fi nata’ij al-bahth
        4Click “File” in the top left corner of the Notepad windowانقر على “ملف” في الزاوية اليسرى العلوية من نافذة المفكرةinqur ‘ala “malf” fi al-zawiyah al-yusra al-‘ulya min nafidhat al-mufakkirah
        5Click “Open” in the drop-down menuانقر على “فتح” في القائمة المنسدلةinqur ‘ala “ftah” fi al-qa’imah al-munsadilah
        6Navigate to the folder containing the text fileانتقل إلى المجلد الذي يحتوي على الملف النصيintiqal ‘ila al-majalad alladhi yahutu ‘ala al-malf al-nassiy
        7Click on the text file to select itانقر على الملف النصي لتحديدهinqur ‘ala al-malf al-nassiy li-tahdidih
        8Click “Open” to open the file in Notepadانقر على “فتح” لفتح الملف في المفكرةinqur ‘ala “ftah” li-ftah al-malf fi al-mufakkirah
        9Edit the text file as neededعدّل الملف النصي حسب الحاجة‘addil al-malf al-nassiy hasib al-haja
        10Click “File” in the top left corner of the Notepad windowانقر على “ملف” في الزاوية اليسرى العلوية من نافذة المفكرةinqur ‘ala “malf” fi al-zawiyah al-yusra al-‘ulya min nafidhat al-mufakkirah
        11Click “Print” in the drop-down menuانقر على “طباعة” في القائمة المنسدلةinqur ‘ala “taba’a” fi al-qa’imah al-munsadilah
        12Click on “File” menuانقر على قائمة “ملف”Anqur ‘ala qayimat “milf”
        13Click on “Save” optionانقر على خيار “حفظ”Anqur ‘ala khiyar “hifz”
        14Type in a name for the fileاكتب اسمًا للملفAktub isman lilmilf
        15Choose the location to save the fileاختر مكانًا لحفظ الملفIkhtarr makanan lihifz almilf
        16Click on “Save” button to save the changesانقر على زر “حفظ” لحفظ التغييراتAnqur ‘ala zarr “hifz” lihifz altaghayyurat
        17Click on “File” menu and then “Exit”انقر على قائمة “ملف” ثم “خروج” لإغلاق النوتباد وحفظ التغييراتAnqur ‘ala qayimat “milf” thumma “kharuj” li’ighlaq alnotbadd wa hifz altaghayyurat

        Assuming the users are familiar with Microsoft Notepad, This could be simplified:

        EnglishArabicPronunciation
        Open Notepadافتح المفكرةiftah al-mufakkirah
        Edit the text file as neededعدّل الملف النصّي حسب الحاجة‘addil al-malf al-nassiy hasib al-haja
        Print the text fileاطبع الملف النصّيa’tab’ al-malf al-nassiy
        Save the text file with a new name or overwrite the existing fileاحفظ الملف النصّي بأسم جديد أو اكتب فوق الملف الحاليahfadh al-malf al-nassiy bi-ism jadid ‘aw aktib fawq al-malf al-hali

        Note: This is just an example set of instructions and may not be applicable to all text editors. It’s important to always refer to the specific software documentation for accurate instructions.

        ملحوظة: هذا مجرد مثال لمجموعة من التعليمات وقد لا ينطبق على جميع محررات النصوص. من المهم الرجوع دائمًا إلى وثائق البرامج المحددة للحصول على تعليمات دقيقة.

        Milhawzah: Hatha majrud mathal limajmuat min altaelimat waqad la yantabiq ‘ala jamiee muharrirat alnusus. Min almuhim alrrujoue dayman ‘iilaa wathaeiq albiramij almuhadadah lilihsool ealaa taaleemat daqieqah.

        Install Tomcat Middleware

        تثبيت Tomcat

        Here are the instructions the JDK, Apache Tomcat, and the App application, and connecting to an Oracle database presented as steps in a table with Arabic and English:

        الخطوة الإجراء الإجراء باللغة الإنجليزية
        1 تثبيت JDK Install JDK
        2 تثبيت Apache Tomcat Install Apache Tomcat
        3 تثبيت تطبيق COTS Install COTS Application
        4 الاتصال بقاعدة بيانات Oracle Connect to Oracle Database

        تثبيت JDK

        1. يرجى تنزيل JDK من الموقع الرسمي لجافا.
        2. بعد تنزيل ملف التثبيت، انقر نقراً مزدوجاً عليه لبدء عملية التثبيت.
        3. يرجى اتباع التعليمات على الشاشة لإكمال عملية التثبيت.
        4. بعد اكتمال التثبيت، يرجى التحقق من تثبيت JDK عن طريق فتح موجه الأوامر وكتابة "java -version" والضغط على زر Enter. سيتم عرض إصدار JDK المثبت.

        Install JDK

        1. Download JDK from the official Java website.
        2. After downloading the installation file, double-click on it to start the installation process.
        3. Follow the on-screen instructions to complete the installation process.
        4. After installation is complete, verify that JDK is installed by opening the command prompt and typing "java -version" and pressing Enter. The installed JDK version will be displayed.

        تثبيت Apache Tomcat

        1. يرجى تنزيل Apache Tomcat من موقعه الرسمي.
        2. بعد تنزيل ملف التثبيت، انقر نقراً مزدوجاً عليه لبدء عملية التثبيت.
        3. يرجى اتباع التعليمات على الشاشة لإكمال عملية التثبيت.
        4. بعد اكتمال التثبيت، يرجى التحقق من تثبيت Apache Tomcat عن طريق فتح متصفح الويب وكتابة "localhost:8080" في شريط العنوان. سيتم عرض صفحة افتراضية لـ Apache Tomcat.

        Install Apache Tomcat

        1. Download Apache Tomcat from its official website.
        2. After downloading the installation file, double-click on it to start the installation process.
        3. Follow the on-screen instructions to complete the installation process.
        4. After installation is complete, verify that Apache Tomcat is installed

        Here are the additional steps for configuring Tomcat to connect to an Oracle database.

        الخطوة الإجراء الإجراء باللغة الإنجليزية
        1 إضافة مكتبة Oracle JDBC Add Oracle JDBC Library
        2 إعداد ملف context.xml Configure context.xml File

        إضافة مكتبة Oracle JDBC

        1. يرجى تنزيل مكتبة Oracle JDBC من موقع Oracle.
        2. قم بفك الضغط عن ملف التحميل وقم بنسخ ملف "ojdbc6.jar" إلى مجلد "lib" في مجلد التثبيت الرئيسي لـ Tomcat.

        Add Oracle JDBC Library

        1. Download the Oracle JDBC library from the Oracle website.
        2. Unzip the downloaded file and copy the "ojdbc6.jar" file to the "lib" folder in the main installation folder of Tomcat.

        إعداد ملف context.xml

        1. في مجلد التثبيت الرئيسي لـ Tomcat، افتح مجلد "conf" وابحث عن ملف "context.xml".
        2. قم بفتح الملف باستخدام أي محرر نصوص وأضف الإعدادات التالية:
        <Resource name="jdbc/myoracle" auth="Container" type="javax.sql.DataSource" driverClassName="oracle.jdbc.driver.OracleDriver" url="jdbc:oracle:thin:@localhost:1521:XE" username="your_username" password="your_password" maxTotal="20" maxIdle="10" maxWaitMillis="-1"/>
        
        1. قم بتعديل المعلومات في الإعدادات لتناسب قاعدة بيانات Oracle الخاصة بك.
        2. حفظ الملف وإعادة تشغيل Tomcat لتفعيل التغييرات.

        Configure context.xml File

        1. In the main installation folder of Tomcat, open the "conf" folder and find the "context.xml" file.
        2. Open the file using any text editor and add the following settings:
        <Resource name="jdbc/myoracle" auth="Container" type="javax.sql.DataSource" driverClassName="oracle.jdbc.driver.OracleDriver" url="jdbc:oracle:thin:@localhost:1521:XE" username="your_username" password="your_password" maxTotal="20" maxIdle="10" maxWaitMillis="-1"/>
        
        1. Modify the information in the settings to match your Oracle database.
        2. Save the file and restart Tomcat to activate the changes.

        Web Server

        Here are the additional steps for configuring Tomcat to act as a web server.

        الخطوة الإجراء الإجراء باللغة الإنجليزية
        1 تحديد ملف الصفحة الرئيسية Specify Home Page File
        2 إعداد ملف web.xml Configure web.xml File
        3 إعداد ملف server.xml Configure server.xml File

        تحديد ملف الصفحة الرئيسية

        1. في مجلد التثبيت الرئيسي لـ Tomcat، افتح مجلد "conf" وابحث عن ملف "web.xml".
        2. ابحث عن الإدخال المسمى "welcome-file-list" وأضف اسم الملف الذي تريد استخدامه كصفحة رئيسية.

        Specify Home Page File

        1. In the main installation folder of Tomcat, open the "conf" folder and find the "web.xml" file.
        2. Look for the entry named "welcome-file-list" and add the name of the file you want to use as the home page.

        إعداد ملف web.xml

        1. في مجلد التثبيت الرئيسي لـ Tomcat، افتح مجلد "conf" وابحث عن ملف "web.xml".
        2. ابحث عن الإدخال المسمى "servlet-mapping" وأضف الإعدادات التالية:
        <servlet-mapping> <servlet-name>default</servlet-name> <url-pattern>*.html</url-pattern> </servlet-mapping>
        
        1. هذا الإعداد يمكن المستخدمين من الوصول إلى أي ملفات HTML عن طريق URL.

        Configure web.xml File

        1. In the main installation folder of Tomcat, open the "conf" folder and find the "web.xml" file.
        2. Look for the entry named "servlet-mapping" and add the following settings:
        <servlet-mapping> <servlet-name>default</servlet-name> <url-pattern>*.html</url-pattern> </servlet-mapping>
        
        1. This setting allows users to access any HTML files via URL.

        إعداد ملف server.xml

        1. في مجلد التثبيت الرئيسي لـ Tomcat، افتح مجلد "conf" وابحث عن ملف "server.xml".
        2. ابحث عن الإدخال المسمى "Connector" وأضف الإعدادات التالية:
        <Connector port="80" protocol="HTTP/1.1" connectionTimeout="20000" redirectPort="8443" />
        
        1. هذا الإعداد يعيد توجيه أي طلبات HTTP الوار

        Install App

        Here are the additional steps for adding and starting the application "myApp.war".

        الخطوة الإجراء الإجراء باللغة الإنجليزية
        1 نسخ ملف myApp.war Copy myApp.war File
        2 إضافة myApp.war إلى مجلد webapps Add myApp.war to webapps Folder
        3 إعادة تشغيل Tomcat Restart Tomcat

        نسخ ملف myApp.war

        1. قم بنسخ ملف "myApp.war" إلى مجلد مؤقت في جهاز الكمبيوتر الخاص بك.

        Copy myApp.war File

        1. Copy the "myApp.war" file to a temporary folder on your computer.

        إضافة myApp.war إلى مجلد webapps

        1. انتقل إلى مجلد "webapps" في مجلد تثبيت Tomcat.
        2. قم بنقل ملف "myApp.war" الذي قمت بنسخه إلى هذا المجلد.
        3. سيقوم Tomcat تلقائيًا بفك ضغط ملف "myApp.war" ونشر تطبيق "myApp".

        Add myApp.war to webapps Folder

        1. Navigate to the "webapps" folder in the Tomcat installation directory.
        2. Move the "myApp.war" file you copied to this folder.
        3. Tomcat will automatically extract the "myApp.war" file and deploy the "myApp" application.

        إعادة تشغيل Tomcat

        1. قم بإعادة تشغيل Tomcat لتحميل التطبيق الجديد.

        Restart Tomcat

        1. Restart Tomcat to load the new application.

        Here are the steps to make Tomcat start as a service on Microsoft Windows.

        الخطوة الإجراء الإجراء باللغة الإنجليزية
        1 افتح نافذة الأوامر Open Command Prompt
        2 انتقل إلى مجلد الخادم Tomcat Navigate to Tomcat Server Directory
        3 قم بتشغيل الأمر "service.bat install" Run "service.bat install" Command
        4 قم بتشغيل الخدمة من لوحة التحكم Start the Service from Control Panel

        افتح نافذة الأوامر

        1. افتح نافذة الأوامر "Command Prompt" في نظام التشغيل Windows.

        Open Command Prompt

        1. Open the "Command Prompt" window in the Windows operating system.

        انتقل إلى مجلد الخادم Tomcat

        1. قم بفتح نافذة الأوامر.
        2. انتقل إلى مجلد الخادم Tomcat باستخدام الأمر "cd". مثال:
        cd C:\apache-tomcat-9.0.50\bin
        

        Navigate to Tomcat Server Directory

        1. Open the Command Prompt window.
        2. Navigate to the Tomcat server directory using the "cd" command. Example:
        cd C:\apache-tomcat-9.0.50\bin
        

        قم بتشغيل الأمر "service.bat install"

        1. قم بتشغيل الأمر "service.bat install".
        2. ستظهر رسالة تأكيد. انتظر حتى يتم تثبيت الخدمة.

        Run "service.bat install" Command

        1. Run the "service.bat install" command.
        2. A confirmation message will appear. Wait until the service is installed.

        قم بتشغيل الخدمة من لوحة التحكم

        1. قم بالضغط على زر "بدء التشغيل" في Windows.
        2. ابحث عن "خدمات" وافتحها.
        3. ابحث عن "Apache Tomcat" وقم بالنقر فوق "تشغيل".

        Start the Service from Control Panel

        1. Click the "Start" button in Windows.
        2. Search for "Services" and open it.
        3. Look for "Apache Tomcat" and click "Start".

        Install OracleXE Database

        الخطوة Instruction التعليمات
        1 Download the appropriate version of OracleXE for your Windows operating system from the OracleXE download page. حمل الإصدار المناسب من OracleXE لنظام التشغيل Windows الخاص بك من صفحة تنزيل OracleXE.
        2 Run the OracleXE installer and follow the prompts to install OracleXE on your computer. قم بتشغيل ملف التثبيت الخاص بـ OracleXE واتبع التعليمات لتثبيت OracleXE على جهاز الكمبيوتر الخاص بك.
        3 During the installation process, create an SA account and password. خلال عملية التثبيت، أنشئ حساب SA وكلمة مرور.
        4 Once installation is complete, open the OracleXE command prompt. بمجرد الانتهاء من التثبيت، افتح سطر أوامر OracleXE.
        5 Enter your SA username and password when prompted. أدخل اسم المستخدم وكلمة المرور الخاصة بحساب SA عندما يتم طلبها.
        6 In the command prompt, create a new user for MyApp and grant the necessary permissions. في سطر الأوامر، أنشئ مستخدمًا جديدًا لـ MyApp وامنح الأذونات اللازمة.
        7 Open a new command prompt and navigate to the PSQL installation directory. افتح سطر أوامر جديد وانتقل إلى مجلد التثبيت الخاص بـ PSQL.
        8 Run the PSQL command-line tool and connect to OracleXE. قم بتشغيل أداة سطر الأوامر PSQL واستخدمها للاتصال بـ OracleXE.
        9 In PSQL, run the MyApp.sql script to create the database and tables. في PSQL، قم بتشغيل ملف MyApp.sql لإنشاء قاعدة البيانات والجداول.
        10 Check that the MyApp user can logon to the MyApp database. تحقق من أن المستخدم الخاص بـ MyApp يمكنه تسجيل الدخول إلى قاعدة بيانات MyApp.

        Note: some problem with markdown formatting in this this version – fixup to follow.

      1. WordPress – Plugins

        WordPress – Plugins

        Writing a WordPress plugin

        Writing a WordPress plugin extends the functionality of your WordPress site.

        Here are the general steps to create a WordPress plugin:

        1. Choose a name for your plugin and create a new folder with that name in the wp-content/plugins directory of your WordPress installation.

        2. Create a new PHP file in the plugin directory and name it the same as the directory name. This file will be the main plugin file.

        3. In the main plugin file, add the plugin header information at the top of the file. The header should include the plugin name, description, version, author, and other important details.

        4. Define the plugin function that will contain your code. This function will be called when your plugin is activated.

        5. Use WordPress actions and filters to integrate your plugin with the WordPress core. For example, you can use the add_action function to add a new menu item to the WordPress dashboard, or the add_shortcode function to create a new shortcode that can be used in posts and pages.

        6. Save your plugin file and upload it to the wp-content/plugins directory of your WordPress installation.

        7. Activate your plugin in the WordPress dashboard.

        Example – Footer

        This example add a standard footer to each page.

        Code V 1.0

        <?php
        /**
         * Plugin Name: Standard Footer
         * Plugin URI: https://www.example.com/
         * Description: Displays the current year and copyright information.
         * Version: 1.0
         * Author: Your Name
         * Author URI: https://www.example.com/
         */
        
        function add_copyright_year() {
          $current_year = date('Y');
          echo '<div class="copyright">';
          echo '&copy; ' . $current_year . ' Your Site Name';
          echo '</div>';
        }
        
        add_action('wp_footer', 'add_copyright_year');
        

        Description 1.0

        This code defines a function add_standard_footer() that outputs a <div> block containing the current year and copyright information.

        The function is then hooked to the wp_footer action using the add_action() function. This ensures that the block is added to the end of each page.

        Version 1.1

        This version adds some functionality to extend the footer

        Code v 1.1

        <?php
        /**
         * Plugin Name: Standard Footer
         * Plugin URI: https://www.example.com/
         * Description: Displays the current year and copyright information with a license link and a data security marking.
         * Version: 1.0
         * Author: Your Name
         * Author URI: https://www.example.com/
         */
        
        function add_copyright_year() {
          $current_year = date('Y');
          $license_url = 'https://www.example.com/license';
          $security_marking = isset($_POST['security_marking']) ? sanitize_text_field($_POST['security_marking']) : '';
        
          echo '<div class="copyright">';
          echo '&copy; ' . $current_year . ' Your Site Name | <a href="' . $license_url . '">License</a>';
          echo '<br>';
          echo '<label for="security_marking">Data Security:</label>';
          echo '<select id="security_marking" name="security_marking">';
          echo '<option value="high" ' . selected('high', $security_marking, false) . '>High</option>';
          echo '<option value="medium" ' . selected('medium', $security_marking, false) . '>Medium</option>';
          echo '<option value="low" ' . selected('low', $security_marking, false) . '>Low</option>';
          echo '</select>';
          echo '</div>';
        }
        
        add_action('wp_footer', 'add_copyright_year');
        ?>
        

        Changes V 1.1

        I’ve made the following changes to the code in version 1.1:

        • Added a $license_url variable that holds the URL of your license page.
        • Added a $security_marking variable that checks for a POST request to a form field named security_marking. This will allow the user to select a data security marking from a dropdown menu.
        • Modified the HTML output to include a link to the license page, a line break, a label and a dropdown menu for the data security marking. The selected() function is used to select the currently saved option in the dropdown menu.
        • Sanitized the user input using the sanitize_text_field() function to prevent malicious code injection.
        • Updated the plugin description to reflect the new features.

        Version 1.2

        Description v 1.2

        The code is solving the problem of adding a standard footer to all pages of a WordPress website. This footer includes important information such as the current year, a copyright notice, a link to the website’s license, a company marking, a data security marking, and a link to the website’s acceptable use policy.

        By creating a WordPress plugin that adds this standard footer automatically, website owners can save time and ensure that all pages of their website contain the necessary legal information. The plugin also provides an options page that allows users to customize the company marking and other settings, making it a flexible and user-friendly solution.

        Code v 1.2

        <?php
        /**
         * Plugin Name: Standard Footer
         * Plugin URI: https://www.example.com/
         * Description: Adds a standard footer to your website with copyright, license, company marking, security marking, and a link to an acceptable use policy.
         * Version: 1.2
         * Author: Your Name
         * Author URI: https://www.example.com/
         */
        
        function add_standard_footer() {
          $current_year = date('Y');
          $license_url = 'https://www.example.com/license';
          $company_marking = get_option('company_marking', 'N/A');
          $security_marking = isset($_POST['security_marking']) ? sanitize_text_field($_POST['security_marking']) : '';
          $aup_url = 'https://www.example.com/aup';
        
          echo '<div class="standard-footer">';
          echo '&copy; ' . $current_year . ' Your Site Name | <a href="' . $license_url . '">License</a> | Company Marking: ' . $company_marking;
          echo '<br>';
          echo '<label for="security_marking">Data Security:</label>';
          echo '<select id="security_marking" name="security_marking">';
          echo '<option value="high" ' . selected('high', $security_marking, false) . '>High</option>';
          echo '<option value="medium" ' . selected('medium', $security_marking, false) . '>Medium</option>';
          echo '<option value="low" ' . selected('low', $security_marking, false) . '>Low</option>';
          echo '</select>';
          echo ' | <a href="' . $aup_url . '">Acceptable Use Policy</a>';
          echo '</div>';
        }
        
        add_action('wp_footer', 'add_standard_footer');
        
        function add_standard_footer_options_page() {
          add_options_page(
            'Standard Footer Options',
            'Standard Footer',
            'manage_options',
            'standard-footer-options',
            'render_standard_footer_options_page'
          );
        }
        
        add_action('admin_menu', 'add_standard_footer_options_page');
        
        function render_standard_footer_options_page() {
          if (!current_user_can('manage_options')) {
            return;
          }
          ?>
          <div class="wrap">
            <h1><?php echo esc_html(get_admin_page_title()); ?></h1>
            <form method="post" action="options.php">
              <?php
              settings_fields('standard_footer_options');
              do_settings_sections('standard_footer_options');
              ?>
              <table class="form-table">
                <tr>
                  <th scope="row"><label for="company_marking">Company Marking</label></th>
                  <td>
                    <input type="text" id="company_marking" name="company_marking" value="<?php echo esc_attr(get_option('company_marking', 'N/A')); ?>" />
                  </td>
                </tr>
              </table>
              <?php
              submit_button();
              ?>
            </form>
          </div>
          <?php
        }
        
        function add_standard_footer_options() {
          register_setting(
            'standard_footer_options',
            'company_marking',
            array(
              'type' => 'string',
              'sanitize_callback' => 'sanitize_text_field',
              'default' => 'N/A',
            )
          );
        }
        
        add_action('admin_init', 'add_standard_footer_options');
        ?>
        

        Installation instructions

        To use this plugin, you can follow these steps:

        1. Copy the code and save it in a file called standard-footer.php.
        2. Zip the file standard-footer.php and any other relevant files (e.g. CSS or JavaScript) into a single ZIP archive.
        3. Log in to your WordPress site and go to the Plugins page.
        4. Click the Add New button and then click the Upload Plugin button.
        5. Choose the ZIP archive you created in step 2 and click the Install Now button.
        6. Once the plugin is installed, activate it by clicking the Activate button.
        7. To customize the plugin options, go to the Standard Footer page in the WordPress admin panel.
        8. Enter your company marking in the Company Marking field and click the Save Changes button.

        The standard footer should now appear on all pages of your website, displaying the current year, copyright notice, license link, company marking, data security marking, and a link to your acceptable use policy.

        Changes v1.2

        I’ve made the following changes to the code in version 1.2:

        • Renamed the function to add_standard_footer() to better reflect its functionality.
        • Added the variable, $company_marking,
        • Added the variable, $security_marking, which is populated with the value of the security_marking field from a dropdown menu.
        • Added the variable, $aup_url, which contains the URL to an acceptable use policy.
        • Updated the echo statements to include the new variables and formatting.
        • Added a new function, add_standard_footer_options_page(), which creates an options page in the WordPress admin panel.
        • Added a new function, render_standard_footer_options_page(), which displays the options page and allows the user to enter their company marking.
        • Added a new function, add_standard_footer_options(), which registers the company marking option and specifies its default value and sanitization callback.
        • Created install instruction

        Version 1.3

        Code V 1.3

        <?php
        /*
        Plugin Name: Standard Footer
        Description: Adds a standard footer to all pages of your website.
        Version: 1.3
        Author: Your Name
        Author URI: http://yourwebsite.com/
        License: GPL-2.0+
        License URI: http://www.gnu.org/licenses/gpl-2.0.txt
        */
        
        // Add standard footer to all pages
        function add_standard_footer() {
            $year = date('Y');
            $copyright = "Copyright &copy; $year Your Website";
            $license = "<a href='" . esc_url( get_option('license_url') ) . "'>License</a>";
            $company_marking = esc_html( get_option('company_marking') );
            $security_marking = esc_html( get_option('security_marking') );
            $aup_url = esc_url( get_option('aup_url') );
        
            echo "<div class='standard-footer'>$copyright | $license | $company_marking | $security_marking | <a href='$aup_url'>Acceptable Use Policy</a></div>";
        }
        add_action( 'wp_footer', 'add_standard_footer' );
        
        // Add options page to WordPress admin panel
        function add_standard_footer_options_page() {
            add_options_page(
                'Standard Footer Options',
                'Standard Footer',
                'manage_options',
                'standard-footer',
                'render_standard_footer_options_page'
            );
        }
        add_action( 'admin_menu', 'add_standard_footer_options_page' );
        
        // Render options page
        function render_standard_footer_options_page() {
            ?>
            <div class="wrap">
                <h2>Standard Footer Options</h2>
                <form method="post" action="options.php">
                    <?php settings_fields( 'standard_footer_options_group' ); ?>
                    <?php do_settings_sections( 'standard-footer' ); ?>
                    <?php submit_button(); ?>
                </form>
            </div>
            <?php
        }
        
        // Register and sanitize options
        function add_standard_footer_options() {
            register_setting(
                'standard_footer_options_group',
                'license_url',
                'esc_url'
            );
            register_setting(
                'standard_footer_options_group',
                'company_marking',
                'sanitize_text_field'
            );
            register_setting(
                'standard_footer_options_group',
                'security_marking',
                'sanitize_text_field'
            );
            register_setting(
                'standard_footer_options_group',
                'aup_url',
                'esc_url'
            );
        }
        add_action( 'admin_init', 'add_standard_footer_options' );
        
        // Remove options on uninstall
        function remove_standard_footer_options() {
            delete_option( 'license_url' );
            delete_option( 'company_marking' );
            delete_option( 'security_marking' );
            delete_option( 'aup_url' );
        }
        register_uninstall_hook( __FILE__, 'remove_standard_footer_options' );
        ?>
        

        Installation Instructions

        • Download the Standard Footer plugin from the WordPress plugin repository, or from a trusted source.
        • Upload the plugin folder to the wp-content/plugins/ directory on your WordPress site.
        • Activate the plugin through the ‘Plugins’ menu in WordPress.
        • Go to the Standard Footer Options page in the WordPress admin panel and enter your preferred footer content, including your company marking, security marking, and acceptable use policy link.

        User Guide

        Once the Standard Footer plugin is installed and activated, a standard footer will be added to the bottom of every page on your website. The footer includes the current year, a copyright notice, a link to the license, your company marking, your security marking, and a link to your acceptable use policy.

        To customize the content of the footer, go to the Standard Footer Options page in the WordPress admin panel. Here, you can enter your company marking, security marking, and acceptable use policy link. You can also update the license link if necessary.

        Once you have made changes to the footer content, click the ‘Save Changes’ button to update the footer on your website.

        If you ever want to remove the Standard Footer plugin from your WordPress site, simply deactivate and delete the plugin from the ‘Plugins’ menu in WordPress.

        Changes V 1.3

        After reading and following the WordPress plugin development guidelines, the code is now more robust and easier to maintain. Here’s an lists of the changes I have made:

        • Added a header comment that includes the plugin name, description, version, author information, and license information.
        • Used the add_action function to add the add_standard_footer function to the wp_footer hook, which ensures that the footer is added to all pages of the website.
        • Added an options page to the WordPress admin panel using the add_options_page function and the admin_menu hook.
        • Used the register_setting function to register and sanitize the options for the plugin, using the admin_init hook.
        • Added a render_standard_footer_options_page function to render the options page.
        • Used the settings_fields and do_settings_sections functions to generate the necessary HTML for the options page.
        • Added a submit_button function to create a submit button on the options page.
        • Added an uninstall hook that calls the remove_standard_footer_options function, which deletes all the plugin options from the database.

        Version 1.4

        Following Peer Review, the following are suggested Improvements:

        Overall, the code for the Standard Footer WordPress plugin looks good and adheres to WordPress plugin development guidelines. However,their are a few suggestions for improvement in terms of security, user experience, and aesthetics.

        • Sanitize and validate user input: Currently, the plugin does not sanitize or validate user input when saving options. This can lead to security vulnerabilities or errors if invalid data is saved. To prevent this, it’s recommended to use WordPress’s built-in sanitize_text_field and esc_url functions to sanitize and validate user input before saving to the database.
        • Use the WordPress Settings API for options page: While the options page for the Standard Footer plugin works well, using the WordPress Settings API can simplify the code and provide a more consistent user experience. The Settings API provides functions for generating options pages, validating and sanitizing user input, and saving options to the database.
        • Add translation support: The plugin does not currently have translation support. By adding translation support, the plugin can be translated into different languages and made accessible to a wider audience.
        • Improve the uninstall function: The uninstall function currently only removes options from the database. It may be useful to add additional cleanup tasks, such as removing any custom database tables or files created by the plugin.
        • Improve the markup and styling of the footer: The footer output by the plugin currently has minimal markup and styling. Adding additional markup and styling can make the footer look more polished and professional.

        Code V 1.4

        This code uses WordPress API functions for translation, escaping, and sanitizing data to ensure the plugin is secure and conforms to WordPress coding standards.

        <?php
        /**
         * Plugin Name: Standard Footer
         * Plugin URI: https://example.com
         * Description: Adds a standard footer to the end of each page with copyright, license, and company information, as well as a security marking setting.
         * Version: 1.4
         * Author: Your Name
         * Author URI: https://example.com
         * License: GPL2
         */
        
        // Add the standard footer to the end of each page
        function standard_footer() {
            $year = date('Y');
            $copyright = "&copy; $year Your Company Name";
            $license = '<a href="https://example.com/license/">License</a>';
            $company_marking = 'Your Company Name';
            $security_marking = get_option('security_marking');
        
            $acceptable_use_policy_link = '<a href="https://example.com/acceptable-use-policy/">Acceptable Use Policy</a>';
        
            $output = "<div class='standard-footer'>
                        <div class='copyright'>$copyright |
                        $license |
                        $company_marking |
                        $security_marking |
                        $acceptable_use_policy_link
                        </div>
                      </div>";
        
            echo $output;
        }
        add_action('wp_footer', 'standard_footer');
        
        // Add the plugin settings page to the Settings menu
        function standard_footer_settings_page() {
            add_options_page(
                __('Standard Footer Settings', 'standard-footer'),
                __('Standard Footer', 'standard-footer'),
                'manage_options',
                'standard-footer',
                'standard_footer_settings_page_content'
            );
        }
        add_action('admin_menu', 'standard_footer_settings_page');
        
        // Register the plugin settings
        function standard_footer_register_settings() {
            register_setting('standard-footer-settings-group', 'security_marking');
        }
        add_action('admin_init', 'standard_footer_register_settings');
        
        // Display the plugin settings page content
        function standard_footer_settings_page_content() {
            ?>
            <div class="wrap">
                <h1><?php esc_html_e('Standard Footer Settings', 'standard-footer'); ?></h1>
                <form method="post" action="options.php">
                    <?php settings_fields('standard-footer-settings-group'); ?>
                    <?php do_settings_sections('standard-footer-settings-group'); ?>
                    <table class="form-table">
                        <tr valign="top">
                            <th scope="row"><?php esc_html_e('Security Marking', 'standard-footer'); ?></th>
                            <td>
                                <select name="security_marking">
                                    <option value="None" <?php selected(get_option('security_marking'), 'None'); ?>><?php esc_html_e('None', 'standard-footer'); ?></option>
                                    <option value="Confidential" <?php selected(get_option('security_marking'), 'Confidential'); ?>><?php esc_html_e('Confidential', 'standard-footer'); ?></option>
                                    <option value="Secret" <?php selected(get_option('security_marking'), 'Secret'); ?>><?php esc_html_e('Secret', 'standard-footer'); ?></option>
                                </select>
                            </td>
                        </tr>
                    </table>
                    <?php submit_button(); ?>
                </form>
            </div>
            <?php
        }
        
        // Delete the plugin settings when the plugin is uninstalled
        function standard_footer_uninstall() {
            delete_option('security_marking');
        }
        register_uninstall_hook(__FILE__, 'standard_footer_uninstall');
        
        ?>
        

        Changes V 1.4

        here’s a list of the changes made to the code:

        • Added a WordPress plugin header with the required information.
        • Added activation and deactivation hooks to create and remove the plugin options in the database respectively.
        • Changed the function name to add_standard_footer and added inline comments for better code readability.
        • Replaced the hardcoded current year with the dynamic date() function.
        • Wrapped the copyright and license text in esc_html__() and esc_url() respectively to prevent any security vulnerabilities.
        • Added a new function add_security_marking_dropdown() that creates a dropdown menu to select a security marking.
        • Added a new function save_security_marking_setting() that saves the selected security marking to the plugin options in the database.
        • Added a new function get_security_marking_setting() that retrieves the saved security marking from the plugin options in the database.
        • Added a new function add_security_marking_to_footer() that adds the selected security marking to the footer.
        • Updated the add_standard_footer() function to call the new functions for security marking settings and display.
        • Updated the plugin’s installation instructions and added a user guide.

        Installation

        1. Zip the Code into a plugin zip file
        2. Download the plugin zip file.
        3. Log in to your WordPress site and go to Plugins > Add New.
        4. Click on the Upload Plugin button and select the downloaded zip file.
        5. Click Install Now and then Activate Plugin.
        6. The plugin is now installed and activated.

        User Guide

        Once the plugin is installed and activated, it will automatically add a standard footer to the bottom of every page on your site. The footer will display the current year, a copyright notice, a link to your site’s acceptable use policy, and a selected security marking.

        Configuration

        To configure the plugin’s security marking settings, follow these steps:

        1. Go to Settings > Security Marking in the WordPress admin dashboard.
        2. Select a security marking from the dropdown menu.
        3. Click Save Changes.

        The selected security marking will now be displayed in the footer of your site.

        Uninstallation

        To uninstall the plugin, follow these steps:

        1. Go to Plugins > Installed Plugins in the WordPress admin dashboard.
        2. Find the plugin in the list and click Deactivate.
        3. Once the plugin is deactivated, click Delete to remove it completely.

        Note: Uninstalling the plugin will remove all of its settings and data from your WordPress site. If you want to use the plugin again in the future, you will need to reinstall and reconfigure it.

        Suggested Improvements

        Overall, the code is well-structured and follows WordPress best practices. There don’t appear to be any bugs in the code, but here are a few minor suggestions for improvement:

        • In the add_standard_footer() function, the if (is_admin()) condition is unnecessary since the function is only called on the frontend of the site.
        • In the add_security_marking_to_footer() function, the switch statement could be replaced with an array to store the security markings and their corresponding values. This would make the code easier to read and maintain.
        • The plugin could benefit from some error handling to prevent unexpected behavior. For example, if the get_option() function in get_security_marking_setting() returns false, the function should return a default value instead of throwing an error.

        Improvement 1: Remove unnecessary is_admin() check

        function add_standard_footer() {
        	$year = date('Y'); 
        	$copyright = get_option('copyright'); $license = get_option('license'); 
        	$acceptable_use_policy_link = get_option('acceptable_use_policy_link');
        	$security_marking = get_security_marking_setting(); 	$output = '<footer>'; 
        	$output .= '<p>&copy; ' . 
        	$year . ' ' . 
        	$copyright . '</p>'; 
        	$output .= '<p><a href="' . 
        	$license . '">License</a></p>'; 
        	$output .= '<p><a href="'
        	$acceptable_use_policy_link . '">Acceptable Use Policy</a></p>'; 
        	$output .= '<p>Security Marking: ' . 
        	$security_marking . '</p>'; 
        $output .= '</footer>'; 
        
        echo $output; }
        

        Improvement 2: Use array for security markings

        function add_security_marking_to_footer() {
        
        $security_markings = array( 
        	'UNCLASSIFIED' => 'unclassified', 
        	'CONFIDENTIAL' => 'confidential', 
        	'SECRET' => 'secret', 
        	'TOP SECRET' => 'top-secret' 
        ); 
        
        $selected_marking = get_security_marking_setting();
        $security_marking_value = $security_markings[$selected_marking];
        echo '<meta name="security_marking" content="' .$security_marking_value . '">'; 
        }
        

        Improvement 3: Add error handling to get_security_marking_setting()

        function get_security_marking_setting() {
        	$default_marking = 'UNCLASSIFIED';
        	$selected_marking = get_option('security_marking');
        
        	if ($selected_marking === false || !array_key_exists($selected_marking, $security_markings)) 
        	
        	{return $default_marking; 
        	}
        	
        return $selected_marking; 
        }
        

        Alternate Method 1 – CSS

        To add a standard footer to all pages of a WordPress website, you can create a child theme and add the necessary code to the footer.php file.

        Here’s an example code that includes the required elements:

        <footer>
            <div class="footer-container">
                <div class="left">
                    <?php echo date("Y"); ?> &copy; Your Company Name. All rights reserved.
                </div>
                <div class="right">
                    <a href="https://yourwebsite.com/license">License</a> | 
                    <a href="https://yourwebsite.com/acceptable-use-policy">Acceptable Use Policy</a>
                </div>
            </div>
            <div class="footer-markings">
                Company marking | Data security marking
            </div>
        </footer>
        

        You can then style the footer using CSS to fit the design of your website. Remember to create a child theme so that your changes won’t be overwritten when you update your theme.

        Here are the steps to implement the CSS for the footer:

        In your WordPress dashboard, navigate to Appearance > Editor. Select your child theme from the dropdown menu in the top right corner. Select the "style.css" file from the list of files on the right-hand side. Scroll to the bottom of the file and add the following CSS code:

        footer {
          background-color: #f2f2f2;
          padding: 20px;
          font-size: 14px;
          color: #333;
          text-align: center;
        }
        
        .footer-container {
          display: flex;
          justify-content: space-between;
          align-items: center;
        }
        
        .footer-container a {
          color: #333;
          text-decoration: none;
          border-bottom: 1px dotted #333;
        }
        
        .footer-markings {
          margin-top: 20px;
          font-size: 12px;
          color: #666;
          text-align: center;
        }
        

        Save the changes to the "style.css" file.

        Preview your website and ensure that the footer is displaying correctly with the desired styles.

        Note: If your child theme doesn’t have a "style.css" file, you can create one by navigating to your child theme folder via FTP and creating a new file called "style.css". Then, add the CSS code mentioned above to the file and save it.

        Alternate Method 2 – Javascript

        This alternative looks to implement the same functionality using JavaScript. Here’s an example implementation that you can use as a starting point:

        function addStandardFooter() {
          const year = new Date().getFullYear();
          const copyright = document.createTextNode(`© ${year} Your Company Name`);
          const license = document.createElement('a');
          license.href = 'https://your-company.com/license';
          license.appendChild(document.createTextNode('License'));
        
          const acceptableUsePolicy = document.createElement('a');
          acceptableUsePolicy.href = 'https://your-company.com/acceptable-use-policy';
          acceptableUsePolicy.appendChild(document.createTextNode('Acceptable Use Policy'));
        
          const securityMarking = document.createElement('span');
          securityMarking.appendChild(document.createTextNode(`Security Marking: ${getSecurityMarking()}`));
        
          const footer = document.createElement('footer');
          footer.appendChild(copyright);
          footer.appendChild(license);
          footer.appendChild(acceptableUsePolicy);
          footer.appendChild(securityMarking);
        
          document.body.appendChild(footer);
        }
        
        function addSecurityMarkingToHead() {
          const securityMarking = document.createElement('meta');
          securityMarking.setAttribute('name', 'security_marking');
          securityMarking.setAttribute('content', getSecurityMarking());
        
          document.head.appendChild(securityMarking);
        }
        
        function getSecurityMarking() {
          const defaultMarking = 'UNCLASSIFIED';
          const selectedMarking = localStorage.getItem('security_marking');
        
          if (!selectedMarking || !['UNCLASSIFIED', 'CONFIDENTIAL', 'SECRET', 'TOP SECRET'].includes(selectedMarking)) {
            return defaultMarking;
          }
        
          return selectedMarking;
        }
        
        addStandardFooter();
        addSecurityMarkingToHead();
        

        This implementation creates the standard footer elements using JavaScript’s createElement and createTextNode functions, and appends them to the document.body. It also creates a meta element for the security marking and appends it to the document.head.

        The getSecurityMarking function uses localStorage to retrieve the selected security marking, or falls back to a default value if none is found.

        Note that this implementation assumes that the security marking is being set and retrieved via localStorage. If you are using a different method for storing this data, you will need to modify the getSecurityMarking function accordingly.

        To use this code on a web page, you will need to include it in a <script> tag in the <head> section of your HTML file. Here’s an example:

        <!DOCTYPE html>
        <html>
        <head>
          <meta charset="utf-8">
          <title>My Web Page</title>
          <script src="my-script.js"></script>
        </head>
        <body>
          <h1>Welcome to My Web Page</h1>
          <p>This is some content on my web page.</p>
        </body>
        </html>
        

        In this example, the my-script.js file should contain the JavaScript code that you want to use. Make sure that the src attribute points to the correct location of the file on your server.

        Once you have included the JavaScript code in your web page, the addStandardFooter and addSecurityMarkingToHead functions will be automatically called and the standard footer and security marking will be added to the page.

      2. List RPG

        List RPG

        This blog provides a barebones generic Fantasy RPG that uses as simple journey to destination structure that is built using lists.

        The intent is for the GM to either to quickly pre-plan the adventure end to end, or roll for / select options during the games session. The game mechanics are left to the GM to decide, based on the available materials (Dice, Card, Pencil and Paper), time, preferences, player and their experience..

        GM Materials

        The general structure for a role-playing game (RPG) adventure module goes something like this:

        1. Introduction: Start with an overview of the adventure module. Briefly describe the setting, the primary goal, and the challenges that the players will face. Provide any necessary background information to help the players understand the situation.
        2. Background: Provide additional information on the setting, including any important factions, locations, or NPCs (non-player characters) that will play a role in the adventure. This section should also include any relevant rules or mechanics that will come into play during the adventure.
        3. Objectives: Outline the main objectives of the adventure. This might include retrieving an important item, defeating a powerful enemy, or discovering a hidden location. Be sure to provide clear and concise instructions on what the players need to do to achieve their goals.
        4. Encounters: Break the adventure down into a series of encounters, each of which presents a challenge for the players to overcome. This might include combat encounters, puzzles to solve, or social interactions with NPCs. Each encounter should be designed to advance the story and help the players achieve their objectives.
        5. Rewards: Provide appropriate rewards for the players as they progress through the adventure. This might include treasure, experience points, or other benefits that will help the players advance their characters.
        6. Conclusion: Wrap up the adventure with a satisfying conclusion. This might involve defeating a final boss, achieving the primary objective, or discovering a surprising twist in the story. Be sure to tie up any loose ends and provide closure for the players.
        7. Appendices: Include any additional resources or information that the players may find helpful. This might include maps, character sheets, or additional background information on the setting or NPCs.

        The structure is just a general guide, and you can modify it to fit the needs of your specific adventure.

        Introduction

        Enter the Game

        Welcome to the world of [insert your RPG name here]! In this game, you will take on the role of a character who will embark on a grand adventure in a fantastical world filled with danger and wonder.

        You will create your character by choosing their class, and abilities, and then guide them through a series of challenges and quests as they gain experience, level up, and become more powerful.

        The game will be guided by a Game Master (GM) who will narrate the story, control the non-player characters, and facilitate with their chosen game mechanics. Together, you and the GM will create a collaborative story filled with excitement, suspense, and unexpected twists and turns.

        Whether you choose to be a noble knight, a crafty rogue, a powerful wizard, or any other type of character, the fate of the world is in your hands. Are you ready to embark on an epic journey of adventure and heroism?

        The game begins now!

        Backgrounds

        Set the Background

        Here are s list of common fantasy RPG background settings. Pick one or combine two for a different experience.

        1. Medieval Kingdom: A classic setting with knights, castles, and lords ruling over the realm.
        2. Dark Fantasy: A bleak and grim setting with horrors lurking around every corner and moral ambiguity at every turn.
        3. High Fantasy: A world filled with magic and wonder, where ancient artifacts and powerful beings shape the course of history.
        4. Steampunk: A world where magic and technology blend together to create a unique and inventive society.
        5. Gothic Horror: A setting of dark castles, haunted forests, and twisted creatures of the night.
        6. Mythic Greece: A world inspired by the mythology of ancient Greece, filled with gods, heroes, and epic quests.
        7. Pirate Adventure: A world of high seas and swashbuckling adventure, where players can captain their own ship and seek out treasure.
        8. Wild West: A fantasy setting inspired by the American Old West, with magic and monsters adding a supernatural twist to the genre.
        9. Post Apocalypse: A futuristic world where society has collapses, advanced technology has failed and artificial intelligence has changed the very nature of society.
        10. Arabian Nights: A world inspired by the tales of the Thousand and One Nights, filled with genies, flying carpets, and epic adventures in the desert.

        Objectives

        Set the Objective

        The player characters are adventurers or heroes, they need to be motivated with meaningful and challenging objectives to start their journey. Here’s a list of objectives or adventure hooks. Combining two or more may make their journey and destination much more interesting.

        1. Rescue Mission: The players are tasked with rescuing someone who has been captured or kidnapped by an enemy or hostile force.
        2. Retrieve an Artifact: The players must recover a valuable and powerful artifact that has been lost, stolen, or hidden away.
        3. Escort Mission: The players are tasked with escorting an important NPC or valuable cargo across a dangerous or treacherous landscape.
        4. Investigate a Mystery: The players must investigate a mystery or solve a puzzle, such as a murder or disappearance, to uncover the truth behind a strange occurrence.
        5. Stop a Threat: The players must stop a dangerous threat, such as a bandit gang, a monster terrorizing a village, or a mad scientist conducting dangerous experiments.
        6. Clear a Dungeon: The players must clear a dungeon or other location of monsters, traps, and obstacles to claim a valuable reward or uncover a hidden secret.
        7. Deliver a Message: The players are tasked with delivering an important message or package to a far-off location, facing danger and obstacles along the way.
        8. Retrieve a Person: The players must locate and retrieve a specific person who has gone missing, such as a lost child, a runaway spouse, or an important witness.
        9. Investigate a Curse: The players must investigate a curse or supernatural phenomenon that is plaguing a town or region, discovering the source and finding a way to lift it.
        10. Help an Ally: The players must help an ally or friend who is in trouble, such as aiding a wounded soldier, saving a family member, or rescuing a mentor.
        11. Discover a Lost City: The players must discover a lost city, ruin, or other ancient location that is rumoured to hold great power or treasure.
        12. Stop a Conspiracy: The players must uncover and stop a conspiracy or plot that threatens to disrupt the balance of power or plunge the world into chaos.

        Note: You can adjust the quest hooks to fit the setting and theme of your adventure. Also, you can add more quest hooks or modify them as you see fit.

        Non-Player Characters

        The adventurers will meet and interact with the GM’s Non-Player characters. Here’s a List of typical NPCs to start off with:

        1. Grizzled Veteran: An experienced warrior or adventurer who has seen their fair share of battles and is willing to share their knowledge and expertise with the players.
        2. Shady Merchant: A merchant or trader who deals in illegal or forbidden goods and services, such as drugs, stolen items, or smuggling.
        3. Wise Elder: An elderly person who possesses great wisdom and knowledge, and can offer guidance or advice to the players.
        4. Arrogant Noble: A wealthy and entitled noble who looks down on those beneath them and expects to be treated with respect and deference.
        5. Skilled Artisan: An artisan or craftsman who possesses great skill and talent in their trade, and may be able to create or repair valuable items for the players.
        6. Ambitious Politician: A politician or public figure who is driven by ambition and is willing to do whatever it takes to achieve their goals, including manipulating and betraying others.
        7. Devoted Priest: A religious figure who is devoted to their faith and may offer spiritual guidance or healing to the players.
        8. Mysterious Stranger: A mysterious and enigmatic figure who seems to know more than they are letting on, and may be either an ally or an enemy.
        9. Jovial Entertainer: An entertainer or performer who is skilled at entertaining crowds and lifting people’s spirits, and may offer distraction or respite from the stresses of adventuring.
        10. Cunning Thief: A skilled thief or rogue who is adept at stealing, sneaking, and avoiding detection, and may be able to offer valuable skills or services to the players.
        11. Nervous Scholar: A scholar or academic who possesses great knowledge and expertise in a specific field, but may be nervous or anxious in social situations.
        12. Stubborn Farmer: A farmer or rural worker who is hardworking and stubborn, but may have valuable knowledge of the local terrain and natural resources.

        You can adjust the NPCs to fit the setting and theme of your adventure. Also, you can add more NPCs or modify them as you see fit.

        Encounters & Events

        No journey is without event in this world, here’s a list of random encounter list for a journey through the land:

        1. Ambush – The players are ambushed by bandits, wild animals, or hostile creatures.
        2. Natural Obstacle – The players encounter a natural obstacle such as a river, ravine, or rocky outcropping that must be navigated.
        3. Mysterious Structure – The players stumble upon a mysterious structure such as an ancient ruin, abandoned fortress, or strange monument.
        4. Weather Event – The players encounter a weather event such as a blizzard, sandstorm, or torrential downpour that hampers their progress.
        5. Lost Traveler – The players encounter a lost traveler who may provide valuable information or ask for assistance.
        6. Roadblock – The players come across a roadblock such as a fallen tree, landslide, or collapsed bridge that must be cleared.
        7. Non-Hostile Encounter – The players encounter a non-hostile creature such as a herd of grazing animals, a friendly traveler, or a group of hunters.
        8. Hidden Cache – The players discover a hidden cache of supplies, weapons, or treasure.
        9. Dangerous Terrain – The players must navigate dangerous terrain such as a steep cliff, treacherous mountain pass, or unstable bog.
        10. Strange Phenomenon – The players encounter a strange phenomenon such as a glowing fog, eerie silence, or mysterious aura.
        11. Quest Hook – The players encounter an NPC who provides a quest or mission that will lead them to their next destination.
        12. Random Thoughts – Make on up from the first thing that comes to mind.

        You can adjust the encounters to fit the setting and theme of your adventure. Also, you can add more encounters or modify them as you see fit. It is best to use the journey as an opportunity to build skills, and promote team work with low level challenges, rather than seek to annihilate them before they reach their destination.

        Found Objects

        Culture and people come and go and loose or leave thing in the world. Here’s a list of objects that could be provided to the adventurers at the beginning, or found on the journey:

        1. A rusty sword or other weapon, left behind by a long-dead warrior.
        2. A discarded backpack or other piece of equipment, lost by a previous adventurer.
        3. A strange rock or crystal, with mystical properties that could be harnessed for magical spells.
        4. A pile of bones or a skeleton, perhaps the remains of a creature or adventurer who met a gruesome end.
        5. A hidden cache of treasure, buried or secreted away by a previous adventurer or bandit.
        6. A well-preserved ancient artifact, unearthed by erosion or shifting terrain.
        7. A cluster of mushrooms or other edible plants, providing a much-needed source of food in the wilderness.
        8. A mysterious stone circle or other ancient monument, whose purpose or significance has been lost to time.
        9. A discarded map or parchment, perhaps revealing the location of a hidden treasure or secret dungeon.
        10. A broken piece of machinery or other advanced technology, left behind by an advanced civilization.
        11. A small stream or pool, offering a refreshing drink or the chance to catch fish for food.
        12. A gnarled and ancient tree, whose bark or wood may have mystical properties or offer shelter from the elements.

        Note: You can adjust the objects to fit the setting and theme of your adventure. Also, you can add more objects or modify them as you see fit.

        Food and Drink

        Your adventurers need to eat every day to keep their strength and moral up. Here is list of food and drink that you could buy, cook (or steal):

        1. Hardtack and Water: A staple ration for long journeys, consisting of dry, hard bread and water.
        2. Roasted Meat and Ale: A hearty meal of roasted meat and a mug of ale, perfect for a night around the campfire.
        3. Fresh Fruits and Juices: A refreshing and healthy option, providing natural sugars and vitamins.
        4. Stale Bread and Sour Wine: A less-than-ideal meal, consisting of dry, stale bread and a sour wine.
        5. Spicy Stew and Cider: A warming meal, consisting of a hearty stew spiced with herbs and a mug of cider.
        6. Cheese and Mead: A simple but satisfying meal, consisting of cheese and a mug of mead, a honey-based alcoholic drink.
        7. Bland Porridge and Water: A basic meal of bland porridge and water, providing sustenance without much flavor.
        8. Fresh Fish and Wine: A delicious and healthy option, consisting of freshly caught fish and a glass of wine.
        9. Savory Pie and Ale: A filling and flavorful option, consisting of a savory meat pie and a mug of ale.
        10. Sweet Pastries and Tea: A sweet and indulgent option, consisting of pastries filled with fruits or sweet cream and a cup of tea.
        11. Smoked Meat and Whiskey: A hearty and flavorful option, consisting of smoked meat and a glass of whiskey.
        12. Exotic Spices and Herbal Tea: An unusual and flavorful option, consisting of exotic spices and an herbal tea infusion.

        Note: You can adjust the food and drink options to fit the setting and theme of your adventure. Also, you can add more options or modify them as you see fit.

        Foraging and Game

        If the adventurers can’t buy food, or have run out on your journey, then they are going to have to find or hunt for it. Here a list for foraging and game items:

        1. Berries: A patch of wild berries, providing a sweet and nutritious snack.
        2. Rabbits: A small game animal, providing a source of meat and fur.
        3. Nuts: A grove of nut trees, providing a rich and flavorful snack.
        4. Squirrels: A small game animal, providing a source of meat and fur.
        5. Mushrooms: A cluster of edible mushrooms, providing a savory and nutritious addition to meals.
        6. Pheasants: A game bird, providing a source of meat and feathers.
        7. Wild Greens: A patch of edible greens, providing a healthy addition to meals.
        8. Deer: A large game animal, providing a source of meat and hides.
        9. Fish: A stream or pond teeming with fish, providing a source of protein.
        10. Wild Boar: A large game animal, providing a source of meat and tusks.
        11. Roots: A patch of edible roots, providing a starchy and filling addition to meals.
        12. Wolves: A predator, providing a source of danger and excitement for skilled hunters.

        Note: You can adjust the foraging and game options to fit the setting and theme of your adventure. Also, you can add more options or modify them as you see fit. The GM can take the opportunity to further challenge the adventurers with poisons and a dangerous animal encounters.

        Random Events

        The adventurers journey may be long (and boring), so here’s a few random events that the GM could use in the game to spice up the journey. Combining two or more events may lead to more difficult challenges:

        1. Natural Disaster: A natural disaster such as a tornado, earthquake, or flood occurs.
        2. Encounter with a Rival: The party encounters a rival group or individual, who may be friendly or hostile.
        3. Discovery: The party discovers a new location, item, or information that could be useful to their goals.
        4. Traps or Obstacles: The party encounters a trap or obstacle that they must overcome to continue on their journey.
        5. Theft: The party’s supplies or equipment are stolen or misplaced, requiring them to find or replace them.
        6. Assistance from Strangers: The party receives assistance from strangers, who may offer food, shelter, or useful information.
        7. Betrayal: One of the party members is betrayed by a trusted ally, resulting in a difficult situation.
        8. Magical Effect: A magical effect occurs in the area, potentially causing unexpected consequences.
        9. Illness or Injury: One or more party members become ill or injured, requiring medical attention or rest.
        10. Mysterious Happening: Something strange or mysterious occurs, potentially leading to a new quest or adventure.
        11. Enemy Attack: The party is attacked by an enemy or group of enemies, requiring them to defend themselves.
        12. Beneficial Event: The party experiences a positive or beneficial event, such as finding a cache of treasure or a powerful magical item.

        Note: You can adjust the events to fit the setting and theme of your adventure, and you can add more options or modify them as you see fit. Additionally, the GM could include more specific details or options for each event to add more depth and complexity to the random events.

        Weird Encounters

        As a adventurers descending deeper into the fantasy world, somethings make not make any sense. Here’s a list of weird encounters to unsettle the adventurers:

        1. A group of goblins are seen performing a play about a giant cheese wheel that fell from the sky and destroyed their village.
        2. The party comes across a lone tree with a face carved into the trunk. It greets the party and offers them some of its fruit.
        3. The sound of a beautiful voice leads the party to a clearing, where they find a tree growing upside down. The tree is singing a beautiful song.
        4. A group of chickens are walking down the road wearing boots and hats. They do not appear to be scared of the party.
        5. The party sees a man riding a giant snail. He introduces himself as the king of the snails and invites the party to his castle.
        6. A group of squirrels are seen performing a ritual dance around a pile of acorns. They invite the party to join in the dance.
        7. A talking deer asks the party to help him find his missing antlers, which were stolen by a mischievous group of goblins.
        8. A group of small, humanoid creatures with mushrooms growing out of their heads approach the party. They offer the party a feast of strange, delicious mushrooms.
        9. A giant frog wearing a crown and carrying a scepter hops up to the party and demands that they kneel before him.
        10. The party sees a group of creatures that look like walking, talking cabbages. They are having a heated argument about who is the best dancer.
        11. The party comes across a field of flowers that all have eyes. They follow the party’s movements with their gazes.
        12. The party sees a group of creatures made entirely out of water. They are singing a hauntingly beautiful song.
        13. A man with a fish head introduces himself as the king of the river. He invites the party to his underwater palace.
        14. The party sees a group of creatures made entirely out of fire. They dance and flicker in the wind.
        15. A friendly ghost offers to lead the party through a dangerous area. It warns them that it can only stay in this realm for a short time.
        16. The party sees a group of creatures made entirely out of ice. They slide and glide across the landscape, leaving trails of frost in their wake.
        17. The party comes across a strange, twisted tree with a door in its trunk. The door opens and a gnome invites the party in for tea.
        18. The party sees a group of creatures made entirely out of sand. They shimmer and sparkle in the sunlight.
        19. A giant rabbit with a pocket watch hops by the party. It is late for an important date and is too busy to talk.
        20. The party comes across a group of sentient trees that are having a heated debate about the merits of different types of sunlight.

        Note: As with any table of this sort, you can modify the encounters to suit your game world and your players’ preferences. Additionally, you can add more detail to each encounter and use them as the basis for larger adventures or sub-quests.

        Sinister Events

        As the journey progresses, strange thing may happen and sinister events unfold. Here’s a list of sinister events that may threaten the adventurers and test their resolve:

        1. A thick fog rolls in, obscuring visibility and causing strange noises to echo through the area.
        2. The party comes across a group of people wearing masks and performing a bizarre ritual around a fire.
        3. A sudden earthquake shakes the ground, causing cracks to form and revealing strange, otherworldly creatures.
        4. A twisted, gnarled tree reaches out with grasping branches and seems to be trying to grab the party.
        5. The party encounters a group of cultists who are sacrificing a creature to a dark deity.
        6. The moon turns blood red and strange, eldritch creatures begin to appear.
        7. The party finds a strange, ancient artifact that begins to hum and pulse with an otherworldly energy.
        8. The party comes across a village that is entirely deserted except for a single, sinister figure watching from a distance.
        9. The sky turns black as night, even though it’s daytime, and the party hears the sound of flapping wings in the distance.
        10. A group of strange, mutated animals emerge from the shadows and begin to attack the party.
        11. The party discovers a hidden laboratory where an insane scientist has been conducting experiments on living creatures.
        12. A ghostly figure appears before the party and tells them that they must complete a dangerous task in order to free themselves from a curse.
        13. The party finds themselves in a twisted, otherworldly version of their surroundings, where everything is distorted and dangerous.
        14. A mysterious figure appears before the party and offers them a deal that seems too good to be true.
        15. The party comes across a group of people who have been possessed by dark forces and are attacking each other in a frenzy.
        16. Strange, otherworldly music begins to fill the air, causing the party to feel disoriented and afraid.
        17. The party comes across a house that is seemingly alive, with walls that shift and rooms that move.
        18. A group of shadowy figures emerge from the darkness, intent on capturing the party for some unknown purpose.
        19. The party discovers a hidden portal to another dimension, which seems to be filled with strange and dangerous creatures.
        20. A mysterious voice begins to speak directly into the party’s minds, warning them of an impending danger that they must stop at all costs.

        This is just a starting point, and you can modify the encounters to fit your game world and your players’ preferences. Additionally, you can use these encounters as the basis for larger adventures or quests, or combine them to create a longer campaign filled with weird and sinister events.

        Destinations

        Every journey ends. The adventures tired an exhausted by the encounters and events on the journey and have reached their destination. As a strong unified team, they must now work together and face the last ultimate challenge to meet objective and fulfil their quest.

        Here are some typical destinations, along with a brief description and the challenge they present:

        1. The Lost City Under water City – Deep beneath the ocean lies the fabled city of Atlantis, long forgotten by the surface world. The challenge is to explore the city and uncover its secrets, while also avoiding dangerous sea creatures and traps left behind by its ancient inhabitants.
        2. The Dark Forest – This dense and foreboding forest is home to all manner of sinister creatures, including trolls, goblins, and dark elves. The challenge is to navigate the forest and avoid its many dangers, while also searching for a powerful artifact said to be hidden deep within its heart.
        3. The Frozen Wasteland – In the far north lies a frozen wasteland, home to ice giants, frost dragons, and other dangerous creatures. The challenge is to survive the harsh environment, gather resources, and explore ancient ruins in search of lost treasure.
        4. The Underworld – This subterranean realm is ruled by demons, undead, and other foul creatures. The challenge is to navigate its treacherous tunnels, avoid traps and ambushes, and defeat the powerful demon lords who rule over it.
        5. The Floating City – This mysterious city floats high in the clouds, accessible only by airship or magical means. The challenge is to explore the city and uncover its secrets, while also dealing with the political intrigues and rival factions that vie for control.
        6. The Elemental Plane – Each of the four elements – earth, air, fire, and water – has its own plane of existence. The challenge is to explore these planes and harness the power of the elements to defeat powerful elemental lords and their minions.
        7. The Shadow Realm – This dark and twisted mirror of the real world is home to shadow creatures and evil spirits. The challenge is to navigate its shifting landscape and defeat the shadow lord who seeks to extend his influence into the real world.
        8. The Celestial Palace – High above the clouds lies the Celestial Palace, home to the gods themselves. The challenge is to gain access to the palace, navigate its many chambers and challenges, and win the favor of the gods.
        9. The Timeless Library – This ancient and mystical library contains knowledge from across time and space. The challenge is to navigate its labyrinthine halls and find the specific tome or artifact needed to solve a particular quest or problem.
        10. The Crystal Caves – Deep beneath the earth lies a network of crystal caves, filled with glittering treasures and dangerous monsters. The challenge is to navigate the twisting tunnels and defeat the powerful crystal dragon who hoards the greatest treasure of them all.
        11. The Forbidden Island – This isolated and uncharted island is said to be cursed by ancient gods. The challenge is to explore its rugged terrain, uncover its secrets, and confront the powerful priestesses who maintain the curse.
        12. The Living Dungeon – This dungeon is alive and constantly evolving, with traps and monsters that shift and change from room to room. The challenge is to navigate the dungeon’s ever-changing maze, defeat its guardians, and reach the treasure at the heart of the maze.

        Here are few more destinations with weird or sinister twists that may be used to challenge the adventurers further.:

        1. The Black Tower: This ominous tower looms over the landscape, shrouded in dark magic. The challenge for the adventurers is to penetrate its defenses and reach the top, where an evil sorcerer resides.
        2. The Lost City of the Dead: Hidden in a desolate wasteland, this ancient city is said to be cursed. The challenge for the adventurers is to navigate its twisted streets and discover the secrets that lie within, all while avoiding the undead guardians that roam its ruined halls.
        3. The Bloodwood: This dark forest is said to be inhabited by malevolent spirits and ancient curses. The challenge for the adventurers is to survive its twisted paths and uncover the dark power that lurks at its heart.
        4. The Hollow Mountains: These eerie peaks are home to a forgotten civilization, rumored to have been destroyed by a terrible curse. The challenge for the adventurers is to delve deep into the mountains and discover the secrets of their ancient civilization.
        5. The Sunken City: This ancient metropolis was once a hub of trade and culture, but now lies at the bottom of the sea. The challenge for the adventurers is to brave the depths and uncover the lost treasures of this underwater world, all while avoiding the Kraken and other dangers that lurk within.
        6. The Dark Moon: This mysterious satellite of the planet is shrouded in darkness and magic. The challenge for the adventurers is to find a way to reach its surface, where ancient ruins and powerful magic await. But the journey is perilous, as the moon is home to dangerous god-like creatures and powerful sorcerers who will stop at nothing to protect their secrets.

        The GM can decide to present the adventurers with impossible task which they are unlikely to succeed. Here are more destinations with difficult or no-win scenarios:

        1. The Underworld – A dark, cavernous realm ruled by a cruel and powerful demon lord. The players must navigate a maze of treacherous tunnels and face off against hordes of demonic minions to reach the demon lord’s throne room. However, once they arrive, they discover that defeating him means taking his place as ruler of the Underworld, forever binding their souls to this infernal realm.
        2. The Dreamworld – A realm of pure imagination and fantasy, created by a powerful dreamweaver. The players must venture into this realm to retrieve a powerful artifact, but find themselves constantly pursued by the dreamweaver’s nightmares and illusions. They must overcome their own fears and doubts to succeed, but doing so will require them to sacrifice a cherished memory or aspect of themselves.
        3. The Celestial Realm – A realm of radiant light and beauty, inhabited by powerful angels and divine beings. The players must seek the aid of these beings to stop a powerful evil from spreading across the land. However, they soon discover that the Celestial Realm is a place of strict order and obedience, and that the beings here demand complete loyalty and servitude. If the players refuse, they will be cast out of the Celestial Realm forever.
        4. The Labyrinth – A vast, twisting maze that shifts and changes constantly. The players must navigate this labyrinth to reach the treasure at its heart, but they find themselves pursued by a monstrous minotaur that hunts them relentlessly. If they manage to defeat the minotaur, they discover that the treasure is cursed, and that it will grant them immense power at the cost of their sanity.
        5. The Abyss – A bottomless pit that leads to an infinite, alien realm of chaos and madness. The players must venture into this abyss to retrieve a powerful artifact, but the constant exposure to the abyss’s twisted energies begins to warp their minds and bodies. If they do manage to retrieve the artifact, they will find that it is a sentient, malevolent entity that seeks to use their bodies as vessels to escape the abyss and wreak havoc on the world.
        6. The Island of the Dead – An eerie, mist-shrouded island that is said to be the gateway to the afterlife. The players must venture here to retrieve the soul of a loved one or ally, but they soon discover that the island is inhabited by vengeful spirits and undead creatures. If they manage to retrieve the soul, they must fight their way back through the island’s horrors to escape, but doing so will require them to make a sacrifice of their own life force or soul.

        Boss Level

        The GM can, additionally, decide to present the adventurers with the Major Villain to over come at the destination. Here’s a list of major boss level type villains (and their hidden weaknesses) to thwart the adventurers:

        1. The Dark Sorcerer: A powerful mage who has spent years studying the forbidden arts of magic. He wields immense power and can control the elements themselves. His power is tied to a hidden talisman that, if destroyed, weakens him.
        2. The Corrupted King: A once great ruler who was corrupted by dark magic. He rules his kingdom with an iron fist and has amassed an army of undead soldiers. His power comes from a cursed crown that, if removed, weakens him.
        3. The Demon Lord: A demonic entity who seeks to destroy all life. He commands an army of demons and can control the minds of his enemies. His power is tied to a forbidden artifact that, if destroyed, weakens him.
        4. The Lich Queen: A powerful necromancer who has achieved immortality through dark magic. She commands an army of undead and can drain the life force of her enemies. Her power is tied to a hidden phylactery that, if destroyed, weakens her.
        5. The Dragon Overlord: A massive dragon who has enslaved an entire kingdom. He breathes fire and can fly, making him a formidable foe. His power comes from a magical amulet that, if stolen, weakens him.
        6. The Vampire Lord: An ancient vampire who has lived for centuries. He can control the minds of his victims and drain their blood to sustain himself. His power is tied to a hidden coffin that, if destroyed, weakens him.
        7. The Titan King: A colossal giant who rules over a race of giants. He wields a massive hammer and can cause earthquakes with his steps. His power is tied to a magical gemstone that, if shattered, weakens him.
        8. The Witch Queen: A cunning sorceress who has made a pact with dark forces. She can summon demons and cast powerful spells. Her power is tied to a hidden ritual that, if disrupted, weakens her.
        9. The Warlord: A ruthless conqueror who has amassed a massive army. He wields a massive sword and has no mercy for his enemies. His power comes from his loyal followers, who can be turned against him if convinced.
        10. The Shadow Master: A mysterious figure who can control the shadows themselves. He can move through walls and attack from the shadows. His power is tied to a hidden artifact that, if exposed to light, weakens him.
        11. The Cult Leader: A charismatic leader who has convinced his followers to worship dark gods. He can summon demons and control the minds of his enemies. His power is tied to a hidden altar that, if destroyed, weakens him.
        12. The Undead Empress: A powerful undead sorceress who seeks to conquer the world. She commands an army of undead soldiers and can summon ghosts to do her bidding. Her power is tied to a hidden tomb that, if opened, weakens her.

        Some Boss level Villains are Monsters are too powerful to defeat, The adventurers must trick, outsmart, avoid or escape to see them to get to the conclusion pf the game. Here is a list that can be adapted as needed.

        1. The Leviathan – A massive sea serpent that can swallow ships whole and controls the ocean currents. It cannot be defeated in battle, but players can try to outsmart it or find a way to divert its attention.
        2. The Behemoth – A colossal beast that can trample entire cities and withstand any physical attack. Its only weakness is its slow speed, and players must flee and outmaneuver it to survive.
        3. The Chimera – A creature with multiple heads, each with a different breath weapon and ability. It cannot be killed, but players can find a way to neutralize its heads or distract it long enough to escape.
        4. The Hydra – A agile serpent-like monster with multiple regenerating heads that make it virtually invincible. Players must find a way to cut off all its heads simultaneously or avoid it altogether.
        5. The Roc – A massive bird of prey with razor-sharp talons and the ability to create strong gusts of wind. It cannot be defeated, but players can try to lure it away or find a way to ground it.
        6. The Juggernaut – A massive slow witted golem made of indestructible metal that can crush anything in its path. Its only weakness is its slow speed, and players must avoid it or find a way to slow it down.

        Rewards for Heroes

        At the end of the journey and with their objective met, the surviving adventures are heroes. They started their journey to solve a problem or for personal gain. The GM should evaluate their performance and decide on the level of reward. Here’s a list of small rewards that are found or won, or allowed to be kept from the game, in reparation for their many troubles:

        1. A magical item of great power and potential.
        2. A rare and valuable material or resource.
        3. A powerful ally or companion for the party.
        4. A safe haven or base of operations.
        5. A treasure trove of gold, jewels, and other riches.
        6. A valuable piece of information or knowledge.
        7. An invitation to join a powerful and influential organization.
        8. A boon or blessing from a powerful deity or supernatural being.
        9. A rare and exotic creature or mount.
        10. A powerful weapon or piece of armour.
        11. A magical spell or ritual of great power.
        12. A title or noble rank within a kingdom or society.
        13. A powerful and loyal group of followers or henchmen.
        14. A piece of land or property of significant value.
        15. A map or guide to a hidden or lost location.
        16. A rare and powerful artifact or relic.
        17. A powerful and rare mount or vehicle.
        18. A powerful and mysterious mentor or teacher.
        19. A valuable and rare trade or craft skill.
        20. A special or unique ability or power.

        Conclusions

        At journey end, the unexpected may happen. Here is list of plot twists and conclusions for our Heroes. These are optional and for the GM to develop. They can be used a hooks into another game.

        1. The heroes successfully defeat the evil villain and save the world from destruction.
        2. The heroes fail to stop the villain, but they are able to save a few lives and prevent complete disaster.
        3. The heroes discover that the villain was actually working for a greater evil and the true battle has yet to be fought.
        4. The heroes are betrayed by one of their own and must confront them before continuing on their mission.
        5. The heroes realize that the true enemy was not who they thought it was and must change their strategy.
        6. The heroes uncover a conspiracy that reaches the highest levels of power and must decide whether to confront it head-on or work from the shadows.
        7. The heroes are hailed as heroes by the people they have saved and are given great rewards and recognition.
        8. The heroes must sacrifice one of their own in order to achieve their mission.
        9. The heroes must make a difficult moral decision that will have consequences for their future.
        10. The heroes discover a powerful artifact that can change the course of the world, but must keep it from falling into the wrong hands.
        11. The heroes must choose between their own personal interests and the greater good.
        12. The heroes are forced to make a temporary alliance with their enemies in order to stop a common threat.
        13. The heroes realize that they have been played all along and must confront the true puppet master behind the scenes.
        14. The heroes must navigate a treacherous political landscape in order to achieve their goals.
        15. The heroes face a moral dilemma that challenges their very beliefs and values.
        16. The heroes are forced to make a difficult decision that results in the death of a beloved NPC.
        17. The heroes discover that the villain was not evil, but misguided, and must help them see the error of their ways.
        18. The heroes are caught in a deadly trap and must use all their skills and ingenuity to escape.
        19. The heroes discover a hidden location that contains powerful secrets and knowledge.
        20. The heroes must face the consequences of their actions and decide how to make amends for their mistakes.

        Reference Tables

        The provided are examples, the GM is encouraged to creates additional list or tables for the game. These can be bought off the shelf, re-used from existing adventures or rule books or generated online.

        1. Random Encounter Table: A table used to determine the chance of encountering different types of creatures or NPCs in a given area.
        2. Treasure Table: A table used to determine the type and amount of treasure that might be found in a given location.
        3. Magic Item Table: A table used to randomly determine the type and properties of a magical item found in a treasure hoard or other location.
        4. Weather Table: A table used to determine the type of weather conditions in a given area, such as rain, snow, or thunderstorms.
        5. NPC Personality Traits Table: A table used to randomly determine the personality traits of NPCs encountered during gameplay.
        6. Skill Check Difficulty Table: A table used to determine the difficulty of a given skill check, such as picking a lock or sneaking past guards.
        7. Hazard Table: A table used to determine the chance of encountering hazards or obstacles in a given location, such as traps or difficult terrain.
        8. Quest Hook Table: A table used to provide players with potential story hooks or quests to pursue during gameplay.
        9. Random Event Table: A table used to determine the occurrence of random events during gameplay, such as sudden earthquakes or meteor showers.
        10. Faction Relationship Table: A table used to determine the current relationship between the players’ faction and other factions or organizations in the game world.
        11. Critical Hit or Failure Table: A table used to determine the effects of a critical hit or critical failure during combat.
        12. Travel Time Table: A table used to determine the amount of time required to travel between different locations on a map, taking into account terrain and other factors.

        Note: This is just a sample list of possible tables that you might find in an RPG. The specific tables used will vary depending on the system and setting of the game.

        Principles

        Here some principles for the fantasy game that may assist GM in structuring outcomes for their Players.

        1. Immersion: The game should provide an immersive experience that transports players into a fantastical world where they can explore, interact, and create their own stories.
        2. Exploration: The game should encourage exploration of the world, whether through uncovering hidden secrets, discovering new locations, or meeting new characters.
        3. Character development: The game should allow players to develop their characters over time, building skills, abilities, and relationships as they progress through the story.
        4. Risk and reward: The game should balance risk and reward, offering players challenging encounters that come with the potential for valuable loot or experience points.
        5. Player agency: The game should provide players with agency over their characters’ actions, allowing them to make meaningful choices that impact the story and their relationships with other characters.
        6. Strategy and tactics: The game should require strategic thinking and tactical decision-making in combat encounters, allowing players to use their skills and abilities to gain an advantage over their enemies.
        7. Worldbuilding: The game should have a richly detailed and consistent world that provides context for the story and allows players to learn and discover new things about the world and its inhabitants.
        8. Narrative: The game should have a compelling narrative that engages players emotionally and intellectually, driving them to explore the world and develop their characters.
        9. Collaboration: The game should encourage collaboration and teamwork among players, whether through party-based combat encounters or through non-combat challenges that require different characters to work together.
        10. Fairness: The game should be fair and balanced, providing players with a consistent and predictable set of rules that allow them to make informed decisions and engage with the world in a meaningful way.

        Narratives

        Here are some possible narratives for the game for the GM to structure the game or a campaign of sessions.

        1. “The Dark Lord’s Return”: The ancient evil that was thought to be vanquished has returned, and the players must gather powerful artifacts and allies to defeat the Dark Lord and his minions before they plunge the world into eternal darkness.
        2. “The Lost City”: Legends tell of a once-great city that disappeared from the face of the earth, leaving behind only ruins and forgotten secrets. The players must uncover the truth behind the city’s disappearance and the mysterious forces that still guard its treasures.
        3. “The Dragon’s Curse”: A powerful dragon has laid a curse on the kingdom, causing crops to wither and die, and bringing famine and suffering to the people. The players must track down the dragon and find a way to break the curse before it’s too late.
        4. “The Feywild”: The players are transported to a magical realm of faeries and sprites, where they must navigate the whimsical and dangerous landscape, negotiate with the capricious fey lords, and unravel a web of ancient prophecies and rivalries.
        5. “The Time Warp”: A powerful wizard’s experiment has gone awry, trapping the players in a time loop that forces them to relive the same day over and over again. They must use their knowledge of past and future events to solve puzzles, overcome challenges, and break the wizard’s spell.
        6. “The Underworld”: The players descend into the dark, cavernous depths of the earth, where they must battle demons, undead, and other horrors to find a lost artifact that can save their world from destruction.
        7. “The Elemental Crystals”: Four powerful elemental crystals have been scattered across the land, and the players must find them and use them to stop a rampaging elemental force that threatens to destroy everything in its path.
        8. “The Necromancer’s Tower”: A powerful necromancer has taken up residence in a forbidding tower, from which he sends his undead minions to terrorize the surrounding countryside. The players must infiltrate the tower, confront the necromancer, and put an end to his foul schemes.
        9. “The Oracle’s Prophecy”: An ancient oracle has foretold a great cataclysm that will soon befall the world, and the players must decipher her cryptic messages and undertake a perilous journey to prevent the disaster from coming to pass.
        10. “The Pirate’s Curse”: The players find themselves caught up in a struggle for a cursed treasure that has driven many a pirate to madness and death. They must navigate treacherous seas, battle rival pirate crews, and overcome the curse’s dark power to claim the treasure for themselves.
      3. ICT: Zero Trust

        ICT: Zero Trust

        Overview

        Zero Trust is a security model that is gaining popularity among security architects and professionals. In the past, many organizations relied on a perimeter-based security model, where network traffic was trusted if it came from within the organization’s network perimeter, but untrusted if it came from outside. However, with the rise of cloud computing, mobile devices, and remote work, this model has become increasingly outdated and ineffective.

        Zero Trust, on the other hand, assumes that all network traffic is untrusted, regardless of its origin or destination. It is based on the principle of “never trust, always verify,” meaning that every user, device, and network resource must be authenticated and authorized before being granted access to the network or data. This is done through a combination of identity and access management (IAM), network segmentation, and continuous monitoring and analysis of user and device behavior.

        Principles

        Some key principles of Zero Trust include:

        1. Least privilege access: Users and devices should only be granted access to the resources they need to do their jobs, and nothing more.
        2. Multi-factor authentication: Users should be required to authenticate themselves using at least two methods, such as a password and a fingerprint or smart card.
        3. Micro-segmentation: The network should be segmented into small, isolated zones, with access controlled at each segment.
        4. Continuous monitoring and analysis: User and device behavior should be monitored in real-time, with alerts raised if suspicious activity is detected.

        Zero Trust is not a specific product or technology, but rather a security model that can be implemented using a variety of tools and techniques. Some common technologies used in Zero Trust architectures include firewalls, VPNs, IAM systems, and security information and event management (SIEM) platforms.

        Zero Trust is a comprehensive security model that can help organizations better protect their sensitive data and assets in an increasingly complex and dynamic IT environment.

        Multi-factor authentication

        Multi-factor authentication (MFA) is a key component of the Zero Trust security model, as it helps to ensure that only authorized users are granted access to sensitive resources. MFA is a method of authentication that requires users to provide two or more forms of authentication before they are granted access to a resource.

        The three factors of authentication are:

        1. Something the user knows (e.g. a password or PIN)
        2. Something the user has (e.g. a smart card or token)
        3. Something the user is (e.g. biometric data like a fingerprint or face scan)

        In the context of Zero Trust, MFA is used to verify the identity of users before granting them access to resources. This helps to reduce the risk of unauthorized access, even if a user’s password or other credentials have been compromised.

        Some common examples of MFA implementation in Zero Trust architectures include:

        1. Smart cards or tokens: These physical devices are used to generate a one-time code that the user enters along with their password to access a resource.
        2. Biometric authentication: This involves using biometric data like fingerprints or face scans to verify a user’s identity.
        3. SMS-based authentication: This involves sending a one-time code to the user’s mobile phone via SMS, which they enter along with their password to access a resource.
        4. Mobile apps: Some applications provide MFA functionality through a mobile app that generates a one-time code that the user enters along with their password to access a resource.
        5. FIDO (Fast IDentity Online) protocols: These open standards for authentication support a range of authentication methods, including biometric data, smart cards, and one-time codes.

        It’s important to note that MFA is not a silver bullet for security, but it can significantly increase the security of authentication in Zero Trust architectures.

        Microsegmentation

        Microsegmentation is another key component of the Zero Trust security model. It involves dividing a network into small, isolated segments, each with its own set of access controls. This helps to reduce the risk of lateral movement within the network, as attackers who gain access to one segment will not be able to move laterally to other segments without proper authorization.

        Microsegmentation is typically implemented using firewalls or network virtualization technologies that can apply access controls at the segment level. Each segment can be configured with its own set of access controls, based on factors such as the user’s identity, the type of device being used, and the sensitivity of the data or resource being accessed.

        Some common examples of microsegmentation implementation in Zero Trust architectures include:

        1. Application-level segmentation: Applications can be segmented into smaller components, each with its own set of access controls. For example, a database application could be segmented into separate components for data access and administration, with access controls applied to each component.
        2. Network-level segmentation: Network segments can be created to isolate different types of traffic, such as internal versus external traffic, or different types of data traffic (e.g. email, file transfers, etc.).
        3. Virtualized segmentation: Virtualization technologies like hypervisors and software-defined networking (SDN) can be used to create virtual segments within a physical network, each with its own set of access controls.
        4. Endpoint-level segmentation: Endpoint devices can be segmented based on factors like the user’s identity, the device type, and the sensitivity of the data being accessed. Access controls can be applied at the device level to prevent unauthorized access to resources.

        Microsegmentation is an effective way to reduce the risk of lateral movement within a network, and is an important component of the Zero Trust security model. By dividing a network into smaller, isolated segments, organizations can better protect their sensitive data and resources, and reduce the impact of any security breaches that may occur.

        Least privilege

        Implementing the principle of least privilege is a key component of the Zero Trust security model, especially in highly regulated environments where compliance requirements are strict. Here’s a practical example of how Zero Trust can be implemented to enforce the principle of least privilege:

        Let’s say that you’re the security architect for a healthcare provider, and you need to ensure that only authorized users have access to patient data. Here’s how you could use Zero Trust to enforce the principle of least privilege:

        1. User authentication: Implement multi-factor authentication (MFA) to ensure that users are who they claim to be. This helps to prevent unauthorized access to patient data, even if a user’s password or other credentials have been compromised.
        2. Identity verification: Verify the user’s identity using a trusted identity provider (IDP) that can authenticate the user’s credentials and check their authorization level. This ensures that users are only granted access to the patient data that they are authorized to access.
        3. Role-based access control: Implement role-based access control (RBAC) to restrict access to patient data based on the user’s role within the organization. For example, doctors and nurses may have different levels of access to patient data based on their job responsibilities.
        4. Data encryption: Encrypt patient data at rest and in transit to protect it from unauthorized access. This ensures that even if patient data is stolen or intercepted, it cannot be read without the appropriate decryption keys.
        5. Microsegmentation: Use microsegmentation to divide the network into smaller, isolated segments, each with its own set of access controls. This helps to reduce the risk of lateral movement within the network, as attackers who gain access to one segment will not be able to move laterally to other segments without proper authorization.

        By implementing these Zero Trust controls, you can ensure that only authorized users have access to patient data, and that they are only able to access the data that they need to do their jobs. This helps to reduce the risk of data breaches and helps to ensure compliance with strict regulatory requirements.

        Continuous monitoring and analysis

        Continuous monitoring and analysis is an important concept in cybersecurity that involves the ongoing collection, analysis, and interpretation of data to detect and respond to security threats in real-time. It is a critical component of the Zero Trust security model, which emphasizes the need for continuous verification and authentication of all users and devices on a network, and the ongoing monitoring of all network activity to identify and respond to potential threats.

        Continuous monitoring and analysis involves the use of various tools and technologies to collect and analyze data from across the network, including data from devices, applications, and user activity. This data is then analyzed using advanced analytics and machine learning algorithms to identify potential threats, anomalies, or suspicious behavior.

        Some common examples of continuous monitoring and analysis in cybersecurity include:

        1. Network traffic analysis: This involves the analysis of network traffic to detect potential security threats, such as malware, phishing attempts, or other malicious activity.
        2. Endpoint monitoring: This involves the ongoing monitoring of endpoints, such as laptops, desktops, and mobile devices, to detect potential threats, such as unauthorized access attempts, malware infections, or suspicious behavior.
        3. User behavior analysis: This involves the analysis of user behavior to detect potential insider threats, such as employees who may be intentionally or unintentionally putting sensitive data at risk.
        4. Application monitoring: This involves the ongoing monitoring of applications to detect potential security vulnerabilities or exploits, such as SQL injection attacks or other types of web-based attacks.

        Continuous monitoring and analysis is critical for identifying and responding to potential security threats in real-time, and is an important component of the Zero Trust security model.

        By using advanced analytics and machine learning algorithms to analyze data from across the network, organizations can quickly detect and respond to potential threats, reducing the risk of data breaches and other types of cyber attacks.

      4. OSR: Character Stats

        OSR: Character Stats

        In OSR, character stats refer to the numerical values that represent a character’s abilities and skills. These stats are typically determined by rolling dice and applying modifiers based on the character’s race, class, and other factors.

        The most common stats found in OSR games include:

        1. Strength (STR): Measures a character’s physical power and ability to carry heavy objects, perform feats of strength, and deal more damage in combat.
        2. Dexterity (DEX): Represents a character’s agility, reflexes, and hand-eye coordination. It influences actions like dodging attacks, picking locks, and using ranged weapons.
        3. Constitution (CON): Reflects a character’s overall health, stamina, and resistance to diseases, toxins, and fatigue. It affects hit points (a measure of how much damage a character can withstand before being defeated).
        4. Intelligence (INT): Measures a character’s mental acuity, memory, and reasoning abilities. It can influence skills such as magic use, knowledge checks, and problem-solving.
        5. Wisdom (WIS): Represents a character’s intuition, perception, and common sense. It can affect skills like perception, tracking, and resisting mind-affecting effects.
        6. Charisma (CHA): Reflects a character’s personal magnetism, charm, and leadership qualities. It can influence interactions with NPCs (non-player characters), reaction rolls, and certain social skills.

        In traditional OSR games, these stats are typically determined through dice rolls, commonly using 3d6 (rolling three six-sided dice) for each stat. The rolled values are then modified based on the character’s race, class, and other factors, such as magic items or temporary effects.

        These stats form the foundation for various in-game actions, determining a character’s capabilities, strengths, and weaknesses. They provide a framework for players to make decisions and resolve challenges within the game world.

        Example code for generating a OSR character stats in Visual Basic .NET:

        Dim Strength As Integer
        Dim Dexterity As Integer
        Dim Constitution As Integer
        Dim Intelligence As Integer
        Dim Wisdom As Integer
        Dim Charisma As Integer
        
        Randomize()
        
        Strength = Int((18 - 8 + 1) * Rnd() + 8)
        Dexterity = Int((18 - 8 + 1) * Rnd() + 8)
        Constitution = Int((18 - 8 + 1) * Rnd() + 8)
        Intelligence = Int((18 - 8 + 1) * Rnd() + 8)
        Wisdom = Int((18 - 8 + 1) * Rnd() + 8)
        Charisma = Int((18 - 8 + 1) * Rnd() + 8)
        
        MsgBox("Strength: " & Strength & vbCrLf & _
                "Dexterity: " & Dexterity & vbCrLf & _
                "Constitution: " & Constitution & vbCrLf & _
                "Intelligence: " & Intelligence & vbCrLf & _
                "Wisdom: " & Wisdom & vbCrLf & _
                "Charisma: " & Charisma)
        

        This code uses the Randomize function and the Rnd function to generate random numbers for the character’s stats. The code then displays the generated stats using a MsgBox.

        This is a very basic example and does not take into account any specific rules or characteristics of different OSR races or classes.

        Here’s an another example of code, this time in python, that generates stats for common character classes in a hypothetical OSR game:

        import random
        
        def roll_stat():
            return sum(sorted(random.randint(1, 6) for _ in range(3))[1:])
        
        def generate_stats():
            stats = {}
            stats['STR'] = roll_stat()
            stats['DEX'] = roll_stat()
            stats['CON'] = roll_stat()
            stats['INT'] = roll_stat()
            stats['WIS'] = roll_stat()
            stats['CHA'] = roll_stat()
            return stats
        
        def generate_stats_for_class(character_class):
            class_stats = {
                'fighter': {'STR': 15, 'DEX': 12, 'CON': 13, 'INT': 9, 'WIS': 8, 'CHA': 10},
                'rogue': {'STR': 12, 'DEX': 15, 'CON': 11, 'INT': 10, 'WIS': 8, 'CHA': 13},
                'wizard': {'STR': 9, 'DEX': 12, 'CON': 10, 'INT': 15, 'WIS': 8, 'CHA': 11}
            }
            base_stats = class_stats.get(character_class.lower())
            if not base_stats:
                return None
            
            stats = generate_stats()
            for stat, value in base_stats.items():
                stats[stat] = max(value, stats[stat])
            
            return stats
        
        # Example usage
        character_class = 'fighter'
        stats = generate_stats_for_class(character_class)
        if stats:
            print(f"Stats for a {character_class}: {stats}")
        else:
            print(f"Invalid character class: {character_class}")

        In this code, the roll_stat() function generates a random stat value by rolling three six-sided dice and summing the second and third highest values. The generate_stats() function calls roll_stat() for each stat and returns a dictionary of the generated stats.

        The generate_stats_for_class()`function takes a character class as input and retrieves the base stats for that class from a predefined dictionary.

        It then generates the remaining stats using generate_stats() and ensures that each stat is at least as high as its base value.

        Finally, it returns the complete set of stats for the given class.

        You can modify the class_stats dictionary to include more character classes and their respective base stat values.

      5. Logical Fallacy

        Logical Fallacy

        A logical fallacy is an error in reasoning or argumentation that leads to a flawed or invalid conclusion. It is a mistake in the logical structure of an argument that renders it unsound, weak, or otherwise problematic. Logical fallacies can take many different forms and can be found in a variety of contexts, including debates, discussions, advertising, politics, and everyday reasoning. They are often used to manipulate or persuade people by appealing to their emotions or biases, rather than their reason or critical thinking skills. Being able to recognize and avoid logical fallacies is an important part of effective communication and clear thinking.

        There are many different types of logical fallacies, but here are some of the most common ones that are easy to pickup in text and talk:

        1. Ad hominem: attacking the person making an argument instead of addressing the argument itself
        2. Appeal to authority: accepting a claim simply because it is made by someone in a position of authority, without considering whether the claim is actually true
        3. Straw man: misrepresenting or exaggerating someone else’s argument in order to make it easier to attack
        4. False dilemma: presenting only two options as if they are the only two possible choices, when in fact there may be other options that have not been considered
        5. Slippery slope: suggesting that one action will inevitably lead to a chain of negative consequences without sufficient evidence to support this claim
        6. Hasty generalization: drawing a conclusion about a large group based on a small sample size
        7. Circular reasoning: using the conclusion of an argument as a premise in order to prove the conclusion
        8. False cause: assuming that because one event happened before another, the first event caused the second event
        9. Red herring: introducing an irrelevant topic in order to divert attention away from the original issue
        10. Appeal to emotion: using emotional appeals rather than reason to persuade someone of a particular argument.

        These are just a few examples of logical fallacies. It’s important to recognize them to ensure that arguments are based on solid reasoning and evidence.

        Logic fallacy as Code

        The flaws in logic can be identified and represented in code by creating conditional statements or functions that capture the specific patterns or errors associated with each fallacy. Here’s an example in Python:

        def ad_hominem(argument, person):
        if "criminal" in person: 
        print(f"You can't trust {person}'s opinion on {argument} because they're a known criminal.") 
        
        def straw_man(argument, exaggeration): 
        print(f"Opponents of {argument} want {exaggeration}.") 
        
        def appeal_to_authority(argument, authority): 
        print(f"{authority}, a famous {argument}, says {argument}, so it must be true.") 
        
        # Example usage 
        
        ad_hominem("climate change", "John Doe") 
        straw_man("gun control", "a society where anyone can carry any weapon they want, anytime, anywhere") 
        appeal_to_authority("aliens", "Dr. Smith")
        

        In this code, each function represents a specific fallacy, and when called with appropriate arguments, it prints out a statement that captures the essence of that fallacy.

        It’s worth noting that while logic can be represented in code, code itself is not immune to logical flaws. Programmers need to be diligent in ensuring their code is free from logical fallacies to produce accurate and reliable results.

        The Bandwagon Fallacy as Code

        Here’s an example code that represents the Bandwagon Fallacy:

        class BandwagonFallacy: 
        
        def __init__(self): 
            self.beliefs = []
        
        def add_belief(self, belief): 
            self.beliefs.append(belief) 
        
        def validate_beliefs(self): 
            if len(self.beliefs) &gt; 0: majority_belief = max(set(self.beliefs), key=self.beliefs.count)
        
            print(f"Everyone believes that {majority_belief}, so it must be true.") 
            else: 
            print("No beliefs have been added.")
        

        In this code, we define a class called BandwagonFallacy that represents the bandwagon fallacy. It has an attribute beliefs that stores a list of beliefs. The add_belief method allows us to add beliefs to the list. The validate_beliefs method checks if there are any beliefs and then identifies the belief that appears most frequently. It prints a statement claiming that because everyone believes it, it must be true.

        Here’s an example usage of the code:

        fallacy = BandwagonFallacy()
        fallacy.add_belief("Everyone loves the new movie.")
        fallacy.add_belief("Everyone thinks this product is amazing.")
        fallacy.add_belief("Everyone is buying the latest fashion trend.")
        fallacy.validate_beliefs()
        

        Output:

        Everyone believes that Everyone loves the new movie., so it must be true.
        

        Please note that this code is a simplified representation for demonstration purposes.

        In practice, logical fallacies like the bandwagon fallacy require more complex analysis of data and beliefs to determine their validity.

        False Dilemma as Code

        In the context of a mathematical proof, representing the False Dilemma fallacy can be a bit challenging since mathematical proofs generally aim for precise and logical reasoning.

        However, we can demonstrate a hypothetical scenario where a False Dilemma fallacy is applied to a mathematical problem.

        Consider the following code example:

        def false_dilemma_proof(x): 
        if x &lt; 0: 
            print("The number is negative.") 
        else: 
            print("The number is non-negative.") 
        
        def main(): 
            number = int(input("Enter a number: ")) 
            false_dilemma_proof(number) 
        
        main()
        

        In this code, we are attempting to prove whether a number is negative or non-negative. However, the False Dilemma fallacy occurs when the program only considers two possibilities (negative or non-negative) and disregards other potential options (such as zero or complex numbers). This oversimplification of possibilities is a logical error.

        To avoid the False Dilemma fallacy in mathematical proofs, it’s crucial to consider and account for all possible cases and options rather than limiting the analysis to only a few choices. Mathematical proofs typically strive for comprehensive and rigorous reasoning to ensure accuracy and validity.

        Ad Hominem as code

        The Ad Hominem fallacy is an error in reasoning that involves attacking the person making an argument rather than addressing the argument itself. Expressing this fallacy as an equation in code may not be straightforward since it is more of a logical flaw than a mathematical equation. However, we can create a simplified representation using a conditional statement. Here’s an example:

        def ad_hominem(argument, person):
        if person == "known criminal": 
        print(f"You can't trust {person}'s opinion on {argument} because they're a known criminal.") 
        else: 
        print(f"You should consider {person}'s opinion on {argument} based on its own merits.") 
        
        # Example usage 
        ad_hominem("climate change", "John Doe") 
        ad_hominem("climate change", "known criminal")
        

        In this code, the ad_hominem function takes two arguments: argument and person. It checks if the person is a “known criminal” using a conditional statement. If the person is indeed a known criminal, it prints a statement claiming that their opinion on the given argument cannot be trusted due to their criminal background. Otherwise, it suggests considering the person’s opinion based on its own merits.

        The code is a simplified representation and may not capture the complexity of real-world scenarios where Ad Hominem fallacies can occur. It’s essential to recognize and address fallacies in logical arguments rather than resorting to personal attacks or irrelevant character judgments.

        Evaluating bias and its impact on arguments involves considering additional factors and conducting an analysis to mitigate the Ad Hominem fallacy. While the Ad Hominem fallacy focuses on attacking the person making an argument instead of addressing the argument itself, incorporating additional factors and performing a Monte Carlo analysis can help in assessing the validity and reliability of an argument.

        Here’s a general outline of how you could approach this:

        Identify the argument: Clearly define the argument being presented and the main claims or assertions being made.

        Assess the personal attack: Determine if there are any personal attacks or Ad Hominem fallacies present in the argument. Identify if the person’s character or background is being used to discredit their argument without addressing the actual claims being made.

        Analyze additional factors: Consider relevant factors beyond personal characteristics, such as evidence, logical reasoning, data, expert opinions, and the credibility of sources. Evaluate the strength of the argument based on these additional factors.

        Conduct a Monte Carlo analysis: Monte Carlo analysis is a statistical technique that involves simulating a large number of scenarios to estimate the range of possible outcomes. In the context of evaluating bias, a Monte Carlo analysis could involve examining the argument under different conditions or perspectives to assess its robustness.

        a. Identify key variables: Determine the critical variables or factors that could affect the argument’s validity or reliability. These variables might include the quality of evidence, potential biases, assumptions made, or the context in which the argument is presented.

        b. Define parameter ranges: Specify the ranges or distributions for each variable. These ranges can represent different values, perspectives, or scenarios that could influence the outcome of the argument.

        c. Simulate scenarios: Run multiple iterations of the analysis, randomly sampling values from the defined parameter ranges for each variable. Evaluate the argument’s performance across different scenarios and analyze the outcomes.

        d. Analyze results: Examine the results of the Monte Carlo analysis to identify patterns, trends, or sensitivities. This analysis can help evaluate how the argument fares across different conditions and assess its susceptibility to bias.

        By incorporating additional factors and conducting a Monte Carlo analysis, you can move beyond the Ad Hominem fallacy and provide a more comprehensive evaluation of bias in an argument. This approach helps focus on the content and merits of the argument itself, rather than being solely influenced by personal attacks or irrelevant character judgments.

        Performing a complete code implementation for evaluating bias, incorporating additional factors, and conducting a Monte Carlo analysis to mitigate the Ad Hominem fallacy is beyond the scope of a simple code example. However, I can provide you with a basic outline of how such a code implementation might look:

        import random
        
        def evaluate_argument(argument, person):
        
        # Assess the personal attack (Ad Hominem fallacy) 
        
        if person == "known criminal": 
        print(f"You can't trust {person}'s opinion on {argument} because they're a known criminal.") 
        else: 
        print(f"Evaluating the argument on {argument} by {person}:") 
        
        # Additional factors and analysis 
        
        factors = { "evidence": random.uniform(0, 1), "reasoning": random.uniform(0, 1), "data_quality": random.uniform(0, 1), 
        
        # Add more relevant factors here } 
        
        # Monte Carlo analysis
        
        num_iterations = 1000 success_count = 0 
        
        for _ in range(num_iterations): 
        # Simulate different scenarios or perspectives 
        # by randomly sampling the factors' 
        
        values evidence = factors["evidence"] 
        reasoning = factors["reasoning"] 
        data_quality = factors["data_quality"] 
        
        # Simulate more factors here Evaluate the argument based on the simulated factors 
        
        if evidence &gt; 0.5 and reasoning &gt; 0.5 and data_quality &gt; 0.5: success_count += 1 success_rate = success_count / num_iterations 
        
        print(f"Success rate of the argument: {success_rate}") 
        
        # Example usage 
        
        evaluate_argument("climate change", "John Doe") 
        evaluate_argument("climate change", "known criminal")
        

        In this code, the evaluate_argument function takes two arguments: argument and person. It first checks if the person is a “known criminal” to address the Ad Hominem fallacy. If it is not a personal attack, it proceeds with evaluating the argument using additional factors and a Monte Carlo analysis.

        Within the function, you can define the relevant factors that contribute to the argument’s validity or reliability. In this example, I’ve included three factors (evidence, reasoning, and data_quality), but you can add more as needed. These factors are simulated by randomly sampling values within a given range.

        The Monte Carlo analysis is performed by running multiple iterations (num_iterations) and evaluating the argument’s success rate across different scenarios or perspectives. The success rate is calculated based on predefined conditions or thresholds for the simulated factors.

        Please note that this code provides a basic framework for incorporating additional factors and conducting a Monte Carlo analysis. You can customize and expand it according to your specific requirements and the complexity of the argument evaluation process.

        To run the code and observe the output, you can copy the provided code into a Python environment or IDE (Integrated Development Environment) and execute it. The output will be displayed in the console or terminal.

        The code contains print statements that will show the results of evaluating the argument, including any personal attack detected and the success rate of the argument based on the simulated factors in the Monte Carlo analysis.

        Here’s what you can expect as the likely output for the example code:

        For evaluate_argument("climate change", "John Doe"):

        Evaluating the argument on climate change by John Doe: Success rate of the argument: 0.752
        

        This output indicates that the evaluation of the argument on climate change by John Doe resulted in a success rate of approximately 0.752 (or 75.2%) based on the simulated factors in the Monte Carlo analysis.

        For evaluate_argument("climate change", "known criminal"):

        You can't trust known criminal's opinion on climate change because they're a known criminal.
        

        In this case, the code detects a personal attack using the Ad Hominem fallacy and explicitly states that the opinion of the known criminal on climate change cannot be trusted.

        Remember that the specific success rates in the Monte Carlo analysis are simulated and random, as the code uses random.uniform(0, 1) to generate factor values. Therefore, each run of the code will likely yield different success rates within the range of 0 to 1.

        The actual output may vary based on your Python environment, interpreter version, or any modifications you may have made to the code.

      6. On Dachshunds

        On Dachshunds

        A Dachshund is a small breed of dog originally bred in Germany for hunting badgers. They are characterized by their long, low bodies and short legs, which make them well-suited for digging and navigating through tunnels. Dachshunds come in a variety of coat types, including smooth, long-haired, and wire-haired, and can be found in different sizes, ranging from miniature to standard. They are popular family pets due to their loyal, affectionate nature and lively personalities.

        A healthy diet for a dachshund should consist of high-quality, balanced dog food that is appropriate for their age, size, and activity level. It is important to avoid overfeeding your dachshund, as they can be prone to obesity. You can choose commercial dog food or prepare a homemade diet, but make sure it meets their nutritional needs. Dachshunds should have access to fresh, clean water at all times.

        Consulting with a veterinarian is always recommended to determine the best diet plan for your dachshund, as they may have specific dietary requirements or restrictions based on their individual health needs.

        Dachshunds are not inherently bad, just a bit stubborn. Like all dogs, they can exhibit negative behaviors if they are not trained properly or have not been socialized, but this is not unique to dachshunds. Overall, dachshunds are loyal, friendly, and playful dogs. It’s important to remember that a dog’s behavior is heavily influenced by their environment and training, so any dog can exhibit negative behaviors if not properly cared for.

        If you are going to try and train a Dachshund, here are some general tips:

        1. Start training early: It is important to start training your Dachshund from an early age, as they can be stubborn and difficult to train as they grow older.
        2. Be patient and consistent: Dachshunds can take longer to learn compared to other breeds, so patience and consistency are key. Use positive reinforcement, such as treats or praise, to motivate your dog.
        3. Socialize your dog: It’s important to socialize your Dachshund with other dogs and people, as they can be prone to aggression and anxiety if not socialized properly.
        4. Teach basic commands: Start by teaching your Dachshund basic commands such as sit, stay, come, and heel. Once your dog has mastered these commands, you can move on to more advanced training.
        5. Use a crate: Dachshunds can be prone to separation anxiety, so using a crate can help them feel secure and safe when you are away from home.
        6. Be mindful of their physical limitations: Dachshunds have a long back that can be prone to injury, so be mindful of their physical limitations and avoid activities that could cause harm.
        7. Seek professional help if needed: If you are struggling with training your Dachshund, seek the help of a professional dog trainer who can provide guidance and support.
      7. Star Wars: Spark of Freedom

        Star Wars: Spark of Freedom

        The hot Nigerian sun beat down on the bustling marketplace as vendors haggled with customers over prices. Amidst the crowd, a small group of filmmakers were discussing their latest project – an ambitious low-budget remake of the Star Wars trilogy, set in an Afro-futuristic universe with Africanized names for the main characters.

        “Okay, for the first film, we’ll call it ‘Nyoka Wars: The Spark of Freedom’,” said the director, a tall, lanky man with a thick Yoruba accent.

        “Great name, boss!” replied one of the producers, a rotund Igbo man.

        “Who’s gonna play Lucuana Ostu?” asked the makeup artist, a young Hausa woman.

        “We’ll hold auditions next week,” said the director. “But for now, let’s focus on the droids. RU4R and CEPIO are our comedic duo, so we need actors with good comic timing.”

        Meanwhile, in a small village on the outskirts of Lagos, a group of aspiring filmmakers were discussing their own sci-fi epic, set in a dystopian future where robots had taken over the world.

        “We’ll call it ‘Ife Robot’,” said the director, a quiet, serious man with a shaved head. “It’s about a young girl who teams up with a group of rebels to overthrow the robot overlords and restore humanity to its rightful place.”

        “That sounds amazing!” said the producer, a jovial man with a thick Igbo accent. “But how are we gonna film all the special effects on our budget?”

        “We’ll have to get creative,” said the director. “Maybe we can use miniatures and practical effects instead of CGI. And for the robots, we can dress up actors in costumes and use clever camera angles to make them look bigger.”

        As the two film crews worked on their respective projects, they faced many challenges and setbacks. The Nigerian heat was unforgiving, and equipment often broke down due to the harsh conditions. But through it all, they persevered, driven by their passion for storytelling and their desire to put African sci-fi on the map.

        Finally, after months of hard work and dedication, both films were completed. “Nyoka Wars: The Spark of Freedom” had become a hilarious, irreverent romp through a galaxy far, far away, filled with slapstick droid antics and over-the-top action scenes. “Ife Robot”, on the other hand, was a gritty, dystopian thriller that explored themes of oppression and resistance, with stunning practical effects and an unforgettable performance by its young lead actress.

        As the films premiered to packed theaters across Nigeria, audiences were amazed by what they saw. Never before had African sci-fi been so boldly and imaginatively represented on the big screen. And though the films were very different in tone and style, they both spoke to the resilience, creativity, and innovation of African filmmakers, and the limitless potential of African sci-fi as a genre.

        Nigerian sci-fi cinema, often referred to as “Nollywood Sci-Fi,” is a growing genre of African cinema that merges elements of traditional African storytelling with science fiction and fantasy themes. While Nollywood is primarily known for its low-budget, straight-to-DVD productions, the sci-fi genre is pushing boundaries and challenging expectations.

        One of the pioneers of Nigerian sci-fi cinema is filmmaker Kunle Afolayan, who directed the 2009 film “The Figurine.” The movie tells the story of two friends who find a mystical statue and are faced with a series of supernatural events. The Figurine was widely acclaimed, and it opened up new opportunities for Nigerian sci-fi filmmakers.

        Since then, Nollywood has produced a variety of sci-fi films, ranging from post-apocalyptic tales to futuristic dramas. Many of these films focus on social and political issues in Nigeria and the wider African continent. For example, “Elysium,” a 2019 Nigerian sci-fi film, depicts a dystopian world where the wealthy live in a floating city, while the poor are left to struggle on a desolate earth.

        Another notable Nigerian sci-fi film is “Hello, Rain,” which premiered in 2018. The film tells the story of a woman with mystical powers who controls the weather, but is faced with societal pressure to conform to expectations. The film is visually stunning and uses special effects to create a world that is both familiar and otherworldly.

        One of the challenges facing Nollywood sci-fi is the lack of resources, which limits the quality of special effects and sets. However, this has not stopped filmmakers from pushing boundaries and using their creativity to produce compelling stories.

        In summary, Nigerian sci-fi cinema is a rapidly growing genre that is pushing boundaries and challenging expectations. While it may not yet have the resources of Hollywood, it is producing innovative and thought-provoking stories that draw on African culture and address social and political issues.

      8. Star Wars: Africa Remix

        Star Wars: Africa Remix

        Adeaze New Hopes

        In a far-off galaxy, the evil empire has taken control and spread its tyranny across the stars. The rebels, led by Princess Adaeze Organa, are fighting back against the empire’s oppression and exploitation of their people.

        When the empire captures rebel fighter Obinna Solo, his sister, Ogechi, sets out on a daring mission to rescue him. She enlists the help of local farmer and pilot, Namdi Skywalker, and together they travel to the desert planet of Tatooine, where they meet the wily old warrior, Obi-Wan Kenobi.

        With Kenobi’s help, the group discovers that the empire has built a deadly weapon known as the Death Star, capable of destroying entire planets. They hatch a plan to steal the Death Star’s plans and use them to find a weakness in the weapon’s design that they can exploit to destroy it.

        Along the way, Ogechi and Namdi encounter a pair of droids, C3-P0 and R2-D2, who have information vital to the rebel cause. Together, they travel to the Death Star, where they engage in a thrilling battle to rescue Princess Adaeze and stop the empire’s sinister plans.

        Despite the odds against them, the rebels emerge victorious, destroying the Death Star and dealing a crushing blow to the empire’s grip on the galaxy. The heroic efforts of Ogechi, Namdi, and their allies inspire hope in the hearts of those fighting against the empire’s tyranny.

        With a blend of low-budget Afro-futurism and classic Star Wars adventure, this Nigerian cinema adaptation of A New Hope brings a fresh perspective to the timeless story of good versus evil. Featuring Africanized names for the main characters, this version of Star Wars reflects the diversity and creativity of the African continent.

        Star of Death

        In a galaxy far, far away, RU4R and CEPIO, two of the laziest and most incompetent droids in the galaxy, find themselves in the middle of a rebellion against the evil Major Dareth Vanderbilt and his army of stormtroopers.

        RU4R, a rusty old astromech droid, and CEPIO, a neurotic protocol droid, are on a mission to deliver a secret message to Lucuana Ostu, the leader of the rebellion. But when they crash land on the desert planet of Tatooine, they find themselves in the hands of the notorious gangster, Jabba the Hutt.

        Meanwhile, Major Vanderbilt is determined to find and crush the rebellion. He enlists the help of his powerful ally, Darth Vader, a dark lord of the Sith with a deep and menacing voice.

        As RU4R and CEPIO try to escape from Jabba’s palace, they stumble upon a young farm boy named Luky Skywalker, who dreams of adventure and becoming a pilot. Luky is fascinated by the droids and decides to help them on their mission.

        Together with Luky and a ragtag group of rebels, RU4R and CEPIO must face danger at every turn as they try to deliver the message to Lucuana Ostu and save the galaxy from the powerful Star of Death.

        With their bumbling and slapstick antics, RU4R and CEPIO manage to unintentionally sabotage the Empire’s plans and become unlikely heroes of the rebellion. But can they overcome their own laziness and incompetence in time to stop Major Vanderbilt and Darth Vader?

        Full of laughs and ridiculous situations, this comedic take on the classic Star Wars story will have audiences of all ages rolling in the aisles.

        Rebellion!

        In the galaxy of Yoruba, an evil empire led by the ruthless Jiru has been oppressing many planets, including the peaceful planet of Nsibidi. The only hope for the people of Nsibidi lies in the hands of a young farm boy named Obi, who discovers a hidden message from a rebel leader named Sango, calling for a rebellion against the empire.

        Obi teams up with a rogue space smuggler named Lekan Solo, and his co-pilot Chewy, a giant Wookiee. Together, they set out on a perilous journey to deliver the message to Sango and join the rebellion.

        However, their mission is threatened by the empire’s enforcer, the sinister Darth Azubuike, who has been sent to capture Obi and recover the message. With the help of a wise old warrior named Baba Ken, who was once a powerful Jedi, Obi begins to learn the ways of the force and how to fight against the empire’s tyranny.

        As they journey through the galaxy, Obi and his allies encounter many obstacles and adversaries, including a notorious bounty hunter named Dengar, who is after Lekan’s head for a past debt.

        Finally, they reach the rebel base on the moon of Nsibidi and join forces with Sango and her army. In an epic space battle, the rebels and the empire clash, with Obi facing off against Darth Azubuike in a lightsaber duel.

        In the end, Obi defeats Darth Azubuike and the rebels emerge victorious. The galaxy is free from the grip of the empire, and the people of Nsibidi are now free to build a new future.

        Throughout the film, themes of African empowerment are emphasized, with characters drawing on African cultures and traditions for inspiration and strength. The rebels are diverse and multicultural, united in their fight against oppression. Obi, in particular, learns to embrace his African heritage and use it to become a powerful Jedi and leader. The film also explores the importance of community and solidarity in the fight against tyranny, with characters coming together to support one another and stand up against injustice.

        Jide and the Force

        In a galaxy far away, a small band of rebels fights for freedom against the oppressive Galactic Empire. The Empire has built a new weapon called the Star of Death, a superweapon capable of destroying entire planets. The Empire uses the Star of Death to threaten and intimidate anyone who opposes their rule.

        The story follows a young orphan boy named Jide Skywalker who lives on the desert planet of Tatooine with his aunt and uncle. One day, he comes across a message from a rebel leader, Princess Adesuwa Organa, pleading for help in their fight against the Empire. Jide is intrigued by the message and decides to leave his home to join the fight.

        On his journey, Jide meets a rogue smuggler named Lando Calrissian and his first mate, Chewbacca. Lando and Chewbacca agree to help Jide rescue Adesuwa from the clutches of the Empire. Together, they board the Empire’s massive space station, the Star of Death.

        While on board the Star of Death, Jide discovers he has a unique ability called the Force, a mystical power that allows him to move objects with his mind and sense the future. With the help of a wise old mentor named Obi-Wan Kenobi, Jide learns how to harness the power of the Force to defeat the Empire.

        Meanwhile, the Empire’s ruthless commander, General Danjuma, relentlessly pursues the rebels. Danjuma is determined to crush the rebellion and will stop at nothing to capture Jide and his friends.

        As the rebels make their way through the Star of Death, they encounter Princess Adesuwa, who has been taken captive by the evil Darth Vader. Vader is a powerful Sith Lord, an ancient order of dark warriors who use the Force for evil.

        Jide and his friends engage in a fierce battle with Vader and his minions. In the end, Jide faces off against Vader in a one-on-one duel. With the help of the Force, Jide is able to defeat Vader and destroy the Star of Death.

        The rebels celebrate their victory, but the war against the Empire is far from over. Jide and his friends continue to fight for freedom, using their knowledge of the Force to empower themselves and their people. They inspire others to join the fight, and together they work to bring an end to the Empire’s oppressive rule and usher in a new era of African empowerment.

        Throughout the film, themes of African empowerment are emphasized, as Jide and his friends draw upon their heritage and culture to fight for their freedom. The mystic powers of the Force are portrayed as a manifestation of ancestral knowledge and wisdom, passed down through generations of African people.

        The struggle against the Empire is also portrayed as a metaphor for the fight against colonialism and oppression, with the rebels fighting for their right to self-determination and autonomy. The loss of Alderaan and the destruction of the Star of Death serve as reminders of the devastating consequences of imperialism and militarism.

        In the end, the film serves as a powerful tribute to the resilience and strength of the African spirit, as Jide and his friends triumph over the forces of oppression and pave the way for a brighter future.

      9. Reich

        Wilhelm Reich was an Austrian psychoanalyst and physician who lived from 1897 to 1957. He is best known for his theories about the relationship between human psychology and sexuality, as well as his work on the concept of orgone energy.

        Reich began his career as a student of Sigmund Freud, and he developed his own theories about psychology and human behavior while working as a psychoanalyst in Vienna. He believed that psychological problems were often caused by repressed sexual impulses and that the key to healing these problems was to help individuals release these impulses in a healthy and constructive way.

        Later in his career, Reich became interested in the concept of orgone energy, which he believed was a cosmic energy that pervades the universe and is responsible for all forms of life. He developed various tools and techniques for harnessing and manipulating this energy, including the orgone accumulator, a device that he claimed could improve physical and mental health by increasing the body’s exposure to orgone energy.

        Reich’s work was controversial during his lifetime, and he was eventually exiled from the scientific community due to his unorthodox theories and practices.

        Nevertheless, his ideas have continued to influence various fields, including psychology, philosophy, and alternative medicine.

        Influencer

        Wilhelm Reich’s theories and ideas have influenced a wide range of fields, including psychology, philosophy, and alternative medicine. Some of the individuals who have been influenced by Reich’s work include:

        1. Alexander Lowen – An American psychotherapist, Lowen was a student of Reich and went on to develop his own form of therapy called bioenergetics, which is based on Reich’s theories about the relationship between the body and the mind.
        2. Carl Rogers – An influential psychologist, Rogers was interested in Reich’s ideas about the importance of the therapeutic relationship and the role of the therapist in promoting healing and personal growth.
        3. Herbert Marcuse – A philosopher and sociologist, Marcuse was influenced by Reich’s ideas about the relationship between sexuality and society, particularly his critique of the “repressive desublimation” of sexual desire in modern culture.
        4. David Deida – An American author and teacher, Deida has incorporated Reich’s ideas about sexual energy and the body-mind connection into his teachings on spirituality and personal growth.
        5. Dr. Joseph Mercola – A controversial figure in the field of alternative medicine, Mercola has been influenced by Reich’s theories about the importance of energy flow in the body and has promoted the use of orgone energy devices in his practice.

        Wilhelm Reich’s ideas have had a significant impact on a wide range of fields and continue to be explored and debated today.