Category: Games

  • Coding Zork-Like

    Coding Zork-Like

    Introduction

    Zork is a text-based adventure game that was one of the earliest and most influential examples of interactive fiction.

    The name “Zork” was chosen by the game’s creators as a whimsical and catchy title for their adventure game. It has since become synonymous with the genre of text-based adventure games and holds a significant place in the history of video games. It was created by Tim Anderson, Marc Blank, Bruce Daniels, and Dave Lebling who were a group of programmers at the Massachusetts Institute of Technology (MIT). Zork was written in the MDL programming language and originally ran on a DEC PDP-10 mainframe computer.

    In Zork, players navigate through a series of locations within a vast underground dungeon, solving puzzles and interacting with the environment through text commands. The game’s text-based interface presents players with descriptions of their surroundings and prompts them to enter commands to perform actions like picking up objects, examining the environment, or interacting with non-player characters.

    The game’s objective is to explore the world, solve puzzles, and collect treasures. The Zork series expanded over time, with subsequent versions offering more complex storylines, larger game worlds, and enhanced features. Zork gained widespread popularity and was eventually ported to various computer platforms, including personal computers and gaming consoles.

    Zork’s success paved the way for the interactive fiction genre, inspiring numerous other text adventure games and influencing the development of graphical adventure games as well. It remains an iconic example of early computer gaming and has left a lasting impact on the gaming industry.

    Background

    Zork is a classic text-based adventure game that was developed in the late 1970s by a group of programmers at the Massachusetts Institute of Technology (MIT). Zork quickly gained popularity and became one of the most influential games in the adventure genre, laying the foundation for the development of interactive fiction and text-based adventure games. Here’s a brief history of Zork and its impact on the gaming industry:

    Origins:

    In 1977, a group of MIT students and programmers known as the Dynamic Modeling Group started developing a game called “Zork” on a DEC PDP-10 mainframe computer. Zork was initially inspired by the Adventure game developed by Will Crowther and Don Woods in the early 1970s. As development progressed, Zork evolved into a more complex and expansive game, featuring rich descriptions, puzzles, and a vast game world.

    Commercial Success:

    In 1979, Zork was released commercially by Infocom, a software company founded by former members of the Dynamic Modeling Group. Infocom marketed Zork as an interactive fiction game, targeting computer enthusiasts and adventure game fans.
    Zork became a huge success, selling over one million copies across various platforms, including personal computers and game consoles.

    Influence on Adventure Games:

    Zork popularized the text-based adventure game genre and introduced players to the concept of exploring a virtual world through text commands. The game featured detailed descriptions, immersive storytelling, and intricate puzzles, setting a standard for future adventure games. Zork’s success inspired the development of numerous text-based adventure games, both by Infocom and other companies, throughout the 1980s.

    Evolution into Graphical Adventures:

    As technology advanced, text-based adventure games transitioned into graphical adventures with the introduction of graphical user interfaces. Zork’s influence can be seen in early graphical adventure games, such as Sierra On-Line’s King’s Quest series and LucasArts’ Monkey Island series. The concepts of exploration, puzzle-solving, and narrative-driven gameplay that Zork popularized continued to shape and inform the design of adventure games in the graphical era.

    Legacy and Remakes:

    Zork remains a beloved and iconic game, often referenced in popular culture and revered by fans of classic adventure games.

    Over the years, Zork has been remade and reimagined in various forms, including graphical remakes, online adaptations, and fan-created projects. The spirit and gameplay mechanics of Zork have influenced modern adventure games, inspiring developers to create immersive narratives and challenging puzzles.

    Zork’s rich history and groundbreaking gameplay have made it a significant landmark in the gaming industry. Its influence on adventure games, from its text-based roots to the transition into graphical adventures, has shaped the genre and inspired countless developers to create memorable gaming experiences.

    There have been several variants and adaptations of the original Zork game over the years.

    Here is a list of notable Zork variants:

    • Zork I, II, and III (1980-1982): The original trilogy of Zork games developed by Infocom. They form a cohesive storyline and are the most well-known versions of Zork.
    • Zork Zero (1988): A prequel to the original trilogy, providing background information on the Great Underground Empire. It features improved graphics and gameplay mechanics.
    • Return to Zork (1993): A graphical adventure game released by Activision. It introduced a point-and-click interface and full-motion video, departing from the text-based gameplay of the original Zork.
    • Zork Nemesis (1996): A dark and atmospheric graphical adventure game set in the Zork universe. It incorporated a more mature and complex narrative with challenging puzzles.
    • Zork: The Undiscovered Underground (1997): An officially released expansion pack for Zork Nemesis. It introduced new areas, puzzles, and characters to the Zork universe.
    • Zork: Grand Inquisitor (1997): Another graphical adventure game set in the Zork universe. It combined humor, puzzles, and exploration with full-motion video cutscenes.
    • Legends of Zork (2009): A browser-based, multiplayer online game that reimagined Zork as a persistent online world. It featured quests, battles, and community interactions.
    • Zork: A Troll’s Eye View (1996): A spin-off game that offers a different perspective, allowing players to control a troll in the Zork universe. It provided a humorous and unconventional gameplay experience.
    • Zork Chronicles (1997): A graphical adventure game set after the events of the original trilogy. It continued the story of Zork with new characters, locations, and puzzles.

    The Zork franchise has seen numerous other releases, including fan-made games and interactive fiction titles inspired by the original Zork. Each variant brings its own unique take on the Zork universe while staying true to the spirit of exploration, puzzle-solving, and storytelling that made the original game so popular.

    MIT Design Language (MDL)

    MDL stands for “MIT Design Language” which was a programming language developed at the Massachusetts Institute of Technology (MIT) in the 1970s. MDL was specifically designed for implementing and running interactive fiction games, with Zork being one of the most notable examples.

    MDL was an extension of the LISP programming language, which was known for its flexibility and expressive power. It allowed the Zork developers to create complex text-based worlds and implement sophisticated game mechanics. MDL provided features for handling textual input and output, manipulating data structures, and managing game state.

    Although MDL was primarily used for Zork and other interactive fiction games at MIT, it also influenced the development of other programming languages and systems. Its design principles and concepts have been carried forward into subsequent interactive fiction languages and tools, such as Inform and TADS (Text Adventure Development System).

    Here’s a simple example of MDL code:

    <DEFINE ROOM-FUNCTION (ROOM)
        <SET .WHERE <GET .ROOM ,WHERE>>>
        
    <DEFINE (LOOK)
        <COND (<EQUAL? <TYPE ,WHAT>> <TELL "You are in " .WHERE>)
              (ELSE <TELL "You see nothing unusual here.">)>>
              
    <DEFINE (TAKE)
        <COND (<NOT <TYPE ,WHAT>> <TELL "You can't take that.">)
              (<AND <NOT <GET ,WHAT ,AT?>> <NOT <GET ,WHAT ,IN?>>> <TELL "You don't see that here.">)
              (<AND <GET ,WHAT ,AT?> <EQUAL? ,WHAT <OBJECT CARRIED>>> <TELL "You're already carrying that.">)
              (<AND <GET ,WHAT ,AT?> <AND <GET ,WHAT ,IN?> <EQUAL? <OBJECT CARRIED <GET ,WHAT ,IN?>> <GET ,WHAT ,AT?>>> <TELL "You're already carrying that.">)
              (<AND <GET ,WHAT ,AT?> <SET ,WHAT <OBJECT CARRIED <GET ,WHAT ,AT?>>> <TELL "Taken.">)
              (<AND <GET ,WHAT ,IN?> <SET ,WHAT <OBJECT CARRIED <GET ,WHAT ,IN?>>> <TELL "Taken.">)
              (ELSE <TELL "You don't see that here.">)>>
              
    <DEFINE (DROP)
        <COND (<EQUAL? ,WHAT <OBJECT CARRIED>>) <SET ,WHAT <GET ,WHAT ,IN?>> <TELL "Dropped.">)
              (ELSE <TELL "You're not carrying that.">)>>


    In this example, you can see three functions defined using MDL syntax: ROOM-FUNCTION, LOOK, TAKE, and DROP. These functions are part of a larger MDL program for implementing game mechanics in an interactive fiction game.

    The ROOM-FUNCTION function is used to define a room and store its location. The LOOK function is used to describe the player’s current location or provide a default message if nothing unusual is seen. The TAKE function is used to handle taking objects in the game, checking if the object is present and whether it can be carried. The DROP function is used to handle dropping objects, checking if the object is currently carried by the player.

    Please note that this is a simplified example, and in a complete MDL program, you would have more extensive code for defining the game world, implementing interactions, and managing the game state.

    Software Architecture

    Zork is categorized as an interactive fiction or text adventure game. These types of games rely heavily on text-based descriptions and commands to navigate and interact with the game world. Players progress through the game by typing in commands to perform actions, solve puzzles, and advance the storyline. While interactive fiction games like Zork lack graphical or visual elements, they compensate by providing rich narrative experiences and allowing players to engage their imagination to visualize the game world based on the textual descriptions.

    Here’s a high-level software architecture for a Zork-like game:

    User Interface Layer: This layer handles user input and output, providing a way for the player to interact with the game. It may include components like a command line interface or a graphical user interface (GUI) to display the game’s text-based interface and capture player commands.

    Game Logic Layer: This layer contains the core game logic and mechanics. It includes components responsible for managing the game state, maintaining the world model, and executing actions based on player commands. This layer interprets the user input, updates the game state accordingly, and generates appropriate responses to be displayed to the player.

    World Model: The world model represents the game world, including its locations, objects, characters, and their relationships. It may use data structures such as graphs, maps, or object-oriented models to organize and represent the game world’s entities and their properties.

    Parser: The parser component is responsible for understanding and parsing player input. It interprets the player’s commands and extracts relevant information, such as the action to be performed and any associated parameters or arguments. The parser converts user input into a format that can be easily processed by the game logic layer.

    Game Database: The game database holds structured data related to the game, such as information about objects, characters, locations, and their properties. It provides a persistent storage mechanism for saving and loading game states, allowing players to continue their progress across multiple sessions.

    Content Creation Tools: These tools assist game designers and developers in creating and managing game content. They may include text editors, scripting languages, or graphical tools for designing and editing game maps, puzzles, dialogues, and other game elements.

    External Services: This optional layer represents external services that the game may interact with, such as online leaderboards, multiplayer functionality, or social sharing features. It allows players to connect with other players or access additional features beyond the core game experience.

    Note that the provided architecture is a generalized representation and can be adapted based on specific implementation choices and requirements. The architecture can be expanded or modified to incorporate additional features, such as combat mechanics, puzzle-solving, or more complex interactions with the game world.

    Here’s an example code structure that reflects the software architecture for a Zork-like game:

    game/
    ├── ui/
    │   ├── command_line.py        # Command line interface implementation
    │   └── graphical_interface.py # Graphical user interface implementation
    ├── logic/
    │   ├── game_engine.py          # Game engine and core logic
    │   ├── world_model.py          # World model representation
    │   ├── parser.py               # Input parser component
    │   └── game_database.py        # Game database implementation
    ├── content/
    │   ├── levels/                 # Game levels and maps
    │   ├── objects/                # Object definitions and properties
    │   ├── characters/             # Character definitions and properties
    │   ├── puzzles/                # Puzzle designs and solutions
    │   └── dialogues/              # Dialogue scripts and conversations
    ├── services/
    │   ├── leaderboard_service.py  # External service integration (optional)
    │   ├── multiplayer_service.py  # Multiplayer functionality (optional)
    │   └── social_service.py       # Social sharing features (optional)
    └── main.py                     # Main game entry point
    

    In this code structure:

    The ui/ directory contains the user interface components. It includes the implementations for the command line interface (command_line.py) and graphical user interface (graphical_interface.py).

    The logic/ directory contains the core game logic. It includes the game engine and core logic in game_engine.py, the world model representation in world_model.py, the input parser component in parser.py, and the game database implementation in game_database.py.

    The content/ directory holds the game content such as levels, objects, characters, puzzles, and dialogues. Each of these categories has its own subdirectory.

    The services/ directory represents optional external services that the game can integrate with. It includes implementations for leaderboard service (leaderboard_service.py), multiplayer functionality (multiplayer_service.py), and social sharing features (social_service.py).

    Finally, main.py serves as the entry point for the game.

    Please note that this code structure is a simplified example, and you may need to adapt and expand it based on the specific requirements and complexity of your game.

    Content and Formats

    To write content for the game, you’ll need to create engaging and descriptive text that sets the scene, describes locations, provides item descriptions, and guides players through the game world. Here are some steps to help you write compelling content:

    • Define the game world: Start by defining the overall theme, setting, and atmosphere of your game. Determine the style of writing you want to use, whether it’s humorous, mysterious, or serious.
    • Create locations: Design various locations within the game world, such as rooms, outdoor areas, or special landmarks. For each location, write a description that paints a vivid picture in the player’s mind. Include details about the environment, objects, sounds, smells, and any characters or creatures present.
    • Develop characters: If your game includes non-player characters (NPCs), create their personalities, appearances, and dialogues. Write engaging dialogues that reveal their traits, motivations, and provide clues or assistance to the player.
    • Describe items: Design items that players can interact with, such as weapons, tools, keys, or puzzle pieces. Write descriptions for each item, including their appearance, purpose, and any special abilities or effects they possess.
    • Provide instructions and hints: Write instructions and hints to guide players through puzzles, challenges, or quests. Make sure the information is clear and concise, helping players progress without giving away solutions outright.
    • Write dialogues and interactions: If your game allows player-character interactions or conversations with NPCs, write engaging dialogues that offer choices and consequences. Consider branching dialogues that lead to different outcomes or reveal additional information.
    • Polish the text: Review and edit your content for grammar, spelling, and clarity. Ensure that the text is concise yet descriptive, engaging the players and immersing them in the game world.
    • Playtest and iterate: Test your game with real players to gather feedback on the content. Iterate and refine your writing based on player responses, making adjustments to improve clarity, pacing, and player experience.

    Remember that writing content for the game is an iterative process. Continuously evaluate the impact of your writing on the player experience and make adjustments as needed. By creating immersive and captivating text, you can enhance the gameplay and storytelling aspects of your game.

    Here are some examples of levels, objects, characters, puzzles, and dialogs for the game:

    Levels:

    • The Abandoned Mansion: Explore a spooky mansion filled with secret passages, creaking floors, and eerie atmosphere.
    • The Enchanted Forest: Navigate through a dense forest with magical creatures, hidden treasures, and enchanting scenery.
    • The Underground Caverns: Descend into dark and treacherous caves, facing dangers like stalactites, underground rivers, and mysterious creatures.

    Objects:

    • Rusty Key: A key covered in rust, found in the dusty attic of the mansion. It unlocks a hidden door to a secret room.
    • Potion of Invisibility: A shimmering potion that grants temporary invisibility when consumed. It helps the player evade enemies or bypass traps.
    • Grappling Hook: A sturdy hook attached to a rope, allowing the player to reach inaccessible areas or create makeshift bridges.

    Characters:

    • Madam Evangeline: An eccentric fortune teller residing in a tent near the forest. She provides cryptic clues and prophecies about the player’s destiny.
    • Captain Blackbeard: A legendary pirate ghost haunting the caves. He guards a buried treasure and challenges the player to a high-stakes riddle game.
    • Professor Amelia Wright: An archaeologist studying the history of the mansion. She seeks the player’s help in unraveling the mansion’s secrets and solving ancient puzzles.

    Puzzles:

    • Cryptic Symbols: Encountering a series of cryptic symbols in a hidden chamber, the player must decipher their meaning to unlock a hidden passage.
    • Weighted Pressure Plates: To access a hidden room, the player must strategically place objects on a set of pressure plates to match a specific weight combination.
    • Pattern Lock: Confronted with a mysterious lock mechanism, the player must observe and replicate a pattern displayed in a nearby painting to open a hidden compartment.

    Dialogs:

    Player to Madam Evangeline:
    Player: “I seek guidance, Madam. What lies beyond the dark forest?”
    Madam Evangeline: “Beware the ancient guardian, child. Only with the talisman of light can you uncover the path to your destiny.”

    Player to Captain Blackbeard:
    Player: “I’ve come for the treasure, Captain. What challenge awaits me?”
    Captain Blackbeard: “Riddle me this, landlubber. What has keys but can’t open locks, space but no room, and you always carry it with you?”

    Player to Professor Amelia Wright:
    Player: “Professor, how can I uncover the mansion’s hidden secrets?”
    Professor Wright: “Ah, young explorer, the answer lies within the ancient manuscripts. Translate the forgotten language, and the truth shall be revealed.”

    These examples showcase the variety of elements you can incorporate into your game, including diverse levels, intriguing objects, memorable characters, challenging puzzles, and immersive dialogs.

    Feel free to adapt and expand upon these examples to suit your game’s specific storyline and gameplay mechanics.

    Here are examples of formats for levels, objects, characters, puzzles, and dialogs in the game:

    Level Format:

    Level Name: [Name of the Level]
    Description: [Description of the Level]
    - Room 1 -
    Description: [Description of the room]
    Exits: [Available exits from the room]
    Objects: [List of objects in the room]
    - Room 2 -
    Description: [Description of the room]
    Exits: [Available exits from the room]
    Objects: [List of objects in the room]


    Object Format:

    Object Name: [Name of the Object]
    Description: [Description of the Object]
    Location: [Initial location of the Object]
    Interactions: [List of possible interactions with the Object]


    Character Format:

    Character Name: [Name of the Character]
    Description: [Description of the Character]
    Dialogue: [Dialogue lines for the Character]
    Interactions: [List of possible interactions with the Character]


    Puzzle Format:

    Puzzle Name: [Name of the Puzzle]
    Description: [Description of the Puzzle]
    Objective: [Objective of the Puzzle]
    Instructions: [Instructions for solving the Puzzle]
    Solution: [Solution to the Puzzle]


    Dialog Format:

    Character Name:
    - [Player line]
    - [Character response]
    - [Player line]
    - [Character response]


    These formats serve as templates to structure and organize the content in your Zork-like game. You can customize and expand upon them based on the specific requirements of your game and the level of detail you want to provide. Use these formats as a guide to create consistent and coherent content for your game, ensuring that information is clear and easily understood by players.

    Mechanics

    Internal game mechanics in a Zork-like game typically involve parsing player input, managing the game state, executing actions, and updating the world model. Here’s an explanation of the key components and the parsing process:

    Command Parsing:

    The game receives player input, typically in the form of text commands.
    The input is parsed to identify the action the player intends to perform and any additional parameters or objects involved.
    The parsed command is then passed to the game engine for further processing.

    Game Engine:

    The game engine processes the parsed command and determines the appropriate action to take based on the current game state.
    It manages the overall flow of the game, including interactions with the world model, objects, characters, and puzzles.
    The game engine executes actions and updates the game state accordingly.

    World Model:

    The world model represents the game world and its various components, including rooms, objects, characters, and their relationships.
    It stores information about the current state of the game world, such as the player’s location, inventory, and the status of objects and characters.
    The world model is responsible for maintaining consistency and updating the state based on player actions and interactions.

    Content Parsing:

    The game’s content, such as descriptions, dialogues, puzzles, and objects, is typically stored in a structured format, such as JSON or XML.
    The game engine parses the content data to load and populate the world model with the necessary information.
    This parsing process involves reading the data, extracting relevant information, and creating the appropriate game objects and entities.

    Interaction and Event Handling:

    When a player performs an action, such as examining an object or talking to a character, the game engine triggers the corresponding event.

    The event handler in the game engine processes the event and determines the appropriate response, such as displaying a description, initiating a dialogue, or solving a puzzle.

    The event handler updates the game state based on the outcome of the event and triggers any subsequent events or actions.
    By parsing player input, managing the game state, executing actions, and updating the world model, the game mechanics enable the Zork-like game to interpret and respond to player commands, provide dynamic interactions, and progress the gameplay based on the underlying rules and logic of the game world.

    Connections

    In the game, levels, objects, characters, puzzles, and dialogs are interconnected elements that contribute to the overall gameplay and storytelling.

    Here’s how they relate to each other:

    Levels:

    Levels define the different areas or environments within the game world, such as rooms, outdoor areas, or specific locations.
    Levels serve as the backdrop for the player’s exploration and interaction.
    Objects, characters, puzzles, and dialogs are typically placed within levels to provide interactive elements and challenges for the player.

    Objects:

    Objects are interactive elements within the game world that the player can manipulate or interact with.
    Objects can be items that the player can pick up, use, or combine with other objects.
    Objects can also be static elements within the environment that provide information, trigger events, or serve as obstacles.
    Objects may have descriptions, properties, and interactions associated with them.

    Characters:

    Characters are non-player entities within the game world that the player can interact with.
    Characters can provide information, give quests or tasks, offer assistance, or hinder the player’s progress.
    Characters may have their own dialogues, personalities, and storylines that unfold as the player interacts with them.
    Characters can be integral to solving puzzles, progressing the narrative, or acquiring important items or knowledge.

    Puzzles:

    Puzzles are challenges or obstacles that the player must solve to progress in the game.
    Puzzles can be logic-based, requiring the player to solve riddles, decipher codes, or manipulate objects in a specific way.
    Puzzles can also be environmental, requiring the player to navigate mazes, manipulate switches, or overcome physical obstacles.
    Puzzles often involve interacting with objects, characters, or specific locations within the levels.

    Dialogs:

    Dialogs involve conversations or interactions between the player and characters within the game world.
    Dialogs can provide information, clues, or quests to the player.
    Dialogs can unlock new paths, reveal story elements, or provide choices that impact the game’s progression.
    Dialogs may be triggered by specific actions, events, or the player’s progress in the game.

    In summary, levels provide the framework for the game world, objects and characters populate the levels to provide interactive elements, puzzles present challenges for the player to overcome, and dialogs facilitate interactions and storytelling between the player and characters. Together, these elements create an immersive and engaging gameplay experience in the game.

    Python: User Input Functions

    Here are some of the common functions used in interactive fiction games:

    • LOOK: Allows the player to examine the current location or an object in the game.
    • GO: Enables the player to move to different locations within the game world.
    • TAKE: Allows the player to pick up objects or items in the game.
    • DROP: Allows the player to drop objects or items from their inventory.
    • INVENTORY: Displays the list of objects or items currently held by the player.
    • USE: Enables the player to use or interact with objects in the game.
    • OPEN: Allows the player to open doors, containers, or other interactive objects.
    • UNLOCK: Enables the player to unlock doors or containers with the appropriate key or mechanism.
    • SAVE: Allows the player to save the current state of the game for later continuation.
    • LOAD: Enables the player to load a previously saved game.
    • HELP: Provides assistance or instructions to the player regarding available commands or actions.
    • QUIT or EXIT: Allows the player to exit the game.

    The specific functions available can vary depending on the game and its design. Additionally, more complex interactive fiction systems may allow for custom functions to be defined by the game designer to create unique gameplay experiences.

    The basic user input handler in Python that could be used in the game:

    def handle_user_input():
        user_input = input("> ")  # Prompt the user for input
        # Split the user input into command and arguments
        command_parts = user_input.lower().split()
        command = command_parts[0]
        arguments = command_parts[1:]
        # Handle different commands
        if command == "go":
            handle_go_command(arguments)
        elif command == "take":
            handle_take_command(arguments)
        elif command == "drop":
            handle_drop_command(arguments)
        elif command == "look":
            handle_look_command()
        elif command == "inventory":
            handle_inventory_command()
        elif command == "help":
            handle_help_command()
        elif command == "quit":
            handle_quit_command()
        else:
            print("Sorry, I don't understand that command. Type 'help' for a list of available commands.")
    def handle_go_command(arguments):
        # Handle logic for the "go" command
        if len(arguments) > 0:
            # Process the direction argument (e.g., north, south, etc.)
            direction = arguments[0]
            # Perform actions based on the chosen direction
            # ...
    def handle_take_command(arguments):
        # Handle logic for the "take" command
        if len(arguments) > 0:
            # Process the item name argument
            item_name = " ".join(arguments)
            # Perform actions to take the specified item
            # ...
    def handle_drop_command(arguments):
        # Handle logic for the "drop" command
        if len(arguments) > 0:
            # Process the item name argument
            item_name = " ".join(arguments)
            # Perform actions to drop the specified item
            # ...
    # Define handlers for other commands (look, inventory, help, quit) in a similar manner
    # Main game loop
    while True:
        handle_user_input()


    In this example, the handle_user_input() function reads the user’s input, splits it into a command and its arguments, and then dispatches the appropriate handler function based on the command entered. Each handler function is responsible for implementing the logic for its respective command.

    The example includes handlers for commands such as “go”, “take”, “drop”, “look”, “inventory”, “help”, and “quit”. You can define additional commands and their respective handlers as needed for your game.

    The main game loop repeatedly calls the handle_user_input() function to process user input until the game is exited.

    Game Code

    This section provides outline game code.

    main.py

    Here’s an example the main.py file, which is used as the entry point for the game:

    from ui.command_line import CommandLineInterface
    from logic.game_engine import GameEngine
    from logic.world_model import WorldModel
    from logic.parser import InputParser
    from logic.game_database import GameDatabase
    def main():
        # Initialize game components
        game_database = GameDatabase()
        world_model = WorldModel()
        input_parser = InputParser()
        game_engine = GameEngine(world_model, game_database, input_parser)
        user_interface = CommandLineInterface(game_engine)
        # Start the game
        user_interface.display_welcome_message()
        user_interface.display_game_description()
        while not game_engine.is_game_over():
            user_input = user_interface.get_user_input()
            game_engine.process_input(user_input)
            user_interface.display_output()
        user_interface.display_game_over_message()
    if __name__ == "__main__":
        main()


    In this example, the main() function serves as the entry point for the game. It initializes the necessary components, such as the GameDatabase, WorldModel, InputParser, GameEngine, and CommandLineInterface. These components are then used to run the game loop.

    Within the game loop, the user interface prompts the player for input, and the game engine processes that input by calling the appropriate methods. The output generated by the game engine is then displayed through the user interface.

    The game loop continues until the game engine determines that the game is over. At that point, the user interface displays a game-over message, and the game execution terminates.

    Please note that this example assumes the presence of a CommandLineInterface class for the command-line user interface. You may need to adapt this code if you are using a different user interface implementation, such as a graphical user interface.

    command_line.py

    The CommandLineInterface class for the command-line user interface:

    class CommandLineInterface:
        def __init__(self, game_engine):
            self.game_engine = game_engine
        def display_welcome_message(self):
            print("Welcome to Zork-like Game!")
        def display_game_description(self):
            print("You find yourself in a mysterious world...")
            print("Explore, interact, and solve puzzles to progress!")
        def get_user_input(self):
            user_input = input("> ")
            return user_input.strip()
        def display_output(self):
            output = self.game_engine.get_output()
            print(output)
        def display_game_over_message(self):
            print("Game Over")


    In this example, the CommandLineInterface class provides methods for interacting with the player through the command line interface.

    • The __init__ method initializes the interface with a reference to the GameEngine instance.
    • The display_welcome_message method displays a welcome message to the player at the start of the game.
    • The display_game_description method provides a brief description of the game world and sets the stage for the player’s adventure.
    • The get_user_input method prompts the player for input and returns the entered command as a string.
    • The display_output method retrieves the output generated by the game engine and displays it to the player.
    • The display_game_over_message method displays a game-over message when the game is finished.

    This implementation is a simplified example, and you may need to adapt and expand it based on your specific requirements and the complexity of your game.

    parser.py

    The InputParser class is used for parsing user input in the game:

    class InputParser:
        def __init__(self):
            self.commands = {
                "go": self.parse_go_command,
                "take": self.parse_take_command,
                "drop": self.parse_drop_command,
                "look": self.parse_look_command,
                "inventory": self.parse_inventory_command,
                "help": self.parse_help_command,
                "quit": self.parse_quit_command
            }
        def parse_input(self, user_input):
            parts = user_input.lower().split()
            command = parts[0]
            arguments = parts[1:] if len(parts) > 1 else []
            if command in self.commands:
                return self.commands[command](arguments)
            else:
                return ("unknown", command)
        def parse_go_command(self, arguments):
            if len(arguments) == 1:
                return ("go", arguments[0])
            else:
                return ("invalid", "go")
        def parse_take_command(self, arguments):
            if len(arguments) >= 1:
                return ("take", " ".join(arguments))
            else:
                return ("invalid", "take")
        def parse_drop_command(self, arguments):
            if len(arguments) >= 1:
                return ("drop", " ".join(arguments))
            else:
                return ("invalid", "drop")
        def parse_look_command(self, arguments):
            return ("look",)
        def parse_inventory_command(self, arguments):
            return ("inventory",)
        def parse_help_command(self, arguments):
            return ("help",)
        def parse_quit_command(self, arguments):
            return ("quit",)


    The InputParser class provides methods for parsing different types of commands in a Zork-like game. The parse_input method takes the user input as a parameter and determines the command and its arguments.

    The commands dictionary holds the supported commands as keys, with their corresponding parsing methods as values. Each parsing method takes the arguments as input and returns a tuple indicating the parsed command and its associated data.

    For example, the parse_go_command method handles parsing the “go” command. It checks if the command has one argument (the direction) and returns a tuple with the command “go” and the direction as the associated data. Similarly, other commands like “take”, “drop”, “look”, “inventory”, “help”, and “quit” are parsed by their respective methods.

    If the input command is not recognized, the parser returns a tuple with the command “unknown” and the unrecognized command itself.

    In a complete implementation, you might need to handle more complex commands and their associated data based on the specific requirements of your game.

    game_engine.py

    The GameEngine class that manages the game logic:

    class GameEngine:
        def __init__(self, world_model, game_database, input_parser):
            self.world_model = world_model
            self.game_database = game_database
            self.input_parser = input_parser
            self.output = ""
        def process_input(self, user_input):
            command, arguments = self.input_parser.parse_input(user_input)
            if command == "go":
                self.handle_go_command(arguments)
            elif command == "take":
                self.handle_take_command(arguments)
            elif command == "drop":
                self.handle_drop_command(arguments)
            elif command == "look":
                self.handle_look_command()
            elif command == "inventory":
                self.handle_inventory_command()
            elif command == "help":
                self.handle_help_command()
            elif command == "quit":
                self.handle_quit_command()
            elif command == "unknown":
                self.output = "Unknown command: {}".format(arguments)
            elif command == "invalid":
                self.output = "Invalid {} command.".format(arguments)
        def handle_go_command(self, direction):
            # Handle logic for the "go" command
            if self.world_model.can_move(direction):
                self.world_model.move(direction)
                self.output = self.world_model.get_current_location_description()
            else:
                self.output = "You can't go that way."
        def handle_take_command(self, item_name):
            # Handle logic for the "take" command
            if self.world_model.take_item(item_name):
                self.output = "You took the {}.".format(item_name)
            else:
                self.output = "There's no {} here to take.".format(item_name)
        def handle_drop_command(self, item_name):
            # Handle logic for the "drop" command
            if self.world_model.drop_item(item_name):
                self.output = "You dropped the {}.".format(item_name)
            else:
                self.output = "You don't have a {} to drop.".format(item_name)
        def handle_look_command(self):
            # Handle logic for the "look" command
            self.output = self.world_model.get_current_location_description()
        def handle_inventory_command(self):
            # Handle logic for the "inventory" command
            inventory = self.world_model.get_player_inventory()
            if inventory:
                self.output = "Inventory: " + ", ".join(inventory)
            else:
                self.output = "Your inventory is empty."
        def handle_help_command(self):
            # Handle logic for the "help" command
            self.output = "Available commands: go, take, drop, look, inventory, help, quit."
        def handle_quit_command(self):
            # Handle logic for the "quit" command
            self.output = "Goodbye!"
            self.game_over = True
        def get_output(self):
            return self.output
        def is_game_over(self):
            return self.game_over


    The GameEngine class manages the game logic and interacts with the WorldModel, GameDatabase, and InputParser to process player commands and update the game state.

    The process_input method takes the user input, uses the InputParser to parse the command and arguments, and then calls the appropriate handler method based on the parsed command.

    Each handler method, such as handle_go_command, handle_take_command, etc., implements the specific logic for that command. For example, the handle_go_command checks if the player can move in the specified direction and updates the game state accordingly. Similarly, other commands are implemented with their respective logic.

    world_model.py

    The WorldModel class represents the world model in the game:

    class WorldModel:
        def __init__(self):
            self.current_location = None
            self.player_inventory = []
            self.locations = {}  # Dictionary to store locations
        def add_location(self, location):
            self.locations[location.name.lower()] = location
        def set_start_location(self, location_name):
            self.current_location = self.locations[location_name.lower()]
        def move(self, direction):
            next_location = self.current_location.get_connected_location(direction)
            if next_location:
                self.current_location = next_location
        def can_move(self, direction):
            return self.current_location.get_connected_location(direction) is not None
        def take_item(self, item_name):
            if self.current_location.has_item(item_name) and item_name not in self.player_inventory:
                item = self.current_location.remove_item(item_name)
                self.player_inventory.append(item)
                return True
            return False
        def drop_item(self, item_name):
            if item_name in self.player_inventory:
                item = self.player_inventory.remove(item_name)
                self.current_location.add_item(item)
                return True
            return False
        def get_player_inventory(self):
            return self.player_inventory
        def get_current_location_description(self):
            return self.current_location.description
    class Location:
        def __init__(self, name, description):
            self.name = name
            self.description = description
            self.connected_locations = {}  # Dictionary to store connected locations
            self.items = []  # List to store items present in the location
        def add_connected_location(self, direction, location):
            self.connected_locations[direction.lower()] = location
        def get_connected_location(self, direction):
            return self.connected_locations.get(direction.lower())
        def has_item(self, item_name):
            return item_name in self.items
        def add_item(self, item):
            self.items.append(item)
        def remove_item(self, item_name):
            self.items.remove(item_name)
    class Item:
        def __init__(self, name):
            self.name = name


    The WorldModel class represents the game world and manages the locations, player inventory, and movement between locations.

    • The add_location method allows adding a location to the world model.
    • The set_start_location method sets the starting location for the player.
    • The move method allows the player to move to a connected location in the specified direction.
    • The can_move method checks if the player can move in the specified direction from the current location.
    • The take_item method handles taking an item from the current location and adding it to the player’s inventory.
    • The drop_item method handles dropping an item from the player’s inventory and adding it back to the current location.
    • The get_player_inventory method returns the player’s inventory.
    • The get_current_location_description method returns the description of the current location.

    The Location class represents a location in the game world and contains information such as its name, description, connected locations, and items present in that location.

    • The add_connected_location method allows adding a connected location to a specific direction.
    • The get_connected_location method returns the connected location in the specified direction.
    • The has_item method checks if a specific item is present in the location.
    • The add_item method adds an item to the location.
    • The remove_item method removes an item from the location.
    • The Item class represents an item in the game world and contains information such as its name.

    game_database.py

    The GameDatabase class represents the game database in the game:

    class GameDatabase:
        def __init__(self):
            self.item_descriptions = {}  # Dictionary to store item descriptions
        def add_item_description(self, item_name, description):
            self.item_descriptions[item_name.lower()] = description
        def get_item_description(self, item_name):
            return self.item_descriptions.get(item_name.lower(), "No description available.")


    The GameDatabase class represents a database for storing item descriptions in the game.

    The add_item_description method allows adding an item description to the database. It takes the item name and its corresponding description as parameters and stores them in the item_descriptions dictionary.

    The get_item_description method retrieves the description of a specific item from the database. It takes the item name as a parameter and returns the corresponding description if it exists in the item_descriptions dictionary. If the description is not found, it returns a default message indicating that no description is available.

    This database can be used to store and retrieve item descriptions for use in the game, allowing for dynamic and customizable descriptions based on the specific items encountered in the game.

    Please note that this is a simplified example, and in a complete implementation, you might expand the functionality of the GameDatabase class to include additional methods or store other types of game data based on your game’s requirements.

    social_services.py

    The SocialServices class represents social services functionality in the game:

    class SocialServices:
        def __init__(self):
            self.characters = {}  # Dictionary to store characters and their relationships
        def add_character(self, character_name):
            self.characters[character_name.lower()] = []
        def add_relationship(self, character1, character2):
            character1 = character1.lower()
            character2 = character2.lower()
            if character1 in self.characters and character2 in self.characters:
                self.characters[character1].append(character2)
                self.characters[character2].append(character1)
        def get_relationships(self, character):
            character = character.lower()
            if character in self.characters:
                return self.characters[character]
            else:
                return []
        def are_characters_related(self, character1, character2):
            character1 = character1.lower()
            character2 = character2.lower()
            if character1 in self.characters and character2 in self.characters:
                return character2 in self.characters[character1]
            else:
                return False


    The SocialServices class provides functionality related to characters and their relationships in the game.

    • The add_character method allows adding a character to the social services. It takes the name of the character as a parameter and adds an entry for that character in the characters dictionary.
    • The add_relationship method allows adding a relationship between two characters. It takes the names of the two characters as parameters and adds each character to the other’s list of relationships in the characters dictionary.
    • The get_relationships method retrieves the relationships of a specific character. It takes the name of the character as a parameter and returns a list of their relationships from the characters dictionary.
    • The are_characters_related method checks if two characters are related. It takes the names of the two characters as parameters and checks if the second character is in the list of relationships for the first character in the characters dictionary.

    These social services can be used to manage and track relationships between characters in the game, enabling interactions and dynamic storytelling based on character connections.

    You can can expand the functionality of the SocialServices class to include additional methods or store additional data about the characters and their relationships based on the specific requirements of your game.

    Writeleaderboard_service.py

    The LeaderboardService class that represents a leaderboard service in the game:

    class LeaderboardService:
        def __init__(self):
            self.leaderboard = {}  # Dictionary to store player scores
        def add_score(self, player_name, score):
            if player_name in self.leaderboard:
                self.leaderboard[player_name] += score
            else:
                self.leaderboard[player_name] = score
        def get_top_scores(self, num_scores):
            sorted_scores = sorted(self.leaderboard.items(), key=lambda x: x[1], reverse=True)
            return sorted_scores[:num_scores]


    The LeaderboardService class provides functionality to manage and retrieve player scores in the game.

    • The add_score method allows adding a score for a player. It takes the player’s name and their score as parameters. If the player is already present in the leaderboard, the score is added to their existing score. Otherwise, a new entry is created for the player in the leaderboard with the given score.
    • The get_top_scores method retrieves the top scores from the leaderboard. It takes the number of scores to retrieve as a parameter (num_scores) and returns a list of tuples containing the player name and their corresponding score. The list is sorted in descending order based on the scores.

    This leaderboard service can be used to track and display the top scores achieved by players in the game, adding a competitive aspect to the gameplay experience.

    You can expand the functionality of the LeaderboardService class to include additional methods or store additional data related to player scores based on the specific requirements of your game.

    multiplayer_service.py

    The MultiplayerService class that represents a multiplayer service in a Zork-like game:

    class MultiplayerService:
        def __init__(self):
            self.players = []  # List to store connected players
        def add_player(self, player_name):
            self.players.append(player_name)
        def remove_player(self, player_name):
            if player_name in self.players:
                self.players.remove(player_name)
        def get_player_count(self):
            return len(self.players)
        def get_players(self):
            return self.players.copy()


    The MultiplayerService class provides functionality to manage connected players in the game’s multiplayer mode.

    • The add_player method allows adding a player to the multiplayer service. It takes the player’s name as a parameter and adds them to the players list.
    • The remove_player method allows removing a player from the multiplayer service. It takes the player’s name as a parameter and removes them from the players list if they exist.
    • The get_player_count method returns the current count of connected players.
    • The get_players method returns a copy of the players list, which contains the names of all connected players.

    This multiplayer service can be used to manage player connections, handle player joining and leaving, and retrieve information about the connected players in the game’s multiplayer mode.

    You can expand the functionality of the MultiplayerService class to include additional methods or store additional data related to player interactions and gameplay in the multiplayer mode based on the specific requirements of your game.

    graphical_interface.py

    The GraphicalInterface class that represents a graphical user interface (GUI):

    class GraphicalInterface:
        def __init__(self):
            # Initialize the GUI elements and setup
        def display_message(self, message):
            # Display a message to the player in the GUI
        def get_user_input(self):
            # Get user input from the GUI and return it
        def update_inventory(self, inventory):
            # Update the player's inventory in the GUI
        def update_location(self, location_description):
            # Update the current location description in the GUI
        def update_score(self, score):
            # Update the player's score in the GUI
        def show_leaderboard(self, leaderboard):
            # Display the leaderboard in the GUI
        def show_game_over(self):
            # Display the game over screen in the GUI


    The GraphicalInterface class represents the graphical user interface for the game.

    The __init__ method is used for initializing the GUI elements and setting up the graphical interface.

    • The display_message method is responsible for displaying a message to the player within the GUI. The message parameter represents the text to be displayed.
    • The get_user_input method is used to retrieve user input from the GUI. It captures the player’s input and returns it to the game for further processing.
    • The update_inventory method is used to update the player’s inventory within the GUI. It takes the inventory parameter, which represents the current state of the player’s inventory, and updates the corresponding GUI elements.
    • The update_location method is responsible for updating the current location description in the GUI. It takes the location_description parameter, which represents the description of the current location, and updates the GUI accordingly.
    • The update_score method is used to update the player’s score within the GUI. It takes the score parameter and updates the GUI elements displaying the player’s score.
    • The show_leaderboard method is responsible for displaying the leaderboard within the GUI. It takes the leaderboard parameter, which represents the current state of the leaderboard, and displays it in the GUI.
    • The show_game_over method is used to display the game over screen within the GUI. It can be invoked when the game ends.

    You would need to integrate the GUI framework of your choice and implement the specific methods based on the functionality and design requirements of your game’s graphical interface.

    Recap

    Here’s a recap of the code structure:

    • main.py: The main entry point of the game that initializes and starts the game.
    • command_line.py: Handles user input and interacts with the game engine.
    • parser.py: Parses user commands and extracts relevant information for game actions.
    • game_engine.py: Implements the core game logic, including game progression, object interactions, and puzzle solving.
    • world_model.py: Represents the game world, including levels, rooms, objects, and characters.
    • game_database.py: Handles the storage and retrieval of game data, such as saved games and high scores.
    • social_services.py: Provides social features, such as sharing achievements or connecting with other players.
    • leaderboard_service.py: Manages the leaderboard functionality, recording and displaying player scores.
    • multiplayer_service.py: Handles multiplayer functionality, allowing players to interact and collaborate.
    • graphical_interface.py: Implements a graphical user interface for the game, providing visual representations of the game world and interactions.

    Please note that these code snippets provide a basic structure for the game, and you may need to customize and expand upon them to meet the specific requirements.

    Release Notes

    Here’s an example of release notes for the game:

    Release Notes - Version 1.0
    New Features:
    - Added three new levels: The Abandoned Mansion, The Enchanted Forest, and The Underground Caverns.
    - Introduced 10 unique objects, including keys, potions, and tools, to enhance gameplay interactions.
    - Implemented three captivating characters: Madam Evangeline, Captain Blackbeard, and Professor Amelia Wright, each with their own dialogues and quests.
    - Included five challenging puzzles that require logical thinking and observation to solve.
    - Expanded the world model to provide a more immersive and diverse game experience.
    - Improved command parsing and error handling for smoother gameplay interactions.
    Enhancements:
    - Enhanced the graphical user interface with improved visuals and animations.
    - Refined the text descriptions for levels, objects, and characters to provide more detailed and atmospheric storytelling.
    - Streamlined the game mechanics to improve player feedback and responsiveness.
    - Optimized game performance for faster loading times and smoother gameplay.
    - Polished the user interface and menu options for better usability.
    Bug Fixes:
    - Resolved issues related to object interactions, ensuring consistent behavior and correct outcomes.
    - Fixed dialog triggers and options to ensure proper progression and dialogue flow.
    - Addressed minor graphical glitches and alignment issues for improved visual consistency.
    - Corrected typos and grammar errors in various text descriptions and dialogues.
    - Fixed a rare crash issue that occurred during certain puzzle-solving sequences.
    Known Issues:
    - Some users may experience occasional frame rate drops during intense graphical effects. This will be addressed in future updates.
    - A small number of minor collision detection issues may occur in specific levels. These will be resolved in upcoming patches.
    Thank you for playing our Zork-like game! We appreciate your support and feedback. If you encounter any issues or have suggestions for future updates, please contact our support team at support@examplegame.com.
    Enjoy your adventure in the mysterious world of our game!


    These release notes provide an overview of the new features, enhancements, bug fixes, and known issues in a specific version of the Zork-like game. They serve as a communication tool to inform players about the changes and improvements in the game, as well as acknowledge any outstanding issues that are being addressed.

    User Guide

    Here’s an example of a user guide for a Zork-like game:

    User Guide
    "In the mystical realm of Eldoria, an ancient evil has awakened, threatening to plunge the land into eternal darkness. You, a brave adventurer, have been summoned by the Council of Elders to embark on a perilous quest to defeat this malevolent force and restore balance to the realm.
    Armed with only your wits and a trusty map, you set out on a journey through treacherous landscapes, forgotten ruins, and mysterious dungeons. Along the way, you encounter a diverse cast of characters, each with their own stories and secrets to uncover.
    As you navigate the immersive world of Eldoria, you face challenging puzzles that guard the path to the ultimate showdown with the ancient evil. You must decipher cryptic riddles, manipulate enchanted objects, and unlock hidden passages to progress further.
    Throughout your quest, you collect powerful artifacts imbued with ancient magic. These artifacts grant you unique abilities and provide insight into the history and lore of Eldoria. Wield the Sword of Light to vanquish darkness, wear the Amulet of Wisdom to unravel ancient secrets, and harness the Elemental Gauntlet to control the forces of nature.
    Your choices matter as you interact with the inhabitants of Eldoria. Forge alliances with noble knights, outsmart cunning thieves, and seek guidance from wise sages. Every decision you make influences the outcome of your journey and the fate of the realm.
    In the heart-pounding climax, you confront the ancient evil within the depths of the Dark Citadel. A battle of epic proportions ensues, testing your courage, intelligence, and resourcefulness. Only by harnessing the powers you have acquired and using your knowledge of Eldoria's history can you hope to overcome the darkness and save the realm.
    The fate of Eldoria rests in your hands. Will you emerge victorious, bringing light back to the land? Or will darkness prevail, consigning the realm to eternal despair? The choice is yours as you embark on the legendary adventure of a lifetime."
    Welcome to the game! This user guide will help you get started on your adventure and provide essential information to navigate the game world successfully.
    Gameplay Basics:
    The game is played through a text-based interface. Enter commands to interact with the game world and progress the story.
    Use simple English commands to perform actions like "look," "go," "take," "use," and "talk to" followed by relevant objects or characters.
    Exploring the Game World:
    Navigate through different levels and locations by using commands like "go north," "go east," "go west," or "go south."
    Explore each room or area thoroughly by using the "look" command to examine objects, characters, and the surroundings.
    Interacting with Objects:
    Use the "take" command to pick up objects and add them to your inventory.
    Use the "use" command followed by an object name to interact with it. Experiment with different combinations and actions to progress.
    Conversing with Characters:
    Engage in conversations with characters by using the "talk to" command followed by the character's name.
    Pay attention to the dialogues and ask relevant questions to gather information, receive quests, or unlock new paths.
    Solving Puzzles:
    Encounter various puzzles throughout the game. Study the clues and descriptions carefully.
    Use your logical thinking and problem-solving skills to solve puzzles, open doors, unlock hidden passages, or reveal secrets.
    Managing Inventory:
    Access your inventory by using the "inventory" or "i" command. It lists the objects you have collected.
    Use the "use" command followed by an object name to utilize items in your inventory for specific tasks or interactions.
    Saving and Loading:
    The game supports saving and loading your progress. Use the "save" command to save your game state.
    To load a saved game, use the "load" command followed by the saved file name.
    Game Hints:
    If you find yourself stuck, try using the "hint" command for a helpful hint or suggestion to progress.
    Use hints sparingly to maintain the challenge and sense of discovery.
    Remember, in this game, exploration and experimentation are key. Pay attention to details, read descriptions carefully, and think outside the box to uncover the game's mysteries.
    Good luck on your adventure! Enjoy the immersive world of our game!
    End of User Guide
    

    Customizations

    Here are some possible customizations and enhancements you can consider for your game:

    Additional Levels and Locations:

    Create new levels, areas, or regions within the game world to expand the exploration aspect of the game.
    Introduce diverse environments like forests, caves, mountains, or futuristic cities.
    Unique Objects and Items:

    Design and add new objects, items, and artifacts with special properties or abilities.
    Create interactive objects that can be combined, transformed, or used in specific ways to solve puzzles or progress in the game.

    Characters and NPCs:

    Introduce new characters, non-player characters (NPCs), or companions that players can interact with throughout the game.
    Give each character a distinct personality, dialogue options, and quests to add depth and immersion.

    Challenging Puzzles and Riddles:

    Create complex and challenging puzzles that require careful observation, logical thinking, and creative problem-solving skills.
    Incorporate riddles, cryptic codes, mazes, or time-based challenges to engage players.

    Multiple Endings and Choices:

    Implement branching storylines and multiple endings based on the player’s choices and actions during the game.
    Allow players to shape the outcome of the game through their decisions and interactions.

    Enhanced Graphics and Multimedia Elements:

    Upgrade the graphical interface with improved visuals, animations, and atmospheric effects to enhance the immersion.
    Incorporate sound effects, background music, and voiceovers to create a more immersive audiovisual experience.

    Customized User Interface:

    Customize the user interface to provide a unique and intuitive interaction experience.
    Add features like customizable keybindings, tooltips, and context-sensitive help to assist players.

    Achievements and Rewards:

    Implement an achievement system to track and reward players for completing specific tasks, challenges, or milestones.
    Provide in-game rewards such as unlockable content, special abilities, or cosmetic enhancements.

    Multiplayer and Social Features:

    Introduce multiplayer functionality, allowing players to collaborate, compete, or interact in the game world.
    Enable online leaderboards, player rankings, or social sharing of achievements.

    Modding and Customization Support:

    Provide modding tools or support community-created content, allowing players to create their own levels, puzzles, and stories.

    Remember, these are just some ideas to inspire your customization options. You can choose the features that align with your game vision and target audience. The possibilities for customization are vast, and you can make your Zork-like game truly unique and engaging.

    Situations

    Here are a few more examples of situation code that you can incorporate into your game:

    Unlocking a Door:

    def unlock_door(player, door):
        if door.is_locked():
            if player.has_key(door.lock_key):
                door.unlock()
                print("You unlock the door with the key.")
            else:
                print("You don't have the key to unlock the door.")
        else:
            print("The door is already unlocked.")


    Solving a Puzzle:

    def solve_puzzle(player, puzzle):
        if puzzle.is_solved():
            print("You have already solved the puzzle.")
        else:
            # Code to handle puzzle-solving logic
            # Check player's inventory, interact with puzzle objects, and determine the solution
            if puzzle.check_solution(player):
                puzzle.solve()
                print("Congratulations! You have solved the puzzle.")
            else:
                print("The puzzle remains unsolved.")


    Talking to a Character:

    def talk_to_character(player, character):
        if character.is_available():
            # Code to handle character dialogues and interactions
            dialogue = character.get_dialogue()
            print(f"{character.name}: {dialogue}")
            # Handle player choices and responses to the character
            player_response = input("Your response: ")
            character_response = character.respond(player_response)
            print(f"{character.name}: {character_response}")
        else:
            print(f"{character.name} is not available to talk at the moment.")


    Using an Object:

    def use_object(player, object):
        if object.is_usable():
            # Code to handle the specific functionality of the object
            if object.name == "torch":
                if player.has_item("torch"):
                    print("You light up the torch, illuminating the room.")
                    # Code to update game state or reveal hidden information using the object
                else:
                    print("You don't have a torch to use.")
            else:
                # Code for using other objects in the game
                pass
        else:
            print("You can't use this object.")


    These are just a few examples of situation code snippets that demonstrate how different game scenarios can be implemented in the game. Feel free to customize and expand upon them based on your specific game mechanics, objects, characters, and puzzles.

    Dialogue

    Here’s an example code snippet that allows the player to engage in a dialogue with a character in a Zork-like game:

    class Character:
        def __init__(self, name):
            self.name = name
        def initiate_dialogue(self):
            dialogue_options = [
                "Hello, how can I help you?",
                "What brings you here?",
                "Do you need any assistance?"
            ]
            for index, option in enumerate(dialogue_options, start=1):
                print(f"{index}. {option}")
            choice = int(input("Enter the number corresponding to your choice: "))
            if 1 <= choice <= len(dialogue_options):
                self.handle_dialogue_choice(choice)
            else:
                print("Invalid choice. Please try again.")
        def handle_dialogue_choice(self, choice):
            if choice == 1:
                print(f"{self.name}: Welcome! What can I assist you with?")
                # Handle player response and continue the dialogue
            elif choice == 2:
                print(f"{self.name}: I'm just here enjoying the view. How about you?")
                # Handle player response and continue the dialogue
            elif choice == 3:
                print(f"{self.name}: Of course! What do you need help with?")
                # Handle player response and continue the dialogue


    In this code snippet, the Character class represents a character in the game. The initiate_dialogue() method presents a set of dialogue options to the player and prompts them to choose an option. Based on the player’s choice, the handle_dialogue_choice() method is invoked to handle the selected dialogue option and proceed with the conversation.

    You can customize the dialogue options, character responses, and the logic inside each handle_dialogue_choice() branch to fit the specific interactions and narrative of your game. This code provides a basic structure for handling character dialogues in a Zork-like game.

    Additionally, for further reference and learning, you may find resources such as Python documentation, game development tutorials, or interactive fiction development guides helpful in understanding more about implementing dialogue systems and interactive conversations in games.

    Objects and Actions

    Defining objects and actions is an essential part of creating a game. Here’s an example of how you can define objects and actions in a Zork-like game:

    class Object:
        def __init__(self, name, description):
            self.name = name
            self.description = description
    class Action:
        def __init__(self, name, verbs, method):
            self.name = name
            self.verbs = verbs
            self.method = method
    class Player:
        def __init__(self):
            self.inventory = []
        def take_object(self, object):
            self.inventory.append(object)
            print(f"You take the {object.name}.")
        def examine_object(self, object):
            print(f"You examine the {object.name}. {object.description}")
    # Create objects
    key = Object("Key", "A small golden key.")
    book = Object("Book", "An ancient spellbook with faded inscriptions.")
    # Define actions
    take_action = Action("Take", ["take", "pick up", "grab"], Player.take_object)
    examine_action = Action("Examine", ["examine", "inspect"], Player.examine_object)
    # Mapping of actions to objects
    object_actions = {
        key: [take_action],
        book: [take_action, examine_action]
    }
    # Sample usage
    player = Player()
    current_object = key
    # Perform actions on the current object
    for action in object_actions[current_object]:
        if "take" in action.verbs:
            action.method(player, current_object)
    # Output: You take the Key.
    # Perform another action on the current object
    for action in object_actions[current_object]:
        if "examine" in action.verbs:
            action.method(player, current_object)
    # Output: You examine the Key. A small golden key.


    In this example, the Object class represents game objects with properties like name and description. The Action class defines actions that can be performed on objects, including their name, associated verbs, and a corresponding method that gets executed when the action is performed.

    The Player class represents the player character and contains methods for specific actions, such as take_object and examine_object, which are invoked when the corresponding actions are performed.

    You can create instances of Object and define Action objects for each object. Then, you can map the actions to objects using a dictionary (object_actions). This allows you to associate specific actions with each object.

    By calling the appropriate action’s method, you can perform actions on objects based on player input or game events.

    You can add more actions, define different methods, and incorporate additional functionality as needed.

    Game Setting: Eldoria

    Here’s the context for the realm of Eldoria:

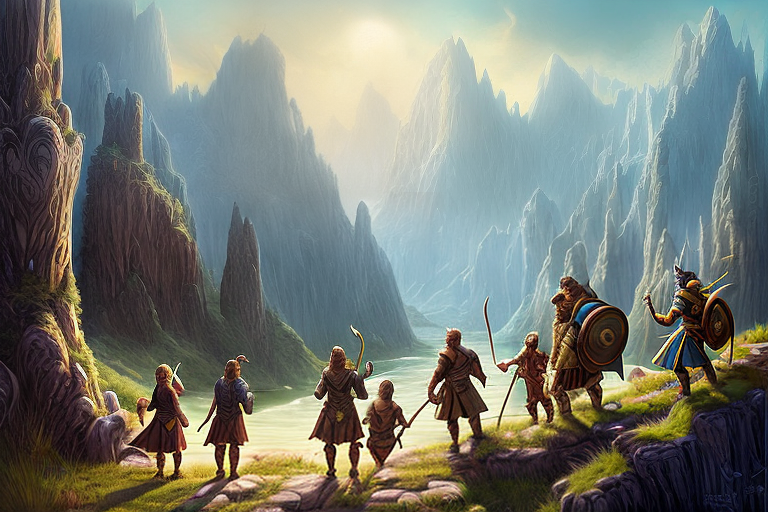
    Eldoria is a fantastical realm steeped in magic and ancient lore. It is a land of diverse landscapes, ranging from lush forests and cascading waterfalls to barren deserts and towering mountain ranges. The realm is inhabited by various mystical creatures, including elves, dwarves, wizards, and mythical beasts.

    For centuries, Eldoria has been a beacon of harmony and prosperity under the protection of the Council of Elders, a group of wise and powerful beings who uphold the balance between light and darkness. The realm is known for its rich history, ancient ruins, and magical artifacts that hold great power.

    However, an unforeseen catastrophe has befallen Eldoria. A long-dormant evil force has awoken from its slumber deep within the forbidden depths of the Dark Citadel. As its malevolence spreads, darkness engulfs the once-thriving lands, causing crops to wither, creatures to turn hostile, and chaos to ensue.

    Recognizing the imminent threat, the Council of Elders summons a legendary hero from another realm to embark on a quest to save Eldoria. The hero, known for their bravery, intelligence, and determination, is entrusted with a sacred mission to restore balance and vanquish the ancient evil that plagues the realm.

    In this time of crisis, the inhabitants of Eldoria look to the hero with hope and anticipation, as they believe in the prophecy that foretells of a chosen one who will rise to face the darkness and bring light back to the land.

    The hero’s journey through Eldoria is filled with challenges, discoveries, and encounters with both allies and adversaries. As they navigate the intricate web of alliances, rivalries, and ancient secrets, they gradually unravel the true nature of the evil that threatens to consume Eldoria.

    It is within this context of a realm in desperate need of salvation that the hero sets forth on their epic quest, their actions shaping the destiny of Eldoria and all who inhabit it.

    Game Scenario: The Dark Citadel

    Here’s a set of descriptions generated for the Dark Citadel:

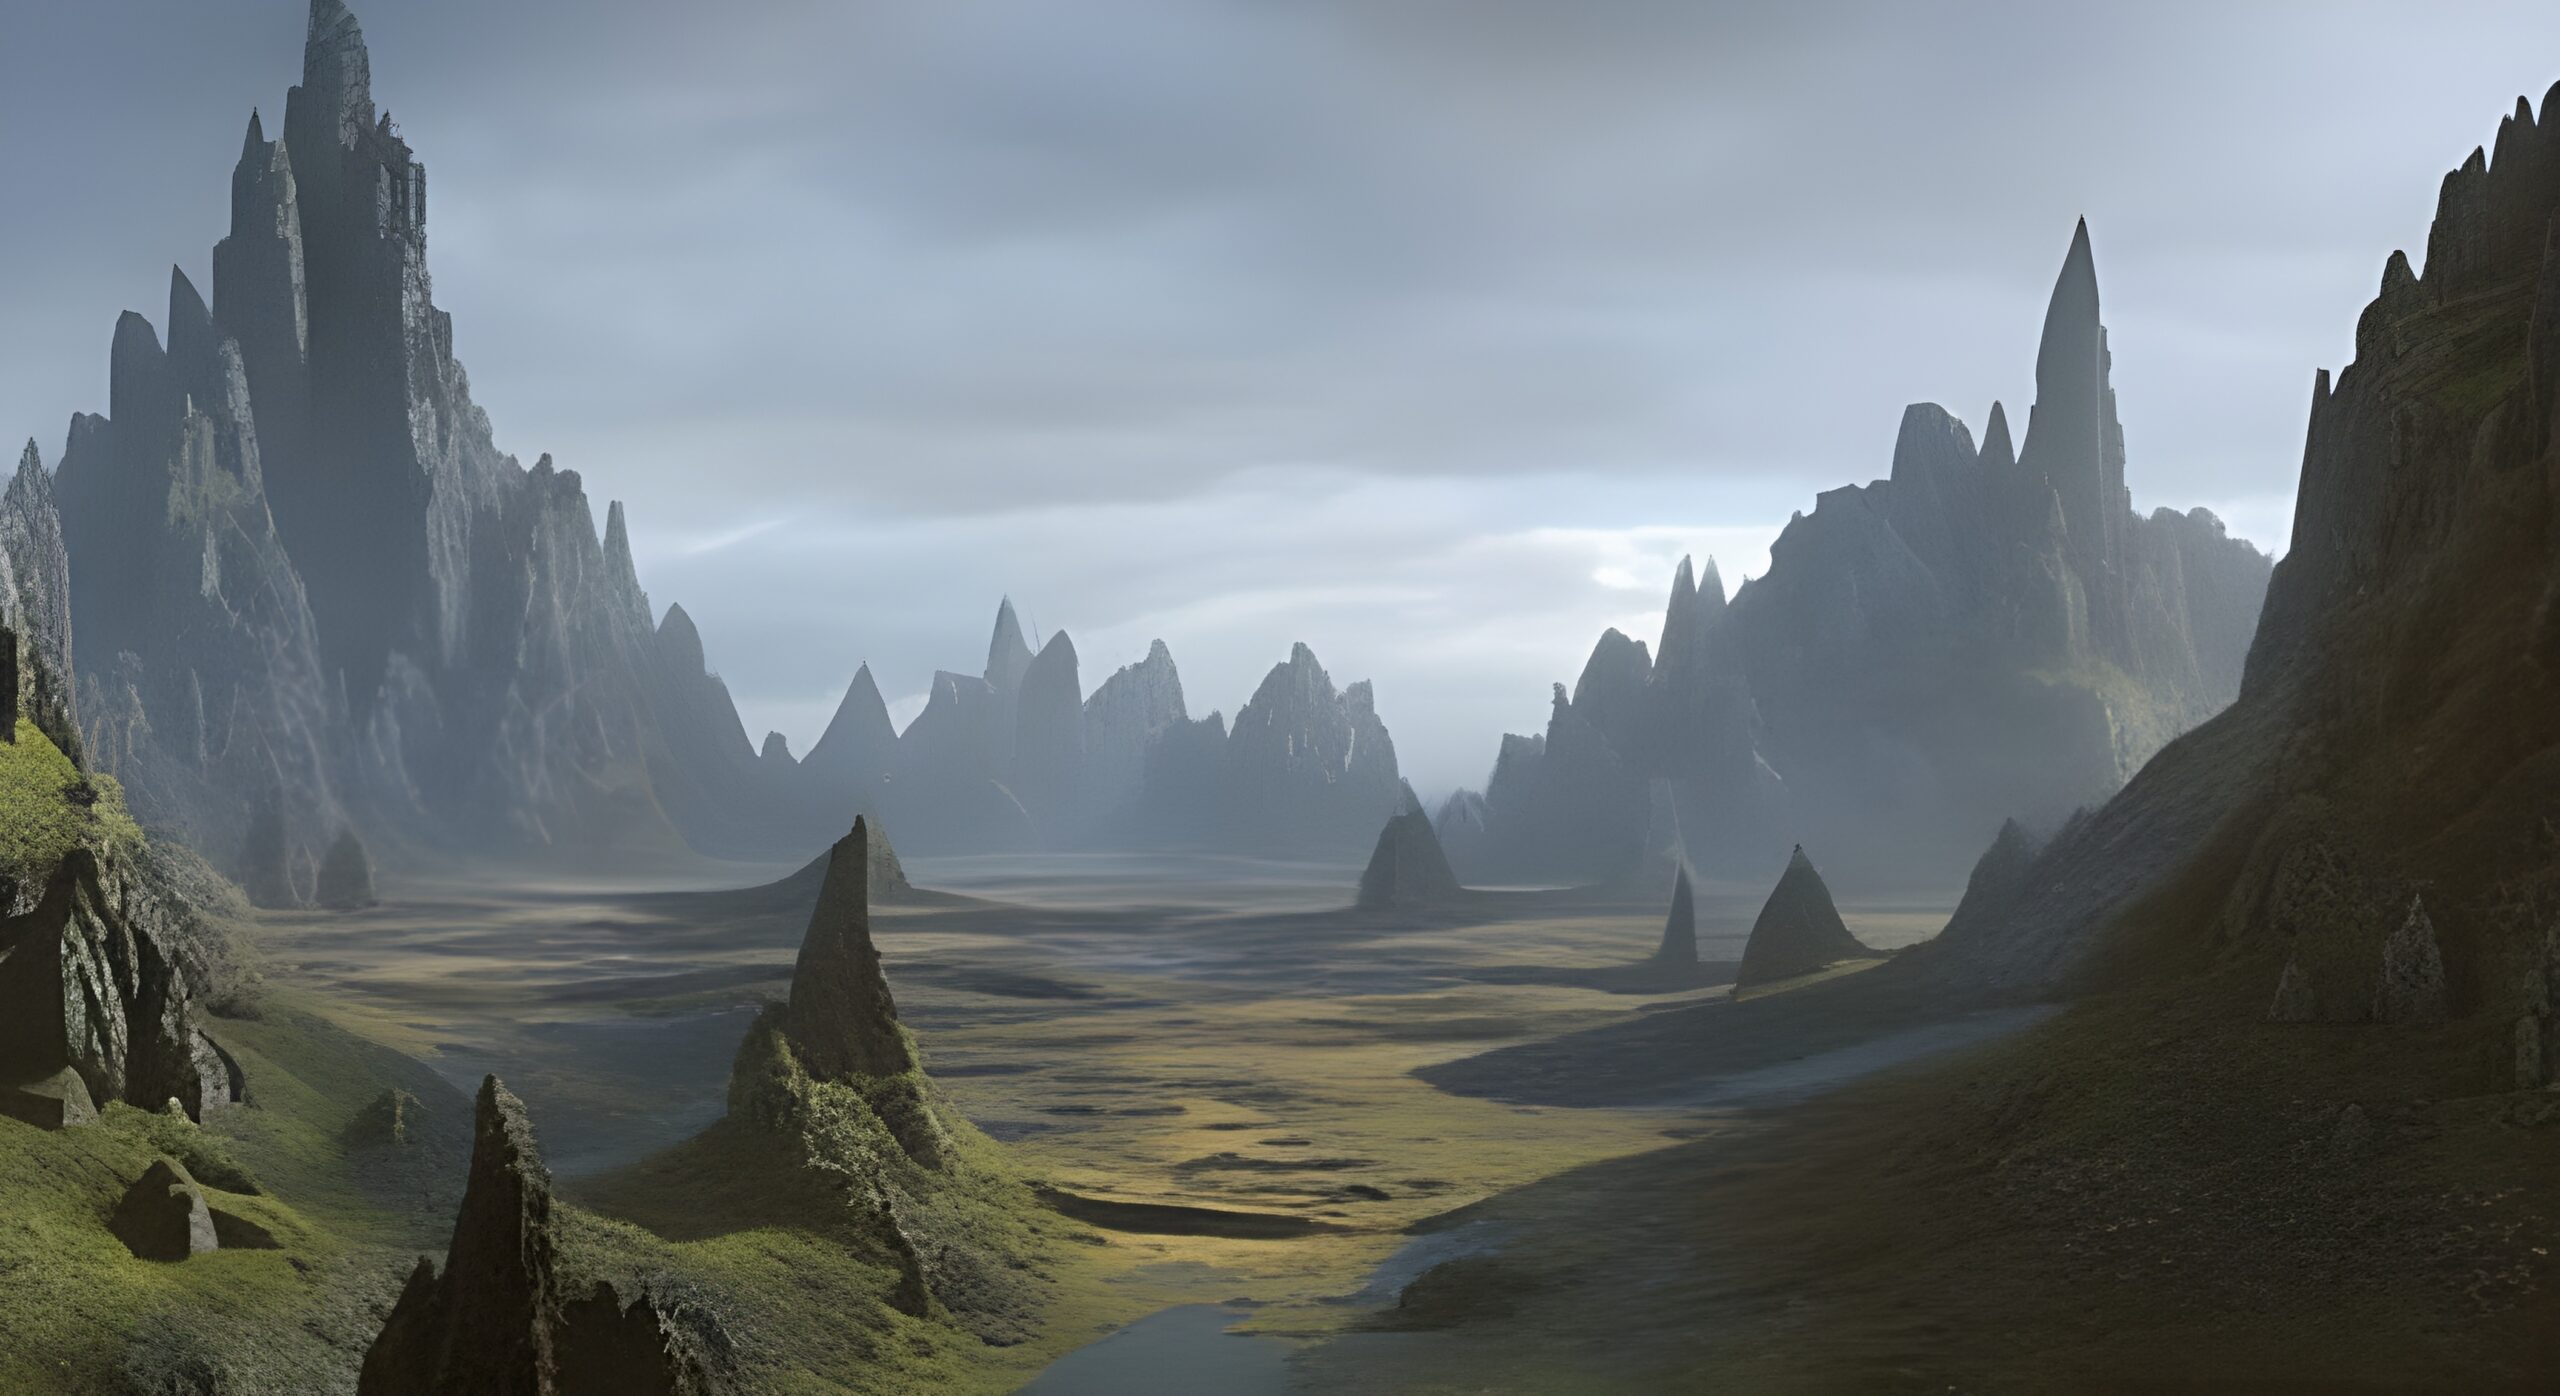
    The Dark Citadel looms ominously in the heart of a desolate, forbidding landscape. Its towering, jagged spires pierce the darkened sky, casting eerie shadows that seem to dance with malevolence. The air around the Citadel is thick with an otherworldly aura, a palpable sense of ancient evil that sends a shiver down the spine of any who approach.

    As the adventurer draws closer, they notice the massive, iron-wrought gates that guard the entrance. These gates, adorned with twisted, demonic motifs, creak with an unnerving echo as they slowly swing open, seemingly welcoming the unwary traveler into a world of darkness and danger.

    Inside the Citadel’s foreboding walls, the air grows colder and heavier, carrying the faint scent of decay. A labyrinthine network of corridors stretches out before the adventurer, leading deeper into the heart of the fortress. The walls are etched with arcane symbols and runes, pulsating with an eerie, dim light that casts long, sinister shadows along the path.

    Throughout the Citadel, the adventurer encounters treacherous traps and intricate mechanisms designed to deter intruders. Ancient mechanisms and hidden switches must be cleverly manipulated to progress further, as deadly pitfalls and secret chambers lie in wait for the unwary.

    Deeper still, the adventurer reaches the heart of the Citadel, a vast chamber shrouded in impenetrable darkness. Flickering torches cast an ethereal glow upon a grand throne, where the source of the ancient evil awaits. This malevolent being, with eyes as cold as ice and a voice that drips with malice, challenges the adventurer to a final, epic confrontation.

    The Dark Citadel is a place of dread and despair, a testament to the power of darkness and the resilience of the adventurer’s spirit. It is a treacherous labyrinth filled with secrets, traps, and the echoes of forgotten sorcery. Only the most courageous and cunning adventurers dare to venture within, for the fate of the realm hangs in the balance within the heart of this accursed fortress.

    Here’s a list of encounters one might experience within the Dark Citadel:

    • Guardian Spirits: Upon entering the Citadel, the adventurer encounters ethereal guardian spirits that block their path. These spirits must be appeased or outwitted to gain access to the inner chambers.
    • Puzzle Chambers: Throughout the Citadel, the adventurer stumbles upon chambers filled with intricate puzzles. These puzzles test their logic, memory, and problem-solving skills, unlocking secret passages or granting access to valuable artifacts.
    • Shadow Sentinels: Silent and agile, the Shadow Sentinels are the eyes and ears of the Citadel’s master. They lurk in the shadows, attacking with deadly precision. The adventurer must either avoid their notice or engage in strategic combat to overcome them.
    • Hall of Mirrors: In a chamber adorned with countless mirrors, the adventurer becomes trapped in a maze of reflections. They must navigate the maze while avoiding their own reflections, as touching them brings a nightmarish consequence.
    • Ancient Library: The adventurer discovers a long-forgotten library within the Citadel, filled with dusty tomes and crumbling scrolls. Unraveling the cryptic texts and deciphering ancient languages provides clues to the Citadel’s secrets and reveals the weakness of its master.
    • Chamber of Illusions: A deceptive chamber filled with illusory traps and shifting walls, designed to confuse and disorient intruders. The adventurer must trust their instincts and use their observational skills to distinguish reality from illusion.
    • Guardian Golems: Massive stone guardians stand sentinel in a grand hall. They come to life with a thunderous roar, attacking any intruder who dares to trespass. The adventurer must find a way to deactivate or bypass these formidable constructs.
    • Sorcerer’s Laboratory: Within the depths of the Citadel, the adventurer discovers the laboratory of the sorcerer who unleashed the ancient evil. The laboratory is filled with alchemical apparatuses, forbidden spells, and volatile concoctions. The adventurer must navigate this hazardous environment to find a way to weaken the sorcerer’s powers.
    • Final Confrontation: At the heart of the Citadel, the adventurer faces the master of darkness themselves. A climactic battle ensues, where the adventurer must utilize their skills, acquired artifacts, and knowledge of the Citadel’s secrets to overcome the ultimate evil.

    Each encounter in the Dark Citadel presents a unique challenge, requiring the adventurer to employ their wit, resourcefulness, and courage. Success brings them one step closer to saving the realm and emerging victorious from this treacherous fortress of darkness.

    Here’s a list of objects that one might find within the Dark Citadel:

    • Ancient Key: An ornate key with intricate engravings. It unlocks a hidden chamber within the Citadel, leading to valuable treasures or critical information.
    • Crystal Prism: A shimmering crystal prism that refracts light in mesmerizing patterns. It is a key component in solving a puzzle within the Citadel, revealing hidden paths or triggering mechanisms.
    • Shadow Cloak: A dark, hooded cloak that grants the wearer temporary invisibility, allowing them to bypass certain enemies or sneak past traps undetected.
    • Glowing Orb: A mystical orb that emits a soft, ethereal glow. It illuminates dark areas of the Citadel, revealing hidden inscriptions or exposing hidden dangers.
    • Enchanted Dagger: A dagger imbued with magical properties. It possesses the ability to disrupt magical barriers or deal increased damage to certain enemies within the Citadel.
    • Mirror of Reflection: A polished mirror that reflects not only physical appearance but also one’s inner thoughts and emotions. It provides insights into the motives and intentions of characters encountered within the Citadel.
    • Ethereal Crystal: A fragile crystal imbued with the essence of the spirit realm. It can be used to dispel spectral obstacles or summon helpful spectral entities to aid the adventurer.
    • Sorcerer’s Tome: A weathered and ancient tome filled with forbidden knowledge and dark incantations. It holds the key to unraveling the sorcerer’s weaknesses and unlocking powerful spells.
    • Mystic Amulet: An intricately designed amulet that offers protection against magical attacks or enchantments within the Citadel. It can also reveal hidden magical glyphs or sigils.
    • Serpent Staff: A staff adorned with a coiled serpent, symbolizing both power and danger. It can control serpentine creatures within the Citadel or unleash devastating elemental spells.
    • Gargoyle Statuette: A small statuette depicting a menacing gargoyle. It acts as a talisman against evil influences, providing resistance to curses or protecting the adventurer from certain dark enchantments.
    • Whispering Skull: A mysterious skull that possesses ancient knowledge. It can offer cryptic clues or answer riddles within the Citadel, providing guidance to the adventurer.

    These objects serve various purposes within the Dark Citadel, aiding the adventurer in their quest, unlocking secrets, or providing advantages in combat or puzzle-solving. Each object holds a unique significance within the game world and contributes to the immersive and challenging experience of exploring the Citadel.

    Here’s a list of puzzles that one might encounter within the Dark Citadel in a Zork-like game:

    • Symbolic Lock: The adventurer discovers a door with a lock that requires the correct arrangement of symbolic glyphs. They must search for clues throughout the Citadel to decipher the meaning of the symbols and unlock the door.
    • Mystic Chessboard: In a chamber, the adventurer encounters a mystical chessboard with pieces frozen in time. They must strategize and make the correct moves to free the pieces and reveal a hidden passage.
    • Light Reflection Puzzle: The adventurer comes across a room with mirrors and light beams. They must manipulate the mirrors to redirect the beams and illuminate specific areas or trigger mechanisms.
    • Elemental Switches: The adventurer encounters a chamber with a series of switches representing different elements (fire, water, earth, air). They must determine the correct sequence or combination to unlock a hidden door or disable a trap.
    • Musical Riddles: The adventurer stumbles upon a chamber with musical instruments and cryptic musical riddles. They must play the correct sequence of notes or melodies to reveal a hidden passage or obtain a valuable item.
    • Weighted Platforms: In a room with multiple platforms, the adventurer must place objects of specific weights on the platforms to activate mechanisms or create a balanced configuration.
    • Time-based Puzzle: The adventurer finds themselves in a chamber where time flows differently. They must perform certain actions or solve tasks within a limited time frame to prevent being trapped or overcome by an advancing threat.
    • Pattern Recognition: The adventurer encounters a series of symbols or patterns displayed on walls or tiles. They must discern the underlying pattern and replicate it correctly to unlock a door or gain access to a valuable artifact.
    • Maze of Illusions: The adventurer enters a maze-like chamber filled with illusory walls and false paths. They must navigate the maze using visual cues, logical reasoning, and memory to reach the exit.
    • Alchemy Puzzle: The adventurer discovers an alchemical laboratory within the Citadel. They must combine various ingredients and follow recipes to create potions or concoctions that unlock hidden abilities or reveal secrets.

    These puzzles provide challenges that test the adventurer’s observation, problem-solving, and critical thinking skills. They serve as obstacles that must be overcome to progress further within the Dark Citadel, adding depth and engagement to the gameplay experience.

    Here’s a list of locations that one might explore within the Dark Citadel:

    • Main Entrance: The imposing entrance to the Dark Citadel, guarded by massive gates adorned with demonic motifs. This is where the adventure begins, setting the tone for the treacherous journey ahead.
    • Grand Hall: A vast hall within the Citadel, adorned with towering columns and intricate carvings. It serves as a central hub, connecting various wings and chambers of the fortress.
    • Crypts: A series of ancient burial chambers hidden beneath the Citadel. The crypts are filled with sarcophagi, eerie echoes, and a sense of foreboding. They hold secrets, valuable artifacts, or even restless spirits.
    • Shadowed Corridors: Dimly lit, winding corridors that snake through the Citadel. These shadowed pathways are filled with hidden traps, secret passages, and lurking dangers. Navigating them requires caution and keen observation.
    • Chamber of Whispers: A chamber where strange whispers and disembodied voices echo endlessly. It is said that these whispers hold cryptic clues and warnings for those who listen closely.
    • Observatory: A tower atop the Citadel that offers a panoramic view of the surrounding landscape. It contains telescopes and ancient starmaps, providing insight into celestial alignments and hidden constellations.
    • Cursed Well: A dark, stagnant well within the Citadel’s depths. It is said to hold mysterious powers but comes with a heavy price. Interacting with the well can grant boons or curses, depending on the adventurer’s choices.
    • Hall of Mirrors: A chamber filled with countless mirrors, reflecting distorted images and illusions. It serves as a testing ground where the adventurer must discern reality from illusion to progress.
    • Sorcerer’s Sanctum: The innermost chamber where the sorcerer responsible for the Citadel’s darkness resides. This sanctum is heavily guarded and holds the key to defeating the ultimate evil that plagues the realm.
    • Forgotten Archives: A hidden library within the Citadel, housing ancient tomes, scrolls, and manuscripts. It contains forgotten knowledge, arcane spells, and historical records that offer insights into the Citadel’s origins and secrets.
    • Gargoyle Perches: Hidden alcoves and ledges where stone gargoyles perch, silently observing all who pass by. They hold valuable information or act as guardians, challenging the adventurer to prove their worth.
    • Chamber of Shadows: A chamber cloaked in perpetual darkness, inhabited by shadow creatures and imbued with potent dark magic. It requires the adventurer to confront their deepest fears and navigate the inky blackness.

    Each location within the Dark Citadel offers a unique atmosphere, challenges, and rewards, contributing to the immersive and perilous nature of the game world. Exploring these locations reveals the rich lore, hidden treasures, and the secrets that lie within the heart of the Citadel.

    Here’s a numbered table list of locations, encounters, puzzles, and objects within the Dark Citadel:

    #LocationEncounterPuzzleObject
    1Main EntranceGuardian SpiritsSymbolic LockAncient Key
    2Grand HallPuzzle ChambersMystic ChessboardCrystal Prism
    3CryptsShadow SentinelsLightReflection Puzzle
    4Shadowed CorridorsHall of MirrorsElemental SwitchesGlowing Orb
    5Chamber of WhispersAncient LibraryMusical RiddlesEnchanted Dagger
    6ObservatoryGuardian GolemsWeighted PlatformsMirror of Reflection
    7Cursed WellSorcerer’s LaboratoryTime-based PuzzleEthereal Crystal
    8Hall of ShadowsFinal ConfrontationPattern RecognitionSorcerer’s Tome
    9Forgotten ArchivesMaze of IllusionsMystic Amulet
    10Gargoyle PerchesAlchemy PuzzleSerpent Staff
    11Chamber of ShadowsGargoyle Statuette
    12Sorcerer’s SanctumWhispering Skull

    In this table, each location is associated with a specific encounter, puzzle, and object that can be found or experienced within that location. This provides an overview of the various elements that the player can encounter and interact with as they explore the Dark Citadel.

    Diagram for the Dark Citadel:

                            Main Entrance
                                 |
                                 |
                            Grand Hall
                        /                \
                       /                  \
               Crypts                    Observatory
                  |                            |
                  |                            |
      Shadowed Corridors                Cursed Well
                  |                            |
                  |                            |
         Chamber of Whispers          Sorcerer's Sanctum
                  |                            |
                  |                            |
      Forgotten Archives          Hall of Shadows
                  |                            |
                  |                            |
      Gargoyle Perches             Chamber of Shadows
                  |                            |
                  |                            |
            Final Confrontation
    

    Please note that this is a simplified representation and does not capture all the intricate details and interconnectedness of the Dark Citadel. It gives you a basic idea of the hierarchical structure and some of the major locations within the Citadel.

    Here’s a textual representation of the Dark Citadel as a Mermaid diagram:

    ```mermaid
    
    graph LR
        Main_Entrance --> Grand_Hall
        Grand_Hall --> Crypts
        Grand_Hall --> Observatory
        Crypts --> Shadowed_Corridors
        Shadowed_Corridors --> Chamber_of_Whispers
        Chamber_of_Whispers --> Forgotten_Archives
        Forgotten_Archives --> Gargoyle_Perches
        Forgotten_Archives --> Final_Confrontation
        Gargoyle_Perches --> Chamber_of_Shadows
        Chamber_of_Shadows --> Final_Confrontation
        Observatory --> Cursed_Well
        Cursed_Well --> Sorcerers_Sanctum
        Sorcerers_Sanctum --> Hall_of_Shadows
    ```

    This Mermaid diagram represents the connections between various locations within the Dark Citadel. Arrows indicate the flow from one location to another, indicating the pathways or transitions between them.

    Here’s an example code structure representing the Dark Citadel game:

    # Dark Citadel Locations
    class Location:
        def __init__(self, name, description, connections):
            self.name = name
            self.description = description
            self.connections = connections
    class MainEntrance(Location):
        def __init__(self):
            super().__init__("Main Entrance", "An imposing entrance to the Dark Citadel.", ["Grand Hall"])
    class GrandHall(Location):
        def __init__(self):
            super().__init__("Grand Hall", "A vast hall adorned with towering columns.", ["Main Entrance", "Crypts", "Observatory"])
    class Crypts(Location):
        def __init__(self):
            super().__init__("Crypts", "Ancient burial chambers hidden beneath the Citadel.", ["Grand Hall", "Shadowed Corridors"])
    # Define other locations (Observatory, Shadowed Corridors, Chamber of Whispers, etc.) similarly...
    # Dark Citadel Objects
    class Object:
        def __init__(self, name, description):
            self.name = name
            self.description = description
    class AncientKey(Object):
        def __init__(self):
            super().__init__("Ancient Key", "A key with intricate engravings.")
    class CrystalPrism(Object):
        def __init__(self):
            super().__init__("Crystal Prism", "A prism that refracts light beautifully.")
    # Define other objects (Shadow Cloak, Glowing Orb, Enchanted Dagger, etc.) similarly...
    # Dark Citadel Puzzles
    class Puzzle:
        def __init__(self, name, description):
            self.name = name
            self.description = description
    class SymbolicLock(Puzzle):
        def __init__(self):
            super().__init__("Symbolic Lock", "A lock that requires arranging symbolic glyphs correctly.")
    class MysticChessboard(Puzzle):
        def __init__(self):
            super().__init__("Mystic Chessboard", "A chessboard with frozen pieces that need to be freed.")
    # Define other puzzles (Light Reflection Puzzle, Elemental Switches, Musical Riddles, etc.) similarly...
    # Dark Citadel Encounters
    class Encounter:
        def __init__(self, name, description):
            self.name = name
            self.description = description
    class GuardianSpirits(Encounter):
        def __init__(self):
            super().__init__("Guardian Spirits", "Ethereal spirits guarding the entrance.")
    class ShadowSentinels(Encounter):
        def __init__(self):
            super().__init__("Shadow Sentinels", "Sinister shadow creatures lurking in the crypts.")
    # Define other encounters (Guardian Golems, Sorcerer's Laboratory, etc.) similarly...
    # Create instances of locations, objects, puzzles, and encounters
    main_entrance = MainEntrance()
    grand_hall = GrandHall()
    crypts = Crypts()
    ancient_key = AncientKey()
    crystal_prism = CrystalPrism()
    symbolic_lock = SymbolicLock()
    mystic_chessboard = MysticChessboard()
    guardian_spirits = GuardianSpirits()
    shadow_sentinels = ShadowSentinels()
    # Connect the locations
    main_entrance.connections = [grand_hall]
    grand_hall.connections = [main_entrance, crypts, observatory]
    crypts.connections = [grand_hall, shadowed_corridors]
    # Define other connections and assign objects, puzzles, and encounters to respective locations...
    

    This code structure provides a basic representation of the Dark Citadel in a Zork-like game, defining locations, objects, puzzles, and encounters as classes. You can expand upon this structure by adding more locations, objects, puzzles, and encounters, as appropriate.

    Glossary

    Here’s a glossary of terms that you might find useful for the game:

    Adventurer: The player-controlled character who embarks on a quest and explores the game world.

    Artifacts: Powerful objects imbued with magical properties that aid the adventurer in their journey.

    Character: Non-player characters (NPCs) that the adventurer encounters throughout the game, providing information, quests, or obstacles.

    Dark Citadel: The ancient fortress that serves as the stronghold of the main antagonist or source of evil in the game.

    Dialogue: Conversations between the adventurer and characters, presenting information, clues, and choices.

    Inventory: The collection of items and artifacts that the adventurer carries, which can be used, combined, or interacted with during the game.

    Puzzles: Challenges or obstacles that the adventurer must solve to progress in the game, often requiring logic, observation, or item manipulation.

    Quest: A specific mission or objective that the adventurer undertakes, typically assigned by characters or discovered through exploration.

    Riddles: Cryptic puzzles or questions that the adventurer must solve, often involving wordplay or clever thinking.

    Save/Load: The ability for the player to save their progress and reload it later, ensuring they can continue the game from where they left off.

    Score: A numerical representation of the adventurer’s progress or achievement in the game, often based on completing tasks or solving puzzles.

    Settings: The different locations and environments within the game world that the adventurer can explore, each with its own unique characteristics and challenges.

    Text Parser: The system that interprets the player’s text-based input and translates it into game actions or commands.

    Treasure: Valuable items or rewards that the adventurer can discover and collect throughout their journey.

    Unlockables: Secret or hidden content that can be revealed by completing certain tasks or meeting specific conditions in the game.

    These terms represent common elements found in Zork-like games and provide a foundation for understanding the mechanics and concepts within the game world.

    Further Developing the Game

    Using an Another Implementation

    There are several open-source implementations of Zork or Zork-like games available.

    Here are a few notable examples:

    Frotz:

    Frotz is an interpreter for Z-Machine, the virtual machine used to run Infocom’s text adventure games, including Zork. It is an open-source project that allows you to play classic Zork games and other interactive fiction titles on various platforms.

    Frotz is an open-source interpreter for Z-Machine, the virtual machine used to run Infocom’s text adventure games, including the iconic Zork series. Frotz allows you to play Zork games and other interactive fiction titles on various platforms, including desktop computers and mobile devices. It supports multiple Z-Machine versions and provides features like save/load functionality, customizable fonts, and support for sound effects. Frotz is actively maintained and has a vibrant community of users and developers.

    Reference: Frotz GitHub Repository

    Inform 7:

    Inform 7 is an interactive fiction authoring system that allows you to create your own text-based adventure games in the style of Zork. It provides a natural language programming language specifically designed for interactive fiction development.

    Inform 7 is a popular interactive fiction authoring system that enables you to create your own text-based adventure games, including those in the style of Zork. It uses a natural language programming language based on English, making it accessible to both programmers and non-programmers. Inform 7 provides a powerful and intuitive environment for game development, offering features like scene management, object-oriented design, and built-in debugging tools. It supports various platforms and has an active community of authors and players.

    Reference: Inform 7 Website

    Dialog:

    Dialog is another interactive fiction authoring system that supports the creation of text-based adventure games similar to Zork. It is designed to be easy to use and provides a simple programming language for game development.

    Dialog is an open-source interactive fiction authoring system designed for creating text-based adventure games. It aims to be easy to use and provides a simple programming language specifically tailored for interactive fiction development. Dialog offers features like object-oriented design, customizable parser behavior, and flexible game logic. It comes with a built-in development environment that includes a source code editor, debugging tools, and a testing framework.

    Reference: Dialog GitHub Repository

    Text Adventure Development System (TADS):

    TADS is a powerful toolset for creating interactive fiction games, including Zork-like adventures. It offers a robust programming language, a library of functions for game development, and a development environment to create text-based games with rich features.

    TADS is a comprehensive toolset for creating interactive fiction games, including Zork-like adventures. It provides a powerful programming language called TADS 3, designed specifically for text-based game development. TADS offers an extensive library of functions and classes for building interactive worlds, managing objects and characters, and implementing complex game mechanics. It also includes a development environment with an integrated editor, debugger, and compiler.

    Reference: TADS Website

    These are just a few examples of open-source implementations and tools for creating Zork-like games. They provide the necessary frameworks and resources to build and play text-based adventure games with similar gameplay mechanics to Zork. The references will provide you with more in-depth information, documentation, and resources to explore and utilize each of these open-source implementations for creating and playing Zork-like games.

    Offloading Game Dialogue to NLP

    There are several natural language processing (NLP) libraries and frameworks that can be utilized to enhance the interaction between the player and characters in your game. These NLP tools can help parse and understand player input, allowing for more dynamic and engaging conversations.

    Here are a few options:

    NLTK (Natural Language Toolkit): NLTK is a widely used Python library for NLP tasks. It provides various modules for tokenization, part-of-speech tagging, and parsing, which can be leveraged to process and interpret user input.

    • spaCy: spaCy is a powerful NLP library that offers features like tokenization, named entity recognition, and dependency parsing. It provides an easy-to-use API to extract information from user input and facilitate dialogue-based interactions.
    • Rasa: Rasa is an open-source framework for building conversational AI applications. It offers natural language understanding (NLU) capabilities, dialogue management, and entity extraction. Rasa allows you to define dialogue flows and train models to understand and respond to user input effectively.
    • Dialogflow: Dialogflow, powered by Google Cloud, is a cloud-based conversational platform. It offers a user-friendly interface and natural language understanding capabilities. Dialogflow enables you to define intents, entities, and contexts to build robust conversational agents.

    These tools can help you parse and understand user input, extract relevant information, and generate appropriate responses from characters in your game. You can integrate them into your codebase to handle dialogue processing and create more dynamic and interactive conversations between players and characters.

    Each tool has its own documentation, tutorials, and resources to guide you through the integration process and provide examples of how to leverage their functionalities.

    Choose the one that best suits your requirements and explore their capabilities to enhance the dialogue system in your game.

    Offloading Game Interaction to Chat

    It is possible to create a Zork-like game using a chatbot framework. Chatbot frameworks provide the necessary tools and functionality to build conversational agents that can simulate interactive text-based adventures similar to Zork. Here’s an overview of how you can approach building a Zork-like game using a chatbot framework:

    • Choose a Chatbot Framework: Select a chatbot framework that supports natural language processing and dialogue management. Some popular frameworks include Rasa, Dialogflow, Microsoft Bot Framework, or IBM Watson Assistant. These frameworks provide the core components needed for building conversational agents.
    • Define Intents and Entities: Identify the intents (actions or commands) that players can use in the game, such as “go,” “take,” “examine,” or “use.” Define entities to extract relevant information from the user’s input, such as object names, directions, or commands.
    • Create Dialogues and Responses: Design a set of dialogues and responses for the various game scenarios and interactions. Map intents to corresponding actions or functions in your game engine to trigger the appropriate gameplay mechanics.
    • Implement Dialogue Management: Use the chatbot framework’s dialogue management capabilities to handle the flow of the conversation. Define rules, stories, or machine learning models (like Rasa’s Core or Dialogflow’s Dialog Management) to manage the progression of the game’s storyline and handle player choices.
    • Integrate Game Mechanics: Connect the chatbot framework with your game engine or backend system. Implement the underlying game mechanics, such as managing the game world, handling player inventory, tracking scores, resolving puzzles, and updating the game state based on player input.
    • Handle User Input: Use the chatbot framework’s natural language processing capabilities to parse and understand user input. Extract intents and entities to determine the player’s actions and parameters. Based on the recognized intent and entities, trigger the corresponding game actions or responses.
    • Provide Feedback and Responses: Generate dynamic responses based on the game state and player actions. Provide descriptive and engaging feedback to the player, describing the outcome of their actions, providing hints, or advancing the storyline.

    By leveraging a chatbot framework, you can create a text-based adventure game with conversational interactions, similar to the experience of playing Zork. The framework handles the natural language understanding, dialogue management, and response generation, while your game engine manages the gameplay mechanics and state.

    Keep in mind that building a Zork-like game using a chatbot framework may require customization and integration with your specific game mechanics and content. It’s essential to understand the capabilities and limitations of the chosen chatbot framework to achieve the desired gameplay experience.

    Offloading Mechanics to a Game Engine

    There are off-the-shelf and open-source game engines available that can help you manage gameplay mechanics and state in your Zork-like game. These engines provide pre-built functionalities and frameworks for handling game logic, physics, rendering, and other aspects of game development. Here are a few options:

    • Unity: Unity is a widely used game engine that offers a comprehensive set of tools for creating 2D and 3D games. It provides a visual editor, scripting support (C#), and a vast asset store where you can find plugins, scripts, and assets to enhance your game development process.
    • Godot: Godot is an open-source game engine that provides a user-friendly interface and supports both 2D and 3D game development. It features a built-in scripting language (GDScript) and offers a range of features such as physics simulation, animation tools, and a dedicated editor.
    • Unreal Engine: Unreal Engine is a powerful game engine commonly used for creating high-quality 3D games. It offers a visual scripting system (Blueprints) and supports programming in C++. Unreal Engine provides advanced graphics capabilities, physics simulation, and a robust editor.
    • Ren’Py: Ren’Py is an open-source visual novel engine specifically designed for creating narrative-driven games. It provides a simple scripting language (Python-based) and focuses on text-based storytelling, making it suitable for Zork-like games.

    These game engines come with various built-in features and tools that can assist in managing gameplay mechanics, state, and other aspects of game development. You can leverage their capabilities to handle player input, manage game objects, implement puzzles, and maintain the overall game state.

    Additionally, these engines often have active communities and extensive documentation, making it easier to find resources, tutorials, and examples to guide you through the development process.

    Consider exploring the features, documentation, and community support of these engines to determine which one aligns best with your requirements and preferences for developing your game.

    Ren’Py

    Ren’Py is an open-source visual novel engine that specializes in creating narrative-driven games, including interactive stories, dating sims, and visual novels. It provides a user-friendly framework for developers to create games with a focus on storytelling and character interaction.

    Key features of Ren’Py include:

    • Scripting Language: Ren’Py utilizes a Python-based scripting language that is specifically designed for visual novel development. The scripting language allows you to define scenes, dialogue, choices, and other game elements in a readable and intuitive format.
    • Visual Novel Editor: Ren’Py includes a built-in visual editor that simplifies the process of creating and organizing your game’s assets, such as backgrounds, character sprites, music, and sound effects. The visual editor provides an interface to manage and arrange these assets within your game.
    • Dialogue and Choices: Ren’Py makes it easy to create interactive dialogue sequences with branching choices. You can define character dialogue, display character sprites and backgrounds, and control the flow of the narrative based on player choices.
    • Animations and Effects: Ren’Py supports animations and effects to enhance the visual presentation of your game. You can add transitions, screen effects, character animations, and other visual elements to create a more immersive and engaging experience for players.
    • Screen Layout and Menus: Ren’Py provides flexible options for designing the layout of your game screens and menus. You can customize the appearance and positioning of text boxes, character portraits, and user interface elements to match the style and theme of your game.
    • Extensibility and Customization: Ren’Py allows you to extend its functionality by writing custom Python code. This enables you to implement complex game mechanics, create custom user interfaces, and integrate additional features tailored to your specific game requirements.

    Ren’Py offers a comprehensive set of tools and features specifically geared towards visual novel development. It provides a streamlined workflow for creating narrative-driven games and allows developers to focus on crafting compelling stories and character interactions.

    Ren’Py has a dedicated community of developers and a wealth of online resources, tutorials, and documentation available to assist you in learning and utilizing the engine effectively.

    Overall, if you are looking to create a game with a strong emphasis on storytelling and visual novel elements, Ren’Py can be an excellent choice.

    To structure the game using Ren’Py, you can follow a modular approach that separates different components of your game. Here’s a suggested structure:

    • Assets: Create a folder to store your game assets, such as character sprites, backgrounds, sound effects, and music. Organize these assets into subfolders for easy management.
    • Script Files: Ren’Py uses script files to define the flow of the game, including dialogue, choices, and scene transitions. Create a .rpy script file for each section or scene of your game. For example, you can have script files for different locations, puzzles, or character interactions.
    • Character Definitions: Define your game characters in a separate script file. Specify their names, appearances, personalities, and any other relevant information. You can also assign character sprites and voice files to be used during dialogue sequences.
    • Game Mechanics: Implement the game mechanics specific to your Zork-like game. This includes handling player input, managing the game world, tracking inventory, resolving puzzles, and updating the game state. You can create separate Python modules or script files to handle these game mechanics.
    • Dialogues and Choices: Write the dialogues and choices for your game in the script files. Use Ren’Py’s syntax to define character dialogue, display character sprites and backgrounds, and present choices to the player. Incorporate branching narratives based on the player’s choices to create multiple story paths.
    • Customization and Extensions: Leverage Ren’Py’s extensibility to customize and enhance your game. Write custom Python code to implement additional game features, create unique gameplay mechanics, or integrate external libraries or APIs.
    • Testing and Debugging: Use Ren’Py’s built-in testing and debugging tools to playtest your game, identify issues, and make necessary adjustments. Ren’Py provides a development console and error logs to assist in troubleshooting.
    • Packaging and Distribution: Once your game is complete, package it for distribution. Ren’Py allows you to create standalone executables or packages for different platforms (Windows, macOS, Linux) for easy distribution to players.

    Remember to refer to Ren’Py’s documentation, tutorials, and community resources to familiarize yourself with the engine’s features and syntax. The Ren’Py website (https://www.renpy.org/) provides comprehensive documentation, examples, and a supportive community forum to help you throughout the development process.

    By structuring your code and assets in a modular manner, you can maintain a clear organization and separation of concerns in your Zork-like game built with Ren’Py.
  • Python Tamagotchi – Class 2: Micro:bit

    Python Tamagotchi – Class 2: Micro:bit

    Code comes alive, 
    Micro:bit Tamagotchi, 
    Joy on tiny screen.

    To adapt the original Tamagotchi clone implemented in Python to the micro:bit , several changes are made to accommodate the hardware limitations and provide a simplified user experience. Here are the key changes:

    • Hardware Interaction: The original Python version used console input/output for user interaction, but in the micro:bit version, we utilized the micro:bit’s buttons (A and B) and accelerometer for user input, as well as the LED matrix for visual feedback.
    • Energy and Happiness Variables: In the Python version, energy and happiness were represented as numeric variables. In the micro:bit version, they were simplified to single integers representing the energy and happiness levels, which ranged from 0 to 10.
    • Visual Feedback: The LED matrix on the micro:bit was used to provide visual feedback on the pet’s state, such as displaying happy, sad, or sleeping faces based on the energy and happiness levels.
    • Shake to Wake: The micro:bit’s accelerometer was used to detect a shaking gesture to wake the pet up from sleep mode. This feature was not present in the original Python version.
    • Button Controls: The micro:bit’s buttons (A and B) were assigned specific functions. Button A was used for feeding the pet, and Button B was used for playing with the pet. These actions were not interactive in the original Python version.
    • Simplified Logic: The game logic was simplified in the micro:bit version. The pet’s energy and happiness levels decreased gradually over time, and there was no aging or complex health mechanics. The focus was on basic care and interaction with the pet.
    • Real-time Interactions: In the micro:bit version, the interactions with the pet were immediate, allowing the user to see the visual feedback and changes in energy and happiness levels instantly.

    To summarise, the adaptation to the micro:bit hardware involved simplifying the variables, streamlining the game logic, and utilizing the micro:bit’s buttons, accelerometer, and LED matrix for user interaction and visual feedback. The goal was to provide a more concise and engaging experience tailored to the capabilities of the micro:bit platform.

    User Guide

    Here’s a user guide for a young person on how to load the code to the micro:bit and how to play the game:

    Part 1: Loading the Code to the micro:bit

    1. Connect the micro:bit to your computer using a USB cable.
    2. Open a web browser and go to the micro:bit website: https://microbit.org/.
    3. Click on the “Let’s Code” button on the website.
    4. You will be taken to the micro:bit coding editor. Click on the “Create code” button.
    5. In the coding editor, you will see a blank canvas where you can write your code. Clear any existing code if present.
    6. Copy the Tamagotchi code provided into the coding editor. Make sure you copy the entire code correctly.
    7. Once you have pasted the code, click on the “Download” button to download the code onto your computer.
    8. Locate the downloaded file on your computer. It should have a “.hex” file extension.
    9. Drag and drop the downloaded “.hex” file onto the micro:bit drive that appears on your computer.
    10. The code will be transferred to the micro:bit. Wait for the transfer to complete.
    11. Safely disconnect the micro:bit from your computer.

    Part 2: Playing the Game

    1. Turn on the micro:bit by pressing the power button.
    2. You will see different faces displayed on the LED matrix. These faces represent the state of your Tamagotchi pet.
    3. If you see a sleep face, it means your pet is asleep and needs to be woken up. Shake the micro:bit gently to wake up your pet.
    4. Once your pet is awake, you will see different faces depending on its happiness level.
    5. To feed your pet, press the button labeled “A”. This will increase the energy and happiness of your pet.
    6. To play with your pet, press the button labeled “B”. This will increase the happiness of your pet.
    7. Your pet will gradually lose energy and happiness over time, so make sure to keep an eye on their levels.
    8. If the energy level reaches 0, your pet will fall asleep again. Shake the micro:bit to wake them up.
    9. Take care of your pet by feeding and playing with them to keep them happy and energized.
    10. Enjoy playing with your Tamagotchi pet and see how well you can take care of them!

    Remember to take breaks and have fun while playing with your micro:bit Tamagotchi.

    The Code

    # Tamagotchi Micro:bit Code
    # Import necessary modules from the microbit library
    from microbit import *
    # Define constants for LED matrix icons
    happy_face = Image("00000:"
                       "00000:"
                       "09090:"
                       "50005:"
                       "05550")
    sad_face = Image("00000:"
                     "00000:"
                     "09090:"
                     "05550:"
                     "50005")
    sleep_face = Image("00000:"
                       "00000:"
                       "05050:"
                       "00000:"
                       "55555")
    # Initial state variables
    energy = 10
    happiness = 5
    asleep = True
    # Function to check if the micro:bit was shaken
    def was_shaken():
        return accelerometer.was_gesture("shake")
    # Main loop
    while True:
        # Check if the micro:bit was shaken to wake up the pet
        if asleep and was_shaken():
            energy = min(10, energy + 2)
            asleep = False
        # Update LED matrix display based on pet state
        if asleep:
            display.show(sleep_face)
        elif happiness > 3:
            display.show(happy_face)
        else:
            display.show(sad_face)
        # Display energy level using the LED matrix (top row)
        energy_level = min(int(energy / 2), 5)
        for x in range(5):
            if x < energy_level:
                display.set_pixel(x, 0, 5)
            else:
                display.set_pixel(x, 0, 0)
        # Button A (Feed)
        if button_a.was_pressed():
            if not asleep:
                energy = min(10, energy + 2)
                happiness = min(5, happiness + 1)
        # Button B (Play)
        if button_b.was_pressed():
            if not asleep:
                happiness = min(5, happiness + 2)
        # Pet loses energy and happiness over time
        if not asleep:
            energy -= 0.1
            happiness -= 0.1
        # Check if the pet should fall asleep
        if energy <= 0:
            asleep = True
        # Pause for a short time to prevent rapid button presses
        sleep(100)


    This code implements a simple Tamagotchi-like game on the micro:bit device.

    Here’s a summary of the code’s functionality:

    • The code initializes the state variables for energy, happiness, and the asleep status of the pet.
    • The was_shaken() function checks if the micro:bit was shaken by using the accelerometer’s “shake” gesture.
    • Inside the main loop, it checks if the pet is asleep and if the micro:bit was shaken to wake it up. If so, it increases the energy level and sets the asleep status to False.
    • It updates the LED matrix display based on the pet’s state, showing the sleep face if asleep, happy face if happiness is high, and sad face if happiness is low.
    • The energy level is represented by a decreasing indicator on the top row of the LED matrix, where the brightness decreases from left to right based on the energy level.
    • Button A is used for feeding the pet, increasing energy and happiness if the pet is not asleep.
    • Button B is used for playing with the pet, increasing happiness if the pet is not asleep.
    • The pet gradually loses energy and happiness over time.
    • If the energy level reaches 0, the pet falls asleep.
    • A short delay is included to prevent rapid button presses.

    Tips

    Here are some tips to keep your micro:bit Tamagotchi pet alive and well:

    1. Feed Regularly: Make sure to press the “A” button to feed your pet regularly. This will increase their energy level and keep them active.
    2. Play Often: Press the “B” button to play with your pet frequently. Playing will boost their happiness and overall well-being.
    3. Monitor Energy Level: Keep an eye on the energy level displayed on the LED matrix. If it starts to decrease, it’s a sign that your pet needs to be fed or played with to replenish their energy.
    4. Avoid Neglect: If you neglect your pet for too long, their energy level will reach zero, and they will fall asleep. Shake the micro:bit gently to wake them up and make sure to attend to their needs promptly.
    5. Balance Feeding and Playing: Find a balance between feeding and playing with your pet. Providing them with both food and entertainment will contribute to their overall health and happiness.
    6. Check Happiness Level: The happiness level of your pet is crucial for their well-being. If you notice the happiness level dropping, spend some extra time playing with them to boost their spirits.
    7. Shake to Wake: If your pet falls asleep, gently shake the micro:bit to wake them up. Remember, they need your attention and care to stay active and happy.
    8. Take Breaks: While it’s essential to take care of your virtual pet, don’t forget to take breaks yourself. Set aside specific playtime intervals throughout the day to interact with your pet, and give yourself some time for other activities.
    9. Experiment and Explore: Don’t be afraid to try different actions and see how they affect your pet. Observe their responses and learn what makes them the happiest.
    10. Have Fun: The most important tip is to have fun and enjoy the experience of taking care of your micro:bit Tamagotchi pet. It’s a game meant to bring joy and entertainment, so make the most of it and create memorable moments with your virtual companion!

    Remember, the key to keeping your micro:bit Tamagotchi alive is to provide them with love, attention, and regular care. Enjoy the journey of nurturing your virtual pet and see how well you can keep them happy and thriving.

    So Sad:

    Notes on re-coding for the micro:bit

    If you have a micro:bit and want to port the code to it, you’ll need to consider the differences in hardware and programming environment. The micro:bit uses a different programming language and has a different set of capabilities compared to a mobile app. Here’s an overview of the steps you can follow to port the code:

    1. Understand the micro:bit Platform: Familiarize yourself with the micro:bit hardware and its features. The micro:bit has an LED matrix, buttons, sensors, and other built-in components that you can leverage to create the user experience.
    2. Choose a Programming Language: The micro:bit supports multiple programming languages. The most popular ones are Python, JavaScript (MakeCode), and MicroPython. Select the language you’re most comfortable with or interested in learning.
    3. Adapt the Code Logic: Review your existing code and identify the parts that are specific to the mobile app platform. Rewrite or modify those sections to work with the micro:bit’s hardware and programming language. Consider how you’ll represent the visual state, interact with the LED matrix, and handle user input using buttons or other sensors.
    4. Implement Micro:bit-specific Functionality: Utilize micro:bit libraries and APIs to access the hardware features. For example, you can use the LED matrix functions to display the state and status, use button events for user interactions, and leverage the sensors for various game mechanics.
    5. Test and Iterate: Test the ported code on the micro:bit to ensure it functions as expected. Make adjustments as necessary and iterate on the code until you achieve the desired behavior.
    6. Optimize Performance: The micro:bit has limited resources, so consider optimizing your code for memory usage and performance. Minimize unnecessary computations and reduce memory footprint where possible.
    7. Document and Share: Document your code, including any modifications made for the micro:bit platform. Share your work with others who may be interested in using or learning from it. Consider contributing to micro:bit community resources or forums to help others with similar projects.

    Remember to refer to the micro:bit documentation and resources specific to your chosen programming language for detailed instructions and examples.

    Additionally, you may find micro:bit project tutorials and code samples online that can provide insights into leveraging its hardware capabilities effectively.

    micro:bit Architecture

    From an architecture perspective, the micro:bit is a small, programmable computer designed to introduce and educate students and beginners to the world of electronics, coding, and physical computing. It provides a simplified platform for creating interactive projects and learning about computational thinking.

    The architecture of the micro:bit consists of several key components that work together to enable its functionality:

    • Processor: At the heart of the micro:bit is a microcontroller unit (MCU) based on the ARM Cortex-M0 architecture. This low-power, 32-bit processor is responsible for executing the code and controlling the behavior of the micro:bit.
    • Input/Output (I/O) Pins: The micro:bit features a set of I/O pins, both digital and analog, which allow users to connect various external components such as sensors, LEDs, buttons, and motors. These pins provide the means for input and output interactions between the micro:bit and the physical world.
    • LED Matrix: One of the most distinctive features of the micro:bit is its 5×5 LED matrix. This matrix consists of 25 individually addressable LEDs, allowing users to display simple graphics, text, and animations. It serves as a visual output for the micro:bit’s programs.
    • Sensors: The micro:bit includes several built-in sensors that enable it to gather input from the environment. These sensors typically include an accelerometer, which detects motion and orientation changes, and a magnetometer, which can sense the presence of magnetic fields. Some variants of the micro:bit may also feature additional sensors like a temperature sensor or a light sensor.
    • Wireless Connectivity: The micro:bit is equipped with a radio module that supports Bluetooth Low Energy (BLE) communication. This wireless capability enables communication between multiple micro:bits or with other devices such as smartphones, tablets, or computers. It allows for the creation of interactive projects and the exchange of data between different devices.
    • Power and Programming: The micro:bit can be powered by a USB connection or an external battery pack. It can be programmed using various programming languages and development environments, including the block-based programming language MakeCode and the text-based programming language Python. The code is typically written on a computer and transferred to the micro:bit via USB or wirelessly.

    Overall, the architecture of the micro:bit combines a compact form factor, a simple user interface, and a range of built-in components to provide an accessible and versatile platform for learning and experimentation in the fields of coding, electronics, and physical computing.

    The micro:bit is a fantastic educational tool that provides an excellent platform for learning electronics, coding, and physical computing.

    Here’s a review of the micro:bit:

    Pros:

    • Educational Value: The micro:bit is specifically designed for educational purposes, making it an ideal tool for students and beginners. It introduces programming concepts in a visual and interactive manner, promoting computational thinking and problem-solving skills.
    • Ease of Use: The micro:bit is user-friendly, with a straightforward interface and programming environments like MakeCode and Python. Its block-based programming language allows users to easily create programs by dragging and dropping code blocks, while the text-based programming option caters to those looking for more advanced coding.
    • Versatility: Despite its small size, the micro:bit offers a surprising range of capabilities. It has built-in sensors like an accelerometer and magnetometer, allowing for projects involving motion detection, orientation sensing, and more. The LED matrix provides visual output, and the I/O pins enable connections with external components.
    • Connectivity: The micro:bit’s Bluetooth Low Energy (BLE) capability enables wireless communication with other devices, fostering collaboration and enabling interactions between multiple micro:bits or with smartphones, tablets, or computers. This feature enhances the learning experience and expands project possibilities.
    • Open Source: The micro:bit is an open-source platform, which means the hardware and software designs are available to the public. This openness promotes creativity, innovation, and community collaboration, allowing users to customize and extend the functionality of the micro:bit.

    Cons:

    • Limited Resources: Due to its compact size and educational focus, the micro:bit has limited resources compared to more powerful development boards or microcontrollers. Its memory and processing power may restrict the complexity of projects that can be implemented. However, this limitation is necessary to maintain affordability and simplicity.
    • Lack of Advanced Features: While the micro:bit is an excellent tool for beginners, it may not be suitable for advanced users or those seeking to tackle more complex projects. Its simplicity and focus on education mean that it may not offer the same level of sophistication and features as other development platforms.
    • Fragility: The micro:bit, being a small and lightweight device, may be prone to physical damage if not handled with care. The exposed components, such as the LED matrix, can be vulnerable to impact or rough handling. However, using a protective case or cover can help mitigate this issue.

    Overall, the micro:bit is an exceptional tool for introducing students and beginners to the world of electronics and coding.

    Its educational focus, ease of use, versatility, and connectivity make it an excellent choice for learning and exploring the fundamentals of programming and physical computing.

  • Code: Tic-Tac-Toe

    Code: Tic-Tac-Toe

    Overview

    Tic-Tac-Toe is a game that has gained cultural significance and popularity worldwide. While it may not have deep cultural or historical roots like some traditional games, its simplicity and accessibility have contributed to its widespread recognition and appeal.

    Here are a few aspects of Tic-Tac-Toe’s cultural significance:

    1. Universal Understanding: Tic-Tac-Toe is a game that is easily understood across cultures and age groups. The rules are simple, and the gameplay is straightforward, making it accessible to people of all backgrounds. It is often one of the first strategy games children learn to play, helping develop their logical thinking and decision-making skills.
    2. Educational Tool: Tic-Tac-Toe is frequently used as an educational tool in schools and educational settings. It helps teach concepts such as strategy, critical thinking, pattern recognition, and spatial reasoning. The game’s simplicity makes it an effective learning tool for introducing and reinforcing these concepts.
    3. Reinforcement of Social Skills: Playing Tic-Tac-Toe can encourage social interaction, sportsmanship, and fair play. It provides an opportunity for individuals to engage in friendly competition, take turns, make decisions, and learn to accept both victory and defeat gracefully. These social skills are valuable in various contexts, including personal relationships, teamwork, and community interactions.
    4. Strategic Thinking and Problem Solving: Tic-Tac-Toe is a game that can be played casually or with a more strategic approach. Advanced players can explore different strategies and try to anticipate their opponent’s moves to gain an advantage. The game challenges players to think ahead, analyze patterns, and adapt their strategies to achieve a winning outcome. This aspect of the game appeals to those who enjoy strategic thinking and problem-solving activities.
    5. Cultural References and Variations: Tic-Tac-Toe has been referenced in popular culture, including movies, literature, and art. Its iconic grid and X-O symbols are recognizable and often used to represent the concept of competition, decision-making, or binary choices. The game also has variations and adaptations in different cultures, showcasing how it has been embraced and modified to suit local preferences.

    While Tic-Tac-Toe may not have deep cultural roots, its simplicity, educational value, and universal appeal have contributed to its cultural significance. It continues to be enjoyed and appreciated as a game that brings people together, encourages strategic thinking, and provides a platform for social interaction and learning.

    Game Description

    Tic-Tac-Toe is a classic two-player game played on a 3×3 grid. The goal of the game is to get three of your own marks (either “X” or “O”) in a horizontal, vertical, or diagonal line.

    Here’s a step-by-step explanation of how the game is played:

    The game starts with an empty 3×3 grid.

    Player 1, typically represented as “X,” takes the first turn. Player 2, typically represented as “O,” takes the second turn.

    Players take turns placing their marks in empty cells of the grid. Player 1 starts by choosing an empty cell and placing an “X” in it.

    • The turn alternates between the players until one of the following conditions is met:
    • A player has three of their marks in a horizontal, vertical, or diagonal line, resulting in a win.
    • The entire grid is filled with marks, resulting in a draw.
    • If a player gets three of their marks in a line, they win the game. The game ends, and the winning player is declared.
    • If the grid is completely filled with marks, and no player has achieved a winning combination, the game is declared a draw.

    Tic-Tac-Toe is a game of strategy, and skilled players can often force a draw by making optimal moves. It’s a popular choice for beginners to learn basic game-playing concepts and for AI algorithm development due to its simplicity and well-defined rules.

    Two Player Code

    Here’s a very simple example of a tic-tac-toe game implemented in Python:

    def print_board(board):
        for row in board:
            print("|".join(row))
            print("-" * 5)
    def check_win(board, player):
        for i in range(3):
            if all(board[i][j] == player for j in range(3)):
                return True
            if all(board[j][i] == player for j in range(3)):
                return True
        if all(board[i][i] == player for i in range(3)):
            return True
        if all(board[i][2 - i] == player for i in range(3)):
            return True
        return False
    def play_game():
        board = [[" " for _ in range(3)] for _ in range(3)]
        players = ["X", "O"]
        current_player = 0
        game_over = False
        while not game_over:
            print_board(board)
            player = players[current_player]
            print("Player", player, "turn")
            row = int(input("Enter the row (0-2): "))
            col = int(input("Enter the column (0-2): "))
            if board[row][col] != " ":
                print("Invalid move. Try again.")
                continue
            board[row][col] = player
            if check_win(board, player):
                print_board(board)
                print("Player", player, "wins!")
                game_over = True
            elif all(board[i][j] != " " for i in range(3) for j in range(3)):
                print_board(board)
                print("It's a tie!")
                game_over = True
            current_player = (current_player + 1) % 2
    play_game()
    

    To play the game, run the script.

    Each player takes turns entering the row and column numbers to make a move on the tic-tac-toe board.

    The game will display the current state of the board after each move.

    If a player wins or the game ends in a tie, the result will be displayed.

    Single Player Code

    An updated version of the tic-tac-toe game where you can play against an simple ‘AI’ opponent:

    import random
    def print_board(board):
        for row in board:
            print("|".join(row))
            print("-" * 5)
    def check_win(board, player):
        for i in range(3):
            if all(board[i][j] == player for j in range(3)):
                return True
            if all(board[j][i] == player for j in range(3)):
                return True
        if all(board[i][i] == player for i in range(3)):
            return True
        if all(board[i][2 - i] == player for i in range(3)):
            return True
        return False
    def get_empty_cells(board):
        empty_cells = []
        for i in range(3):
            for j in range(3):
                if board[i][j] == " ":
                    empty_cells.append((i, j))
        return empty_cells
    def make_random_move(board):
        empty_cells = get_empty_cells(board)
        return random.choice(empty_cells)
    def play_game():
        board = [[" " for _ in range(3)] for _ in range(3)]
        players = ["X", "O"]
        current_player = 0
        game_over = False
        while not game_over:
            print_board(board)
            player = players[current_player]
            if player == "X":
                print("Player", player, "turn")
                row = int(input("Enter the row (0-2): "))
                col = int(input("Enter the column (0-2): "))
                if board[row][col] != " ":
                    print("Invalid move. Try again.")
                    continue
            else:
                print("AI's turn")
                row, col = make_random_move(board)
            board[row][col] = player
            if check_win(board, player):
                print_board(board)
                if player == "X":
                    print("Player", player, "wins!")
                else:
                    print("AI wins!")
                game_over = True
            elif all(board[i][j] != " " for i in range(3) for j in range(3)):
                print_board(board)
                print("It's a tie!")
                game_over = True
            current_player = (current_player + 1) % 2
    play_game()
    

    In this version, the player (“X”) makes their move by entering the row and column numbers as before’

    The AI opponent (“O”) selects a random empty cell on the board as its move.

    The game continues until a player wins or the game ends in a tie.

    The board is displayed after each move, and the result is printed at the end.

    Updating he Code for am AI opponent uses a more ‘aggressive’ strategy to play against the player:

    import random
    def print_board(board):
        for row in board:
            print("|".join(row))
            print("-" * 5)
    def check_win(board, player):
        for i in range(3):
            if all(board[i][j] == player for j in range(3)):
                return True
            if all(board[j][i] == player for j in range(3)):
                return True
        if all(board[i][i] == player for i in range(3)):
            return True
        if all(board[i][2 - i] == player for i in range(3)):
            return True
        return False
    def get_empty_cells(board):
        empty_cells = []
        for i in range(3):
            for j in range(3):
                if board[i][j] == " ":
                    empty_cells.append((i, j))
        return empty_cells
    def make_ai_move(board, player):
        # Check for possible wins
        for row in range(3):
            for col in range(3):
                if board[row][col] == " ":
                    board[row][col] = player
                    if check_win(board, player):
                        return row, col
                    else:
                        board[row][col] = " "
        # Check for possible blocking moves
        opponent = "O" if player == "X" else "X"
        for row in range(3):
            for col in range(3):
                if board[row][col] == " ":
                    board[row][col] = opponent
                    if check_win(board, opponent):
                        return row, col
                    else:
                        board[row][col] = " "
        # Make a random move
        empty_cells = get_empty_cells(board)
        return random.choice(empty_cells)
    def play_game():
        board = [[" " for _ in range(3)] for _ in range(3)]
        players = ["X", "O"]
        current_player = 0
        game_over = False
        while not game_over:
            print_board(board)
            player = players[current_player]
            if player == "X":
                print("Player", player, "turn")
                row = int(input("Enter the row (0-2): "))
                col = int(input("Enter the column (0-2): "))
                if board[row][col] != " ":
                    print("Invalid move. Try again.")
                    continue
            else:
                print("AI's turn")
                row, col = make_ai_move(board, player)
            board[row][col] = player
            if check_win(board, player):
                print_board(board)
                if player == "X":
                    print("Player", player, "wins!")
                else:
                    print("AI wins!")
                game_over = True
            elif all(board[i][j] != " " for i in range(3) for j in range(3)):
                print_board(board)
                print("It's a tie!")
                game_over = True
            current_player = (current_player + 1) % 2
    play_game()
    

    In this version, the AI opponent tries to make winning moves and block the player from winning.

    • It checks for possible wins by placing its own symbol in each empty cell and checking if it wins.
    • Similarly, it checks for blocking moves by placing the player’s symbol in each empty cell and checking if the player is close to winning.
    • If there are no winning or blocking moves available, the AI makes a random move like before.
    • It’s not possible for the AI to always win in tic-tac-toe if both players play optimally and follow the rules of the game.

    Tic-tac-toe is a game with a finite number of possible positions, and it has been proven that if both players play perfectly, the game will always end in a draw.

    However, the AI can be programmed to play a perfect game, ensuring that it never loses and the game ends in a draw.

    In such a case, the AI will win whenever the opponent makes a mistake or deviates from the optimal strategy.

    Here’s an example of an AI that plays a perfect game:

    import random
    def print_board(board):
        for row in board:
            print("|".join(row))
            print("-" * 5)
    def check_win(board, player):
        for i in range(3):
            if all(board[i][j] == player for j in range(3)):
                return True
            if all(board[j][i] == player for j in range(3)):
                return True
        if all(board[i][i] == player for i in range(3)):
            return True
        if all(board[i][2 - i] == player for i in range(3)):
            return True
        return False
    def get_empty_cells(board):
        empty_cells = []
        for i in range(3):
            for j in range(3):
                if board[i][j] == " ":
                    empty_cells.append((i, j))
        return empty_cells
    def minimax(board, depth, maximizing_player):
        scores = {
            "X": 1,
            "O": -1,
            "draw": 0
        }
        if check_win(board, "X"):
            return scores["X"]
        elif check_win(board, "O"):
            return scores["O"]
        elif len(get_empty_cells(board)) == 0:
            return scores["draw"]
        if maximizing_player:
            max_score = float("-inf")
            for row, col in get_empty_cells(board):
                board[row][col] = "X"
                score = minimax(board, depth + 1, False)
                board[row][col] = " "
                max_score = max(max_score, score)
            return max_score
        else:
            min_score = float("inf")
            for row, col in get_empty_cells(board):
                board[row][col] = "O"
                score = minimax(board, depth + 1, True)
                board[row][col] = " "
                min_score = min(min_score, score)
            return min_score
    def make_ai_move(board):
        best_score = float("-inf")
        best_move = None
        for row, col in get_empty_cells(board):
            board[row][col] = "X"
            score = minimax(board, 0, False)
            board[row][col] = " "
            if score &gt; best_score:
                best_score = score
                best_move = (row, col)
        return best_move
    def play_game():
        board = [[" " for _ in range(3)] for _ in range(3)]
        players = ["X", "O"]
        current_player = 0
        game_over = False
        while not game_over:
            print_board(board)
            player = players[current_player]
            if player == "X":
                print("Player", player, "turn")
                row = int(input("Enter the row (0-2): "))
                col = int(input("Enter the column (0-2): "))
                if board[row][col] != " ":
                    print("Invalid move. Try again.")
                    continue
            else:
                print("AI's turn")
            row, col = make_ai_move(board, player)
            board[row][col] = player
            if check_win(board, player):
                print_board(board)
                if player == "X":
                    print("Player", player, "wins!")
                else:
                    print("AI wins!")
                game_over = True
            elif all(board[i][j] != " " for i in range(3) for j in range(3)):
                print_board(board)
                print("It's a tie!")
                game_over = True
            current_player = (current_player + 1) % 2
    play_game()
    

    In theory the player can never ‘win’, only draw or loose. The best scenario is sustaining a series of draw until human error result in a AI win.

    No Player Code

    In this example two AI opponents play a series of games against each other, and the final scores are displayed at the end:

    import random
    def print_board(board):
        for row in board:
            print("|".join(row))
            print("-" * 5)
    def check_win(board, player):
        for i in range(3):
            if all(board[i][j] == player for j in range(3)):
                return True
            if all(board[j][i] == player for j in range(3)):
                return True
        if all(board[i][i] == player for i in range(3)):
            return True
        if all(board[i][2 - i] == player for i in range(3)):
            return True
        return False
    def get_empty_cells(board):
        empty_cells = []
        for i in range(3):
            for j in range(3):
                if board[i][j] == " ":
                    empty_cells.append((i, j))
        return empty_cells
    def minimax(board, depth, maximizing_player):
        scores = {
            "X": 1,
            "O": -1,
            "draw": 0
        }
        if check_win(board, "X"):
            return scores["X"]
        elif check_win(board, "O"):
            return scores["O"]
        elif len(get_empty_cells(board)) == 0:
            return scores["draw"]
        if maximizing_player:
            max_score = float("-inf")
            for row, col in get_empty_cells(board):
                board[row][col] = "X"
                score = minimax(board, depth + 1, False)
                board[row][col] = " "
                max_score = max(max_score, score)
            return max_score
        else:
            min_score = float("inf")
            for row, col in get_empty_cells(board):
                board[row][col] = "O"
                score = minimax(board, depth + 1, True)
                board[row][col] = " "
                min_score = min(min_score, score)
            return min_score
    def make_ai_move(board):
        best_score = float("-inf")
        best_move = None
        for row, col in get_empty_cells(board):
            board[row][col] = "X"
            score = minimax(board, 0, False)
            board[row][col] = " "
            if score &gt; best_score:
                best_score = score
                best_move = (row, col)
        return best_move
    def play_game():
        board = [[" " for _ in range(3)] for _ in range(3)]
        players = ["X", "O"]
        current_player = 0
        game_over = False
        while not game_over:
            player = players[current_player]
            if player == "X":
                row, col = make_ai_move(board)
            else:
                row, col = make_ai_move(board)
            board[row][col] = player
            if check_win(board, player):
                game_over = True
            elif all(board[i][j] != " " for i in range(3) for j in range(3)):
                game_over = True
            current_player = (current_player + 1) % 2
        print_board(board)
        if check_win(board, "X"):
            print("AI X wins!")
            return "X"
        elif check_win(board, "O"):
            print("AI O wins!")
            return "O"
        else:
            print("It's a draw!")
            return "draw"
    def play_series(num_games):
        scores = {
    def play_series(num_games):
        scores = {
            "X": 0,
            "O": 0,
            "draw": 0
        }
        for i in range(num_games):
            print(f"Game {i+1}:")
            result = play_game()
            scores[result] += 1
            print("-" * 20)
        print("Series Results:")
        print(f"AI X wins: {scores['X']}")
        print(f"AI O wins: {scores['O']}")
        print(f"Draws: {scores['draw']}")
    play_series(10)  # Play a series of 10 games
    

    In this code, the play_series function takes the number of games as an input parameter and plays the specified number of games between the two AI opponents.

    After each game, it updates the scores based on the result (whether “X” wins, “O” wins, or it’s a draw). At the end of the series, it displays the final scores for each AI and the number of draws.

    You can adjust the value passed to play_series to change the number of games played in the series.

    Improving the AI Player

    There are several algorithms that can be used within the tic-tac-toe game or create AI opponents.

    Here are some commonly used algorithms:

    • Minimax: Minimax is a recursive algorithm that is commonly used in two-player games. It explores all possible moves and assigns a score to each move based on the outcome of the game. The AI player chooses the move with the highest score, assuming the opponent plays optimally.
    • Alpha-Beta Pruning: Alpha-Beta pruning is an optimization technique used with the Minimax algorithm. It reduces the number of nodes explored by eliminating branches that are guaranteed to be worse than previously explored branches.
    • Monte Carlo Tree Search (MCTS): MCTS is a simulation-based search algorithm that is often used in games with large branching factors and uncertain outcomes. It builds a search tree by sampling random game simulations and uses statistics to guide the selection of moves.
    • Rule-based Systems: Rule-based systems define a set of rules or heuristics that guide the AI’s decision-making process. These rules are based on patterns, strategies, or expert knowledge of the game. The AI evaluates the current game state and selects a move based on the applicable rules.
    • Neural Networks: Neural networks can be trained to play tic-tac-toe by providing them with a large number of game states and corresponding optimal moves. The network learns to predict the best move for a given game state based on the training data.
    • Reinforcement Learning: Reinforcement learning algorithms can be used to train an AI agent to play tic-tac-toe through trial and error. The agent interacts with the game environment, receives feedback in the form of rewards or penalties based on its moves, and learns to improve its strategy over time.

    Your choice of algorithm depends on various factors such as the desired level of difficulty, the complexity of the game, and the available resources for implementation.

    Here’s an example of code that allows the player to select an AI algorithm to play against in a tic-tac-toe game:

    import random
    # Function to print the tic-tac-toe board
    def print_board(board):
        for row in board:
            print("|".join(row))
            print("-" * 5)
    # Function to check if a player has won
    def check_win(board, player):
        for i in range(3):
            if all(board[i][j] == player for j in range(3)):
                return True
            if all(board[j][i] == player for j in range(3)):
                return True
        if all(board[i][i] == player for i in range(3)):
            return True
        if all(board[i][2 - i] == player for i in range(3)):
            return True
        return False
    # Function to get empty cells on the board
    def get_empty_cells(board):
        empty_cells = []
        for i in range(3):
            for j in range(3):
                if board[i][j] == " ":
                    empty_cells.append((i, j))
        return empty_cells
    # Function for the random AI algorithm
    def random_ai(board):
        empty_cells = get_empty_cells(board)
        return random.choice(empty_cells)
    # Function for the minimax AI algorithm
    def minimax(board, depth, maximizing_player):
        scores = {
            "X": 1,
            "O": -1,
            "draw": 0
        }
        if check_win(board, "X"):
            return scores["X"]
        elif check_win(board, "O"):
            return scores["O"]
        elif len(get_empty_cells(board)) == 0:
            return scores["draw"]
        if maximizing_player:
            max_score = float("-inf")
            for row, col in get_empty_cells(board):
                board[row][col] = "X"
                score = minimax(board, depth + 1, False)
                board[row][col] = " "
                max_score = max(max_score, score)
            return max_score
        else:
            min_score = float("inf")
            for row, col in get_empty_cells(board):
                board[row][col] = "O"
                score = minimax(board, depth + 1, True)
                board[row][col] = " "
                min_score = min(min_score, score)
            return min_score
    # Function for the player's move
    def player_move(board):
        valid_move = False
        while not valid_move:
            row = int(input("Enter the row (0-2): "))
            col = int(input("Enter the column (0-2): "))
            if board[row][col] != " ":
                print("Invalid move. Try again.")
            else:
                valid_move = True
        return row, col
    # Function to play the game
    def play_game(player_algorithm):
        board = [[" " for _ in range(3)] for _ in range(3)]
        players = ["X", "O"]
        current_player = 0
        game_over = False
        while not game_over:
            print_board(board)
            player = players[current_player]
            if player == "X":
                print("Player X's turn")
                row, col = player_move(board)
            else:
                print("AI's turn")
                if player_algorithm == "random":
                    row, col = random_ai(board)
                elif player_algorithm == "minimax":
                    row, col = minimax_ai(board)
            board[row][col] = player
            if check_win(board, player):
                print
    if check_win(board, player):
                game_over = True
    elif all(board[i][j] != " " for i in range(3) for j in range(3)):
                game_over = True
            current_player = (current_player + 1) % 2
        print_board(board)
        if check_win(board, "X"):
            print("AI X wins!")
            return "X"
        elif check_win(board, "O"):
            print("AI O wins!")
            return "O"
        else:
            print("It's a draw!")
            return "draw"
           current_player = (current_player + 1) % 2
    

    Here’s an example of code that includes the minimax and random algorithms for the AI player, as well as the option for the player to select the algorithm:

    import random
    # Function to print the tic-tac-toe board
    def print_board(board):
        for row in board:
            print("|".join(row))
            print("-" * 5)
    # Function to check if a player has won
    def check_win(board, player):
        for i in range(3):
            if all(board[i][j] == player for j in range(3)):
                return True
            if all(board[j][i] == player for j in range(3)):
                return True
        if all(board[i][i] == player for i in range(3)):
            return True
        if all(board[i][2 - i] == player for i in range(3)):
            return True
        return False
    # Function to get empty cells on the board
    def get_empty_cells(board):
        empty_cells = []
        for i in range(3):
            for j in range(3):
                if board[i][j] == " ":
                    empty_cells.append((i, j))
        return empty_cells
    # Function for the random AI algorithm
    def random_ai(board):
        empty_cells = get_empty_cells(board)
        return random.choice(empty_cells)
    # Function for the minimax AI algorithm
    def minimax_ai(board):
        best_score = float("-inf")
        best_move = None
        for row, col in get_empty_cells(board):
            board[row][col] = "O"
            score = minimax(board, 0, False)
            board[row][col] = " "
            if score &gt; best_score:
                best_score = score
                best_move = (row, col)
        return best_move
    # Function for the player's move
    def player_move(board):
        valid_move = False
        while not valid_move:
            row = int(input("Enter the row (0-2): "))
            col = int(input("Enter the column (0-2): "))
            if board[row][col] != " ":
                print("Invalid move. Try again.")
            else:
                valid_move = True
        return row, col
    # Function to play the game
    def play_game(player_algorithm):
        board = [[" " for _ in range(3)] for _ in range(3)]
        players = ["X", "O"]
        current_player = 0
        game_over = False
        while not game_over:
            print_board(board)
            player = players[current_player]
            if player == "X":
                print("Player X's turn")
                row, col = player_move(board)
            else:
                print("AI's turn")
                if player_algorithm == "random":
                    row, col = random_ai(board)
                elif player_algorithm == "minimax":
                    row, col = minimax_ai(board)
            board[row][col] = player
            if check_win(board, player):
                print(f"{player} wins!")
                game_over = True
            elif all(board[i][j] != " " for i in range(3) for j in range(3)):
                print("It's a draw!")
                game_over = True
            current_player = (current_player + 1) % 2
        print_board(board)
    # Function to start the game
    def start_game():
        algorithms = ["random", "minimax"]
        player_algorithm = None
        while player_algorithm not in algorithms:
            print("Select an AI algorithm:")
            print("1. Random AI")
            print("2. Minimax AI")
            option
    

    Rule-based AI

    Here’s an example of the code with a third algorithm, that uses a rule based approach.

    # Function for the rule-based AI algorithm
    def rule_based_ai(board):
        # Add your rule-based logic here to determine the best move
        empty_cells = get_empty_cells(board)
        return random.choice(empty_cells)
    # Function to start the game
    def start_game():
        algorithms = ["random", "minimax", "rule-based"]
        player_algorithm = None
        while player_algorithm not in algorithms:
            print("Select an AI algorithm:")
            print("1. Random AI")
            print("2. Minimax AI")
            print("3. Rule-based AI")
            option = input("Enter the option number: ")
            if option == "1":
                player_algorithm = "random"
            elif option == "2":
                player_algorithm = "minimax"
            elif option == "3":
                player_algorithm = "rule-based"
            else:
                print("Invalid option. Try again.")
        play_game(player_algorithm)
    # Function to play the game
    def play_game(player_algorithm):
        # Remaining code remains the same :)
    

    In this updated code, we added a new algorithm called “Rule-based AI.”
    You can define your own rule-based logic in the rule_based_ai function to determine the best move based on the current game state.
    The player can select this algorithm by entering “3” as the option.

    Please note that the implementation of the rule-based AI is left empty in this example, and you will need to add your own rules or heuristics to make the AI make intelligent moves.

    Here’s an example of a rule-based AI heuristic implementation for the rule_based_ai function:

    # Function for the rule-based AI algorithm
    def rule_based_ai(board):
        # Check for winning moves
        for row in range(3):
            for col in range(3):
                if board[row][col] == " ":
                    board[row][col] = "O"
                    if check_win(board, "O"):
                        return row, col
                    board[row][col] = " "
        # Check for blocking moves
        for row in range(3):
            for col in range(3):
                if board[row][col] == " ":
                    board[row][col] = "X"
                    if check_win(board, "X"):
                        return row, col
                    board[row][col] = " "
        # Play in the center if available
        if board[1][1] == " ":
            return 1, 1
        # Play in a corner if available
        corners = [(0, 0), (0, 2), (2, 0), (2, 2)]
        random.shuffle(corners)
        for corner in corners:
            if board[corner[0]][corner[1]] == " ":
                return corner
        # Play in any available cell
        empty_cells = get_empty_cells(board)
        return random.choice(empty_cells)
    

    In this example,we have implemented a simple rule-based AI using heuristics to determine the best move for the AI player.

    The AI follows the following rules:

    • Check for winning moves: It checks if making a move in any empty cell would result in an immediate win for the AI. If such a move exists, it plays that move.
    • Check for blocking moves: It checks if the opponent (human player) has any winning moves, and if so, it plays a move to block the opponent from winning.
    • Play in the center: If the center cell is empty, the AI plays its move there.
    • Play in a corner: If no winning or blocking moves are available and the center cell is already taken, the AI plays its move in one of the available corners.
    • Play in any available cell: If no winning, blocking, center, or corner moves are available, the AI randomly selects any empty cell to play its move.

    Please note that this is a simple rule-based heuristic implementation, and you can modify or expand it based on your desired game strategy or complexity.

    Monte Carlo Tree Search

    Here’s an example of a Monte Carlo Tree Search (MCTS) implementation for the tic-tac-toe game:

    import random
    import math
    # Define the Node class for the Monte Carlo Tree
    class Node:
        def __init__(self, state, parent=None):
            self.state = state
            self.parent = parent
            self.children = []
            self.visits = 0
            self.wins = 0
        def add_child(self, child_state):
            child_node = Node(child_state, parent=self)
            self.children.append(child_node)
    # Function to print the tic-tac-toe board
    def print_board(board):
        for row in board:
            print("|".join(row))
            print("-" * 5)
    # Function to check if a player has won
    def check_win(board, player):
        for i in range(3):
            if all(board[i][j] == player for j in range(3)):
                return True
            if all(board[j][i] == player for j in range(3)):
                return True
        if all(board[i][i] == player for i in range(3)):
            return True
        if all(board[i][2 - i] == player for i in range(3)):
            return True
        return False
    # Function to get empty cells on the board
    def get_empty_cells(board):
        empty_cells = []
        for i in range(3):
            for j in range(3):
                if board[i][j] == " ":
                    empty_cells.append((i, j))
        return empty_cells
    # Function to simulate a random game from the given state
    def simulate_random_game(state):
        board = state.copy()
        players = ["X", "O"]
        current_player = 0
        while True:
            empty_cells = get_empty_cells(board)
            if not empty_cells or check_win(board, players[current_player]):
                break
            row, col = random.choice(empty_cells)
            board[row][col] = players[current_player]
            current_player = (current_player + 1) % 2
        return board
    # Function to perform the Monte Carlo Tree Search
    def mcts(board, simulations):
        root = Node(board)
        current_player = "O"
        for _ in range(simulations):
            node = root
            # Selection: Find the node with the highest UCT value until a leaf node is reached
            while node.children:
                node = max(node.children, key=lambda n: n.wins / n.visits + math.sqrt(2 * math.log(node.visits) / n.visits))
            # Expansion: Expand a random child node if the selected node is not terminal
            if not check_win(node.state, "X") and not check_win(node.state, "O") and get_empty_cells(node.state):
                empty_cells = get_empty_cells(node.state)
                random_child_state = node.state.copy()
                row, col = random.choice(empty_cells)
                random_child_state[row][col] = current_player
                node.add_child(random_child_state)
                node = node.children[-1]
            # Simulation: Simulate a random game from the selected child node
            result = simulate_random_game(node.state)
            # Update the wins and visits of the nodes in the selected path
            while node:
                node.visits += 1
                if check_win(result, current_player):
                    node.wins += 1
                node = node.parent
        # Select the best move based on the visit counts of the children nodes
        best_move = max(root.children, key=lambda n: n.visits)
        return best_move.state
    e
    # Function for the player's move
    def player_move(board):
        valid_move = False
        while not valid_move:
            row = int(input("Enter the row (0-2): "))
            col = int(input("Enter the column (0-2): "))
            if board[row][col] != " ":
                print("Invalid move. Try again.")
            else:
                valid_move = True
        return row, col
    # Function to play the game
    def play_game():
        board = [[" " for _ in range(3)] for _ in range(3)]
        current_player = "X"
        game_over = False
        while not game_over:
            print_board(board)
            if current_player == "X":
                row, col = player_move(board)
                board[row][col] = current_player
            else:
                print("AI's turn")
                board = mcts(board, simulations=1000)
            if check_win(board, current_player):
                print_board(board)
                print(f"{current_player} wins!")
                game_over = True
            elif all(board[i][j] != " " for i in range(3) for j in range(3)):
                print_board(board)
                print("It's a draw!")
                game_over = True
            current_player = "O" if current_player == "X" else "X"
    # Start the game
    play_game()
    

    In this updated code, the play_game function handles the main game loop.

    The player can make their move by entering the row and column numbers, and the AI’s move is determined using the Monte Carlo Tree Search (MCTS) algorithm implemented in the mcts function. The game continues until there is a winner or a draw.

    Please note that the number of simulations in the mcts function can be adjusted based on your preference and computational resources.

    A higher number of simulations generally leads to better AI performance but takes more time to compute.

    Reinforcement Learning

    Implementing a complete reinforcement learning algorithm for tic-tac-toe is a complex task that involves several components such as state representation, action selection, value function approximation, and learning updates.

    Here’s a simplified example to give you an idea of how a reinforcement learning algorithm could be implemented for tic-tac-toe using Q-learning:

    import numpy as np
    import random
    # Define the Q-learning agent
    class QLearningAgent:
        def __init__(self, alpha, gamma, epsilon):
            self.alpha = alpha  # Learning rate
            self.gamma = gamma  # Discount factor
            self.epsilon = epsilon  # Exploration rate
            self.Q = {}  # Q-table
        def get_action(self, state):
            if random.random() &lt; self.epsilon:
                # Explore by selecting a random action
                return random.choice(state.get_available_actions())
            else:
                # Exploit by selecting the action with the highest Q-value
                q_values = self.Q.get(state, {})
                if q_values:
                    return max(q_values, key=q_values.get)
                else:
                    return random.choice(state.get_available_actions())
        def update_q_value(self, state, action, next_state, reward):
            q_values = self.Q.get(state, {})
            next_q_values = self.Q.get(next_state, {})
            max_q_value = max(next_q_values.values()) if next_q_values else 0.0
            q_values[action] = q_values.get(action, 0.0) + self.alpha * (
                reward + self.gamma * max_q_value - q_values.get(action, 0.0)
            )
            self.Q[state] = q_values
    # Define the TicTacToe environment
    class TicTacToeEnvironment:
        def __init__(self):
            self.board = [[' ' for _ in range(3)] for _ in range(3)]
            self.current_player = 'X'
            self.winner = None
        def get_state(self):
            return tuple(map(tuple, self.board))
        def get_available_actions(self):
            actions = []
            for i in range(3):
                for j in range(3):
                    if self.board[i][j] == ' ':
                        actions.append((i, j))
            return actions
        def is_terminal_state(self):
            return self.winner is not None or all(self.board[i][j] != ' ' for i in range(3) for j in range(3))
        def make_move(self, action):
            if self.winner is not None or self.board[action[0]][action[1]] != ' ':
                return
            self.board[action[0]][action[1]] = self.current_player
            if self.check_win(self.current_player):
                self.winner = self.current_player
            elif all(self.board[i][j] != ' ' for i in range(3) for j in range(3)):
                self.winner = 'Draw'
            self.current_player = 'O' if self.current_player == 'X' else 'X'
        def check_win(self, player):
            for i in range(3):
                if all(self.board[i][j] == player for j in range(3)):
                    return True
                if all(self.board[j][i] == player for j in range(3)):
                    return True
            if all(self.board[i][i] == player for i in range(3)):
                return True
            if all(self.board[i][2 - i] == player for i in range(3)):
                return True
            return False
    # Function to train the Q-learning agent
    def train_agent(agent, episodes):
        for episode in range(episodes):
            environment = TicTacToe
            while not environment.is_terminal_state():
                state = environment.get_state()
                action = agent.get_action(state)
                environment.make_move(action)
                next_state = environment.get_state()
                reward = 0
                if environment.winner == 'X':
                    reward = 1
                elif environment.winner == 'O':
                    reward = -1
                agent.update_q_value(state, action, next_state, reward)
            # Reset the environment for the next episode
            environment = TicTacToeEnvironment()
    # Function to play against the trained agent
    def play_against_agent(agent):
        environment = TicTacToeEnvironment()
        while not environment.is_terminal_state():
            if environment.current_player == 'X':
                # Player's turn
                print("Your turn")
                row = int(input("Enter the row (0-2): "))
                col = int(input("Enter the column (0-2): "))
                action = (row, col)
            else:
                # Agent's turn
                print("Agent's turn")
                action = agent.get_action(environment.get_state())
            environment.make_move(action)
            # Print the current state of the board
            for row in environment.board:
                print("|".join(row))
                print("-" * 5)
            print()
        # Print the final result
        if environment.winner == 'X':
            print("You win!")
        elif environment.winner == 'O':
            print("Agent wins!")
        else:
            print("It's a draw!")
    # Create a Q-learning agent
    agent = QLearningAgent(alpha=0.5, gamma=0.9, epsilon=0.1)
    # Train the agent
    train_agent(agent, episodes=10000)
    # Play against the trained agent
    play_against_agent(agent)
    

    In this updated code, the train_agent function trains the Q-learning agent by running episodes of tic-tac-toe games.

    Each episode consists of the agent interacting with the environment, making moves based on its Q-values and updating the Q-values based on the rewards received.

    After training, the play_against_agent function allows the player to play against the trained agent.

    The player can make their moves by entering the row and column numbers, and the agent selects its moves based on the learned Q-values.

    Please note that this is a simplified implementation of Q-learning for tic-tac-toe and may not produce optimal results.

    Q-learning is a model-free, reinforcement learning algorithm used to train agents in an environment to make optimal decisions. It is based on the concept of Q-values, which represent the expected cumulative rewards an agent can achieve by taking a particular action in a given state.

    Here’s a step-by-step explanation of how Q-learning works:

    1. Environment Setup: Define the environment in which the agent operates. The environment consists of states, actions, and rewards. Each state represents a specific configuration of the environment, and actions are the possible choices the agent can make. Rewards indicate the immediate feedback the agent receives based on its actions.
    2. Initialize the Q-Table: Create a Q-table that maps state-action pairs to Q-values. The Q-table is initially populated with arbitrary values or zeros.
    3. Exploration vs. Exploitation: During training, the agent balances between exploration and exploitation. Exploration involves randomly selecting actions to explore the environment and discover potentially better strategies. Exploitation involves selecting the action with the highest Q-value based on the current knowledge.
    4. Action Selection: In each training episode or step, the agent selects an action to perform based on an exploration-exploitation trade-off. The action can be selected either randomly (exploration) or by choosing the action with the highest Q-value for the current state (exploitation).
    5. Update Q-Values: After taking an action, the agent observes the resulting state and receives a reward. The Q-value for the previous state-action pair is updated using the following formula:
      Q(s, a) = Q(s, a) + α * (R + γ * max(Q(s’, a’)) – Q(s, a))
      Here, Q(s, a) represents the Q-value of state s and action a, α is the learning rate (controls the weight of the new information), R is the immediate reward received, γ is the discount factor (determines the importance of future rewards), s’ is the new state, and a’ is the action chosen in the new state.
    6. Repeat Steps 4 and 5: The agent continues to interact with the environment, selecting actions, updating Q-values, and transitioning to new states until it reaches a terminal state or a predefined number of training episodes.
    7. Convergence: Through repeated iterations, the Q-values in the Q-table converge towards their optimal values, representing the maximum expected cumulative rewards for each state-action pair. Once the training process is complete, the agent has learned an optimal policy for decision-making.
    8. Exploitation: After training, the agent can exploit the learned Q-values to make optimal decisions in the environment. It selects the action with the highest Q-value for each state encountered, following the policy derived from the Q-table.

    Q-learning is a powerful algorithm that allows agents to learn optimal strategies in environments with discrete states and actions. It has applications in various domains, such as robotics, game playing, and autonomous systems, where agents need to learn and adapt to make decisions that maximize rewards.

    The performance of the agent can be further improved by tuning the hyperparameters, using more advanced techniques like function approximation, or employing more sophisticated algorithms like Deep Q-Networks (DQN).

    Neural Networks

    To implement a neural network for tic-tac-toe using an API, you would typically follow these steps:

    • Prepare the Data: Convert the tic-tac-toe game states and corresponding actions into a suitable format for training the neural network. This may involve one-hot encoding the board states and representing actions as numerical values.
    • Design the Neural Network Architecture: Choose the structure and layers of your neural network. For tic-tac-toe, a simple feedforward neural network with multiple hidden layers can work well.
    • Build the API: Use a web framework such as Flask or Django to create an API endpoint that accepts tic-tac-toe board states as input and returns the predicted action by the neural network.
    • Train the Neural Network: Use the prepared data to train the neural network. You can use techniques such as gradient descent and backpropagation to update the network weights based on the prediction errors.
    • Serve the Trained Model: Save the trained model and load it in the API endpoint. This allows the API to use the trained model for making predictions based on the input board states.
    • Make API Requests: Send requests to the API endpoint with the current tic-tac-toe board state, and the API will return the predicted action. You can integrate this API into your game or any other application that requires the AI player.

    Here’s a simplified example of how the code for the API endpoint might look like using the Flask framework:

    from flask import Flask, request, jsonify
    import numpy as np
    import tensorflow as tf
    app = Flask(__name__)
    # Load the trained model
    model = tf.keras.models.load_model('trained_model.h5')
    @app.route('/api/tic-tac-toe', methods=['POST'])
    def get_next_move():
        data = request.get_json()
        board_state = data['board_state']
        # Preprocess the board state
        # ...
        # Make the prediction using the trained model
        prediction = model.predict(np.array([board_state]))
        # Process the prediction and convert it into an action
        # ...
        response = {
            'action': predicted_action
        }
        return jsonify(response)
    if __name__ == '__main__':
        app.run()
    

    In this example, the API receives a POST request containing the current board state in JSON format. The board state is preprocessed to match the input format required by the neural network. Then, the loaded model makes a prediction on the preprocessed board state, and the predicted action is processed and returned as a JSON response.

    Keep in mind that this is a simplified example, and you may need to adapt it to your specific requirements, including data preprocessing, action processing, and handling more complex neural network architectures.

    To implement a neural network for tic-tac-toe without using an API, you can use a deep learning library like TensorFlow or PyTorch.

    Here’s an example implementation using TensorFlow:

    import numpy as np
    import tensorflow as tf
    # Prepare the Data
    # ...
    # Define the Neural Network Architecture
    model = tf.keras.Sequential([
        tf.keras.layers.Dense(64, activation='relu', input_shape=(9,)),
        tf.keras.layers.Dense(64, activation='relu'),
        tf.keras.layers.Dense(9, activation='softmax')
    ])
    # Compile the Model
    model.compile(optimizer='adam', loss='categorical_crossentropy', metrics=['accuracy'])
    # Train the Model
    model.fit(X_train, y_train, epochs=10, batch_size=32)
    # Evaluate the Model
    loss, accuracy = model.evaluate(X_test, y_test)
    print(f"Test Loss: {loss}")
    print(f"Test Accuracy: {accuracy}")
    # Make Predictions
    predictions = model.predict(X_test)
    # Convert Predictions to Actions
    # ...
    # Play the Game using the Neural Network
    # ...
    

    In this example:

    • Prepare the Data: You need to prepare the data by converting the tic-tac-toe game states and corresponding actions into a suitable format for training the neural network. This may involve one-hot encoding the board states and representing actions as numerical values.
    • Define the Neural Network Architecture: Create a neural network using TensorFlow’s Sequential model. Specify the layers and their configurations. In the example, we use two dense layers with ReLU activation functions and a final dense layer with softmax activation to predict the probabilities of each possible action.
    • Compile the Model: Specify the optimizer, loss function, and any additional metrics for the model. In this case, we use the Adam optimizer and categorical cross-entropy loss.
    • Train the Model: Use the prepared data to train the neural network. Fit the model to the training data for a specified number of epochs. Adjust the batch size as needed.
    • Evaluate the Model: Use the test data to evaluate the performance of the trained model. This gives you insights into the model’s accuracy and loss on unseen data.
    • Make Predictions: Use the trained model to make predictions on new or unseen data. In this example, we use the predict method to obtain predictions for the test data.
    • Convert Predictions to Actions: Depending on your specific representation of actions, you need to process the model predictions to determine the appropriate action to take.
    • Play the Game using the Neural Network: Use the trained neural network to play tic-tac-toe. You can integrate it into your game logic to make AI-controlled moves based on the predicted actions.

    Remember to we will need to adapt the code to your specific data preprocessing, model architecture, and action representation requirements.

    Here’s a breakdown of the code into a framework and functions:

    import numpy as np
    import tensorflow as tf
    class TicTacToeNeuralNetwork:
        def __init__(self):
            self.model = None
        def create_model(self):
            self.model = tf.keras.Sequential([
                tf.keras.layers.Dense(64, activation='relu', input_shape=(9,)),
                tf.keras.layers.Dense(64, activation='relu'),
                tf.keras.layers.Dense(9, activation='softmax')
            ])
            self.model.compile(optimizer='adam', loss='categorical_crossentropy', metrics=['accuracy'])
        def train_model(self, X_train, y_train, epochs=10, batch_size=32):
            self.model.fit(X_train, y_train, epochs=epochs, batch_size=batch_size)
        def evaluate_model(self, X_test, y_test):
            loss, accuracy = self.model.evaluate(X_test, y_test)
            print(f"Test Loss: {loss}")
            print(f"Test Accuracy: {accuracy}")
        def predict_actions(self, X):
            predictions = self.model.predict(X)
            # Convert predictions to actions
            # ...
        def save_model(self, filename):
            self.model.save(filename)
        def load_model(self, filename):
            self.model = tf.keras.models.load_model(filename)
        def play_game(self):
            # Game logic using the neural network
            # ...
    def prepare_data():
        # Prepare the data for training and testing
        # ...
        return X_train, y_train, X_test, y_test
    def main():
        nn = TicTacToeNeuralNetwork()
        nn.create_model()
        X_train, y_train, X_test, y_test = prepare_data()
        nn.train_model(X_train, y_train)
        nn.evaluate_model(X_test, y_test)
        nn.save_model('model.h5')
        nn.play_game()
    if __name__ == '__main__':
        main()
    

    In this breakdown:

    The TicTacToeNeuralNetwork class represents the neural network model and its associated methods. It encapsulates the creation, training, evaluation, and prediction functionalities.

    The prepare_data function is responsible for preparing the data for training and testing. It should return the prepared data in the format expected by the neural network model.

    The main function serves as the entry point of the program. It creates an instance of the TicTacToeNeuralNetwork class, calls the necessary methods to train and evaluate the model, saves the trained model to a file, and invokes the play_game method to utilize the trained model in the game logic.

    This breakdown provides a framework where you can add more functionality and expand upon the methods of the TicTacToeNeuralNetwork class as needed. You can also incorporate additional functions for data preprocessing, action processing, and game logic based on your specific requirements.

    User Interface

    The code provided implements a console-based Tic-Tac-Toe game where the user can play against an AI opponent.

    However, this is abit clunky, creating a simple user interface with mouse click functionality, the code is modified to accommodate that.

    The updated version of the code that includes a graphical user interface (GUI) using the Tkinter library:

    import tkinter as tk
    import random
    def print_board(board):
        for row in board:
            print("|".join(row))
            print("-" * 5)
    def check_win(board, player):
        for i in range(3):
            if all(board[i][j] == player for j in range(3)):
                return True
            if all(board[j][i] == player for j in range(3)):
                return True
        if all(board[i][i] == player for i in range(3)):
            return True
        if all(board[i][2 - i] == player for i in range(3)):
            return True
        return False
    def get_empty_cells(board):
        empty_cells = []
        for i in range(3):
            for j in range(3):
                if board[i][j] == " ":
                    empty_cells.append((i, j))
        return empty_cells
    def make_ai_move(board, player):
        # Check for possible wins
        for row in range(3):
            for col in range(3):
                if board[row][col] == " ":
                    board[row][col] = player
                    if check_win(board, player):
                        return row, col
                    else:
                        board[row][col] = " "
        # Check for possible blocking moves
        opponent = "O" if player == "X" else "X"
        for row in range(3):
            for col in range(3):
                if board[row][col] == " ":
                    board[row][col] = opponent
                    if check_win(board, opponent):
                        return row, col
                    else:
                        board[row][col] = " "
        # Make a random move
        empty_cells = get_empty_cells(board)
        return random.choice(empty_cells)
    def on_button_click(row, col):
        global board, current_player, game_over, player_score, ai_score, player_label, ai_label
        if game_over or board[row][col] != " ":
            return
        player = players[current_player]
        board[row][col] = player
        buttons[row][col].configure(text=player, state=tk.DISABLED)
        if check_win(board, player):
            print_board(board)
            if player == "X":
                player_score += 1
                player_label.configure(text="Player: " + str(player_score))
                result_label.configure(text="Player X wins!")
            else:
                ai_score += 1
                ai_label.configure(text="AI: " + str(ai_score))
                result_label.configure(text="AI wins!")
            game_over = True
        elif all(board[i][j] != " " for i in range(3) for j in range(3)):
            print_board(board)
            result_label.configure(text="It's a tie!")
            game_over = True
        current_player = (current_player + 1) % 2
        if not game_over and players[current_player] == "O":
            ai_move()
    def restart_game():
        global board, current_player, game_over, result_label
        board = [[" " for _ in range(3)] for _ in range(3)]
        current_player = 0
        game_over = False
        result_label.configure(text="")
        for i in range(3):
            for j in range(3):
                buttons[i][j].configure(text=" ", state=tk.NORMAL)
    def create_game_board():
        global buttons
        buttons = []
        for i in range(3):
            row_buttons = []
            for j in range(3):
                button = tk.Button(root, text=" ", width=10, height=5,
                                   command=lambda r=i, c=j: on_button_click(r, c))
                button.grid(row=i, column=j)
                row_buttons.append(button)
            buttons.append(row_buttons)
    def ai_move():
        global board, current_player, game_over, player_score, ai_score, player_label, ai_label
        player = players[current_player]
        row, col = make_ai_move(board, player)
        board[row][col] = player
        buttons[row][col].configure(text=player, state=tk.DISABLED)
        if check_win(board, player):
            print_board(board)
            if player == "X":
                player_score += 1
                player_label.configure(text="Player: " + str(player_score))
                result_label.configure(text="Player X wins!")
            else:
                ai_score += 1
                ai_label.configure(text="AI: " + str(ai_score))
                result_label.configure(text="AI wins!")
            game_over = True
        elif all(board[i][j] != " " for i in range(3) for j in range(3)):
            print_board(board)
            result_label.configure(text="It's a tie!")
            game_over = True
        current_player = (current_player + 1) % 2
    def play_game():
        create_game_board()
        global players, current_player, game_over, player_score, ai_score, player_label, ai_label, result_label
        players = ["X", "O"]
        current_player = 0
        game_over = False
        player_score = 0
        ai_score = 0
        # Create score labels
        player_label = tk.Label(root, text="Player: " + str(player_score))
        ai_label = tk.Label(root, text="AI: " + str(ai_score))
        player_label.grid(row=3, column=0, columnspan=2)
        ai_label.grid(row=3, column=2, columnspan=2)
        # Create result label
        result_label = tk.Label(root, text="")
        result_label.grid(row=4, column=0, columnspan=3)
        if players[current_player] == "O":
            ai_move()
        # Create restart button
        restart_button = tk.Button(root, text="Restart", command=restart_game)
        restart_button.grid(row=4, column=3)
        root.mainloop()
    # Create the main window
    root = tk.Tk()
    root.title("Tic-Tac-Toe")
    play_game()
    

    To run this code, make sure you have Tkinter installed and execute the script.

    This code uses the Tkinter library to create a simple GUI for the Tic-Tac-Toe game. Each cell in the 3×3 grid is represented by a Tkinter Button widget, and the on_button_click function handles the user’s mouse clicks. The AI moves are triggered by the ai_move function.

    The game continues until there is a winner or a tie.

    The game window will appear, and you can start playing Tic-Tac-Toe by clicking on the cells of the grid. The AI will automatically make its moves as “O” after the player’s turn.

  • Python: Tamagotchi Class

    Python: Tamagotchi Class

    Egg cracks with new life,
    Watch it grow, time unfurls swift,
    Tamago and watch.

    Tamagotchi are virtual pets that originated in the 1990s. The term “Tamagotchi” is a combination of the Japanese words for “egg” (tamago) and “watch” (utchi). The original Tamagotchi was a handheld digital device created by the Japanese toy company Bandai.

    Tamagotchis were designed to simulate the experience of owning and taking care of a real pet. The device featured a small screen where a virtual creature, known as a Tamagotchi, would appear. Users had to take care of their virtual pet by feeding it, playing with it, and attending to its various needs. The pet would evolve and grow based on how well it was cared for.

    The key aspect of Tamagotchis and other cyber pets was the need for constant attention and care. The virtual pets required regular feeding, cleaning, and entertainment. Neglecting their needs could result in the pet becoming sick or even dying. Users had to regularly interact with their cyber pets to ensure their well-being.

    Tamagotchis became incredibly popular during the 1990s, sparking a global craze for virtual pets. They were small, portable, and easy to carry around, which contributed to their appeal. Over time, Tamagotchis evolved, introducing new features and functionalities. Different versions included additional games, increased pet variety, and improved graphics.

    Various other cyber pets and virtual pet games emerged in the market. Some notable examples include Digimon virtual pets, Giga Pets, Nano Pets, and Pocket Pikachu. Each had its own unique set of virtual creatures and gameplay mechanics.

    In recent years, the concept of virtual pets has expanded beyond dedicated devices. With the advent of smartphones and mobile apps, virtual pet games have become popular in the form of downloadable apps. These apps offer a similar experience to the original cyber pets, allowing users to care for virtual animals on their mobile devices.

    Virtual pets provided a form of interactive entertainment that simulated the responsibilities and joys of pet ownership. They captured the imagination of people worldwide and remain nostalgic icons of the 1990s.

    A full Tamagotchi simulation involves several feedback loops to create an interactive and engaging experience. Here’s a description of the main feedback loops in a Tamagotchi:

    • Hunger Loop: The hunger level of the Tamagotchi gradually increases over time. When the user feeds the Tamagotchi, it decreases the hunger level. This loop encourages the user to provide regular nourishment to keep the Tamagotchi well-fed.
    • Happiness Loop: The happiness level of the Tamagotchi decreases over time. Interactions such as playing with the Tamagotchi or meeting its needs can increase its happiness. The higher the happiness level, the more content and satisfied the Tamagotchi becomes.
    • Energy Loop: The energy level of the Tamagotchi decreases over time, reflecting its need for rest and sleep. When the user allows the Tamagotchi to sleep, it replenishes its energy level. Adequate rest helps the Tamagotchi maintain its vitality and activity.
    • Health Loop: Neglecting the Tamagotchi’s needs, such as not feeding it or not attending to its happiness and energy levels, can negatively impact its health. If the Tamagotchi’s hunger, happiness, or energy reaches critical levels, it can become sick or eventually die. Taking care of its needs regularly ensures its overall health and well-being.
    • Interaction Loop: The user interacts with the Tamagotchi through various actions, such as feeding, playing, and sleeping. These interactions influence the Tamagotchi’s attributes, including hunger, happiness, and energy. The user’s actions directly affect the well-being and development of the Tamagotchi, forming a feedback loop between the user and the virtual pet.

    These feedback loops create a dynamic and evolving virtual pet experience. The user’s actions influence the Tamagotchi’s needs, emotions, and overall condition, while the Tamagotchi’s changing attributes and responses prompt the user to take appropriate actions. This cycle of interaction and response forms the core gameplay of a Tamagotchi simulation.

    By balancing and managing the feedback loops effectively, the user can ensure the Tamagotchi’s health, happiness, and longevity, creating a rewarding and enjoyable experience of virtual pet ownership.

    Version 1 – The Engine

    In a basic implementation:

    • The Tamagotchi class represents a virtual pet.
    • It has attributes such as name, hunger, happiness, energy, and is_alive.
    • The methods feed(), play(), and sleep() allow you to interact with the pet by modifying its attributes.
    • The update() method is responsible for updating the pet’s attributes over time.
    • The display_stats() method is used to display the pet’s current status.

    The example usage creates an instance of Tamagotchi called pet and enters a loop where the pet’s stats are displayed, and the user can choose to feed, play, or put the pet to sleep.

    The pet’s attributes are updated after each action.

    Once the pet is no longer alive (if any of the attributes reach critical levels), the loop ends, and a message is displayed.

    class Tamagotchi:
        def __init__(self, name):
            self.name = name
            self.hunger = 0
            self.happiness = 0
            self.energy = 0
            self.is_alive = True
        def feed(self):
            self.hunger -= 1
            self.happiness += 1
        def play(self):
            self.happiness += 1
            self.energy -= 1
        def sleep(self):
            self.energy += 1
        def update(self):
            self.hunger += 1
            self.happiness -= 1
            self.energy -= 1
            if self.hunger >= 10 or self.happiness <= 0 or self.energy <= 0:
                self.is_alive = False
        def display_stats(self):
            print("Name:", self.name)
            print("Hunger:", self.hunger)
            print("Happiness:", self.happiness)
            print("Energy:", self.energy)
    # Example usage:
    pet = Tamagotchi("Fluffy")
    while pet.is_alive:
        pet.display_stats()
        choice = input("What do you want to do? (feed/play/sleep): ")
        if choice == "feed":
            pet.feed()
        elif choice == "play":
            pet.play()
        elif choice == "sleep":
            pet.sleep()
        pet.update()
    print("Oh no! Your Tamagotchi has passed away.")


    Problem: It seems that the condition for the pet’s passing away is being triggered too quickly. Let’s modify the code to adjust the thresholds for hunger, happiness, and energy, and make the passing away condition less strict.

    Fix: Updated code, the initial values for happiness and energy are higher, and the sleep action increases energy by 2 instead of 1. Additionally, the conditions for passing away have been adjusted to be more forgiving. This should allow for a longer playtime before the pet passes away.

    Problem: Feeding the Tamagotchi should not cause it to lose energy.

    Fix: Feeding the Tamagotchi will only decrease its hunger level and increase its happiness. It will no longer affect the energy level. In the updated code, the check for the pet passing away has been moved outside the while loop. After the loop ends, we check if the pet is still alive, and if not, we display the message indicating that the Tamagotchi has passed away.

    Improvements: In this improved version, the following changes have been made:

    • Added a check in each action method (feed, play, sleep) to ensure that the actions are only performed if the pet is alive. This prevents actions from being taken on a pet that has already passed away.
    • Moved the status check to a separate method _check_status to centralize the condition for determining if the pet has passed away.
    • Added a call to _check_status after each action method to update the pet’s status and check if it has passed away.

    These changes address the issue of the pet passing away even when it is fed. Now, feeding the Tamagotchi will decrease hunger, increase happiness, and decrease energy, as intended.

    The code is now marked up with comments to explain the purpose and functionality of each section.

    Version 2 – The Fixes

    class Tamagotchi:
        def __init__(self, name):
            self.name = name
            self.hunger = 0
            self.happiness = 5
            self.energy = 5
            self.is_alive = True
        def feed(self):
            if self.is_alive:
                self.hunger -= 1  # Decrease hunger level
                self.happiness += 1  # Increase happiness level
                self.energy -= 1  # Decrease energy level
                self._check_status()  # Check if the pet has passed away
        def play(self):
            if self.is_alive:
                self.happiness += 1  # Increase happiness level
                self.energy -= 1  # Decrease energy level
                self._check_status()  # Check if the pet has passed away
        def sleep(self):
            if self.is_alive:
                self.energy += 2  # Increase energy level
                self._check_status()  # Check if the pet has passed away
        def _check_status(self):
            if self.hunger >= 10 or self.happiness <= 0 or self.energy <= 0:
                self.is_alive = False  # Set the pet as not alive if any condition is met
        def display_stats(self):
            print("Name:", self.name)
            print("Hunger:", self.hunger)
            print("Happiness:", self.happiness)
            print("Energy:", self.energy)
    # Example usage:
    pet = Tamagotchi("Fluffy")
    while pet.is_alive:
        pet.display_stats()
        choice = input("What do you want to do? (feed/play/sleep): ")
        if choice == "feed":
            pet.feed()  # Perform the feed action
        elif choice == "play":
            pet.play()  # Perform the play action
        elif choice == "sleep":
            pet.sleep()  # Perform the sleep action
    print("Oh no! Your Tamagotchi has passed away.")
    

    Through the process of debugging and improving the code, we have learned several important concepts and practices in programming.

    Here’s a summary of what you have learned:

    1. Debugging Skills: You encountered a bug in the original code where feeding the Tamagotchi caused it to pass away. By carefully analyzing the code, identifying the problematic areas, and making targeted changes, you were able to debug and fix the issue. Debugging skills are essential in programming to identify and resolve problems in code.
    2. Conditional Statements: You used conditional statements (if-elif-else) to control the flow of the program based on user input. By checking the user’s choice and executing the corresponding action methods, you provided interactivity to the Tamagotchi simulation.
    3. Object-Oriented Programming (OOP) Principles: The code utilizes the principles of OOP by defining a Tamagotchi class and creating an instance (object) of that class. This approach allows for encapsulation, modularity, and code reusability.
    4. Method Invocation: You invoked methods on the Tamagotchi object to perform actions such as feeding, playing, and sleeping. Method invocation allows you to execute specific blocks of code and perform operations within the context of the object.
    5. Instance Variables: You used instance variables (self.name, self.hunger, self.happiness, self.energy, self.is_alive) to store and track the state and attributes of the Tamagotchi object. Instance variables hold data unique to each object instance and can be accessed and modified within the methods of the class.
    6. Code Organization: By organizing the code into methods and utilizing class structure, you achieved better code organization and readability. This makes it easier to understand and maintain the codebase.
    7. Code Commenting: You learned the importance of code commenting to provide explanations, clarifications, and context to the code. Commenting helps both yourself and others understand the code’s purpose and functionality.

    Overall, this exercise allowed you to practice problem-solving, debugging, object-oriented programming, and code organization, which are all valuable skills in software development.

    Improving the Functionality

    To further improve the code, here are a few suggestions:

    • Input Validation: Add input validation to handle unexpected or invalid user inputs. For example, if the user enters a choice other than “feed,” “play,” or “sleep,” you can display an error message and ask for input again.
    • Limit Attribute Values: Implement upper and lower limits for attribute values such as hunger, happiness, and energy. For instance, set a minimum value of 0 for hunger and happiness, and ensure that these attributes do not exceed a maximum value (e.g., hunger <= 10). You can add checks in the code to enforce these limits and prevent attribute values from going beyond the specified range.
    • Add Additional Actions: Expand the functionality of the Tamagotchi by adding more actions or interactions. For example, you could include grooming, giving medicine when the pet is sick, or allowing the pet to interact with other virtual pets. This will enhance the simulation and provide a richer experience for the user.
    • Implement Time-Based Updates: Introduce a time-based system where the pet’s attributes change gradually over time, even when the user is not actively interacting. This can mimic the passage of time and make the simulation more realistic. For instance, hunger could increase slowly over time, happiness could decrease if left unattended, and energy could naturally regenerate over time.
    • Create a User Interface: Consider building a graphical user interface (GUI) for the Tamagotchi simulation. A GUI can enhance the user experience by providing visual representations, buttons for actions, and interactive elements. There are various GUI frameworks available for Python, such as Tkinter, PyQT, or Pygame, that you can explore.
    • Implement Save and Load Functionality: Allow users to save their Tamagotchi’s progress and load it later. This way, users can continue interacting with their virtual pet across multiple sessions or even between device restarts.

    Remember to approach these improvements one step at a time, thoroughly testing each change to ensure it functions as intended. Gradually adding enhancements will make the code more robust and enjoyable for users.

    Improving the User Experience

    The output in the Tamagotchi simulation refers to the visual and auditory cues provided to the owner, indicating the state and needs of the virtual pet. These outputs have specific effects on the owner, creating a sense of responsibility and emotional attachment. Here’s a description of the outputs and their effects:

    • Visual Representations: The device or app typically displays visual representations of the pet, including its appearance, facial expressions, and animations. These visuals reflect the pet’s current state, such as its hunger, happiness, and energy levels. Seeing the pet looking happy and vibrant can evoke a sense of joy and satisfaction in the owner, while observing signs of distress or sickness may generate concern and prompt immediate action.
    • Notifications and Alerts: The simulations often utilize notifications or alerts to inform the owner about the pet’s needs. These can include messages or icons indicating hunger, low happiness, or low energy. Notifications serve as reminders for the owner to take appropriate actions and attend to the pet’s requirements. These prompts help create a sense of responsibility and encourage the owner to actively engage with the virtual pet.
    • Sounds and Music: Incorporating sound effects and music to enhance the interactive experience. Sounds can accompany various actions, such as feeding, playing, or sleeping, providing auditory feedback to the owner. Pleasant sounds and cheerful melodies when the pet is well-cared for can generate positive emotions and a sense of accomplishment. Conversely, distressing sounds or melancholic tunes may elicit concern and prompt the owner to address the pet’s needs.
    • Outcome Messages: When the pet’s attributes reach critical levels or the pet passes away, Simulkation typically display outcome messages. These messages inform the owner about the consequences of their actions or inactions, such as the pet falling ill or the pet’s unfortunate demise. These outcomes can evoke feelings of sadness, guilt, or motivation to improve the care provided to future virtual pets.

    The combination of visual representations, notifications, sounds, and outcome messages in a the simulation aims to engage the owner emotionally and foster a sense of responsibility and attachment to the virtual pet. The feedback provided through these outputs influences the owner’s behavior and prompts them to actively participate in the pet’s well-being.

    TamagotchiGUI

    The Definition for a minimum simple user interface that shows at he top the pets name, allows use of a picture in a square, displays Hunger, Happiness and Energy as Horizontal Bars, Left =0 , Right = 10. Also Add 3 buttons named Feed, Play sleep at the bottom. To implement the user interface with the desired features, you can utilize the Tkinter library, which is a standard Python GUI toolkit. Here’s an example code snippet that incorporates the changes:

    import tkinter as tk
    from tkinter import ttk
    class TamagotchiGUI:
        def __init__(self, pet):
            self.pet = pet
            # Create the main window
            self.root = tk.Tk()
            self.root.title("Tamagotchi")
            # Pet name label
            self.name_label = ttk.Label(self.root, text="Name: " + self.pet.name)
            self.name_label.pack()
            # Pet picture (replace 'pet_image.png' with the path to your own pet image)
            self.pet_image = tk.PhotoImage(file='pet_image.png')
            self.pet_label = ttk.Label(self.root, image=self.pet_image)
            self.pet_label.pack()
            # Hunger bar
            self.hunger_label = ttk.Label(self.root, text="Hunger")
            self.hunger_label.pack()
            self.hunger_bar = ttk.Progressbar(self.root, orient='horizontal', length=200, mode='determinate')
            self.hunger_bar.pack()
            # Happiness bar
            self.happiness_label = ttk.Label(self.root, text="Happiness")
            self.happiness_label.pack()
            self.happiness_bar = ttk.Progressbar(self.root, orient='horizontal', length=200, mode='determinate')
            self.happiness_bar.pack()
            # Energy bar
            self.energy_label = ttk.Label(self.root, text="Energy")
            self.energy_label.pack()
            self.energy_bar = ttk.Progressbar(self.root, orient='horizontal', length=200, mode='determinate')
            self.energy_bar.pack()
            # Button frame
            self.button_frame = ttk.Frame(self.root)
            self.button_frame.pack()
            # Feed button
            self.feed_button = ttk.Button(self.button_frame, text="Feed", command=self.feed_pet)
            self.feed_button.grid(row=0, column=0, padx=10, pady=10)
            # Play button
            self.play_button = ttk.Button(self.button_frame, text="Play", command=self.play_pet)
            self.play_button.grid(row=0, column=1, padx=10, pady=10)
            # Sleep button
            self.sleep_button = ttk.Button(self.button_frame, text="Sleep", command=self.sleep_pet)
            self.sleep_button.grid(row=0, column=2, padx=10, pady=10)
            # Update the GUI with initial pet stats
            self.update_gui()
        def feed_pet(self):
            self.pet.feed()
            self.update_gui()
        def play_pet(self):
            self.pet.play()
            self.update_gui()
        def sleep_pet(self):
            self.pet.sleep()
            self.update_gui()
        def update_gui(self):
            self.hunger_bar["value"] = self.pet.hunger
            self.happiness_bar["value"] = self.pet.happiness
            self.energy_bar["value"] = self.pet.energy
            if not self.pet.is_alive:
                self.feed_button.config(state='disabled')
                self.play_button.config(state='disabled')
                self.sleep_button.config(state='disabled')
        def run(self):
            self.root.mainloop()
    # Example usage:
    pet = Tamagotchi("Fluffy")
    gui = TamagotchiGUI(pet)
    gui.run()
    

    In this code, a TamagotchiGUI class is created to handle the GUI elements and interactions. The pet’s name is displayed at the top as a label. The pet’s picture is shown using a PhotoImage widget. The hunger, happiness, and energy levels are represented as progress bars using ttk.Progressbar widgets.

    The feed, play, and sleep buttons are created at the bottom using ttk.Button widgets. The button actions are linked to the corresponding methods in the TamagotchiGUI class.

    The update_gui method is responsible for updating the GUI elements based on the pet’s current state. It sets the values of the progress bars and disables the buttons if the pet has passed away.

    To run the GUI, create an instance of TamagotchiGUI, passing in the Tamagotchi object, and then call the run method.

    Please note that you’ll need to replace 'pet_image.png' with the path to your own pet image file.

    Version 3 – The MVP

    Here’s an updated code that integrates the Tamagotchi class and the TamagotchiGUI class into a single code, with an indicator for the pet’s status and a restart button:

    import tkinter as tk
    from tkinter import ttk
    class Tamagotchi:
        def __init__(self, name):
            self.name = name
            self.hunger = 5
            self.happiness = 5
            self.energy = 5
            self.is_alive = True
        def feed(self):
            if self.is_alive:
                self.hunger -= 1
                self.happiness += 1
                self.energy -= 1
                self._check_status()
        def play(self):
            if self.is_alive:
                self.happiness += 1
                self.energy -= 1
                self._check_status()
        def sleep(self):
            if self.is_alive:
                self.energy += 2
                self.hunger -= 1
                self._check_status()
        def _check_status(self):
            if self.hunger >= 10 or self.happiness <= 0 or self.energy <= 0:
                self.is_alive = False
        def restart(self):
            self.hunger = 5
            self.happiness = 5
            self.energy = 5
            self.is_alive = True
    class TamagotchiGUI:
        def __init__(self, pet):
            self.pet = pet
            # Create the main window
            self.root = tk.Tk()
            self.root.title("Tamagotchi")
            # Pet name label
            self.name_label = ttk.Label(self.root, text="Name: " + self.pet.name)
            self.name_label.pack()
            # Pet picture (replace 'pet_image.png' with the path to your own pet image)
            self.pet_image = tk.PhotoImage(file='pet_image.png')
            self.pet_label = ttk.Label(self.root, image=self.pet_image)
            self.pet_label.pack()
            # Status label
            self.status_label = ttk.Label(self.root, text="Status: Alive", foreground="green")
            self.status_label.pack()
            # Hunger bar
            self.hunger_label = ttk.Label(self.root, text="Hunger")
            self.hunger_label.pack()
            self.hunger_bar = ttk.Progressbar(self.root, orient='horizontal', length=200, mode='determinate')
            self.hunger_bar.pack()
            # Happiness bar
            self.happiness_label = ttk.Label(self.root, text="Happiness")
            self.happiness_label.pack()
            self.happiness_bar = ttk.Progressbar(self.root, orient='horizontal', length=200, mode='determinate')
            self.happiness_bar.pack()
            # Energy bar
            self.energy_label = ttk.Label(self.root, text="Energy")
            self.energy_label.pack()
            self.energy_bar = ttk.Progressbar(self.root, orient='horizontal', length=200, mode='determinate')
            self.energy_bar.pack()
            # Button frame
            self.button_frame = ttk.Frame(self.root)
            self.button_frame.pack()
            # Feed button
            self.feed_button = ttk.Button(self.button_frame, text="Feed", command=self.feed_pet)
            self.feed_button.grid(row=0, column=0, padx=10, pady=10)
            # Play button
            self.play_button = ttk.Button(self.button_frame, text="Play", command=self.play_pet)
            self.play_button.grid(row=0, column=1, padx=10, pady=10)
            # Sleep button
            self.sleep_button = ttk.Button(self.button_frame, text="Sleep", command=self.sleep_pet)
            self.sleep_button.grid(row=0, column=2, padx=10, pady=10)
            # Restart button
            self.restart_button = ttk.Button(self.root, text="Restart", command=self.restart_game)
            self.restart_button.pack()
            # Update the GUI with initial pet stats
            self.update_gui()
        def feed_pet(self):
            self.pet.feed()
            self.update_gui()
        def play_pet(self):
            self.pet.play()
            self.update_gui()
        def sleep_pet(self):
            self.pet.sleep()
            self.update_gui()
        def restart_game(self):
            self.pet.restart()
            self.update_gui()
        def update_gui(self):
            self.hunger_bar["value"] = self.pet.hunger
            self.happiness_bar["value"] = self.pet.happiness
            self.energy_bar["value"] = self.pet.energy
            if self.pet.is_alive:
                self.status_label.config(text="Status: Alive", foreground="green")
                self.feed_button.config(state='normal')
                self.play_button.config(state='normal')
                self.sleep_button.config(state='normal')
            else:
                self.status_label.config(text="Status: Dead", foreground="red")
                self.feed_button.config(state='disabled')
                self.play_button.config(state='disabled')
                self.sleep_button.config(state='disabled')
        def run(self):
            self.root.mainloop()
    # Example usage:
    pet = Tamagotchi("Fluffy")
    gui = TamagotchiGUI(pet)
    gui.run()
    

    In this updated code, the Tamagotchi class and TamagotchiGUI class are defined separately but integrated into the same code. The Tamagotchi class handles the pet’s attributes and actions, while the TamagotchiGUI class manages the GUI elements and interactions.

    The new addition is the restart button, which calls the restart_game method in the TamagotchiGUI class, which in turn invokes the restart method in the Tamagotchi class to reset the pet’s attributes and revive it.

    The status label is updated to display “Alive” or “Dead” based on the pet’s status, with corresponding text colors. The feed, play, and sleep buttons are enabled or disabled depending on the pet’s status.

    TamagotchiGUI

    Please make sure to replace 'pet_image.png' with the actual path to your own pet image file.

    Here’s Fluffy if you want it!

    pet_image.png

    Also, feel free to adjust the layout and appearance of the GUI to suit your preferences.

    Stay tuned for part 2

  • Glorantha – Notes

    Glorantha – Notes

    Glorantha is a detailed and immersive fictional world created by Greg Stafford, the creator of RuneQuest.

    It serves as the setting for several tabletop role-playing games, including RuneQuest and HeroQuest. Glorantha is known for its deep mythology, rich cultures, and complex history.

    Glorantha is a highly mythic world where the power of gods and myths shape the reality. It is a flat world surrounded by the “Great Darkness,” with various cosmic realms and planes layered upon it. The world is populated by numerous diverse and distinct cultures, each with its own pantheon of gods, myths, and magical traditions.

    The mythology of Glorantha is central to its lore and gameplay. The world has a complex pantheon of deities, and the interactions between gods, heroes, and mortals play a crucial role in shaping the world’s history and destiny. The mythology reflects a deep understanding of anthropological and cultural concepts, resulting in a highly detailed and coherent setting.

    The cultures of Glorantha vary widely, from nomadic tribes to highly organized empires. Each culture has its own unique customs, beliefs, and ways of life. They often have specific relationships with the gods and spirits of the world, which influence their everyday lives, rituals, and magical practices.

    The history of Glorantha is rich and spans thousands of years, filled with epic conflicts, heroics, and grand quests. Major events in the world’s history have shaped its current state, including cataclysms, wars between gods, and the rise and fall of empires.

    Glorantha has been expanded and explored in various forms of media beyond tabletop role-playing games, including novels, board games, and computer games. Its deep lore and immersive world-building have made it a beloved setting for fans of fantasy role-playing games.

    Geography

    Glorantha is a highly detailed and complex world with a rich and diverse geography. Here’s a general overview of some of the major regions and landmarks within Glorantha:

    • Dragon Pass: Located in the central part of Glorantha, Dragon Pass is a significant region known for its lush valleys, mountains, and the mighty River of Cradles. It is home to numerous human clans, trolls, and other creatures.
    • Holy Country: Situated to the southwest of Dragon Pass, the Holy Country is a sacred land dominated by the Lunar Empire. It is characterized by its fertile plains, powerful temples, and religious significance.
    • Prax: To the east of Dragon Pass lies the desolate and windswept plains of Prax. This region is inhabited by nomadic tribes such as the Bison Riders and the fearsome broos.
    • Lunar Empire: Covering a large portion of Glorantha’s south-central region, the Lunar Empire is a powerful civilization ruled by the Red Goddess. It includes cities like Glamour and the influential provincial capital of Sartar.
    • Balazar: Located in the northwest, Balazar is a wild and untamed region known for its dense forests, hidden valleys, and dangerous creatures.
    • Ralios: To the northeast of Dragon Pass lies Ralios, a region of varied landscapes, including forests, hills, and rivers. It is home to diverse cultures and is known for its sorcery.
    • Pent: A collection of city-states situated on the eastern coast of Glorantha, Pent is known for its maritime trade and the influence of the sea gods.
    • Teshnos: An island nation located in the far east of Glorantha, Teshnos is known for its exotic flora, fauna, and a strong influence of sorcery.
    • Kralorela: Far to the southeast, Kralorela is a vast and ancient empire heavily influenced by dragons. It is known for its intricate bureaucracy, magical arts, and the worship of the Celestial Dragon.

    These are just a few examples of the regions within Glorantha, and there are many more areas with their unique features, cultures, and histories.

    As for online map resources, there are several websites where you can find maps and explore the geography of Glorantha.

    Here are a few options:

    • Chaosium: The publisher of RuneQuest and Glorantha-related materials, Chaosium’s website may materials available for purchase or as part of their published works; https://rqwiki.chaosium.com/; https://www.chaosium.com/runequest-rpg/
    • Glorantha.com: This was the official website for Glorantha provides various resources, including maps and geographical information. Visit the website’s Maps section for a collection of maps depicting different regions. Most Content has now moved over the Chaosium hosted site with materials located in the Well of Daliath; https://wellofdaliath.chaosium.com/
    • Glorantha Wiki: The Glorantha Wiki is a comprehensive resource with articles, maps, and information about Glorantha’s geography. You can explore different regions and find maps specific to certain areas; https://glorantha.fandom.com/wiki/Main_Page

    It’s worth noting that some of these resources may require membership or purchase, as Glorantha maps are often part of official publications or licensed materials.

    Timeline

    Glorantha is a rich and intricate setting with a deep mythology, allowing for a vast array of stories and adventures to unfold within its timeline. The history of Glorantha spans thousands of years, and it is a complex and ever-evolving world. These are just some of the major events in Glorantha’s history, and there are countless smaller events, conflicts, and cultural developments that shape the world in more detail.

    A simplified timeline of significant events in Glorantha’s history goes something like this:

    Pre-Time: The universe is created and shaped by the actions of cosmic entities known as Elder Races.

    The Golden Age: The gods of Glorantha emerge and establish their dominions, shaping the world and its mythic landscape. Various cultures rise and fall during this era.

    The Great Darkness: The evil entity called the Devil captures the sun, plunging Glorantha into darkness. Heroes embark on quests to retrieve the sun, leading to the birth of new gods and significant upheavals.

    The Storm Age: A period of conflict between the gods and their followers. The Thunder Brothers, Orlanth and Yelm, clash in a cosmic battle, resulting in the imprisonment of Yelm and the establishment of the Storm Tribe as a dominant force.

    The Great Compromise: The gods form a pantheon called the Council to maintain balance and avoid cosmic catastrophes. The Council enacts the Celestial Compromise, establishing a new order in the cosmos.

    The Lunar Empire: The Moon Goddess, known as the Red Goddess or the Lunar Empress, leads the Lunar Empire, a powerful and expansionist civilization that seeks to impose its influence on Glorantha.

    The Dragonrise: Dragons, ancient and powerful beings, emerge and wreak havoc across Glorantha. They establish themselves as significant players in the world’s affairs.

    The Hero Wars: A major conflict between rival factions and pantheons, where heroes and gods battle for control and influence. The Hero Wars reshape the political, social, and magical landscape of Glorantha.

    Characters

    In Glorantha, there are several major races and species that inhabit the world.

    Here are some of the notable races:

    • Humans: Humans are the most numerous and diverse race in Glorantha. They are divided into various cultures and ethnic groups, each with its own traditions, customs, and mythologies.
    • Aldryami & Mostali: Glorantha features different types of elves, such as Aldryami (tree elves) and Mostali (dwarf-like metal elves). Aldryami elves are deeply connected to nature and live in harmony with the forests, while Mostali are master craftsmen and miners. They have a strong affinity for metals and are known for their craftsmanship and knowledge of engineering.
    • Trolls: Trolls are a diverse race with different types and subtypes, including the powerful and intelligent Dark Trolls, the regenerative and stone-like Rock Trolls, and the sneaky and amphibious River Trolls. They have their own unique cultures and societies.
    • Broos: Broos are chaotic, shape-shifted creatures spawned from Chaos. They are typically seen as vile and corrupt, embodying chaos and destruction. However, not all broos are evil, and some individuals may try to resist their chaotic nature.
    • Dragonewts: Dragonewts are enigmatic and highly mystical creatures resembling humanoid dragons. They are associated with cosmic truths and esoteric knowledge, often living in seclusion and following their own mysterious ways.
    • Durulz: Glorantha has sentient, anthropomorphic ducks. They are known for their water-based societies, their skill in sailing and fishing, and their connection to the deity known as the Duck God.

    These are just a few examples of the major races in Glorantha. Each race has its own unique characteristics, cultures, and roles within the world. The interactions and conflicts between these races add depth and diversity to Glorantha’s societies and narratives.

    Unique Attributes

    Glorantha is known for its unique and distinctive aspects, setting it apart from other fantasy worlds.

    Here are some key features that make Glorantha stand out:

    • Mythic World: Glorantha is a deeply mythic world where mythology, gods, and magic play integral roles in shaping the fabric of reality. The mythic narrative is woven into every aspect of Gloranthan cultures, influencing their beliefs, rituals, and daily lives.
    • Culturally Diverse: Glorantha embraces cultural diversity, with numerous distinct cultures, tribes, and civilizations inhabiting the world. Each culture has its own unique customs, social structures, and mythologies, creating a rich tapestry of beliefs and practices.
    • Heroic Tradition: Heroes hold a significant role in Gloranthan society. They are legendary figures with extraordinary abilities and are often central to the mythic narratives and conflicts of the world. Heroic deeds and quests shape the destiny of nations and have a direct impact on the balance of power.
    • Rune Magic: RuneQuest and Glorantha introduced the concept of rune magic, where individuals can tap into the cosmic forces represented by mystical runes. These runes are associated with elements, concepts, and deities, and understanding their symbolism is crucial for practicing magic.
    • Complex Pantheon: Glorantha features a complex pantheon of gods, each representing different aspects of the world. The relationships between these deities, their interactions with mortals, and the divine politics create a dynamic and intricate divine hierarchy.
    • Non-Typical Races: Glorantha offers a diverse range of races and creatures that go beyond traditional fantasy tropes. From trolls and dragonewts to intelligent ducks and shapeshifted broos, Glorantha embraces a variety of unique and often unconventional species.
    • Dynamic History: Glorantha has a detailed and ever-evolving history. Major events and conflicts shape the world, and the consequences of past actions continue to influence the present. This allows for a rich and immersive experience as players and readers engage with the ongoing narrative of Glorantha.

    These unique aspects contribute to the depth and richness of Glorantha, making it a beloved and distinctive setting within the realm of fantasy role-playing and literature.

    Novels & Source Material

    Here are a list of some notable novels set in the world of Glorantha:

    “King of Sartar” by Greg Stafford: This book is a collection of myths, legends, and historical accounts that provide an in-depth look at the world of Glorantha and its history.

    “The Coming Storm” by Greg Stafford: This Guide explores the Hero Wars, a major conflict that shakes the foundations of Glorantha. It follows the stories of various characters as they navigate the turbulent times.

    “The Lightbringers’ Quest” by Greg Stafford: This Guide tells the story of the Lightbringers, a group of heroes who embark on a perilous quest to restore light to the world. It delves into the myths and heroics of Glorantha’s past.

    “Griffin Mountain” by Greg Stafford: This sourcebook presents a detailed setting within Glorantha, focusing on a remote and dangerous region called Griffin Mountain. It provides adventure scenarios and rich lore for players and game masters.

    “The Complete Griselda” by Oliver Dickinson: This collection of short stories follows the adventures of Griselda, a fierce warrior and Rune Priestess, as she battles various enemies and explores the mysteries of Glorantha.

    Please note that Glorantha has a vast and complex lore, and while these novels provide a glimpse into the world, there are many more publications and sourcebooks that delve into different aspects of Glorantha’s history, cultures, and mythology.

    King of Sartar

    “King of Sartar” by Greg Stafford is not a traditional novel but rather a collection of myths, legends, and historical accounts set in the world of Glorantha. It provides readers with an in-depth exploration of Gloranthan lore and offers a comprehensive understanding of the rich mythological tapestry that underpins the setting.

    The book presents itself as a historical account, chronicling the life and reign of the titular King of Sartar. It covers various periods and events in Glorantha’s history, including the hero’s early life, his rise to power, and the challenges he faces during his reign. Through these tales, readers gain insight into the cultural, social, and political aspects of Glorantha’s civilizations.

    One of the standout features of “King of Sartar” is the depth and authenticity of the myths and legends presented. Greg Stafford, the creator of Glorantha, brings his expertise and passion for mythological and anthropological concepts to the forefront. The book feels like a genuine compilation of ancient stories, complete with gods, heroes, and epic conflicts that shape the destiny of the world.

    The writing style of “King of Sartar” is engaging and evocative, effectively capturing the grandeur and mythic tone of Glorantha. The stories are presented with a sense of gravitas and reverence, immersing readers in the world and making them feel like participants in the mythological history.

    Stafford’s writing captures the epic scale and mythic atmosphere of Glorantha, immersing readers in a world of gods, heroes, and magical powers. The narrative weaves together personal stories and grand events, providing a multi-layered experience that showcases the diverse cultures and mythologies of Glorantha.

    However, it is worth noting that “King of Sartar” may not be accessible to those unfamiliar with Glorantha or the broader context of the setting. The book assumes a certain level of knowledge about Glorantha’s mythology, cultures, and history, which could make it challenging for newcomers to fully grasp and appreciate.

    Overall, “King of Sartar” serves as a valuable resource for fans of Glorantha and those interested in exploring the depth of its mythology. It offers a comprehensive and immersive experience, delving into the rich tapestry of stories that define the world. While it may not be the ideal starting point for those new to Glorantha, it remains a must-read for enthusiasts looking to deepen their understanding of this intricate and captivating setting.

    The Complete Griselda

    “The Complete Griselda” is a collection of short stories written by Oliver Dickinson, centered around the adventures of Griselda, a formidable warrior and Rune Priestess in the world of Glorantha. Each story follows Griselda as she battles enemies, unravels mysteries, and explores the complexities of Gloranthan cultures.

    The book showcases Griselda’s journey through various lands and cultures, offering readers a diverse and immersive look into different corners of Glorantha. From encounters with gods and spirits to clashes with mortal adversaries, the stories present a range of challenges that Griselda faces with her strength, wit, and magical prowess.

    One of the highlights of “The Complete Griselda” is its vivid and descriptive writing style. Oliver Dickinson brings the world of Glorantha to life, painting a detailed picture of its landscapes, peoples, and mythological elements. The prose is engaging, capturing the essence of adventure and the mysticism of the setting.

    Griselda herself is a compelling protagonist, depicted as a strong and capable warrior with a deep connection to the spiritual forces of Glorantha. Her character development is gradual but evident throughout the stories, allowing readers to witness her growth as she confronts both physical and metaphysical challenges.

    The book also explores the cultural diversity of Glorantha, with Griselda encountering various tribes, cults, and societies. This provides an opportunity for readers to delve into the intricate social structures, religious beliefs, and magical practices of different cultures within the world.

    However, “The Complete Griselda” may not be for everyone. The stories assume a certain level of familiarity with Glorantha and its mythology, which could be a hurdle for readers new to the setting. Additionally, the collection consists of separate stories rather than a cohesive narrative, so those seeking a continuous plotline might find it lacking in that regard.

    In summary, “The Complete Griselda” offers an enjoyable and immersive exploration of the world of Glorantha through the eyes of a captivating protagonist. The book’s engaging writing style, rich world-building, and diverse adventures make it a worthwhile read for fans of Glorantha and those looking for exciting tales of heroism in a mythical realm.

    RuneQuest

    RuneQuest is a tabletop role-playing game (RPG) that was first published in 1978 by Chaosium Inc. It was designed by Steve Perrin and Greg Stafford. RuneQuest is set in a fictional world called Glorantha, which is richly detailed and known for its mythological and anthropological depth.

    In RuneQuest, players assume the roles of characters in a variety of cultures and societies within Glorantha. The game emphasizes realistic and detailed character development, with a focus on skills, abilities, and interactions between characters and the world around them. It features a skill-based system where characters improve their abilities through practice and experience.

    Magic plays a significant role in RuneQuest, with various magical systems tied to different cultures and belief systems within the game world. The game also incorporates a unique combat system that emphasizes tactical decision-making and realistic combat mechanics.

    RuneQuest has gone through several editions and revisions over the years, with the most recent version being RuneQuest: Roleplaying in Glorantha, released in 2018.

    It has gather and retained a dedicated fan base and is considered one of the classic RPGs of the hobby.

    Glorantha Computer Games.

    TTRPGs have been the primary medium for experiencing the rich lore and immersive setting of Glorantha, but it’s worth noting that while these are some of the notable computer games set in Glorantha,

    There have been several computer games set in the world of Glorantha:

    1. “King of Dragon Pass” (1999): Developed by A Sharp, “King of Dragon Pass” is a unique blend of strategy, resource management, and interactive storytelling set in Glorantha. Players take on the role of a clan leader and make decisions that shape the destiny of their clan and its interactions with other tribes and gods.
    2. “HeroQuest” (1991): Developed by Chaosium, “HeroQuest” is an interactive adaptation of the Glorantha tabletop RPG. Players can create characters and embark on quests in the world of Glorantha, experiencing its rich mythology and engaging in tactical combat.
    3. “Six Ages: Ride Like the Wind” (2018): Created by A Sharp as a spiritual successor to “King of Dragon Pass,” “Six Ages” is set in Glorantha and offers a similar blend of strategy, storytelling, and decision-making. Players lead a clan in an immersive narrative-driven experience, making choices that affect their clan’s survival and prosperity.
    4. “Glorantha: The Gods War” (TBA): In development by Petersen Games, “Glorantha: The Gods War” is an upcoming digital adaptation of the board game by the same name. The game focuses on the conflict between gods and their avatars in Glorantha, allowing players to engage in strategic battles and shape the world’s destiny.

    King of Dragon Pass

    “King of Dragon Pass” is a unique and captivating game that offers a fresh and immersive experience in the world of Glorantha. Developed by A Sharp, it combines elements of strategy, resource management, and interactive storytelling to create a rich and dynamic gameplay experience.

    One of the standout features of “King of Dragon Pass” is its emphasis on decision-making and the consequences of those decisions. As a clan leader, players are faced with numerous choices that impact their clan’s fortunes, relationships with other tribes, and interactions with the mystical forces of Glorantha. Each decision carries weight and can have far-reaching consequences, making every playthrough feel unique and personal.

    The game excels in its storytelling aspect, presenting a complex and rich narrative that draws heavily from Gloranthan mythology. The events, encounters, and quests encountered throughout the game are filled with lore and cultural depth, allowing players to delve deep into the world and its traditions. The writing is top-notch, providing vivid descriptions and engaging dialogues that bring the characters and the world to life.

    The gameplay mechanics of “King of Dragon Pass” are well-crafted and strategic. Managing resources, making alliances, resolving conflicts, and conducting rituals are just a few of the tasks players must undertake to lead their clan to prosperity. The game strikes a good balance between strategy and storytelling, ensuring that decisions have real consequences while maintaining an engaging and accessible gameplay experience.

    Visually, the game features a distinctive art style with hand-drawn illustrations and a rich color palette. While the graphics may not be cutting-edge by today’s standards, they effectively convey the unique atmosphere of Glorantha and contribute to the game’s overall charm.

    One potential drawback of “King of Dragon Pass” is its learning curve. The game can be complex and overwhelming for newcomers, as it requires understanding various mechanics, systems, and the underlying mythology of Glorantha. However, once players become familiar with the game’s intricacies, it becomes an incredibly rewarding experience.

    Overall, “King of Dragon Pass” is a remarkable game that successfully captures the essence of Glorantha and provides an engaging blend of strategy, storytelling, and decision-making. Its deep lore, immersive world-building, and meaningful choices make it a standout title for fans of both strategy and role-playing games.

  • Minesweeper Project

    Minesweeper Project

    Problem Statement

    Justifying the Development of a Portable Version of Minesweeper.

    Introduction:

    Minesweeper is a popular and addictive game that has been enjoyed by millions of players worldwide since its introduction. However, the existing versions of Minesweeper are primarily designed for specific platforms, such as Windows, and lack portability across different operating systems and devices. This poses a problem for players who want to enjoy the game on their preferred platforms or carry it on the go. Therefore, there is a need to develop a portable version of Minesweeper that can run on multiple platforms and devices.

    Problem Statement:

    The lack of a portable version of Minesweeper limits the accessibility and enjoyment of the game for players who prefer platforms other than Windows or wish to play it on different devices. This problem can be addressed by developing a portable version of Minesweeper that is compatible with various operating systems (Windows, macOS, Linux) and devices (desktops, laptops, tablets, smartphones).

    Justification:

    Platform Independence: By developing a portable version of Minesweeper, players will have the freedom to play the game on their preferred platforms without being restricted to a specific operating system. This enhances the accessibility and user experience, allowing Minesweeper enthusiasts to enjoy the game on a wide range of devices.

    Mobile Gaming: With the increasing popularity of mobile devices, a portable version of Minesweeper will cater to the growing demand for mobile gaming. Players can enjoy the game on their smartphones or tablets, providing entertainment during commutes, breaks, or any time they desire a quick gaming session.

    Cross-Device Compatibility: A portable Minesweeper version will allow players to seamlessly transition between devices. They can start a game on their desktop computer, continue playing on their smartphone while on the move, and resume on their laptop later. This flexibility enhances the gaming experience and accommodates the dynamic lifestyles of players.

    User Convenience: A portable Minesweeper version eliminates the need for players to install multiple operating systems or virtual machines solely for the purpose of playing the game. It saves time, resources, and technical complexities associated with setting up different platforms.

    Reach and Market Potential: By developing a portable version of Minesweeper, the game can reach a wider audience across various platforms and devices. This extends the potential user base and opens avenues for distribution and monetization, including app stores and online gaming platforms.

    Conclusion:

    Developing a portable version of Minesweeper addresses the limitations of existing versions and offers players the flexibility to enjoy the game on their preferred platforms and devices. It enhances accessibility, provides a seamless cross-device experience, and opens up opportunities for reaching a broader audience. By overcoming the current restrictions, a portable Minesweeper version brings the joy and challenge of the game to a wider player base, catering to the evolving needs and preferences of gaming enthusiasts.

    About Minesweeper

    Minesweeper is a classic puzzle game that originated in the 1960s and gained popularity with the release of Microsoft Windows. The objective of the game is to clear a rectangular grid containing hidden mines without detonating any of them. Players reveal the cells on the grid by clicking on them, and the numbers displayed in each cell indicate how many mines are adjacent to that particular cell. By using deductive reasoning and logical thinking, players aim to uncover all non-mine cells and mark the locations of the mines. It’s a challenging and addictive game that requires careful strategy to solve.

    The computer game that was originally developed by Microsoft. The game was created by Robert Donner and later included as a standard application in the Microsoft Windows operating system starting from Windows 3.1. As such, Minesweeper is owned by Microsoft Corporation.

    The concept of the Minesweeper game, which involves clearing a minefield without detonating any mines, is not owned by any individual or company. The game concept itself is considered a classic puzzle game and has been implemented by various developers and companies over the years. While Microsoft popularized the Minesweeper game by including it in their Windows operating system, the concept of the game is not exclusive to them, and anyone is free to create their own implementation of the game.

    The Minesweeper game is primarily known by its original name, “Minesweeper.” However, there are variations and similar games with different names that follow the same or similar gameplay mechanics.

    Some of the alternative names for games that share similarities with Minesweeper include:

    • Minefield
    • Mine Detection
    • Mine Clearing
    • Mine Buster
    • Bomb Sweeper
    • Mine Hunter
    • Mine Disarmer
    • Minefield Navigator

    These are just a few examples, and there may be other localized or unofficial names for similar games. However, “Minesweeper” remains the most widely recognized and commonly used name for this type of game.

    Architecture

    Here’s a high-level software architecture for a Minesweeper game:

    User Interface (UI) Layer:

    Handles user interactions and displays the game grid, flags, and other relevant information.
    Receives user input, such as mouse clicks or touch events, to reveal cells or place flags.
    Notifies the game logic layer of user actions and updates the UI based on game state changes.

    Game Logic Layer:

    Manages the game state and implements the game rules.
    Generates and maintains the game grid, including the mine placements and cell information.
    Processes user actions from the UI layer, such as revealing cells or flagging them.
    Determines the outcome of the game (win, loss, or ongoing) based on the user’s actions.
    Provides relevant game events or notifications to the UI layer.

    Persistence Layer:

    Handles the storage and retrieval of game data, such as high scores, game settings, and user profiles.
    Stores and loads game states to allow for saving and resuming games.

    AI (Artificial Intelligence) Layer (optional):

    Implements an AI algorithm to provide hints or automatically solve the Minesweeper game.
    Can be used to assist the player or act as a computer opponent.

    Utilities and Helpers:

    Contains various utility functions and helper classes to support the other layers.
    Includes functions for generating random mine placements, calculating adjacent mine counts, etc.

    The overall architecture promotes a separation of concerns, allowing for modular development and easier maintenance. The UI layer interacts with the user and displays the game, while the game logic layer handles the game rules and state management. The persistence layer handles data storage, and the AI layer (optional) provides additional features. Utilities and helper functions support the other layers by providing common functionality.

    Keep in mind that this is a general architectural outline, and there may be variations or additional components based on specific implementation requirements.

    Use Cases & User Stories

    Here are some example use cases and user stories for a Minesweeper game based on the software architecture mentioned earlier:

    Use Case: Start a New Game

    User Story: As a player, I want to start a new game of Minesweeper.
    Description: The player initiates a new game either by clicking a “New Game” button or selecting a difficulty level. The game logic layer generates a new game grid with random mine placements and initializes the necessary data structures. The UI layer updates the display to show the new game grid.

    Use Case: Reveal a Cell

    User Story: As a player, I want to reveal a cell by left-clicking on it.
    Description: The player clicks on a cell in the game grid. The UI layer sends the cell coordinates to the game logic layer. The game logic layer processes the action, determines the result, and updates the game state accordingly. If the revealed cell contains a mine, the game ends in a loss. If the revealed cell is empty, adjacent cells are automatically revealed recursively until non-zero adjacent mine counts are encountered.

    Use Case: Flag a Cell

    User Story: As a player, I want to flag a cell to indicate the presence of a mine.
    Description: The player right-clicks on a cell in the game grid. The UI layer sends the cell coordinates to the game logic layer. The game logic layer toggles the flagged status of the cell, updates the game state, and notifies the UI layer to display the flagged cell accordingly.

    Use Case: Win the Game

    User Story: As a player, I want to win the game by successfully flagging all mines and revealing all safe cells.
    Description: The player strategically flags all cells that contain mines and reveals all remaining safe cells without detonating any mines. The game logic layer verifies the win condition by checking if all mine cells are flagged and all non-mine cells are revealed. If the win condition is met, the game ends in a win.

    Use Case: Load a Saved Game

    User Story: As a player, I want to load a previously saved game of Minesweeper.
    Description: The player selects the “Load Game” option from the menu. The persistence layer retrieves the saved game data and restores the game state. The UI layer updates the display to reflect the loaded game state.

    Use Case: Get a Hint

    User Story: As a player, I want to receive a hint to help me make the next move.
    Description: The player clicks a “Hint” button or selects the hint option from the menu. If the AI layer is implemented, it analyzes the game state and provides a hint to the player, such as suggesting a safe cell to reveal or a mine to flag. The UI layer displays the hint to the player.

    These are just a few examples of potential use cases and user stories for a Minesweeper game. The specific use cases and user stories may vary based on the desired features and functionality of the game.

    Requirements

    Here are some example functional and non-functional requirements based on the software architecture, use cases, and user stories described earlier:

    Functional Requirements

    FR1: Start a New Game

    The system should allow the player to start a new game of Minesweeper.
    The player should be able to select a difficulty level (e.g., beginner, intermediate, expert) to determine the grid size and number of mines.
    The game logic layer should generate a new game grid with random mine placements based on the selected difficulty level.

    FR2: Reveal a Cell

    The system should enable the player to reveal a cell in the game grid by left-clicking on it.
    When a cell is revealed, the game logic layer should determine if the cell contains a mine or is empty.
    If the revealed cell is empty, the game logic layer should recursively reveal adjacent cells until non-zero adjacent mine counts are encountered.

    FR3: Flag a Cell

    The system should allow the player to flag a cell in the game grid to indicate the presence of a mine.
    The player should be able to flag or unflag a cell by right-clicking on it.
    The game logic layer should update the flagged status of the cell accordingly.

    FR4: Win the Game

    The system should detect when the player wins the game by successfully flagging all mines and revealing all safe cells.
    The game logic layer should check if all mine cells are flagged and all non-mine cells are revealed to determine the win condition.

    FR5: Load a Saved Game

    The system should allow the player to load a previously saved game of Minesweeper.
    The persistence layer should retrieve the saved game data and restore the game state.

    Non-Functional Requirements

    NFR1: User Interface Responsiveness

    The UI layer should respond to user interactions in a smooth and timely manner.
    The game grid and UI elements should update promptly when actions are performed, providing a seamless user experience.

    NFR2: Performance

    The game logic layer should handle game state updates, grid generation, and cell reveal operations efficiently, even for large grid sizes.
    The game should provide a fast and responsive gameplay experience without significant delays or lag.

    NFR3: Usability and Accessibility

    The user interface should be intuitive, visually appealing, and easy to navigate.
    The game should provide appropriate feedback and clear instructions to guide the player.
    The UI should support accessibility features, such as keyboard navigation and screen reader compatibility, to accommodate users with disabilities.

    NFR4: Persistence and Data Integrity

    The persistence layer should securely store game data, including saved games, high scores, and user profiles.
    The system should ensure data integrity and prevent data loss or corruption during storage and retrieval operations.

    NFR5: AI Performance (optional)

    If an AI layer is implemented, it should provide hints or solve the game efficiently.

    The AI algorithms should be optimized to minimize computational overhead and provide accurate recommendations in a reasonable time frame.

    These requirements provide a basis for developing a Minesweeper game that meets both functional and non-functional aspects, ensuring a satisfying user experience and system performance. Remember to further refine and expand these requirements based on specific project needs and stakeholder expectations.

    Project Definition

    Here’s an example of an Agile project structure for developing the Minesweeper software based on the user stories:

    Product Backlog:

    Create a backlog of user stories, including all the user stories related to Minesweeper.
    Prioritize the user stories based on their importance and dependencies.
    Break down the user stories into smaller, manageable tasks called “product backlog items” (PBIs).

    Sprint Planning:

    Select a set of user stories from the product backlog to be completed in the upcoming sprint.
    Break down the selected user stories into smaller tasks or sub-tasks.
    Estimate the effort required for each task using techniques like story points or time-based estimates.
    Determine the team’s capacity for the sprint and allocate tasks accordingly.

    Sprint:

    Develop and implement the tasks identified during sprint planning.
    Hold daily stand-up meetings to discuss progress, challenges, and plan the day’s work.
    Collaborate closely with team members to ensure smooth progress and resolve any blockers.
    Continuously test and review the implemented features to ensure they meet the acceptance criteria defined in the user stories.
    Regularly communicate with stakeholders, providing updates on progress and seeking feedback.

    Sprint Review:

    Demonstrate the completed user stories to stakeholders and gather their feedback.
    Discuss any changes or adjustments required based on stakeholder feedback.
    Review the product backlog and re-prioritize user stories if necessary.

    Sprint Retrospective:

    Reflect on the sprint and identify what went well and areas for improvement.
    Discuss any challenges faced and find ways to overcome them.
    Adapt and adjust the development process and team practices for better efficiency in future sprints.

    Repeat:

    Repeat the sprint cycle, selecting new user stories from the product backlog for each sprint.
    Continue developing and refining the software iteratively based on user feedback and changing requirements.

    It’s important to note that this is a simplified Agile project structure and can be adapted or customized based on the specific needs of the development team and the project. Additionally, various Agile frameworks such as Scrum or Kanban can be used to facilitate the implementation of the project structure and enable effective collaboration and iterative development.

    Epic & Stories

    Here’s an example backlog of user stories for the Minesweeper game:

    Epic: Play Minesweeper Game

    User Stories:

    As a player, I want to start a new game of Minesweeper with different difficulty levels.
    As a player, I want to reveal a cell on the game grid by left-clicking on it.
    As a player, I want to flag a cell on the game grid by right-clicking on it.
    As a player, I want the game to display the number of adjacent mines for each revealed cell.
    As a player, I want to receive a hint to help me make the next move.
    As a player, I want to win the game by successfully flagging all mines and revealing all safe cells.
    As a player, I want to lose the game if I reveal a cell containing a mine.
    As a player, I want to save the game progress and be able to resume it later.
    As a player, I want to track and display my high scores for each difficulty level.

    Here’s an example sprint plan for a two-week sprint:

    Sprint Duration: 2 weeks

    Sprint Goal: Implement core gameplay functionality

    Tasks:

    Set up project structure and version control.
    Design and implement the game grid UI.
    Implement game logic for generating mine placements and calculating adjacent mine counts.
    Implement cell reveal functionality.
    Implement cell flagging functionality.
    Implement hint feature using a basic AI algorithm (optional).
    Implement win condition and end game logic.
    Implement game save and resume functionality.
    Implement high score tracking and display.

    Note: The tasks mentioned above are just examples and can be further broken down into smaller, more specific tasks during sprint planning based on the team’s estimation and capacity.

    During the sprint, the team will work on these tasks, collaborate, and make progress towards completing the selected user stories. Daily stand-up meetings will be held to discuss progress, address any obstacles, and plan the day’s work. At the end of the sprint, the team will review the implemented features, gather feedback, and plan for the next sprint based on the revised product backlog and stakeholder input.

    Estimating

    Estimating the development effort for a game like Minesweeper can vary based on several factors, including the specific requirements, features, and the expertise of the developer. Additionally, development estimates are subjective and can vary significantly based on individual coding style and experience.

    That being said, let’s provide a rough estimate based on a professional developer’s perspective. Keep in mind that this estimate is just an approximation and can differ depending on various factors:

    Game Structure and Architecture: The initial setup of the project, including setting up the file structure, creating classes, and establishing the architecture, could take around 4-8 hours.

    User Interface (UI) Implementation: Developing the UI components, including the game grid, buttons, timer, and score display, might take approximately 6-12 hours.

    Game Logic and Algorithms: Implementing the core game logic, such as generating the minefield, handling cell reveals and flagging, checking win/loss conditions, and calculating adjacent mine counts, could require about 10-20 hours.

    AI Component (Hint System): If you plan to include an AI component to provide hints to the player, it might take an additional 8-16 hours, depending on the complexity of the AI algorithms.

    Storage Management: Implementing the functionality to save and load game progress might require around 4-8 hours, depending on the chosen storage mechanism (e.g., local storage, server-side storage).

    Testing and Bug Fixing: Allocating time for thorough testing, bug fixing, and ensuring a smooth user experience is essential. Plan for approximately 8-16 hours for this phase.

    Considering these estimates, the total development effort could range from approximately 40 to 80 hours. This estimation is a rough guideline and may vary based on individual development speed, familiarity with the technologies used, and the level of polish and refinement desired for the final product.

    It’s crucial to note that development estimates are subject to change based on project-specific requirements, unforeseen complexities, and individual development styles. It’s always recommended to perform a detailed analysis of the project requirements and consult with the developer to obtain a more accurate estimate for a specific development timeline.

    Code Structure

    Here’s an example structure for the codebase of the Minesweeper game:

    
    minesweeper/
    ├── src/
    │   ├── components/
    │   │   ├── GameGrid.js
    │   │   ├── Cell.js
    │   │   └── ...
    │   ├── game/
    │   │   ├── GameLogic.js
    │   │   ├── AI.js (optional)
    │   │   └── ...
    │   ├── ui/
    │   │   ├── UIController.js
    │   │   ├── UIManager.js
    │   │   └── ...
    │   ├── persistence/
    │   │   ├── StorageManager.js
    │   │   └── ...
    │   ├── utils/
    │   │   ├── GridUtils.js
    │   │   └── ...
    │   ├── main.js
    │   └── ...
    └── tests/
        ├── components/
        │   ├── GameGrid.test.js
        │   ├── Cell.test.js
        │   └── ...
        ├── game/
        │   ├── GameLogic.test.js
        │   ├── AI.test.js (optional)
        │   └── ...
        ├── ui/
        │   ├── UIController.test.js
        │   ├── UIManager.test.js
        │   └── ...
        ├── persistence/
        │   ├── StorageManager.test.js
        │   └── ...
        ├── utils/
        │   ├── GridUtils.test.js
        │   └── ...
        └── ...


    Explanation of the Code Structure:

    src/: Contains the source code for the Minesweeper game.

    components/: Contains the components responsible for rendering the game grid and individual cells.
    game/: Contains the game logic components, such as the main game logic and an optional AI component for hints (if implemented).
    ui/: Contains components responsible for managing the user interface and handling user interactions.
    persistence/: Contains components responsible for data storage and retrieval, including saving and loading game states.
    utils/: Contains utility functions or helper classes that assist with various tasks, such as grid manipulation or calculations.
    main.js: The entry point of the application that initializes and starts the game.
    tests/: Contains unit tests for the codebase.

    The test folder structure mirrors the source code structure, with corresponding test files for each component.
    Unit tests are written using a testing framework (e.g., Jest) to ensure the correctness of individual components and functionalities.
    This code structure promotes modularity and separation of concerns, making it easier to develop and maintain the codebase. Each component has its own folder, allowing for focused development and testing. The main entry point initializes the game and connects the different components together.

    Remember that this is just an example code structure, and you can adapt it to fit the specific requirements of your project or coding practices.

    Code Samples

    main.js

    Here’s an example code for the main.js file, which serves as the entry point for the Minesweeper game:

    
    import UIController from './ui/UIController.js';
    
    // Create an instance of the UIController
    const uiController = new UIController();
    
    // Initialize the game
    uiController.initialize();
    
    // Start the game
    uiController.startGame();


    In this code snippet, the main.js file imports the UIController class from the UIController.js file. It then creates an instance of the UIController and assigns it to the uiController variable.

    Next, the code calls the initialize() method of the UIController instance. This method sets up the user interface, event listeners, and any necessary initializations.

    Finally, the code calls the startGame() method of the UIController instance to begin the Minesweeper game.

    This code assumes that the UIController class is responsible for managing the overall game flow, user interface, and interaction between different game components. Adjust the code as needed based on your specific implementation and class structure.

    UIcontroller.js

    To create or write the UIController.js file, you can use various resources and references to guide you. Here are some useful resources:

    JavaScript Documentation:

    Mozilla Developer Network (MDN): The MDN web docs provide comprehensive and reliable documentation on JavaScript. You can refer to their documentation on JavaScript syntax, objects, classes, and event handling.
    MDN JavaScript Guide: This guide covers various JavaScript concepts and features, including objects, classes, modules, and more.

    JavaScript Frameworks and Libraries:

    React: If you plan to build the UI using React, the official React documentation can be a valuable resource. It covers React concepts, components, state management, and event handling.
    Vue.js: For Vue.js developers, the Vue.js documentation provides a comprehensive guide to building user interfaces, managing state, and handling events using Vue.js components.

    Online Tutorials and Courses:

    YouTube tutorials: Search for JavaScript or game development tutorials on YouTube. Many channels offer step-by-step guidance on building games, including Minesweeper, with JavaScript.
    Online learning platforms: Platforms like Udemy, Coursera, and Pluralsight offer online courses on JavaScript, game development, and specific frameworks like React or Vue.js. These courses often provide structured learning paths with practical examples.

    Open-Source Projects:

    GitHub: Explore open-source projects related to Minesweeper or game development on GitHub. You can find repositories that include source code for game logic, user interface implementation, and overall game structure.
    Remember, the UIController.js file will depend on your chosen technology stack and design decisions. You may need to define event listeners, manage the game state, handle user interactions, and communicate with other game components. Be sure to review the provided resources and adapt the code to match your specific project requirements and coding style.

    Here’s an example of a UIController.js file that demonstrates a basic implementation for the Minesweeper game:

    
    import GameLogic from '../game/GameLogic.js';
    
    class UIController {
      constructor() {
        this.gameLogic = new GameLogic();
        // Add any additional properties or dependencies here
      }
    
      initialize() {
        // Perform any necessary initialization tasks here, such as setting up the game board UI
        // and attaching event listeners
        this.setupGameBoard();
        this.attachEventListeners();
      }
    
      setupGameBoard() {
        // Implement the code to create the game board UI, including cells and any necessary elements
        // You can use DOM manipulation techniques or a front-end framework like React or Vue.js
      }
    
      attachEventListeners() {
        // Implement the code to attach event listeners to relevant UI elements
        // For example, listen for click events on cells to handle cell reveal or flagging
        // You can use native JavaScript event listeners or framework-specific event handling mechanisms
      }
    
      startGame() {
        // Implement the code to start the Minesweeper game
        this.gameLogic.startGame();
        // You can call necessary methods from the game logic component or any other relevant component here
      }
    
      // Add more methods as needed to handle various game actions, UI updates, or user interactions
    }
    
    export default UIController;


    In this sample code, the UIController class is responsible for managing the user interface and handling user interactions for the Minesweeper game. It has methods for initialization, setting up the game board UI, attaching event listeners, and starting the game.

    Note that this is a basic example, and you may need to extend the UIController class with additional methods and properties to handle more specific game functionalities or UI updates. The implementation details will depend on your chosen technology stack (e.g., native JavaScript, React, Vue.js) and design decisions.

    Remember to adapt the code to match your specific project requirements and coding style.

    GameLogic.js

    Here’s an example of a GameLogic.js file that handles the game logic for the Minesweeper game:

    
    class GameLogic {
      constructor() {
        this.grid = [];
        this.gameOver = false;
        // Add any additional properties or dependencies here
      }
    
      startGame() {
        // Implement the code to start a new game
        this.generateGrid();
        this.placeMines();
        // Add any additional setup or initialization steps here
      }
    
      generateGrid() {
        // Implement the code to generate the game grid
        // The grid should consist of cells, each containing information about whether it's a mine, adjacent mine count, etc.
      }
    
      placeMines() {
        // Implement the code to randomly place mines on the game grid
        // Ensure that the number of mines and their positions are determined based on the game's difficulty level
      }
    
      revealCell(row, col) {
        // Implement the code to reveal a cell on the game grid
        // Handle the case when a mine is revealed and end the game if necessary
        // Update the adjacent mine counts for the neighboring cells
        // Handle any additional logic related to cell reveal, such as checking for a win condition
      }
    
      flagCell(row, col) {
        // Implement the code to flag/unflag a cell on the game grid
        // Update the flag state of the cell and handle any related logic
      }
    
      // Add more methods as needed to handle various game actions, calculations, or updates
    }
    
    export default GameLogic;


    In this sample code, the GameLogic class handles the core game logic for the Minesweeper game. It includes methods for starting a new game, generating the game grid, placing mines, revealing cells, flagging cells, and potentially more.

    Please note that this is a basic example, and the implementation details of the GameLogic class will depend on the specific rules and mechanics of your Minesweeper game. You’ll need to extend the class and add additional methods or properties to handle other aspects of the game, such as calculating adjacent mine counts, checking win/lose conditions, or implementing additional game features.

    Remember to adapt the code to match your specific project requirements, data structures, and coding style.

    GameGrid.js

    Here’s an example of a GameGrid.js file that represents the game grid and handles rendering the grid UI for the Minesweeper game:

    
    class GameGrid {
      constructor(rows, cols) {
        this.rows = rows;
        this.cols = cols;
        this.grid = [];
        // Add any additional properties or dependencies here
      }
    
      initialize() {
        // Implement the code to initialize the game grid
        this.createGrid();
        // Add any additional setup or initialization steps here
      }
    
      createGrid() {
        // Implement the code to create the grid array with cells
        for (let row = 0; row &lt; this.rows; row++) {
          this.grid[row] = [];
          for (let col = 0; col &lt; this.cols; col++) {
            this.grid[row][col] = {
              isMine: false,
              adjacentMines: 0,
              revealed: false,
              flagged: false,
              // Add any additional cell properties as needed
            };
          }
        }
      }
    
      render() {
        // Implement the code to render the game grid UI
        // This can be done using DOM manipulation or by utilizing a front-end framework like React or Vue.js
        // Iterate through the grid array and generate the UI elements for each cell, applying appropriate styles and classes
      }
    
      // Add more methods as needed to handle various grid actions, UI updates, or calculations
    }
    
    export default GameGrid;


    In this example code, the GameGrid class represents the game grid and handles rendering the grid UI for the Minesweeper game. It includes methods for initializing the grid, creating the grid array with cells, and rendering the grid UI.

    Note that this is a basic example, and you may need to extend the GameGrid class with additional methods and properties to handle more specific grid functionalities, cell interactions, or UI updates. The implementation details will depend on your chosen technology stack (e.g., native JavaScript, React, Vue.js) and design decisions.

    Remember to adapt the code to match your specific project requirements, data structures, and coding style.

    Cell.js

    Here’s an example of a Cell.js file that represents an individual cell in the game grid for the Minesweeper game:

    
    class Cell {
      constructor(row, col) {
        this.row = row;
        this.col = col;
        this.isMine = false;
        this.adjacentMines = 0;
        this.revealed = false;
        this.flagged = false;
        // Add any additional properties or dependencies here
      }
    
      reveal() {
        // Implement the code to reveal the cell
        this.revealed = true;
        // Add any additional logic related to cell reveal
      }
    
      flag() {
        // Implement the code to flag/unflag the cell
        this.flagged = !this.flagged;
        // Add any additional logic related to cell flagging
      }
    
      // Add more methods as needed to handle various cell actions or calculations
    }
    
    export default Cell;


    In this example code, the Cell class represents an individual cell in the game grid for the Minesweeper game. It includes properties for the cell’s position, whether it contains a mine, the number of adjacent mines, and its reveal/flag states. The class also includes methods for revealing the cell and flagging/unflagging the cell.

    Please note that this is a basic example, and the implementation details of the Cell class may vary based on your specific project requirements and game rules. You can extend the class with additional methods or properties to handle other cell actions, such as calculating adjacent mine counts or handling additional cell states.

    Remember to adapt the code to match your specific project requirements, data structures, and coding style.

    AI.js

    Here’s an example of an AI.js file that represents an AI component for providing hints in the Minesweeper game:

    
    class AI {
      constructor(gameLogic) {
        this.gameLogic = gameLogic;
        // Add any additional properties or dependencies here
      }
    
      getHint() {
        // Implement the code to get a hint from the AI
        // Analyze the game state and return a cell that the AI suggests to be revealed or flagged
        // You can use various algorithms or strategies to determine the hint, such as analyzing the probability of mines
        // Return the coordinates (row, col) of the cell that the AI suggests
      }
    
      // Add more methods as needed to handle various AI actions, calculations, or strategies
    }
    
    export default AI;


    In this example code, the AI class represents an AI component for providing hints in the Minesweeper game. It takes an instance of the GameLogic class as a dependency to analyze the game state and make suggestions.

    The getHint() method is responsible for returning a hint from the AI. It can analyze the game state using various algorithms or strategies to determine the suggested cell to reveal or flag. The method should return the coordinates (row, col) of the cell that the AI suggests.

    Please note that this is a basic example, and the implementation details of the AI class may vary based on your specific project requirements and AI strategies. You can extend the class with additional methods or properties to handle other AI actions, calculations, or strategies.

    Remember to adapt the code to match your specific project requirements, game logic, and coding style.

    Here’s a high-level overview of how you can approach the AI component:

    Identify Possible Moves:

    Determine the set of cells that are not revealed yet and do not have a flag.
    This set of cells represents the possible moves that the AI can suggest to the player.

    Evaluate Cell Scores:

    Assign a score to each of the possible moves based on the likelihood of the cell being safe or containing a mine.
    The score can be determined by analyzing the adjacent revealed cells and their mine counts.
    Higher scores can indicate a higher probability of being safe, while lower scores can suggest a higher probability of containing a mine.
    Sort Moves by Score:

    Sort the possible moves in descending order based on their scores.
    This step helps prioritize the moves that are more likely to be safe.

    Provide Hint to Player:

    Once the moves are sorted, the AI can suggest the cell with the highest score to the player as a hint.
    The suggested move can be highlighted or visually indicated to attract the player’s attention.

    User Interaction:

    When the player interacts with the suggested move, the game logic should handle the reveal or flagging of the cell as per the player’s action.
    It’s important to note that the AI for the hint system can be as simple or as complex as desired. The above approach provides a basic foundation for implementing a hint system. However, you can enhance the AI by incorporating more sophisticated algorithms or strategies, such as considering patterns, analyzing probabilities, or even implementing machine learning techniques.

    Remember to thoroughly test the AI component to ensure it provides helpful and accurate hints to the player, enhancing the gaming experience without compromising the challenge.

    Here’s an example code structure for the AI component in the hint system of the Minesweeper game:

    
    class AI {
      constructor(gameGrid) {
        this.gameGrid = gameGrid;
      }
    
      suggestMove() {
        const possibleMoves = this.identifyPossibleMoves();
        const scoredMoves = this.evaluateCellScores(possibleMoves);
        const sortedMoves = this.sortMovesByScore(scoredMoves);
        const hintCell = sortedMoves[0]; // Select the move with the highest score as the hint
        return hintCell;
      }
    
      identifyPossibleMoves() {
        const possibleMoves = [];
        // Iterate through the game grid to find unrevealed cells without a flag
        // Add those cells to the possibleMoves array
        // Example:
        for (let row = 0; row &lt; this.gameGrid.rows; row++) {
          for (let col = 0; col &lt; this.gameGrid.cols; col++) {
            const cell = this.gameGrid.getCell(row, col);
            if (!cell.revealed &amp;&amp; !cell.flagged) {
              possibleMoves.push(cell);
            }
          }
        }
        return possibleMoves;
      }
    
      evaluateCellScores(possibleMoves) {
        const scoredMoves = [];
        // Iterate through the possibleMoves array and assign scores to each cell
        // based on the adjacent revealed cells and their mine counts
        // Example:
        for (const cell of possibleMoves) {
          const score = this.calculateCellScore(cell);
          scoredMoves.push({ cell, score });
        }
        return scoredMoves;
      }
    
      calculateCellScore(cell) {
        // Calculate the score for a given cell based on the adjacent revealed cells
        // and their mine counts
        // Example:
        let score = 0;
        const adjacentCells = this.gameGrid.getAdjacentCells(cell.row, cell.col);
        for (const adjacentCell of adjacentCells) {
          if (adjacentCell.revealed) {
            score += adjacentCell.mineCount;
          }
        }
        return score;
      }
    
      sortMovesByScore(scoredMoves) {
        // Sort the scoredMoves array in descending order based on the scores
        // Example:
        scoredMoves.sort((a, b) =&gt; b.score - a.score);
        return scoredMoves.map((move) =&gt; move.cell);
      }
    }


    In this example, the AI class provides the functionality to suggest moves to the player as hints. The suggestMove method orchestrates the AI’s decision-making process by calling other helper methods.

    The identifyPossibleMoves method finds all unrevealed cells without a flag and returns them as an array. The evaluateCellScores method assigns scores to each possible move based on the adjacent revealed cells and their mine counts. The calculateCellScore method calculates the score for a given cell. The sortMovesByScore method sorts the possible moves in descending order based on their scores.

    You can customize and expand upon this code structure to implement additional logic or more sophisticated AI algorithms based on your specific requirements.

    Please note that the provided code structure is a simplified example and may need adaptation to fit within your existing codebase or integrate with your game logic.

    UIManager.js

    Here’s an example of a UIManager.js file that manages the user interface for the Minesweeper game:

    
    class UIManager {
      constructor() {
        this.gameGrid = null;
        // Add any additional properties or dependencies here
      }
    
      initialize(gameGrid) {
        // Initialize the UIManager with the game grid
        this.gameGrid = gameGrid;
        // Add any additional setup or initialization steps here
      }
    
      render() {
        // Implement the code to render the game interface
        // This can involve rendering the game grid, buttons, score, timer, etc.
        // You can use DOM manipulation or a front-end framework like React or Vue.js for rendering
        // Utilize the game grid's render() method to render the grid UI
        this.gameGrid.render();
        // Add any additional rendering logic or UI updates
      }
    
      // Add more methods as needed to handle various UI actions, updates, or interactions
    }
    
    export default UIManager;


    In this example code, the UIManager class is responsible for managing the user interface for the Minesweeper game. It includes methods for initializing the UIManager with the game grid, rendering the game interface, and potentially more methods for handling UI actions, updates, or interactions.

    The initialize() method is used to initialize the UIManager with the game grid. It takes the game grid as a parameter and sets it as a property of the UIManager for later use.

    The render() method is responsible for rendering the game interface. It can involve rendering various UI elements such as the game grid, buttons, score, timer, and any other components. In this example, the render() method calls the render() method of the game grid object to render the grid UI. You can add additional rendering logic or UI updates as needed.

    Please note that this is a basic example, and the implementation details of the UIManager class may vary based on your specific project requirements and the chosen technology stack. You can extend the class with additional methods or properties to handle other UI actions, updates, or interactions.

    Remember to adapt the code to match your specific project requirements, UI components, and coding style.

    StorageManager.js

    Here’s an example of a StorageManager.js file that manages the storage and retrieval of game data for the Minesweeper game:

    
    class StorageManager {
      constructor() {
        // Add any necessary properties or dependencies here
      }
    
      saveGame(gameData) {
        // Implement the code to save the game data
        // Store the game data in the browser's storage (e.g., localStorage) or on the server
      }
    
      loadGame() {
        // Implement the code to load the saved game data
        // Retrieve the game data from the storage and return it
      }
    
      clearSavedGame() {
        // Implement the code to clear the saved game data
        // Remove the stored game data from the storage
      }
    
      // Add more methods as needed to handle various storage actions or operations
    }
    
    export default StorageManager;


    In this example code, the StorageManager class is responsible for managing the storage and retrieval of game data for the Minesweeper game. It includes methods for saving the game data, loading the saved game data, and clearing the saved game data.

    The saveGame() method is used to save the game data. It takes the game data as a parameter and stores it in the browser’s storage (e.g., localStorage) or on the server, depending on your chosen implementation.

    The loadGame() method retrieves the saved game data from the storage and returns it.

    The clearSavedGame() method removes the stored game data from the storage, allowing the user to start a new game or reset the saved game.

    Please note that this is a basic example, and the implementation details of the StorageManager class may vary based on your specific project requirements and storage mechanism. You can extend the class with additional methods or properties to handle other storage actions or operations, such as managing multiple saved games or implementing encryption.

    Remember to adapt the code to match your specific project requirements, storage mechanism, and coding style.

    GridUtils.js

    Here’s an example of a GridUtils.js file that provides utility functions for manipulating the game grid in the Minesweeper game:

    
    class GridUtils {
      static getAdjacentCells(row, col, grid) {
        // Implement the code to get the adjacent cells of a given cell
        // The function should return an array of adjacent cells
        // You can use the row and col parameters to determine the current cell's position
        // The grid parameter represents the game grid array
        // Handle edge cases and ensure that you're not accessing cells outside the grid boundaries
        // Return the array of adjacent cells
      }
    
      static countAdjacentMines(row, col, grid) {
        // Implement the code to count the number of adjacent mines for a given cell
        // The function should return the count of adjacent mines
        // You can utilize the getAdjacentCells() function to get the adjacent cells of the current cell
        // Check each adjacent cell and count the number of cells that contain mines
        // Return the count of adjacent mines
      }
    
      // Add more utility functions as needed to handle various grid operations or calculations
    }
    
    export default GridUtils;


    In this example code, the GridUtils class provides utility functions for manipulating the game grid in the Minesweeper game. It includes static methods for getting the adjacent cells of a given cell (getAdjacentCells()) and counting the number of adjacent mines for a given cell (countAdjacentMines()).

    The getAdjacentCells() method takes the row and col parameters to determine the position of the current cell. It also takes the grid parameter, which represents the game grid array. The method should handle edge cases, such as cells on the grid boundaries, and return an array of adjacent cells.

    The countAdjacentMines() method takes the row and col parameters to determine the position of the current cell. It also takes the grid parameter, which represents the game grid array. The method uses the getAdjacentCells() function to retrieve the adjacent cells of the current cell and counts the number of cells that contain mines. It returns the count of adjacent mines.

    Please note that this is a basic example, and the implementation details of the GridUtils class may vary based on your specific project requirements and grid representation. You can extend the class with additional utility functions to handle other grid operations or calculations, such as revealing all adjacent cells or checking for win conditions.

    Remember to adapt the code to match your specific project requirements, grid representation, and coding style.

    Test Cases

    Here are some example test cases for the Minesweeper software:

    Test Case: Initialize Game Grid

    Description: Verify that the game grid is initialized correctly.
    Steps:
    Create a new instance of the game grid.
    Verify that the grid is created with the correct number of rows and columns.
    Verify that all cells in the grid are initialized with the correct default values (e.g., isMine: false, revealed: false, flagged: false).

    Test Case: Reveal Cell

    Description: Verify that a cell can be revealed correctly.
    Steps:
    Create a new instance of the game grid.
    Choose a cell to reveal.
    Call the revealCell(row, col) method on the game grid, passing the row and column indices of the chosen cell.
    Verify that the specified cell is now revealed.
    Verify that the adjacent cells are revealed if the chosen cell has no adjacent mines.

    Test Case: Flag Cell

    Description: Verify that a cell can be flagged and unflagged correctly.
    Steps:
    Create a new instance of the game grid.
    Choose a cell to flag.
    Call the flagCell(row, col) method on the game grid, passing the row and column indices of the chosen cell.
    Verify that the specified cell is now flagged.
    Call the flagCell(row, col) method again on the same cell.
    Verify that the flag is removed from the cell.

    Test Case: Game Over (Mine Explosion)

    Description: Verify that the game ends when a mine is revealed.
    Steps:
    Create a new instance of the game grid.
    Place a mine in a specific cell.
    Call the revealCell(row, col) method on the game grid, passing the row and column indices of the cell with the mine.
    Verify that the game ends and displays the appropriate message (e.g., “Game Over – You Lost”).

    Test Case: Game Win (All Cells Revealed)

    Description: Verify that the game ends when all non-mine cells are revealed.
    Steps:
    Create a new instance of the game grid.
    Reveal all non-mine cells on the grid.
    Verify that the game ends and displays the appropriate message (e.g., “Congratulations! You Win!”).

    These are just a few examples of test cases that can be performed to validate the functionality of the Minesweeper software. You can expand the test suite to include additional test cases covering various scenarios, edge cases, and interactions with the user interface.

    Remember to adapt the test cases to match your specific implementation, methods, and expected outcomes.

    Automation

    Here’s an example of how you can set up automation to assemble and test the Minesweeper game code using test cases:

    Package Manager Configuration:

    Set up a package manager configuration file such as package.json (for npm) or pyproject.toml (for pipenv).
    Include the necessary dependencies and scripts for building and testing the code.
    Build Script:

    Create a build script to compile or bundle the source code.
    Depending on your project setup, this could involve transpiling JavaScript, minifying assets, or any other necessary steps.
    For example, if you’re using a bundler like webpack, your build script could be defined in the package manager configuration file.

    Test Setup:

    Set up a test framework or library for unit testing, such as Jest, Mocha, or Pytest.
    Install the necessary testing dependencies and configure the testing environment.
    Test Cases:

    Write individual test cases for each component or functionality of the game.
    Include test cases for different scenarios, edge cases, and expected behaviors.
    Test both positive and negative scenarios to ensure code robustness.

    Test Runner Script:

    Create a test runner script to execute the test cases.
    This script can be defined as a separate file, such as test.js or test.py.
    Within the test runner script, import the necessary test libraries and modules, and execute the test cases.

    Automation Script:

    Write an automation script, such as a shell script or a task runner configuration file (e.g., Makefile, Gruntfile.js, Gulpfile.js), to automate the build and test processes.
    Define the necessary commands to build the code and run the test runner script.
    For example, your automation script might include commands like npm run build to build the code and npm test to run the tests.

    Continuous Integration (CI) Configuration:

    If you’re using a CI/CD platform like Jenkins, Travis CI, or GitHub Actions, configure the build and test automation in your CI pipeline.
    Define the necessary steps, triggers, and environment setup in your CI configuration file.

    For example, you might specify that the build and test automation should run whenever changes are pushed to the repository or triggered by a pull request.
    By setting up the automation process described above, you can ensure that your code is automatically built and tested whenever changes are made. This helps catch any issues or regressions early on and ensures the reliability of your Minesweeper game.

    Release Notes

    Release Notes – Minesweeper Game (Version 1.0.0)

    We are excited to announce the release of Minesweeper Game version 1.0.0! This release brings a fully functional Minesweeper game with an intuitive user interface, challenging gameplay, and various features to enhance the gaming experience.

    Features:

    Game Grid: Play on a customizable grid with adjustable dimensions, including rows and columns.
    Mines Placement: Mines are randomly distributed across the game grid to provide unique gameplay every time.
    Cell Actions: Reveal cells to uncover numbers or mines, and flag cells to mark potential mines.
    Game Over Condition: If a mine is revealed, the game ends with a loss.
    Game Win Condition: When all non-mine cells are revealed, the game ends with a win.
    Timer: Track your game time and challenge yourself to complete the game faster.
    Hint System (AI): Get hints from the AI component to assist you in making strategic moves.
    Storage Management: Save and load your game progress to continue playing from where you left off.

    Bug Fixes and Improvements:

    Fixed an issue where the game grid was not rendering properly on certain screen resolutions.
    Improved the responsiveness of the user interface for smoother gameplay.
    Enhanced the hint system to provide more accurate and helpful hints.
    Optimized the game logic for better performance and reduced memory consumption.
    Known Issues:

    None at the moment. Please report any issues you encounter during gameplay for prompt resolution.
    We appreciate your support and feedback in making this release possible. Enjoy playing Minesweeper Game version 1.0.0, and stay tuned for future updates and enhancements!

    Note: The release notes are fictitious and provided as an example. In an actual release, you would include specific details about the changes, bug fixes, and improvements made in the software.

    Minesweeper Game Readme

    Minesweeper Game is a classic single-player puzzle game where the objective is to clear the minefield without detonating any mines. This repository contains the source code and assets for the Minesweeper Game software.

    Table of Contents

    • Features
    • Installation
    • Usage
    • Game Rules
    • Contributing
    • License

    Features

    Customizable game grid with adjustable dimensions.
    Random placement of mines for a unique gameplay experience.
    Ability to reveal cells to uncover numbers or mines.
    Flag cells to mark potential mines.
    Game Over condition if a mine is revealed.
    Game Win condition if all non-mine cells are revealed.
    Timer to track the game duration.
    Hint system (AI) to assist with strategic moves.
    Storage management to save and load game progress.

    Installation

    Clone the repository to your local machine.

    git clone https://github.com/your-username/minesweeper-game.git
    

    Navigate to the project directory.

    Copy code
    cd minesweeper-game
    

    Open the index.html file in a web browser.

    Usage

    Upon opening the game, set the desired grid dimensions and the number of mines.
    Left-click on a cell to reveal it.
    Right-click on a cell to flag or unflag it.
    Use the timer to keep track of your game duration.
    If a mine is revealed, the game ends with a loss.
    If all non-mine cells are revealed, the game ends with a win.
    Save and load your game progress using the storage management feature.

    Game Rules

    The numbers in the revealed cells indicate the count of adjacent cells that contain mines.
    If a cell does not have any adjacent mines, it will automatically reveal its adjacent cells.
    Avoid clicking on cells that may contain mines. Revealing a mine will end the game.
    Use the flag feature to mark cells that you suspect contain mines.
    Utilize the hint system (AI) to assist you in making strategic moves.

    Contributing

    Contributions to Minesweeper Game are welcome! If you find any bugs, have suggestions for improvements, or would like to add new features, please open an issue or submit a pull request.

    When contributing to this repository, please ensure that your code follows the existing coding style and conventions. Also, make sure to test your changes thoroughly before submitting a pull request.

    License

    This project is licensed under the MIT License. Feel free to use and modify the code for personal or commercial purposes.

  • The Pac-Man Project

    The Pac-Man Project

    Problem Statement

    The CEO of our small, but innovative gaming and software consulting business, has been reading about retro-games and has asked the product team to build a business case and provide an estimate for an updated pac-man like game for home computers, believing that a small project, well executed can make a good product, which when sensibly marketed and distributed should pay for itself and return a reasonable margin for our business.

    Research – Pac-Man Overview

    Pac-Man is an iconic arcade game that was created by the Japanese video game designer Toru Iwatani and developed by the company Namco.

    It was first released in Japan in May 1980 and quickly became a global phenomenon, influencing the gaming industry and popular culture.

    Here is a brief history of Pac-Man:

    1. Conception and Development (1979-1980): Toru Iwatani, a young game designer at Namco, wanted to create a game that would appeal to a broader audience, including women and non-traditional gamers. Inspired by the image of a pizza with a missing slice, he conceptualized the character of Pac-Man. The goal was to create a game that was simple, non-violent, and fun for players of all ages.
    2. Release and Popularity (1980-1982): Pac-Man was released in Japanese arcades in May 1980 and gained immediate popularity. Its unique gameplay, colorful graphics, and catchy music captivated players. Pac-Man’s success extended beyond Japan and quickly spread to the United States and other countries, becoming a cultural phenomenon and a symbol of the thriving arcade gaming industry.
    3. Impact and Innovations: Pac-Man introduced several innovations to the gaming industry. It was one of the first games to feature cutscenes, with intermissions between levels that revealed the personalities of the game’s characters. Pac-Man also introduced power pellets, which temporarily made the ghosts vulnerable, providing a strategic twist to the gameplay.
    4. High Score Competitions and Records (1980s): Pac-Man sparked intense competition among players to achieve high scores. Players participated in tournaments and competed for world records. Billy Mitchell’s 1999 documentary “The King of Kong: A Fistful of Quarters” brought renewed attention to competitive Pac-Man play.
    5. Legacy and Cultural Impact: Pac-Man’s popularity extended beyond the gaming world. It became a cultural phenomenon and inspired a wide range of merchandise, including toys, clothing, and even an animated television series. The Pac-Man character became an enduring icon in popular culture, representing the nostalgia of classic arcade gaming.
    6. Sequels, Spin-Offs, and Adaptations: Due to Pac-Man’s immense success, numerous sequels, spin-offs, and adaptations have been developed over the years. These include games like Ms. Pac-Man, Pac-Man Jr., Pac-Man World, and Pac-Man Championship Edition. Pac-Man has been released on various platforms, including home consoles, handheld devices, and mobile phones.
    7. Enduring Legacy and Influence: Pac-Man’s impact on the gaming industry is profound. It helped establish the maze-chase genre and paved the way for future arcade classics. Its simple yet addictive gameplay and recognizable characters continue to resonate with players today, making it one of the most enduring and beloved video games of all time.

    Pac-Man’s success and lasting influence have solidified its place in gaming history, and it remains a beloved and iconic game that continues to entertain and inspire new generations of players.

    The Business Case

    Business Case: Modern Version of the Pac-Man Game

    1. Executive Summary: Pac-Man is a classic arcade game that has stood the test of time and has a strong nostalgic appeal. The proposed Pac-Man game aims to capture the essence of the original game while offering enhanced features and modern gameplay experiences. This business case outlines the reasons for developing and launching the Pac-Man game, highlighting its potential market, revenue opportunities, and long-term sustainability.
    2. Problem Statement: There is a demand for high-quality, engaging, and nostalgic gaming experiences that resonate with a wide range of players. While there are existing Pac-Man games available, there is an opportunity to create a fresh and updated version that appeals to both new and existing fans of the franchise.
    3. Market Analysis:
    • Pac-Man has a large and dedicated fan base worldwide, comprising both older players who have fond memories of the original game and newer players discovering the timeless appeal of classic arcade games.
    • The gaming market continues to grow, with a diverse range of platforms including PC, consoles, mobile devices, and web-based gaming. This provides multiple avenues to reach and engage with players.
    • Nostalgia-driven gaming experiences are popular and often have a broad appeal, attracting not only existing fans but also new players seeking retro gaming experiences.
    1. Product Description: The proposed Pac-Man game aims to deliver an authentic and enjoyable gameplay experience while incorporating modern enhancements. Key features include:
    • Multiple levels with increasing difficulty and unique maze layouts to keep players engaged.
    • Improved ghost AI, creating more challenging and dynamic gameplay.
    • Power pellets that grant temporary invincibility and strategic advantages.
    • Score tracking, level progression, and high score competition to drive player engagement and replayability.
    • Enhanced audio and visual effects for an immersive and nostalgic experience.
    1. Target Audience: The target audience for the Pac-Man game includes:
    • Fans of the original Pac-Man game, both older players seeking a nostalgic experience and younger players discovering the game for the first time.
    • Casual gamers looking for simple yet addictive gameplay experiences.
    • Players interested in retro or classic arcade games.
    • Mobile gamers, console gamers, and PC gamers across various platforms.
    1. Revenue Opportunities: There are several revenue opportunities associated with the Pac-Man game:
    • Game sales: Generate revenue through sales of the game on various platforms, such as app stores, gaming consoles, and digital distribution platforms.
    • In-app purchases: Offer optional in-app purchases for cosmetic enhancements, power-ups, or additional levels.
    • Advertising: Include non-intrusive advertisements within the game to generate ad revenue.
    • Licensing: Explore licensing opportunities for Pac-Man merchandise, collaborations, or brand partnerships.
    1. Development and Launch Plan:
    • Assemble a development team with expertise in game design, programming, graphics, and sound.
    • Design and implement the game mechanics, AI, levels, and graphical assets.
    • Conduct rigorous testing and quality assurance to ensure a polished and bug-free experience.
    • Plan a targeted marketing campaign to build anticipation and awareness before the game’s release.
    • Collaborate with platform holders and distributors to launch the game across various platforms simultaneously.
    1. Financial Projections:
    • Develop financial projections based on estimated development costs, expected sales volume, and revenue from in-app purchases and advertising.
    • Consider factors such as platform fees, marketing expenses, and ongoing support and updates.
    • Calculate return on investment (ROI) and set revenue targets based on projected sales and monetization strategies.
    1. Sustainability and Future Growth:
    • Continuously monitor player feedback, identify areas for improvement, and release regular updates and patches to enhance the game’s quality and address any issues.
    • Explore expansion opportunities, such as additional levels, downloadable content (DLC), or multiplayer modes.

    Return on Investment

    To estimate the return on investment (ROI) for the Pac-Man product, we need to consider several factors, including the cost of development, potential revenue streams, and the expected timeframe for generating returns. Please note that ROI calculations can vary depending on specific business models, pricing strategies, and market conditions. Here’s a general framework to help you estimate the ROI:

    1. Development Cost: Calculate the total cost of developing the Pac-Man game. This includes expenses related to personnel, equipment, software licenses, marketing, and any other associated costs.
    2. Revenue Streams: Identify potential revenue streams for the product. These may include:
      • Game Sales: Revenue generated from selling the Pac-Man game to customers, either through digital platforms or physical copies.
      • In-App Purchases: Additional revenue from in-game purchases, such as power-ups, extra lives, or customization options.
      • Advertisements: Revenue generated from displaying ads within the game, either through partnerships with advertisers or through ad networks.
      • Licensing: Possibility of licensing the game to other platforms or companies for distribution.
    3. Pricing Strategy: Determine the pricing strategy for the Pac-Man game, considering factors such as market demand, competition, and target audience. Analyze pricing models such as one-time purchase, freemium (with in-app purchases), or subscription-based, and estimate the average revenue per user or unit.
    4. Market Analysis: Assess the potential market size and demand for Pac-Man games or similar arcade-style games. Consider factors such as target demographics, gaming trends, and competitive landscape. This analysis will help estimate the market share and potential sales volume.
    5. Projected Sales and Revenue: Based on the pricing strategy and market analysis, make an educated estimate of the number of game units or users you expect to acquire over a specific timeframe (e.g., monthly, yearly). Multiply the projected sales volume by the average revenue per unit to estimate the potential revenue.
    6. ROI Calculation: Finally, calculate the ROI using the following formula: ROI = (Net Profit / Development Cost) * 100 Net Profit = Total Revenue – Development Cost

    By plugging in the estimated revenue and development cost values, you can determine the ROI percentage.

    Keep in mind that ROI calculations are estimates and may vary based on numerous external factors, market dynamics, and other business considerations.

    To refine and obtain a more accurate ROI estimate, it’s advisable to perform detailed market research, consider pricing experiments, analyze historical data (if available), and consult with industry experts or financial advisors who can provide insights into the gaming industry and market trends.

    To calculate the ROI for the Pac-Man game based on an hourly rate, you will need to consider the total development cost and the projected revenue generated from the game. Here’s a step-by-step approach:

    1. Development Cost: Determine the total development cost of the Pac-Man game, including all associated expenses such as salaries, software licenses, equipment, marketing, and any other relevant costs. Express this cost in monetary terms.
    2. Revenue Projection: Estimate the potential revenue you expect to generate from the game. Consider factors such as pricing strategy, market size, target audience, and potential revenue streams (e.g., game sales, in-app purchases, advertisements, licensing). Express the projected revenue in monetary terms.
    3. Effort Estimation: Estimate the total effort in hours required to develop the Pac-Man game. This includes the work hours of the development team, including programmers, designers, testers, and other relevant roles. Take into account the estimated effort you derived earlier.
    4. Hourly Rate: Determine the hourly rate for the development team. This rate reflects the cost per hour for the development resources involved in the project.
    5. Net Profit Calculation: Calculate the net profit by subtracting the development cost from the projected revenue. Net Profit = Projected Revenue – Development Cost.
    6. ROI Calculation: Calculate the ROI using the following formula: ROI = (Net Profit / Development Cost) * 100.

    By plugging in the values for the development cost, projected revenue, and hourly rate, you can calculate the ROI percentage.

    It’s important to note that this ROI calculation assumes that the hourly rate represents the true cost of the development team and doesn’t account for other operational expenses or external factors. Additionally, market uncertainties and unforeseen factors can affect the actual revenue and ROI. Therefore, it’s advisable to perform a detailed analysis and consider various scenarios and sensitivities when estimating the ROI for your Pac-Man game.

    Let’s assume the following values for the calculation:

    • Development Cost: $100,000
    • Projected Revenue: $500,000
    • Total Effort: 5,000 hours
    • Hourly Rate: $50 per hour
    1. Net Profit Calculation: Net Profit = Projected Revenue – Development Cost Net Profit = $500,000 – $100,000 Net Profit = $400,000
    2. ROI Calculation: ROI = (Net Profit / Development Cost) * 100 ROI = ($400,000 / $100,000) * 100 ROI = 400%

    Based on these assumptions, the estimated ROI for the Pac-Man game is 400%.

    Please note that this calculation is based on our hypothetical values and assumptions.The actual ROI may vary depending on various factors, including market conditions, actual revenue generated, and the accuracy of the development cost and effort estimation.

    It’s important to conduct a thorough analysis and consider realistic values specific for our project to obtain a more accurate ROI estimate.

    Architecture

    The classic game Pac-Man was released in 1980 and has become an iconic piece of video game history. It is well understood.

    Here are the architectural building blocks that make up Pac-Man:

    1. Game Engine: The game engine is the core component that powers Pac-Man. It manages the game loop, handles input from the player, updates the game state, and renders the graphics.
    2. Maze: The maze is the playing field where Pac-Man and the ghosts move around. It consists of a grid of cells, each representing a position that characters can occupy. The maze defines the layout of walls, dots, power pellets, and other elements.
    3. Characters:
      • Pac-Man: The player-controlled character who navigates the maze, consumes dots, avoids ghosts, and collects power pellets to temporarily turn the tables on the ghosts.
      • Ghosts: The antagonistic characters that chase Pac-Man throughout the maze. Each ghost has its unique behavior and movement patterns, adding complexity and challenge to the game.
    4. Movement and Collision Detection: The game must handle the movement of characters within the maze and detect collisions between them and other objects, such as walls or dots. It determines whether a character can move to a particular position or if it collides with an obstacle.
    5. Score and Points: Pac-Man keeps track of the player’s score, which increases as the player consumes dots and fruits. Additional points are awarded for eating ghosts after consuming a power pellet.
    6. Power Pellets and Fruits: Power pellets are special items placed within the maze that give Pac-Man temporary invincibility and the ability to eat ghosts. Fruits appear periodically, and eating them grants bonus points.
    7. Level Design and Progression: Pac-Man features multiple levels, each with a different maze layout. As the player progresses through the levels, the game may introduce new challenges, such as faster ghosts or more complex mazes.
    8. User Interface: The game’s user interface includes elements like the score display, level indicator, and any additional information necessary for the player’s interaction and understanding of the game state.
    9. Sound and Audio: Pac-Man incorporates various sound effects and background music to enhance the gameplay experience. These include sound cues for eating dots, power pellets, and fruits, as well as specific audio for events like Pac-Man’s death or victory.
    10. Game Logic and Rules: The game logic and rules define the behavior and interactions of the various components. This includes determining the consequences of specific events, such as Pac-Man’s collision with a ghost or the consumption of a power pellet.

    These building blocks work together to create the captivating gameplay experience of Pac-Man, which has remained popular and influential for over four decades.

    Use Cases & User Stories

    Here are some use cases and user stories for Pac-Man:

    Use Case 1: Playing the Game

    • Title: Playing a New Game
    • Actor: Player
    • Description: The player wants to start a new game and enjoy the Pac-Man gameplay experience.
    • Flow:
      1. The player launches the Pac-Man game.
      2. The game displays the main menu screen.
      3. The player selects the “New Game” option.
      4. The game generates a new maze layout and initializes the game state.
      5. The player controls Pac-Man using the arrow keys or a gamepad to navigate through the maze, eating dots and avoiding ghosts.
      6. The player aims to eat all the dots, consume fruits for bonus points, and use power pellets to temporarily make the ghosts vulnerable and gain extra points.
      7. The game tracks the player’s score, lives remaining, and level progression.
      8. The game continues until the player completes all levels or loses all lives.
      9. If the player completes all levels, the game displays a victory screen with the final score.
      10. If the player loses all lives, the game displays a game over screen with the final score.

    Use Case 2: Game Progression

    • Title: Progressing to the Next Level
    • Actor: Player
    • Description: The player wants to advance to the next level after completing the current level.
    • Flow:
      1. The player starts a new game or continues from a saved game.
      2. The player completes all the objectives of the current level, such as eating all the dots.
      3. The game detects the completion of the level.
      4. The game generates a new maze layout for the next level, increasing the difficulty.
      5. The game updates the level indicator and resets the player’s position and number of lives.
      6. The player continues playing the game in the new level, facing new challenges and earning more points.

    User Story 1: As a Player, I want to control Pac-Man

    • Description: As a player, I want to be able to control Pac-Man’s movement using the arrow keys or a gamepad.
    • Acceptance Criteria:
      • Pac-Man should respond to arrow key inputs or gamepad inputs for up, down, left, and right movements.
      • Pac-Man should move smoothly and responsively in the desired direction.
      • Pac-Man should not be able to move through walls or obstacles.

    User Story 2: As a Player, I want to eat dots and earn points

    • Description: As a player, I want to navigate Pac-Man through the maze, eating dots to earn points.
    • Acceptance Criteria:
      • Dots should be placed throughout the maze, and Pac-Man should be able to consume them by moving over them.
      • Each consumed dot should increment the player’s score by a specific value.
      • Consumed dots should disappear from the maze.

    User Story 3: As a Player, I want to eat fruits for bonus points

    • Description: As a player, I want to eat fruits that appear periodically in the maze to earn bonus points.
    • Acceptance Criteria:
      • Fruits should appear at specific intervals or conditions in the maze.
      • Pac-Man should be able to consume fruits by moving over them.
      • Each consumed fruit should increment the player’s score by a specific bonus value.
      • Consumed fruits should disappear from the maze.

    User Story 4: As a Player, I want to avoid ghosts and stay alive

    • Description: As a player, I want to navigate Pac-Man through the maze while avoiding

    Functional Requirements

    The functional requirements define the specific features and behaviors that a system must exhibit to fulfill its intended purpose.
    These functional requirements outline the essential features and behaviors that make up a functional version of Pac-Man.
    Depending on the desired implementation, additional features or enhancements can be added to further enrich the gameplay experience.

    Here are the minimum set of functional requirements for Pac-Man:

    1. Game Initialization:
      • The game should start with an initial screen/menu allowing the player to begin a new game, continue from a saved game, or exit the game.
      • Upon starting a new game, the maze should be generated, including the layout of walls, dots, power pellets, and fruits.
    2. Player Controls:
      • Pac-Man should respond to player input for movement in four directions: up, down, left, and right.
      • The player should be able to navigate Pac-Man through the maze, avoiding walls and collecting dots, power pellets, and fruits.
    3. Ghost Behavior:
      • The ghosts should move independently throughout the maze, following specific behaviors or strategies, such as chasing Pac-Man, patrolling specific areas, or scattering when Pac-Man consumes a power pellet.
      • The behavior of the ghosts should create a challenging and dynamic gameplay experience.
    4. Collision Detection:
      • The game should detect collisions between Pac-Man and walls, dots, power pellets, fruits, and ghosts.
      • When Pac-Man collides with dots, power pellets, or fruits, they should be removed from the maze, and the score should be updated accordingly.
      • If Pac-Man collides with a ghost while not invincible from consuming a power pellet, it should result in Pac-Man losing a life.
    5. Power Pellet Effects:
      • When Pac-Man consumes a power pellet, the ghosts should become vulnerable for a limited time, allowing Pac-Man to eat them and gain extra points.
      • The ghosts should exhibit different behavior or movement patterns when in a vulnerable state.
    6. Scoring and Level Progression:
      • The game should keep track of the player’s score, updating it based on actions such as eating dots, consuming fruits, or eating vulnerable ghosts.
      • Each level should have a specific goal, such as eating all dots, to progress to the next level.
      • As the player progresses through levels, the game may introduce increased difficulty, such as faster ghosts or more complex mazes.
    7. Game Over and Restart:
      • The game should detect when the player has lost all lives and trigger a game over condition, displaying the final score and allowing the player to restart the game.
      • The player should have the option to restart the game at any point, either from the beginning or from a previously saved state.
    8. Audio and Visual Effects:
      • The game should incorporate sound effects and background music to enhance the gameplay experience, such as playing different sounds for eating dots, power pellets, or fruits.
      • Visual effects should be used to indicate collisions, power pellet activation, and ghost vulnerability.

    ROM Estimate

    Estimating the effort required to write a version of Pac-Man can vary depending on various factors, including the complexity of the desired features, the size and expertise of the development team, the technology stack chosen, and the overall scope and timeline of the project.

    A general estimate based on a typical development scenario.

    1. Planning and Design:

    • Requirements gathering and analysis: 1-2 weeks
    • Game design, including level layouts and ghost AI: 2-3 weeks
    • User interface and visual design: 1-2 weeks
    • Technical architecture and framework selection: 1-2 weeks

    2. Development:

    • Core gameplay mechanics (movement, collision detection, scoring): 4-6 weeks
    • Maze generation and level progression: 2-3 weeks
    • Ghost AI implementation: 3-4 weeks
    • Power-ups, bonus items, and scoring mechanics: 2-3 weeks
    • Sound and visual effects: 1-2 weeks
    • Saving and loading game states: 1-2 weeks
    • User interface and menus: 2-3 weeks

    3. Testing and Quality Assurance:

    • Unit testing and bug fixing: Ongoing throughout development
    • Playtesting and QA: 2-3 weeks

    4. Deployment and Release:

    • Final testing and bug fixing: 1-2 weeks
    • Packaging and distribution: 1 week

    Total Estimated Effort: Considering the above breakdown, the estimated effort for developing a version of Pac-Man could range from approximately 20 to 36 weeks (or 5 to 9 months) for a small to medium-sized development team. This estimate assumes a full-time commitment and may vary depending on the team’s experience and the specific requirements of the project.

    Keep in mind that this estimate does not account for potential delays, unforeseen challenges, or additional features beyond the core Pac-Man gameplay.

    It’s advisable to conduct a more detailed analysis and project planning to arrive at a more accurate effort estimate based on your specific development scenario.

    Please note that this estimate is a rough order of magnitutide approximation and should be used for reference purposes only.

    Project Definition

    Agile development methodology can be effectively applied to the development of Pac-Man, using epics, stories, and sprints to manage the iterative development process.

    Here’s a description of how Pac-Man development can be organized in Agile terms:

    1. Epic: An epic in Pac-Man development could be the overall goal or theme of the game, such as “Create a Modern and Engaging Version of Pac-Man.” This epic represents the high-level objective of the project and encompasses all the features and improvements planned for the game.
    2. Stories: Stories are the specific features, enhancements, or tasks that contribute to the achievement of the epic. In the context of Pac-Man development, stories could include:
    • “As a player, I want Pac-Man to move smoothly and responsively to arrow key inputs.”
    • “As a player, I want to see updated and visually appealing graphics for Pac-Man and the maze.”
    • “As a player, I want challenging and intelligent ghost AI to enhance gameplay.”

    These stories break down the larger epic into manageable units of work that can be developed and tested independently.

    1. Sprints: Sprints are time-boxed iterations in which development work is planned, executed, and reviewed. In Pac-Man development, each sprint could last one to two weeks, depending on the team’s capacity and complexity of the stories. Sprints help organize and prioritize the work required to complete the stories and contribute to the overall epic. The team selects a set of stories to work on during each sprint, based on their priority and estimated effort.
    2. Backlog: The backlog represents a prioritized list of stories that have yet to be developed. The product owner, in collaboration with the development team, maintains the backlog by continuously adding, removing, or reprioritizing stories based on feedback, changes in requirements, or new ideas.
    3. Sprint Planning: At the beginning of each sprint, the development team and the product owner collaborate to select the stories to be worked on during that sprint. The team estimates the effort required for each story and determines the amount of work they can realistically complete within the sprint.
    4. Sprint Execution: During the sprint, the development team focuses on developing and testing the selected stories. They collaborate closely, ensuring that the requirements are met and delivering incremental value at the end of each sprint.
    5. Daily Stand-ups: Daily stand-up meetings are held to provide a quick update on the progress of the work. Team members discuss their accomplishments, plans for the day, and any obstacles they are facing. This promotes transparency, collaboration, and early identification of potential issues.
    6. Sprint Review and Retrospective: At the end of each sprint, a sprint review is conducted to demonstrate the completed work to stakeholders and gather feedback. The team also conducts a retrospective to reflect on the sprint, discussing what went well, areas for improvement, and any adjustments that need to be made for future sprints.

    By employing Agile methodologies, the development of Pac-Man can benefit from increased flexibility, iterative development, frequent feedback, and a focus on delivering value to the players.

    The Agile approach allows for adaptability, encourages collaboration, and ensures that the final game meets the evolving needs and expectations of the target audience.

    Refining the Estimate

    Agile methodologies can bring several improvements to the estimation process for the Pac-Man project, including:

    1. Adaptability to Changing Requirements: Agile allows for continuous feedback and adaptation, enabling the estimation process to adjust as requirements evolve. Since Pac-Man development may involve frequent iterations and refinements, Agile estimation techniques can accommodate changing priorities, new feature requests, and evolving player expectations.
    2. Iterative Development and Feedback Loops: Agile promotes iterative development, where work is divided into smaller, manageable increments. This allows for more accurate estimation of effort for each iteration based on the feedback and insights gained from previous iterations. Estimation becomes an ongoing process, with the opportunity to refine and improve estimates as the project progresses.
    3. Collaborative Estimation: Agile methodologies encourage collaboration among team members during the estimation process. Developers, testers, and other stakeholders can contribute their expertise and insights to create more accurate estimates. This collaborative approach helps consider different perspectives, mitigates biases, and improves the overall accuracy and reliability of estimates.
    4. Empirical Data for Estimation: Agile methodologies provide opportunities to collect empirical data throughout the project, such as velocity (the rate at which work is completed) and cycle time (the time taken to complete specific tasks). This data can be analyzed and used to inform future estimations, making them more data-driven and grounded in the team’s actual performance.
    5. Continuous Learning and Improvement: Agile emphasizes continuous learning and improvement through retrospectives and feedback loops. Estimation is a topic often addressed during these sessions, where the team can reflect on past estimates, identify areas for improvement, and adjust their estimation techniques accordingly. Over time, the team’s estimation skills and accuracy can improve through this iterative learning process.
    6. Transparency and Stakeholder Involvement: Agile methodologies promote transparency and involvement of stakeholders, such as product owners and end users, in the development process. This includes estimation discussions, allowing stakeholders to provide input, prioritize features, and gain a shared understanding of the estimated effort. Involving stakeholders in the estimation process enhances their trust, engagement, and alignment with the project goals.

    By applying Agile methodologies to the Pac-Man project, the devlopement process can benefit from increased adaptability, collaboration, empirical data, and continuous improvement. These improvements can help the team deliver a higher-quality product within the estimated timeframes while managing stakeholder expectations effectively.

    Pac-Man was estimated at 36 weeks for a medium size team. To refine the estimate for the Pac-Man project using Agile methodologies, we can consider the following factors to derive a more accurate duration and team size:

    1. Breakdown of Stories: Break down the high-level features and requirements of Pac-Man into smaller, well-defined user stories. This will help in estimating the effort required for each story more accurately.
    2. Story Points and Velocity: Assign story points to each user story to indicate its relative size and complexity. Based on historical data or initial estimates, determine the team’s average velocity, which represents the number of story points the team can complete in a sprint.
    3. Sprint Duration: Determine the duration of each sprint. The recommended sprint duration is typically between one to two weeks, although it can vary depending on the team’s preference and the size of the stories.
    4. Initial Capacity: Assess the available capacity of the development team, considering factors like team members’ availability for the project and any potential constraints that may impact their productivity.
    5. Calculating Duration: Divide the total story points of all the user stories by the team’s average velocity to estimate the number of sprints required to complete the project. Multiply the number of sprints by the sprint duration to obtain the estimated project duration.
    6. Deriving Team Size: Divide the total story points of all user stories by the average velocity of the team to determine the number of sprints needed. Divide the estimated project duration by the desired sprint duration to get the total number of sprints. Finally, adjust the team size based on the capacity and expertise of team members, ensuring a balanced distribution of workload.

    It’s important to note that estimation accuracy can vary based on multiple factors, such as the team’s experience, complexity of the project, and potential changes in requirements. Therefore, it’s recommended to use historical data, adjust estimates iteratively, and regularly review and refine the plan as the project progresses.By employing this approach, you can derive a more precise duration and team size for the Pac-Man project, tailored to your specific development context and the principles of Agile methodologies.

    Let’s go through the calculation to derive the estimated duration and team size for the Pac-Man project.

    Assumptions:

    • Initial estimate: 36 weeks
    • Sprint duration: 2 weeks
    1. Breakdown of Stories:
    • Break down the high-level features and requirements of Pac-Man into smaller user stories. Let’s assume we have a total of 60 user stories.
    1. Story Points and Velocity:
    • Assign story points to each user story to indicate its relative size and complexity. For simplicity, let’s assume the total story points for all user stories is 120.
    • Determine the team’s average velocity based on historical data or initial estimates. Let’s assume the team’s average velocity is 15 story points per sprint.
    1. Sprint Duration:
    • Let’s assume the sprint duration is 2 weeks.
    1. Calculating Duration:
    • Divide the total story points (120) by the team’s average velocity (15) to estimate the number of sprints required: 120 / 15 = 8 sprints.
    • Multiply the number of sprints by the sprint duration (2 weeks) to obtain the estimated project duration: 8 * 2 = 16 weeks.
    1. Deriving Team Size:
    • Divide the total story points (120) by the average velocity (15) to determine the number of sprints needed: 120 / 15 = 8 sprints.
    • Divide the estimated project duration (16 weeks) by the desired sprint duration (2 weeks) to get the total number of sprints: 16 / 2 = 8 sprints.
    • Adjust the team size based on the capacity and expertise of team members. For example, if the team can handle an average workload of 30 story points per sprint, you would need 120 / 30 = 4 team members.

    So, based on the calculation, the estimated duration for the Pac-Man project using Agile methodologies would be 16 weeks, and the recommended team size would be 4 team members.

    Code Language Selection

    We have several options when it comes to choosing a programming language for implementing the game.

    Here are a few popular choices:

    1. Python: Python is a versatile and beginner-friendly language known for its simplicity and readability. It offers numerous libraries and frameworks that can facilitate game development, such as Pygame, which provides tools for handling graphics, audio, and user input.
    2. C++: C++ is a widely used language for game development, offering high performance and low-level control over hardware resources. It provides extensive libraries and frameworks, like SFML or SDL, which can handle graphics, input, and audio.
    3. Java: Java is a versatile language with a strong ecosystem for game development. It offers libraries like LibGDX or JavaFX, which provide features for graphics rendering, user input, and audio management.
    4. JavaScript: JavaScript is a popular language for web-based game development. It can leverage HTML5 canvas or WebGL for graphics rendering and has frameworks like Phaser or Pixi.js that offer game development utilities.
    5. C#: C# is a language commonly used with game development frameworks like Unity. Unity provides a comprehensive suite of tools for creating games, including graphical editors, physics simulation, and cross-platform deployment.

    Ultimately, the choice of programming language depends on the familiarity with the language with the developer team, the specific requirements of your project, and the availability of libraries or frameworks that suit your needs.

    Code

    Based on the functional requirements, here are our code modules, or components, that are to be part of our Pac-Man implementation:

    1. Game Initialization Module:
      • Responsible for initializing the game, setting up the initial screen/menu, and generating the maze layout.
    2. Input Module:
      • Handles player input, detecting keyboard or controller inputs for Pac-Man movement.
    3. Movement Module:
      • Manages the movement of Pac-Man and the ghosts within the maze, handling collision detection with walls and other game elements.
    4. Ghost Behavior Module:
      • Implements the behavior and strategies for the ghosts, determining their movement patterns, decision-making, and response to Pac-Man’s actions.
    5. Collision Detection Module:
      • Detects collisions between Pac-Man, ghosts, walls, dots, power pellets, and fruits, triggering appropriate actions and updates to the game state.
    6. Score Tracking Module:
      • Keeps track of the player’s score, updating it based on specific events like eating dots, consuming fruits, or eating vulnerable ghosts.
    7. Level Management Module:
      • Manages the progression through different levels, including setting level goals, generating new maze layouts, and introducing increased difficulty.
    8. Power Pellet Module:
      • Handles the activation and effects of power pellets, including making ghosts vulnerable, changing their behavior, and allowing Pac-Man to eat them for extra points.
    9. Game Over Module:
      • Detects when the player has lost all lives, triggers the game over condition, and handles the display of the final score and options for restarting the game.
    10. Audio and Visual Effects Module:
      • Integrates sound effects and background music, providing visual feedback for collisions, power pellet activation, ghost vulnerability, and other game events.

    These code modules represent logical components that work together to implement the functionality required for Pac-Man.
    The actual implementation may involve further division or combination of these modules based on the chosen programming language, design patterns, and specific architectural considerations.

    Test Cases

    Here are the test cases for testing Pac-Man:

    1. Movement Test Cases:
    • Verify that Pac-Man moves in the correct direction when arrow keys or gamepad inputs are pressed.
    • Test that Pac-Man cannot move through walls or obstacles.
    • Validate that Pac-Man wraps around to the other side of the maze when reaching the edge in wrap-around mode.
    • Ensure Pac-Man’s movement is smooth and responsive, without any noticeable delays or glitches.
    1. Collision Test Cases:
    • Test collision detection between Pac-Man and dots to ensure that Pac-Man consumes the dots and they disappear from the maze.
    • Verify that Pac-Man colliding with a power pellet makes the ghosts vulnerable and grants points.
    • Ensure that when Pac-Man collides with a ghost, the appropriate outcome occurs based on the game state (e.g., Pac-Man loses a life, ghost is eaten, etc.).
    1. Power-Up Test Cases:
    • Test the effect of power pellets on the ghosts, ensuring that they become vulnerable and change their behavior accordingly.
    • Validate that ghosts revert to their normal state after a certain duration or when conditions change (e.g., Pac-Man consumes another power pellet).
    1. Level Progression Test Cases:
    • Test that the game progresses to the next level when all the dots are consumed in the current level.
    • Verify that the maze layout changes between levels, increasing in complexity or introducing new obstacles.
    • Ensure that the difficulty of the game increases as the player advances to higher levels.
    1. Scoring Test Cases:
    • Validate that the score increases correctly when Pac-Man consumes dots, fruits, or ghosts.
    • Verify that bonus points are awarded for specific achievements, such as consuming all the dots in a level or eating multiple ghosts in succession.
    1. User Interface Test Cases:
    • Test the functionality of game menus, ensuring that they display correctly and respond to user input.
    • Verify that the game correctly displays the player’s score, remaining lives, and level information.
    • Test any user interface interactions, such as pausing the game or adjusting settings, to ensure they work as expected.
    1. Game Over Test Cases:
    • Validate the game over conditions, such as when Pac-Man loses all lives or completes all levels, ensuring that the appropriate screens are displayed.
    • Verify that the final score is correctly displayed at the end of the game.

    Depending on the specific implementation and features of the game, we may need to create additional test cases to cover all functionalities and edge cases.

    Product Name

    Assuming we can’t use the name pac-man, the team have come up with some alternative names that capture the essence and spirit of the game while avoiding potential litigation:

    1. “Maze Muncher”
    2. “Dot Dash”
    3. “Ghost Gobbler”
    4. “Retro Runner”
    5. “Munch Mania”
    6. “Maze Master”
    7. “Arcade Eater”
    8. “Ghost Chase”
    9. “Pixel Prowler”
    10. “Munching Madness”

    Around the team “Munch Mania” was the clear favourite.

    Remember to conduct a thorough search to ensure that the chosen name is not already in use or trademarked by another entity in the gaming industry.

    Release notes

    Munch Mania Software Release Notes – Version 1.0

    We are excited to announce the release of Munch Mania Software version 1.0!

    This release brings the classic arcade game to life on modern platforms, offering an immersive and nostalgic gameplay experience.

    Here are the key features and improvements in this release:

    New Features:

    1. Multiple Levels: Enjoy hours of fun with multiple levels of increasing difficulty. Each level features unique maze layouts and challenges to keep you engaged.
    2. Ghost AI Enhancements: The ghost behavior has been improved to provide a more challenging and dynamic experience. Each ghost now exhibits unique movement patterns and strategies, creating more strategic gameplay.
    3. Power Pellets and Vulnerability: Consuming power pellets grants Pac-Man temporary invincibility, allowing you to turn the tables on the ghosts. When vulnerable, the ghosts change their behavior, providing opportunities for extra points.
    4. Score Tracking: The game now keeps track of your score as you progress through levels. Earn points by eating dots, consuming fruits, and eating vulnerable ghosts. Aim for high scores and compete with friends!
    5. Game Over and Restart: When you lose all lives, the game displays a game over screen with your final score. You can now restart the game from the beginning or from a previously saved state, allowing for continuous play.
    6. Audio and Visual Effects: Experience the retro charm with updated audio and visual effects. Enjoy the iconic sound cues for eating dots, power pellets, and fruits. Visual effects indicate collisions, power pellet activation, and ghost vulnerability.

    Bug Fixes and Enhancements:

    • Resolved an issue where collision detection occasionally missed collisions between Munch-Man and ghosts or other game elements.
    • Improved performance and optimized resource usage for smoother gameplay.
    • Fixed rare occurrences of incorrect maze generation, ensuring consistent and fair gameplay.
    • Enhanced user interface responsiveness and interaction, providing a seamless gaming experience.

    System Requirements:

    • Operating System: Windows 10, macOS 10.14 or later, Linux (distribution dependent)
    • Processor: 2.4 GHz quad-core processor or equivalent
    • Memory (RAM): 4 GB or higher
    • Graphics Card: Dedicated graphics card with 1 GB or more VRAM, supporting OpenGL 3.3 or later
    • Storage: 200 MB of available disk space
    • Sound Card: DirectX compatible sound card or onboard audio
    • Display: Minimum resolution of 1280×720 pixels or higher
    • Input: Gamepad/controller support

    We hope you enjoy playing Munch Mania version 1.0! We appreciate your support and feedback as we continue to enhance and expand the game in future releases.

    Have fun reliving the nostalgia of this timeless classic!

    Calculating a Selling Price

    The unit price for each copy of the game can vary depending on various factors, such as market demand, pricing strategy, target audience, platform, and distribution method.

    The following considerationwcprovide us with some general considerations when determining the unit price for the game:

    1. Market Research: Conduct market research to understand the pricing landscape for similar games in the market. Analyze the prices of comparable games or arcade-style games to get a sense of the price range that customers are willing to pay.
    2. Competitive Analysis: Consider the pricing strategies of your competitors. Examine the prices of other games in the same genre or games targeting a similar audience. Determine if you want to position your game as a premium product or offer a more affordable option.
    3. Value Proposition: Assess the unique features, gameplay experience, graphics, and any additional content that your Pac-Man game offers. Consider the value and quality of the game relative to the price you want to set.
    4. Target Audience: Understand your target audience and their willingness to pay for games. Consider factors such as demographics, gaming habits, and purchasing power when setting the price.
    5. Platform and Distribution Costs: If you plan to release the game on specific platforms or through specific distribution channels, take into account any associated costs, fees, or revenue-sharing agreements that may influence the unit price.
    6. Pricing Experiments and Iteration: It can be beneficial to conduct pricing experiments or iterate on the pricing strategy over time. Monitor customer feedback, sales data, and market response to adjust the unit price accordingly.

    Ultimately, the unit price should strike a balance between generating revenue and attracting customers. It should reflect the value proposition of your Pac-Man game while remaining competitive in the market. Consider conducting thorough market analysis, gathering customer insights, and consulting with industry experts or business advisors to determine the most appropriate unit price for your specific Pac-Man game.

    Here’s a formula that you can use as a starting point to calculate the unit price based on market factors and the desired ROI:

    Unit Price = (Development Cost + Desired ROI) / Expected Sales Volume

    Let’s break down the formula:

    • Development Cost: The total cost of developing the game.
    • Desired ROI: The desired return on investment percentage, taking into account the profitability goals of the project.
    • Expected Sales Volume: The estimated number of game units you expect to sell within a specific timeframe.

    By dividing the sum of the development cost and desired ROI by the expected sales volume, you can determine the unit price that helps achieve the desired return on investment.

    It’s important to note that this formula provides a general approach, and the specific values you use for development cost, desired ROI, and expected sales volume should be based on accurate projections and market research specific to your game and target audience.

    Additionally, market dynamics, competition, and other factors may influence the final unit price, so it’s essential to monitor market conditions and customer feedback to ensure the pricing remains competitive and aligned with customer expectations.

    Consider conducting thorough market analysis, competitor research, and customer surveys to gather the necessary data and insights to make informed decisions about the unit price.

    Regularly review and refine the pricing strategy based on real-world results and feedback to optimize your revenue generation and achieve your desired ROI.

    Further Developement !

    At a recent tradefair we were approached by a distributor who want to put pac-man back into the circulation in locations like arcades, game shops and entertainmnet comlexes, hopint to capitaliae on the retro appeal of the game. They have challenged us with making the game robust enough to “just work” on thir commodity hardware platform used in thier gaming cabinets. They want some level of assurance so they can meet thier service levels with thier customers.

    To ensure that the game works without fault in a “harsh environment” and provide an assured product, you can apply several practices during the development process and utilize appropriate software development tooling. Here are some recommendations:

    1. Requirements Elicitation and Validation: Thoroughly elicit and validate the requirements from the customer, ensuring a clear understanding of the expected functionality, performance, and environmental constraints. This includes identifying the specific aspects of the harsh environment and any relevant safety or reliability requirements.
    2. Risk Assessment and Mitigation: Conduct a comprehensive risk assessment to identify potential challenges and hazards associated with the harsh environment. Develop mitigation strategies to address these risks and integrate them into the development process. Regularly reassess risks throughout the project to ensure ongoing mitigation efforts.
    3. Robust Architecture and Design: Focus on creating a robust and fault-tolerant architecture and design for the Pac-Man game. Implement fault detection and recovery mechanisms to handle unexpected errors or environmental disturbances. Consider redundancy, resilience, and error handling strategies to ensure the game can continue functioning even in adverse conditions.
    4. Unit Testing and Test Automation: Implement rigorous unit testing practices to verify the correctness and reliability of individual code components. Develop a comprehensive suite of automated tests to cover different scenarios and edge cases, including those specific to the harsh environment. Continuously run automated tests to detect and address any regressions or defects.
    5. Continuous Integration and Continuous Delivery (CI/CD): Utilize CI/CD practices to integrate code changes frequently and perform automated builds, tests, and deployments. This ensures that each code change undergoes a robust testing process and allows for rapid identification and resolution of issues. Deploying updates frequently also allows for the timely incorporation of bug fixes and improvements.
    6. Static Code Analysis and Code Reviews: Employ static code analysis tools to identify potential coding issues, security vulnerabilities, and potential performance bottlenecks. Conduct regular code reviews to ensure adherence to best practices, promote code quality, and identify any potential issues early on.
    7. Monitoring and Logging: Implement monitoring and logging mechanisms to track the performance, behavior, and errors of the Pac-Man game in real-time. Collect relevant data and logs to gain insights into the system’s behavior and identify any anomalies or issues. This information can be used for troubleshooting, diagnostics, and continuous improvement.
    8. Version Control and Configuration Management: Utilize a robust version control system to track code changes and manage different configurations of the Pac-Man game. This ensures traceability, facilitates collaboration, and allows for the easy rollback of changes if necessary.
    9. Documentation and Knowledge Sharing: Maintain comprehensive documentation of the Pac-Man game’s design, architecture, configuration, and deployment processes. This helps ensure the transfer of knowledge and facilitates troubleshooting and maintenance in the harsh environment.
    10. Security and Data Protection: Implement appropriate security measures to protect the Pac-Man game and any sensitive user data. This includes secure coding practices, encryption, access controls, and adherence to relevant security standards.

    By implementing these practices and utilizing appropriate software development tooling, you can increase the reliability, resilience, and performance of the game. It’s essential to continuously monitor and evaluate the system’s performance, address any identified issues promptly, and engage in ongoing improvement efforts to deliver an assured product that meets the customer’s requirements.

    The specific requirement of developing a game that works without fault will have an impact on the project’s estimate.

    Here are the considerations to take into account when re-estimating the effort and duration:

    1. Complexity and Risk Assessment: Developing a fault-tolerant and robust game for a harsh environment typically introduces additional complexity and challenges. It may require implementing specific error handling mechanisms, dealing with potential hardware limitations or environmental constraints, and performing rigorous testing under harsh conditions. Consider the complexity and associated risks when estimating the effort required.
    2. Research and Analysis: The team may need to invest additional time in researching and analyzing the requirements and constraints of the harsh environment. This includes understanding the specific conditions, potential failure scenarios, and necessary countermeasures. Account for the time required for research and analysis in the estimate.
    3. Design and Architecture: Creating a robust architecture and design to handle fault tolerance and resilience in a harsh environment may require additional effort. This includes identifying potential failure points, designing redundancy mechanisms, and implementing error recovery strategies. Ensure the estimate includes the time needed for designing and implementing a suitable architecture.
    4. Testing and Validation: Testing in a harsh environment poses unique challenges. It may involve creating simulation environments, conducting field testing, or utilizing specialized equipment. Consider the additional effort and resources required for testing and validation in harsh conditions.
    5. Documentation and Compliance: Developing a product for a harsh environment may involve adhering to specific regulations, standards, or safety requirements. Documenting compliance, preparing necessary documentation, and engaging in certification processes may require additional effort.
    6. Experience and Expertise: Ensure that the estimate accounts for the necessary experience and expertise of the team members involved. Developing a fault-tolerant game in a harsh environment may require specialized knowledge or skills that can impact the estimate.

    It’s crucial to engage in detailed discussions with the project team, stakeholders, and subject matter experts to thoroughly understand the specific requirements and constraints of the harsh environment. By considering these factors and adjusting the estimate accordingly, you can provide a more accurate estimate that accounts for the additional effort and challenges associated with developing a Pac-Man game for a harsh environment.

    Providing an accurate revised estimate for developing a game that works without fault in a harsh environment requires detailed knowledge of the specific requirements, constraints, and project context.

    However, I can provide you with a general framework to consider when revising the estimate:

    1. Requirement Analysis: Conduct a thorough analysis of the specific requirements and constraints associated with the harsh environment. Identify the key challenges, potential failure scenarios, and necessary mitigations.
    2. Risk Assessment: Perform a comprehensive risk assessment to identify the potential risks and challenges related to developing a fault-tolerant game in a harsh environment. Prioritize the risks based on their severity and likelihood of occurrence.
    3. Task Breakdown: Break down the development tasks into smaller, more manageable units. Consider the additional tasks required for developing a fault-tolerant game in a harsh environment, such as implementing error recovery mechanisms, conducting specialized testing, and addressing environmental constraints.
    4. Expertise and Resources: Assess the expertise and resources required for the project. Determine if additional skills, specialized knowledge, or external resources are necessary to meet the unique challenges of the harsh environment.
    5. Testing and Validation: Consider the additional effort required for testing and validation in a harsh environment. This may involve creating simulation environments, conducting field testing, and addressing specialized testing requirements.
    6. Iteration and Feedback: Incorporate iterative development cycles to allow for continuous feedback and refinement of the game in response to the challenges identified in the harsh environment. This helps to ensure that the game meets the desired fault tolerance and performance criteria.

    Based on the above factors, the project team can revise the estimate by adjusting the effort, duration, and team size accordingly. It’s essential to engage in detailed discussions with the development team, stakeholders, and subject matter experts to obtain more precise information and make an accurate estimate tailored to your specific project context and requirements.

    If we make certain assumptions regarding the parameters, we can provide a rough estimate for the duration and team size to re-develop the game.

    Please note that these estimates are based on hypothetical assumptions and may not accurately reflect your specific project context.

    Assumptions:

    1. Estimated Effort: Let’s assume an estimated effort of 36 weeks (as mentioned earlier).
    2. Sprint Duration: Assuming a sprint duration of 2 weeks.

    Duration Estimate: To estimate the project duration using Agile methodologies, we need to determine the number of sprints required. Since we assumed a sprint duration of 2 weeks, the estimated project duration would be the product of the number of sprints and the sprint duration.

    Let’s assume an average velocity of 15 story points per sprint (as mentioned earlier). However, in a project with challenging requirements and a harsh environment, it’s advisable to be more cautious and consider reducing the velocity to account for potential complexities and risks.

    Considering a conservative average velocity of 10 story points per sprint, the estimated project duration would be:

    Number of Sprints = Total Story Points / Average Velocity Number of Sprints = 120 / 10 Number of Sprints = 12 sprints

    Estimated Project Duration = Number of Sprints * Sprint Duration Estimated Project Duration = 12 * 2 weeks Estimated Project Duration = 24 weeks

    Team Size Estimate: To estimate the team size, we divide the total story points by the average velocity. However, since we reduced the velocity to account for potential complexities, the team size should be adjusted accordingly.

    Let’s assume an average velocity of 10 story points per sprint (as mentioned earlier). Considering a maximum workload of 30 story points per sprint for a team member, the estimated team size would be:

    Team Size = Total Story Points / Average Velocity Team Size = 120 / 10 Team Size = 12 team members (rounded up)

    Again, please note that these estimates are based on hypothetical assumptions and may not accurately reflect specific project requirements and constraints. It’s crucial to perform a detailed analysis, involve your project team, and consider the actual context to arrive at more accurate estimates for the duration and team size of the project.

  • Code for Solo Play

    Code for Solo Play

    Solo play, in the context of role-playing games (RPGs), refers to engaging in the game as a single player, without the presence of a game master or a group of other players. It allows individuals to enjoy RPG experiences on their own, taking on the roles of both the player character(s) and the game master.

    Solo play provides a unique and immersive gaming experience where the player can create their own stories, make decisions, and explore game worlds at their own pace. It offers the flexibility to play whenever desired, without the need to coordinate schedules or find a group of players.

    To facilitate solo play, various resources and tools have been developed. These include rule systems designed specifically for solo adventures, game master emulators that simulate the decision-making of a game master, random generators for generating encounters and events, and solo-focused adventures or modules.

    Solo play can be a rewarding experience for players who enjoy self-directed storytelling, tactical challenges, character development, and exploration of rich game worlds. It allows for personal creativity, deep immersion, and the ability to adapt the game experience to individual preferences and play styles.

    Remember, the most important aspect of solo play is to have fun and enjoy the experience. Feel free to experiment, adjust rules as needed, and create a gaming experience that suits your preferences.

    Adapting existing guides for solo play.

    Here are some tips and ideas for adapting existing RPG rules for solo play:

    • Choose a solo-friendly RPG system: Some RPG systems are specifically designed for solo play or offer rule sets that are easily adaptable. Look for systems like Ironsworn, Mythic Game Master Emulator, or the Solo Adventurer’s Toolbox. These systems often include mechanisms to generate random events, NPCs, and quests.
    • Create a character: Develop a character concept and build their stats and abilities according to the rules of the RPG system you’re using. Consider your character’s strengths, weaknesses, and backstory to make the solo experience more engaging.
    • Modify encounters and challenges: In a traditional RPG, encounters and challenges are typically designed for a group of players. When playing solo, you may need to adjust the difficulty level. Consider reducing the number or strength of opponents or adjusting the mechanics to compensate for the lack of a full party.
    • Use random generators: Random generators can be a valuable tool for solo play. They can help you generate NPCs, quests, dungeons, and other elements of the game world. You can find online generators or create your own tables based on the setting and themes of your RPG.
    • Create a GM emulator: If your chosen RPG system doesn’t have a built-in Game Master emulator, you can create your own. Use a set of yes/no questions or dice rolls to determine the outcomes of your character’s actions and to simulate the decisions a Game Master would make.
    • Keep a journal: Document your character’s progress, decisions, and the outcomes of their actions. This can help you keep track of the story, maintain continuity, and provide a sense of accomplishment as you see your character’s growth and development over time.
    • Experiment with solo modules or adventures: Some RPG systems offer solo modules or adventures designed specifically for one player. These can provide structured narratives, quests, and encounters tailored to solo play.
    • Embrace improvisation: Solo play gives you the freedom to explore and make decisions without the constraints of a group. Embrace the opportunity to improvise and shape the story according to your character’s choices.

    Solo Play Guides

    If that sound like hard work, then you have the option of using a predefined rule system. Here are some published solo play guides, rules, and modules for role-playing games along with their descriptions, authors, publishers and publication dates:

    • Mythic Game Master Emulator by Tom Pigeon (Publisher: Word Mill Games, 2006): Mythic is a system-agnostic toolkit that allows you to play any role-playing game in solo mode. It provides a set of rules and tables to generate random events, determine outcomes, and simulate the role of the Game Master. It offers flexibility and support for creating your own solo adventures.
    • Scarlet Heroes by Kevin Crawford (Publisher: Sine Nomine Publishing, 2014): Scarlet Heroes is a complete role-playing game designed specifically for solo play or for groups with a single player and Game Master. It focuses on classic fantasy adventures and offers rules and tools tailored for a solo experience. The game includes guidelines for adapting existing modules for solo play.
    • Mythic Variations by Tana Pigeon (Publisher: Word Mill Games, 2014): Mythic Variations is an expansion to the Mythic Game Master Emulator system. It introduces new variations and options for solo play, including additional charts and rules for generating more complex events, character arcs, and story developments. It expands the possibilities for solo role-playing.
    • Four Against Darkness by Andrea Sfiligoi (Publisher: Ganesha Games, 2017): Four Against Darkness is a solitaire dungeon-delving game that uses a simple set of rules and tables. It allows you to create a party of adventurers and explore dungeons, fight monsters, and discover treasure. The game includes a variety of scenarios and provides a quick and accessible solo gaming experience.
    • Solo Adventurer’s Toolbox by Paul Bimler (Publisher: Zozer Games, 2017): The Solo Adventurer’s Toolbox is a supplement for the Cepheus Engine role-playing game, but it can be adapted to other systems as well. It provides resources and techniques for playing solo, including tools for generating encounters, events, and NPC reactions. The toolbox helps create a dynamic and engaging solo experience.
    • Ironsworn by Shawn Tomkin (Publisher: Shawn Tomkin, 2018): Ironsworn is a role-playing game that is designed for solo play or cooperative play with a group. It features a dark fantasy setting and provides rules and tools to guide players through quests and adventures. The game mechanics use a combination of moves and narrative prompts to drive the story forward.

    These are just a few examples of published solo play guides, rules, and modules available. Each of these resources offers different approaches to solo play, so you can choose the one that aligns best with your preferences and the RPG system you want to play.

    System Reference Documents (SRDs)

    The System Reference Document (SRD) for role-playing games typically refers to the open gaming content and rules released under the Open Game License (OGL). The SRD provides a subset of rules and content that can be freely used and referenced by game designers and developers. This can be useful starting point to adopting solo play.

    The specific SRD content may vary depending on the game system or edition. Here are references to some popular SRDs:

    1. Dungeons & Dragons 5th Edition SRD:
    2. Pathfinder RPG SRD:
    3. OpenD6 SRD:
    4. Stars Without Number SRD:

    Please note that the availability and content of SRDs may change over time. It’s always recommended to verify the current sources and licenses for the specific game system you are interested in.

    Code for Random Generators

    Using code to assist with solo play RPGs can provide several benefits:

    • Automation: Code can automate various aspects of the game, such as randomizing encounters, generating NPCs, resolving combat, or managing game mechanics. This automation saves time and effort by handling repetitive tasks, allowing you to focus more on the storytelling and decision-making aspects of the game.
    • Rule Adherence: By using code, you can ensure consistent and accurate application of game rules. The code can enforce rules, calculate probabilities, and handle complex mechanics, reducing the likelihood of errors or oversights in gameplay.
    • Randomization: Code can generate random elements, such as random encounters, loot, or events, adding unpredictability and variety to your solo game sessions. This randomness can enhance the immersion and challenge of the game.
    • Solo Game Structures: Code can help create structures and frameworks specific to solo play, such as generating storylines, managing character progression, or providing prompts for decision-making. These structures provide a framework for solo play and can enhance the overall experience.
    • Flexibility and Customization: Code allows you to customize and adapt the game mechanics to fit your specific preferences and playstyle. You can modify existing code or create your own scripts to tailor the game experience to your liking.
    • Visualization: Code can be used to create visual representations of game elements, such as maps, character sheets, or interactive interfaces. These visualizations can enhance the immersion and make it easier to understand and navigate the game world.

    Overall, using code to assist with solo play RPGs provides automation, rule adherence, randomization, customized game structures, flexibility, and visualization. It can enhance your solo gaming experience by streamlining processes, providing dynamic content, and enabling a more immersive and interactive gameplay environment.

    Getting Started

    Dice Roll

    Here’s an example of code that allows you to roll various types of dice (d4, d6, d8, etc.) with input in the format of “NdX + Y”:

    # python - Dice Roll with Modifiers
    
    import random
    
    def roll_dice(dice_string):
        # Split the input string into the number of dice, dice type, and modifier
        parts = dice_string.split("d")
        num_dice = int(parts[0])
        
        # Check if a modifier is present
        if "+" in parts[1]:
            dice, modifier = parts[1].split("+")
            modifier = int(modifier.strip())
        elif "-" in parts[1]:
            dice, modifier = parts[1].split("-")
            modifier = -int(modifier.strip())
        else:
            dice = parts[1]
            modifier = 0
        
        dice_type = int(dice)
        
        # Roll the dice
        rolls = [random.randint(1, dice_type) for _ in range(num_dice)]
        
        # Calculate the total result
        total = sum(rolls) + modifier
        
        # Print the individual rolls and the total result
        print(f"Rolls: {rolls}")
        print(f"Total: {total}")

    You can use this function by calling roll_dice() with a dice string as the argument. Here are some examples:

    roll_dice("4d6 + 2")  # Roll four six-sided dice and add 2 to the total
    roll_dice("1d8 - 1")  # Roll one eight-sided die and subtract 1 from the total
    roll_dice("2d4")      # Roll two four-sided dice without any modifier
    

    Please feel free to modify the code as per your specific requirements or incorporate it into a larger program.

    Grid of Numbers

    Here’s an example code that generates a uniform grid of numbers for dice rolls and formats it for printing on A4/US letter size:

    #python - Grid of Numbers
    
    def generate_dice_grid(dice_expression, rows, columns):
        # Calculate the maximum value based on the dice expression
        dice_max = int(dice_expression.split("d")[-1]) + int(dice_expression.split("d")[0]) - 1
    
        # Create the grid of numbers
        grid = []
        for i in range(rows):
            row = []
            for j in range(columns):
                value = i * columns + j + 1
                if value <= dice_max:
                    row.append(value)
                else:
                    row.append(None)
            grid.append(row)
    
        return grid
    
    def print_dice_grid(grid):
        max_value_length = len(str(grid[-1][-1])) + 2
        for row in grid:
            for value in row:
                if value is None:
                    print(" " * max_value_length, end=" ")
                else:
                    print(f"{value:>{max_value_length}}", end=" ")
            print()
    
    # Example usage
    dice_expression = "4d6 + 2"
    rows = 6
    columns = 8
    
    grid = generate_dice_grid(dice_expression, rows, columns)
    print_dice_grid(grid)
    

    In this code, the generate_dice_grid function takes the dice expression (e.g., “4d6 + 2”), the number of rows, and the number of columns as input. It calculates the maximum value based on the dice expression and generates a grid of numbers. The numbers in the grid are populated based on their position and the maximum value.

    The print_dice_grid function formats and prints the grid, ensuring that the numbers are aligned properly. It calculates the maximum value length in the grid and pads the numbers accordingly.

    You can modify the dice_expression, rows, and columns variables in the example usage to customize the grid based on your requirements.

    Adventure Outline

    Here’s an example of code for generating an adventure outline. This code provides a basic structure for an adventure, including a quest, NPCs, locations, and encounters:

    #python - Code to generate adventure outline
    
    import random
    
    class AdventureGenerator:
        quests = ["Retrieve an artifact", "Rescue a captive", "Slay a monster", "Uncover a secret", "Deliver an important message"]
        locations = ["Ancient ruins", "Enchanted forest", "Mysterious caverns", "Haunted castle", "Lost city"]
        NPCs = ["Mysterious wizard", "Skilled rogue", Wise old sage", "Brave knight", "Shady merchant"]
    
        @staticmethod
        def generate_adventure():
            adventure = {}
            adventure["quest"] = random.choice(AdventureGenerator.quests)
            adventure["location"] = random.choice(AdventureGenerator.locations)
            adventure["npc"] = random.choice(AdventureGenerator.NPCs)
            adventure["encounters"] = AdventureGenerator.generate_encounters()
            return adventure
    
        @staticmethod
        def generate_encounters():
            num_encounters = random.randint(3, 6)
            encounters = []
            for _ in range(num_encounters):
                encounter = {
                    "location": random.choice(AdventureGenerator.locations),
                    "npc": random.choice(AdventureGenerator.NPCs),
                    "description": "A challenge awaits..."
                }
                encounters.append(encounter)
            return encounters
    
    # Example usage:
    
    adventure = AdventureGenerator.generate_adventure()
    
    print("Adventure Outline:")
    print("Quest:", adventure["quest"])
    print("Location:", adventure["location"])
    print("NPC:", adventure["npc"])
    print("Encounters:")
    for i, encounter in enumerate(adventure["encounters"]):
        print(f"\nEncounter {i+1}:")
        print("Location:", encounter["location"])
        print("NPC:", encounter["npc"])
        print("Description:", encounter["description"])
    

    In the code above, the AdventureGenerator class provides a static method generate_adventure() that generates an adventure outline. It randomly selects a quest, location, and NPC from predefined lists. It also calls the generate_encounters() method to create a list of encounters associated with the adventure.

    The generate_encounters() method determines a random number of encounters (between 3 and 6) and creates encounter objects with randomly chosen locations, NPCs, and a generic description.

    The example usage demonstrates how to generate an adventure outline using the generate_adventure() method and prints the generated adventure’s details, including the quest, location, NPC, and a list of encounters.

    You can expand upon this code and add more details, customizations, or additional components to the adventure outline generator based on your specific requirements and the complexity of your selected RPG system.

    Generate Character

    Here’s an example code to generate a basic OSR (Old School Renaissance) character using the System Reference Document (SRD) as a reference:

    # python - Generate Character
    
    import random
    
    # Character classes and their hit dice
    classes = {
        "Fighter": "d8",
        "Cleric": "d6",
        "Thief": "d4",
        "Magic-User": "d4"
    }
    
    # Ability scores and their modifiers
    abilities = {
        "Strength": 0,
        "Dexterity": 0,
        "Constitution": 0,
        "Intelligence": 0,
        "Wisdom": 0,
        "Charisma": 0
    }
    
    def roll_dice(dice):
        rolls, sides = map(int, dice.split("d"))
        return sum(random.randint(1, sides) for _ in range(rolls))
    
    def generate_character():
        # Roll ability scores
        for ability in abilities:
            abilities[ability] = roll_dice("3d6")
    
        # Randomly select a character class
        character_class = random.choice(list(classes.keys()))
    
        # Generate hit points based on character class hit dice
        hit_dice = classes[character_class]
        hit_points = roll_dice(hit_dice)
    
        # Print the generated character
        print("Character Class:", character_class)
        print("Ability Scores:")
        for ability, score in abilities.items():
            print(ability + ":", score)
        print("Hit Points:", hit_points)
    
    # Generate a character
    generate_character()
    

    In this code, we have a dictionary classes that defines the available character classes and their associated hit dice. The abilities dictionary represents the ability scores of the character.

    The roll_dice function simulates rolling dice based on the provided dice notation (e.g., “3d6” for rolling three six-sided dice).

    The generate_character function randomly selects a character class, rolls ability scores, and generates hit points based on the selected class’s hit dice. It then prints out the generated character’s class, ability scores, and hit points.

    You can customize and expand upon this code by adding more options for character classes, incorporating additional character attributes, or including other elements from the SRD as per your requirements.

    NPC Generator

    Here’s an example of code for generating NPCs (Non-Player Characters) with race, class, stats, armor, weapon, and likely response:

    # python - NPC Generator
    
    import random
    
    class NPCGenerator:
        races = ["Human", "Elf", "Dwarf", "Orc", "Goblin"]
        classes = ["Warrior", "Mage", "Rogue", "Cleric"]
        armor_types = ["Leather", "Chainmail", "Plate"]
        weapon_types = ["Sword", "Axe", "Bow", "Staff", "Dagger"]
        likely_responses = ["Friendly", "Neutral", "Hostile"]
        
        @staticmethod
        def generate_npc():
            npc = {}
            npc["race"] = random.choice(NPCGenerator.races)
            npc["class"] = random.choice(NPCGenerator.classes)
            npc["stats"] = {
                "Strength": random.randint(1, 10),
                "Dexterity": random.randint(1, 10),
                "Intelligence": random.randint(1, 10),
                "Wisdom": random.randint(1, 10),
                "Charisma": random.randint(1, 10)
            }
            npc["armor"] = random.choice(NPCGenerator.armor_types)
            npc["weapon"] = random.choice(NPCGenerator.weapon_types)
            npc["likely_response"] = random.choice(NPCGenerator.likely_responses)
            
            return npc
    
    # Example usage:
    
    npc = NPCGenerator.generate_npc()
    print("Race:", npc["race"])
    print("Class:", npc["class"])
    print("Stats:", npc["stats"])
    print("Armor:", npc["armor"])
    print("Weapon:", npc["weapon"])
    print("Likely Response:", npc["likely_response"])
    

    In the code above, the NPCGenerator class provides a static method generate_npc() that generates a random NPC. It selects a race, class, and likely response from predefined lists. The stats are randomly generated within a range, and the armor and weapon types are chosen randomly as well.

    You can modify the predefined lists (races, classes, armor_types, weapon_types, likely_responses) to include additional options or customize them according to your RPG system’s rules and setting.

    You can expand upon this code and add more features or details to the NPC generation based on your specific requirements.

    Character Sheet

    Here’s an example code that generates a character sheet in Markdown (MD) format:

    #python - character sheet
    
    def generate_character_sheet(character):
        sheet = f"# Character Sheet: {character['name']}\n\n"
        sheet += f"**Race:** {character['race']}\n\n"
        sheet += f"**Class:** {character['class']}\n\n"
        sheet += f"**Level:** {character['level']}\n\n"
        sheet += f"**Attributes:**\n\n"
        for attr, value in character['attributes'].items():
            sheet += f"- {attr.capitalize()}: {value}\n"
        sheet += "\n"
        sheet += f"**Skills:**\n\n"
        for skill, rank in character['skills'].items():
            sheet += f"- {skill.capitalize()}: {rank}\n"
        sheet += "\n"
        sheet += f"**Inventory:**\n\n"
        for item in character['inventory']:
            sheet += f"- {item}\n"
        return sheet
    
    # Example character data
    character_data = {
        "name": "Gandalf",
        "race": "Human",
        "class": "Wizard",
        "level": 10,
        "attributes": {
            "strength": 12,
            "dexterity": 10,
            "constitution": 14,
            "intelligence": 18,
            "wisdom": 16,
            "charisma": 14
        },
        "skills": {
            "arcana": 8,
            "history": 6,
            "persuasion": 4
        },
        "inventory": ["Staff", "Spellbook", "Potion of Healing"]
    }
    
    # Generate character sheet
    character_sheet = generate_character_sheet(character_data)
    
    # Print or save the character sheet
    print(character_sheet)
    

    In this code, the generate_character_sheet function takes a character dictionary as input and constructs a character sheet in Markdown format. It extracts the relevant information from the character data and formats it using Markdown syntax.

    The example character data includes attributes, skills, and inventory information. You can modify the character data structure and add or remove fields as needed to match your RPG system or character sheet requirements.

    The generated character sheet is stored in the character_sheet variable and can be printed or saved to a file.

    Feel free to customize the code further based on your specific character sheet format and additional information you want to include.

    GM Simulator

    Here is code that provides a numbered list of options for the questions, incorporates weighting for yes and no responses based on difficulty parameters, and uses a d20 roll system where 1 is always a fail (no) and 20 is always a pass (yes):

    # python - GM Simulator
    
    import random
    
    def ask_numbered_question(question, options):
        print(question)
        for i, option in enumerate(options):
            print(f"{i+1}. {option}")
        while True:
            response = input("Enter the number of your choice: ")
            if response.isdigit() and 1 <= int(response) <= len(options):
                return int(response)
    
    def roll_d20():
        return random.randint(1, 20)
    
    def simulate_game_master(difficulty):
        # Introduction
        print("Welcome to the Game Master Emulator!")
        print("You can simulate the decisions of a Game Master using this tool.")
    
        # Main loop
        while True:
            # Prompt for player's action
            print("\nWhat do you want to do?")
            action = input("> ")
    
            # Simulate Game Master decision
            yes_weight = 10 + difficulty  # Adjust the weights based on difficulty
            no_weight = 10 - difficulty
    
            if roll_d20() <= yes_weight:
                print("The action is successful.")
            else:
                print("The action failed.")
    
            if roll_d20() > no_weight:
                print("Something unexpected happens.")
    
            if roll_d20() > no_weight:
                print("Random encounter!")
    
            if roll_d20() <= yes_weight:
                print("You find valuable items or treasure.")
    
            if roll_d20() <= yes_weight:
                print("You receive useful information.")
    
            if roll_d20() > no_weight:
                print("There are obstacles in your path.")
    
            if roll_d20() <= yes_weight:
                skill_check_result = roll_d20()
                print("You rolled a", skill_check_result, "on the skill check.")
    
            if roll_d20() > no_weight:
                print("You are in immediate danger.")
    
            # Prompt to continue or exit
            if not ask_numbered_question("Continue playing?", ["Yes", "No"]) == 1:
                print("Exiting the Game Master Emulator.")
                break
    
    # Run the Game Master emulator
    difficulty = ask_numbered_question("Select difficulty:", ["Easy", "Medium", "Hard"])
    simulate_game_master(difficulty)
    

    In this updated code, the ask_numbered_question function takes a question and a list of options. It displays the question along with the numbered options and returns the user’s selected option as a number.

    The roll_d20 function simulates rolling a d20, where the result is a random number between 1 and 20.

    The simulate_game_master function now includes a difficulty parameter. The weights for yes and no responses are adjusted based on the difficulty level.

    The emulator uses the ask_numbered_question function for the “Continue playing?” prompt, allowing the player to choose between “Yes” and “No” options.

    Feel free to further customize the code according to your RPG scenario, including adding more options, adjusting the weighting system, or incorporating additional game mechanics.

    Combat Resolution

    Here’s an example of code for a simple combat resolution between a solo character and an NPC, with inputs from the user per round:

    # python - Combat Resolution
    
    import random
    
    class Character:
        def __init__(self, name, health, attack_damage, defense):
            self.name = name
            self.health = health
            self.attack_damage = attack_damage
            self.defense = defense
    
        def attack(self):
            return random.randint(1, self.attack_damage)
    
        def take_damage(self, damage):
            self.health -= max(0, damage - self.defense)
    
    def combat_resolution(player, npc):
        round_count = 1
    
        while player.health > 0 and npc.health > 0:
            print(f"\nRound {round_count} - {player.name} vs {npc.name}")
            print(f"{player.name} Health: {player.health} | {npc.name} Health: {npc.health}")
    
            player_attack = player.attack()
            npc_attack = npc.attack()
    
            print(f"{player.name} attacks {npc.name} and deals {player_attack} damage.")
            npc.take_damage(player_attack)
    
            if npc.health <= 0:
                print(f"{npc.name} has been defeated!")
                break
    
            print(f"{npc.name} attacks {player.name} and deals {npc_attack} damage.")
            player.take_damage(npc_attack)
    
            if player.health <= 0:
                print(f"{player.name} has been defeated!")
                break
    
            round_count += 1
    
    # Example usage:
    
    player_name = input("Enter the name of your character: ")
    player_health = int(input("Enter the health of your character: "))
    player_attack_damage = int(input("Enter the attack damage of your character: "))
    player_defense = int(input("Enter the defense of your character: "))
    
    npc_name = input("Enter the name of the NPC: ")
    npc_health = int(input("Enter the health of the NPC: "))
    npc_attack_damage = int(input("Enter the attack damage of the NPC: "))
    npc_defense = int(input("Enter the defense of the NPC: "))
    
    player = Character(player_name, player_health, player_attack_damage, player_defense)
    npc = Character(npc_name, npc_health, npc_attack_damage, npc_defense)
    
    combat_resolution(player, npc)
    

    In the code above, the Character class represents a character in the combat scenario. It has attributes such as name, health, attack damage, and defense. The attack() method randomly generates an attack value within the character’s attack damage range, and the take_damage() method reduces the character’s health based on the incoming damage, subtracting the defense value.

    The combat_resolution() function takes a player character and an NPC as parameters. It loops through rounds until either the player or the NPC’s health reaches zero. In each round, it displays the current health of both characters and their attacks. After each attack, it checks if either character’s health has reached zero and breaks the loop if so.

    The example usage prompts the user to enter the details of the player character and the NPC. The combat resolution is then initiated by calling the combat_resolution() function with the player and NPC instances.

    Feel free to modify the code to suit your specific needs, add additional features, or enhance the combat mechanics based on your RPG system’s rules.

    Generating a Map

    Here’s an example of how you can generate a player map for an RPG with markers for a journey, random encounters, and destinations using p5.js:

    let mapSize = 10;
    let tileSize = 50;
    let playerX = 0;
    let playerY = 0;
    let journeyPath = [];
    let randomEncounters = [];
    let destination;
    
    function setup() {
      createCanvas(mapSize * tileSize, mapSize * tileSize);
      
      // Generate random journey path
      generateJourney();
      
      // Generate random encounters
      generateRandomEncounters();
      
      // Set a random destination
      destination = createVector(floor(random(mapSize)), floor(random(mapSize)));
    }
    
    function draw() {
      background(220);
      
      // Draw map tiles
      for (let y = 0; y < mapSize; y++) {
        for (let x = 0; x < mapSize; x++) {
          let xPos = x * tileSize;
          let yPos = y * tileSize;
          
          // Draw journey path
          if (isInJourneyPath(x, y)) {
            fill(255, 255, 0);
            rect(xPos, yPos, tileSize, tileSize);
          }
          
          // Draw random encounters
          if (isRandomEncounter(x, y)) {
            fill(255, 0, 0);
            ellipse(xPos + tileSize / 2, yPos + tileSize / 2, tileSize / 2);
          }
          
          // Draw destination
          if (x === destination.x && y === destination.y) {
            fill(0, 255, 0);
            rect(xPos, yPos, tileSize, tileSize);
          }
        }
      }
      
      // Draw player
      let playerPosX = playerX * tileSize + tileSize / 2;
      let playerPosY = playerY * tileSize + tileSize / 2;
      fill(0, 0, 255);
      ellipse(playerPosX, playerPosY, tileSize / 2);
    }
    
    function keyPressed() {
      // Move player based on arrow keys
      if (keyCode === UP_ARROW && playerY > 0) {
        playerY--;
      } else if (keyCode === DOWN_ARROW && playerY < mapSize - 1) {
        playerY++;
      } else if (keyCode === LEFT_ARROW && playerX > 0) {
        playerX--;
      } else if (keyCode === RIGHT_ARROW && playerX < mapSize - 1) {
        playerX++;
      }
      
      // Check for encounters and destination
      checkEncounter();
      checkDestination();
    }
    
    function isInJourneyPath(x, y) {
      for (let i = 0; i < journeyPath.length; i++) {
        if (x === journeyPath[i].x && y === journeyPath[i].y) {
          return true;
        }
      }
      return false;
    }
    
    function isRandomEncounter(x, y) {
      for (let i = 0; i < randomEncounters.length; i++) {
        if (x === randomEncounters[i].x && y === randomEncounters[i].y) {
          return true;
        }
      }
      return false;
    }
    
    function checkEncounter() {
      if (isRandomEncounter(playerX, playerY)) {
        // Perform random encounter logic
        console.log("Random encounter!");
      }
    }
    
    function checkDestination() {
      if (playerX === destination.x && playerY === destination.y) {
        // Perform destination reached logic
        console.log("Destination reached!");
      }
    }
    
    function generateJourney() {
      journeyPath = [];
      
      let numJourneyTiles = floor(random(mapSize / 2, mapSize - 1));
      let startX = 0;
      let startY = 0;
      
      for (let i = 0; i < numJourneyTiles; i++) {
        let direction = floor(random(4));
        
        if (direction === 0 && startX > 0) {
          startX--;
        } else if (direction === 1 && startX < mapSize - 1) {
          startX++;
        } else if (direction === 2 && startY > 0) {
          startY--;
        } else if (direction === 3 && startY < mapSize - 1) {
          startY++;
        }
        
        journeyPath.push(createVector(startX, startY));
      }
    }
    
    function generateRandomEncounters() {
      randomEncounters = [];
      
      let numEncounters = floor(random(mapSize / 2));
      
      for (let i = 0; i < numEncounters; i++) {
        let encounterX = floor(random(mapSize));
        let encounterY = floor(random(mapSize));
        
        randomEncounters.push(createVector(encounterX, encounterY));
      }
    }
    

    In this code, we use p5.js to create a canvas and draw the player map. The map consists of tiles, where the player can navigate using arrow keys. The journey path, random encounters, and destination are randomly generated.

    You can customize the map size, tile size, and tweak the generation logic to fit your game requirements. The code also includes basic event handling for encountering random events and reaching the destination.

    Feel free to modify and enhance the code to add more features and game mechanics based on your RPG’s needs.

    Generating Mazes and Dungeons

    To generate and visualize a maze with given width and length parameters, you can use a maze generation algorithm such as Recursive Backtracking or Prim’s Algorithm.

    Here’s an example of how you can implement it using the Recursive Backtracking algorithm and the turtle module in Python:

    # python - Maze Code 1
    
    import random
    import turtle
    
    def generate_maze(width, height):
        # Initialize the maze grid with walls
        maze = [[1] * width for _ in range(height)]
        
        # Set the starting point
        start_x, start_y = random.randint(0, width - 1), random.randint(0, height - 1)
        maze[start_y][start_x] = 0
        
        stack = [(start_x, start_y)]
        
        while stack:
            x, y = stack[-1]
            neighbors = []
            
            # Find unvisited neighbors
            if x > 1 and maze[y][x - 2]:
                neighbors.append((x - 2, y))
            if x < width - 2 and maze[y][x + 2]:
                neighbors.append((x + 2, y))
            if y > 1 and maze[y - 2][x]:
                neighbors.append((x, y - 2))
            if y < height - 2 and maze[y + 2][x]:
                neighbors.append((x, y + 2))
            
            if neighbors:
                next_x, next_y = random.choice(neighbors)
                maze[next_y][next_x] = 0
                maze[(y + next_y) // 2][(x + next_x) // 2] = 0
                stack.append((next_x, next_y))
            else:
                stack.pop()
        
        return maze
    
    def visualize_maze(maze):
        turtle.speed(0)
        turtle.hideturtle()
        
        cell_size = 20
        turtle.penup()
        
        rows = len(maze)
        cols = len(maze[0])
        
        screen_width = cols * cell_size
        screen_height = rows * cell_size
        
        turtle.setup(screen_width + 50, screen_height + 50)
        turtle.setworldcoordinates(-20, -20, screen_width + 30, screen_height + 30)
        
        for y in range(rows):
            for x in range(cols):
                if maze[y][x] == 1:
                    turtle.goto(x * cell_size, y * cell_size)
                    turtle.pendown()
                    turtle.setheading(0)
                    turtle.forward(cell_size)
                    turtle.right(90)
                    turtle.forward(cell_size)
                    turtle.right(90)
                    turtle.forward(cell_size)
                    turtle.right(90)
                    turtle.forward(cell_size)
                    turtle.penup()
        
        turtle.exitonclick()
    
    # Example usage:
    
    width = int(input("Enter the width of the maze: "))
    height = int(input("Enter the height of the maze: "))
    
    maze = generate_maze(width, height)
    visualize_maze(maze)
    

    In the code above, the generate_maze() function implements the Recursive Backtracking algorithm to generate a maze. It initializes a grid of cells with walls, sets a starting point, and uses a stack to backtrack and carve paths until all cells are visited.

    The visualize_maze() function uses the turtle module to visualize the generated maze. It sets up the turtle window based on the size of the maze and iterates through the grid, drawing walls where the value is 1.

    You can input the desired width and height of the maze, and the code will generate and display the maze using the turtle graphics. You can click on the window to close it.

    Need something a bit more browser based, here’s an example of how you can generate and visualize a maze using the p5.js library in JavaScript:

    let maze;
    let cellSize = 20;
    
    function setup() {
      createCanvas(800, 600);
      
      let width = floor(width / cellSize);
      let height = floor(height / cellSize);
      
      maze = generateMaze(width, height);
    }
    
    function draw() {
      background(255);
      
      for (let y = 0; y < maze.length; y++) {
        for (let x = 0; x < maze[y].length; x++) {
          if (maze[y][x] === 1) {
            let xPos = x * cellSize;
            let yPos = y * cellSize;
            
            stroke(0);
            fill(255);
            rect(xPos, yPos, cellSize, cellSize);
          }
        }
      }
    }
    
    function generateMaze(width, height) {
      let maze = [];
      
      // Initialize the maze grid with walls
      for (let y = 0; y < height; y++) {
        maze[y] = [];
        for (let x = 0; x < width; x++) {
          maze[y][x] = 1;
        }
      }
      
      // Set the starting point
      let startX = floor(random(width));
      let startY = floor(random(height));
      maze[startY][startX] = 0;
      
      let stack = [[startX, startY]];
      
      while (stack.length > 0) {
        let [x, y] = stack[stack.length - 1];
        let neighbors = [];
        
        // Find unvisited neighbors
        if (x > 1 && maze[y][x - 2]) {
          neighbors.push([x - 2, y]);
        }
        if (x < width - 2 && maze[y][x + 2]) {
          neighbors.push([x + 2, y]);
        }
        if (y > 1 && maze[y - 2][x]) {
          neighbors.push([x, y - 2]);
        }
        if (y < height - 2 && maze[y + 2][x]) {
          neighbors.push([x, y + 2]);
        }
        
        if (neighbors.length > 0) {
          let randomIndex = floor(random(neighbors.length));
          let [nextX, nextY] = neighbors[randomIndex];
          maze[nextY][nextX] = 0;
          maze[(y + nextY) / 2][(x + nextX) / 2] = 0;
          stack.push([nextX, nextY]);
        } else {
          stack.pop();
        }
      }
      
      return maze;
    }
    

    To use this code, you’ll need to include the p5.js library in your HTML file. You can create an HTML file with the following structure:

    <!DOCTYPE html>
    <html lang="en">
    <head>
      <meta charset="UTF-8">
      <title>Maze Generator</title>
      https://cdnjs.cloudflare.com/ajax/libs/p5.js/1.4.0/p5.js
      http://sketch1.js
      <style>body {padding: 0; margin: 0;} canvas {display: block;} </style>
    </head>
    <body>
    </body>
    </html>
    

    Save the JavaScript code in a file named “sketch1.js” in the same directory as your HTML file.

    When you open the HTML file in a web browser, it will display a maze generated using the Recursive Backtracking algorithm.

    Here’s an example of how you can generate and visualize a maze using Prim’s Algorithm and the p5.js library in JavaScript:

    let maze;
    let cellSize = 20;
    
    function setup() {
      createCanvas(800, 600);
      
      let width = floor(width / cellSize);
      let height = floor(height / cellSize);
      
      maze = generateMaze(width, height);
    }
    
    function draw() {
      background(255);
      
      for (let y = 0; y < maze.length; y++) {
        for (let x = 0; x < maze[y].length; x++) {
          if (maze[y][x] === 1) {
            let xPos = x * cellSize;
            let yPos = y * cellSize;
            
            stroke(0);
            fill(255);
            rect(xPos, yPos, cellSize, cellSize);
          }
        }
      }
    }
    
    function generateMaze(width, height) {
      let maze = [];
      
      // Initialize the maze grid with walls
      for (let y = 0; y < height; y++) {
        maze[y] = [];
        for (let x = 0; x < width; x++) {
          maze[y][x] = 1;
        }
      }
      
      // Set the starting point
      let startX = floor(random(width));
      let startY = floor(random(height));
      maze[startY][startX] = 0;
      
      let walls = [];
      addWalls(startX, startY);
      
      while (walls.length > 0) {
        let randomIndex = floor(random(walls.length));
        let [x, y] = walls[randomIndex];
        let neighbors = [];
        
        // Find visited neighbors
        if (x > 1 && maze[y][x - 2] === 0) {
          neighbors.push([x - 2, y, x - 1, y]);
        }
        if (x < width - 2 && maze[y][x + 2] === 0) {
          neighbors.push([x + 2, y, x + 1, y]);
        }
        if (y > 1 && maze[y - 2][x] === 0) {
          neighbors.push([x, y - 2, x, y - 1]);
        }
        if (y < height - 2 && maze[y + 2][x] === 0) {
          neighbors.push([x, y + 2, x, y + 1]);
        }
        
        if (neighbors.length === 1) {
          let [nx, ny, mx, my] = neighbors[0];
          maze[ny][nx] = 0;
          maze[my][mx] = 0;
          addWalls(x, y);
        }
        
        walls.splice(randomIndex, 1);
      }
      
      return maze;
    }
    
    function addWalls(x, y) {
      if (x > 1) walls.push([x - 2, y]);
      if (x < width - 2) walls.push([x + 2, y]);
      if (y > 1) walls.push([x, y - 2]);
      if (y < height - 2) walls.push([x, y + 2]);
    }
    

    Make sure to include the p5.js library in your HTML file as shown in the previous example. Save the JavaScript code in a file named “sketch2.js” in the same directory as your HTML file.

    When you open the HTML file in a web browser, it will display a maze generated using Prim’s Algorithm.

    Need a bit more complexity, here is a visualisation of a grid-based dungeon with corridors, rooms, doors, and aspects of a maze using the p5.js library in JavaScript:

    let dungeon;
    
    let cellSize = 20;
    let widthInCells;
    let heightInCells;
    
    function setup() {
      createCanvas(800, 600);
      
      widthInCells = floor(width / cellSize);
      heightInCells = floor(height / cellSize);
      
      dungeon = generateDungeon(widthInCells, heightInCells);
    }
    
    function draw() {
      background(255);
      
      for (let y = 0; y < dungeon.length; y++) {
        for (let x = 0; x < dungeon[y].length; x++) {
          let xPos = x * cellSize;
          let yPos = y * cellSize;
          
          if (dungeon[y][x] === "wall") {
            fill(0);
            rect(xPos, yPos, cellSize, cellSize);
          } else if (dungeon[y][x] === "corridor") {
            fill(255);
            rect(xPos, yPos, cellSize, cellSize);
          } else if (dungeon[y][x] === "room") {
            fill(200);
            rect(xPos, yPos, cellSize, cellSize);
          } else if (dungeon[y][x] === "door") {
            fill(255, 0, 0);
            rect(xPos, yPos, cellSize, cellSize);
          } else if (dungeon[y][x] === "entrance") {
            fill(0, 255, 0);
            rect(xPos, yPos, cellSize, cellSize);
          }
        }
      }
    }
    
    function generateDungeon(width, height) {
      let dungeon = [];
      
      for (let y = 0; y < height; y++) {
        dungeon[y] = [];
        for (let x = 0; x < width; x++) {
          dungeon[y][x] = "wall";
        }
      }
      
      let startX = floor(random(1, width - 1));
      let startY = floor(random(1, height - 1));
      dungeon[startY][startX] = "entrance";
      
      generateRooms(dungeon);
      generateCorridors(dungeon);
      generateDoors(dungeon);
      
      return dungeon;
    }
    
    function generateRooms(dungeon) {
      let numRooms = floor(random(5, 10));
      
      for (let i = 0; i < numRooms; i++) {
        let roomWidth = floor(random(3, 8));
        let roomHeight = floor(random(3, 8));
        let roomX = floor(random(1, widthInCells - roomWidth - 1));
        let roomY = floor(random(1, heightInCells - roomHeight - 1));
        
        for (let y = roomY; y < roomY + roomHeight; y++) {
          for (let x = roomX; x < roomX + roomWidth; x++) {
            dungeon[y][x] = "room";
          }
        }
      }
    }
    
    function generateCorridors(dungeon) {
      let startX = -1;
      let startY = -1;
      
      for (let y = 1; y < heightInCells; y += 2) {
        for (let x = 1; x < widthInCells; x += 2) {
          if (dungeon[y][x] === "room") {
            if (startX === -1) {
              startX = x;
              startY = y;
            } else {
              let currentX = startX;
              let currentY = startY;
    
    while (currentX !== x || currentY !== y) {
                if (currentX < x) {
                  currentX++;
                } else if (currentX > x) {
                  currentX--;
                } else if (currentY < y) {
                  currentY++;
                } else if (currentY > y) {
                  currentY--;
                }
                
                dungeon[currentY][currentX] = "corridor";
              }
              
              startX = -1;
              startY = -1;
            }
          }
        }
      }
    }
    
    function generateDoors(dungeon) {
      for (let y = 1; y < heightInCells - 1; y++) {
        for (let x = 1; x < widthInCells - 1; x++) {
          if (dungeon[y][x] === "wall") {
            let isAdjacentToCorridor = false;
            
            if (
              dungeon[y - 1][x] === "corridor" ||
              dungeon[y + 1][x] === "corridor" ||
              dungeon[y][x - 1] === "corridor" ||
              dungeon[y][x + 1] === "corridor"
            ) {
              isAdjacentToCorridor = true;
            }
            
            if (isAdjacentToCorridor) {
              dungeon[y][x] = "door";
            }
          }
        }
      }
    }

    Save the updated JavaScript code in a file named “sketch3.js” and make sure to include the p5.js library in your HTML file as shown in the previous examples. When you open the HTML file in a web browser, it will display a visual representation of a grid-based dungeon with corridors, rooms, doors, and an entrance.

    Monsters

    Here’s an example code for an OSR like monster generator that randomly selects a monster with typical stats, hit points, weapon, attitude, and their treasure:

    # python - Monsters
    
    import random
    
    monsters = [
        {
            "name": "Goblin",
            "stats": {"AC": 13, "HP": "2d6", "Attack": "+4", "Damage": "1d6"},
            "attitude": "Hostile",
            "treasure": "Copper coins"
        },
        {
            "name": "Orc",
            "stats": {"AC": 15, "HP": "2d8+2", "Attack": "+5", "Damage": "1d8+2"},
            "attitude": "Hostile",
            "treasure": "Silver coins"
        },
        {
            "name": "Giant Spider",
            "stats": {"AC": 12, "HP": "3d8", "Attack": "+3", "Damage": "1d6+1"},
            "attitude": "Aggressive",
            "treasure": "None"
        },
        # Add more monsters here...
    ]
    
    def generate_monster():
        monster = random.choice(monsters)
        name = monster["name"]
        stats = monster["stats"]
        attitude = monster["attitude"]
        treasure = monster["treasure"]
    
        # Roll hit points
        hit_points = roll_dice(stats["HP"])
    
        # Generate the monster's description
        description = f"Monster: {name}\n"
        description += f"Attitude: {attitude}\n"
        description += f"Stats: {stats}\n"
        description += f"Hit Points: {hit_points}\n"
        description += f"Treasure: {treasure}\n"
    
        return description
    
    def roll_dice(dice):
        rolls, sides = map(int, dice.split("d"))
        return sum(random.randint(1, sides) for _ in range(rolls))
    
    # Generate a random monster
    monster_description = generate_monster()
    
    # Print the generated monster description
    print(monster_description)
    

    In this code, we have a list called monsters containing dictionaries representing different monsters. Each monster has a name, stats (e.g., AC, HP, Attack, Damage), attitude, and treasure. You can add more monsters to the list with their respective attributes.

    The generate_monster function selects a random monster from the list, rolls hit points based on the monster’s HP dice expression, and generates a description string including the monster’s name, attitude, stats, hit points, and treasure.

    The roll_dice function is used to simulate rolling dice based on the provided dice notation (e.g., “2d6” for rolling two six-sided dice).

    You can customize and expand upon this code by adding more monsters to the list, incorporating additional attributes, or modifying the output format as per your requirements.

    Names

    Here’s an example code that uses the “Random User Generator” API to generate random names for characters:

    # python - ask randomuser.me for a name.
    
    import requests
    
    def generate_character_name():
        response = requests.get("https://randomuser.me/api/")
        if response.status_code == 200:
            data = response.json()
            name = data["results"][0]["name"]["first"]
            return name
        else:
            return None
    
    # Generate a character name
    character_name = generate_character_name()
    
    # Print the generated character name
    if character_name:
        print("Character Name:", character_name)
    else:
        print("Failed to generate character name.")
    

    In this code, we make a GET request to the “Random User Generator” API (https://randomuser.me/api/) to fetch a random user’s data, which includes a first name. We extract the first name from the response data and return it as the generated character name.

    The generated character name is then printed to the console.

    Please note that APIs can evolve or change over time, so it’s important to refer to the documentation of the chosen API for any specific requirements or restrictions when using the “Random User Generator” API or any other similar name generation APIs.

    https://github.com/RandomAPI/Randomuser.me-Node

    Random Encounters

    Here’s an example code for a random encounter generator that reads input from a formatted text file. The file syntax and format are as follows:

    File Syntax:

    • Each line in the file represents a unique encounter.
    • The format for each line is as follows: <description>|<difficulty>|<location>|<reward>

    File Format:

    • <description>: A brief description of the encounter.
    • <difficulty>: An integer representing the difficulty level of the encounter.
    • <location>: The location where the encounter takes place.
    • <reward>: A reward or treasure associated with the encounter.

    Example File (encounters.txt):

    Goblin ambush|2|Forest|10 gold coins
    Mysterious cave|3|Mountains|Magical artifact
    Bandit attack|4|Road|25 silver coins
    Ancient ruins|5|Desert|Ancient treasure chest
    

    Now, here’s the code to read the file and generate a random encounter:

    #python - Random Encounters read from a file
    
    import random
    
    def read_encounter_file(filename):
        encounters = []
        with open(filename, "r") as file:
            for line in file:
                line = line.strip()
                if line:
                    encounter_data = line.split("|")
                    if len(encounter_data) == 4:
                        encounter = {
                            "description": encounter_data[0],
                            "difficulty": int(encounter_data[1]),
                            "location": encounter_data[2],
                            "reward": encounter_data[3]
                        }
                        encounters.append(encounter)
        return encounters
    
    def generate_random_encounter(encounters):
        if encounters:
            encounter = random.choice(encounters)
            return encounter
        else:
            return None
    
    # Read encounters from the file
    encounters = read_encounter_file("encounters.txt")
    
    # Generate a random encounter
    random_encounter = generate_random_encounter(encounters)
    
    # Print the generated random encounter
    if random_encounter:
        print("Random Encounter:")
        print("Description:", random_encounter["description"])
        print("Difficulty:", random_encounter["difficulty"])
        print("Location:", random_encounter["location"])
        print("Reward:", random_encounter["reward"])
    else:
        print("No encounters available.")
    

    In this code, the read_encounter_file function reads the encounter details from the specified file. It parses each line and creates a dictionary representing an encounter with the description, difficulty, location, and reward. The encounters are stored in a list.

    The generate_random_encounter function randomly selects an encounter from the provided encounters list. If encounters are available, it returns a random encounter dictionary; otherwise, it returns None.

    The encounters are read from the file using the read_encounter_file function, and a random encounter is generated using generate_random_encounter. Finally, the details of the random encounter are printed to the console.

    You can modify the file syntax, format, and file name as per your requirements. Make sure the text file follows the specified syntax and format to ensure proper parsing and generation of random encounters.

    There are APIs available that you can call to generate random encounters. Here are a few examples:

    • D&D 5th Edition API (D&D5eAPI): The D&D5eAPI provides various endpoints to retrieve data related to Dungeons & Dragons 5th Edition. You can make use of the /monsters endpoint to fetch information about monsters, which can be used to generate random encounters. You can find more information about the API and its endpoints in the D&D5eAPI documentation.
    • Open5e API: Open5e is an open-source API that provides data and resources for Dungeons & Dragons 5th Edition. It offers endpoints to access monster data, including their attributes, abilities, and more. You can refer to the Open5e API documentation to learn about the available endpoints and how to use them.
    • Roleplaying APIs (RPGAPIs): RPGAPIs is a collection of APIs specifically designed for role-playing games. It includes various endpoints for generating random encounters, such as /encounters/random, which provides a random encounter based on specified parameters. You can explore the RPGAPIs documentation to understand the available endpoints and how to integrate them into your code.

    Before using any API, make sure to review their documentation, terms of use, and any usage limitations or requirements. Each API may have its own syntax and authentication process for making API calls.

    Magic Items

    Here’s an example code to generate a random magic item based on a list of common items, magic powers, effects, and their usage limits:

    #python - magic items
    
    import random
    
    common_items = [
        "Ring",
        "Amulet",
        "Potion",
        "Scroll",
        "Wand",
        "Staff",
        "Bracelet",
        "Gem"
    ]
    
    magic_powers = [
        "Fire",
        "Ice",
        "Teleportation",
        "Invisibility",
        "Healing",
        "Summoning",
        "Transformation",
        "Protection"
    ]
    
    effects = [
        "Increase damage",
        "Grant temporary flight",
        "Grant night vision",
        "Create a force field",
        "Grant resistance to elements",
        "Cast a powerful spell",
        "Summon a creature",
        "Grant enhanced senses"
    ]
    
    def generate_magic_item():
        item = random.choice(common_items)
        power = random.choice(magic_powers)
        effect = random.choice(effects)
        uses = random.randint(1, 5)  # Random number of uses
    
        return f"{item} of {power}: {effect} ({uses} uses)"
    
    # Generate a random magic item
    magic_item = generate_magic_item()
    
    # Print the generated magic item
    print("Random Magic Item:")
    print(magic_item)
    

    In this code, we have lists common_items, magic_powers, and effects that contain the respective options for generating a magic item. The generate_magic_item function selects a random item, power, effect, and a random number of uses between 1 and 5. It then combines these elements into a formatted string representing the magic item.

    The usage limits are determined by the randomly chosen number of uses. You can adjust the range of the random number generation based on your preference or requirements.

    The code ensures that simple low-power items are more common since they have an equal chance of being selected from their respective lists. If you want to adjust the probabilities or balance the distribution of items, you can modify the lists or introduce weights to the random selection process.

    Feel free to customize the code by adding more options to the lists, expanding the effects, or enhancing the formatting of the generated magic item.

    Resources

    Here’s a list of online resources for writing code for RPGs.

    1. RPG Toolkit
      Summary: RPG Toolkit is a comprehensive set of tools and resources for creating and running RPGs. It includes an editor for designing game worlds, a scripting language, and a game engine for implementing your RPG mechanics.
      Link: RPG Toolkit
    2. Roll20
      Summary: Roll20 is a popular virtual tabletop platform that provides a wide range of tools for playing and creating RPGs online. It offers features like character sheets, dice rolling, map creation, and a marketplace for game assets.
      Link: Roll20
    3. RPG Maker
      Summary: RPG Maker is a software that enables game developers to create their own RPGs without extensive coding knowledge. It offers a visual interface for designing maps, characters, and dialogues, along with a scripting system for customizing game mechanics.
      Link: RPG Maker
    4. Tiled
      Summary: Tiled is a flexible map editor suitable for RPGs and other game genres. It allows you to design and construct tile-based maps with layers, objects, and custom properties. It supports various map formats and offers plugins for integration with game engines.
      Link: Tiled Map Editor
    5. Unity
      Summary: Unity is a powerful game development engine that can be used to create a wide range of games, including RPGs. It provides a visual editor, scripting capabilities in C#, and a vast asset store for acquiring RPG-related assets, scripts, and plugins.
      Link: Unity
    6. Godot
      Summary: Godot is an open-source game engine suitable for RPG development. It features a visual editor, a node-based scene system, and a scripting language (GDScript) for implementing game logic. It has an active community and extensive documentation.
      Link: Godot Engine
    7. GitHub
      Summary: GitHub is a platform for version control and collaborative development. It provides a space for sharing and discovering open-source RPG projects, code samples, and libraries. You can explore repositories, contribute to existing projects, or start your own.
      Link: GitHub

    These resources offer a range of tools, engines, editors, and communities to support the creation of RPGs. Depending on your specific needs and preferences, you can explore these resources to find the most suitable tools and platforms for your RPG development journey.

    DriveThruRPG

    DriveThruRPG is an online marketplace that specializes in digital and print-on-demand role-playing game (RPG) products. It offers a vast collection of RPG rulebooks, supplements, adventures, and resources from various publishers. It provides a convenient platform for both independent creators and established companies to distribute their RPG materials to a wide audience.

    When it comes to solo play resources, DriveThruRPG offers a range of products designed specifically for solo role-playing experiences. These resources cater to players who prefer to engage in RPGs on their own, without the need for a traditional game master or a group of players. Solo play resources often provide guidance, rules, or scenarios tailored to solo adventures, enabling players to enjoy immersive storytelling and challenging gameplay even when playing alone.

    Here are some popular solo play resources available on DriveThruRPG:

    • “Ironsworn” by Shawn Tomkin: It’s a complete RPG system designed for solo and cooperative play. It features a dark fantasy setting and provides a unique system for resolving actions and tracking progress.
    • “Mythic Game Master Emulator” by Word Mill: This resource offers a set of tools and guidelines for solo role-playing. It helps simulate the decision-making and improvisation aspects of a game master, allowing players to create engaging stories and encounter unexpected events.
    • “Scarlet Heroes” by Kevin Crawford: It’s a retro-style fantasy RPG tailored for solo play or small groups. It includes rules for solo adventuring, scalable encounters, and guidelines for running NPCs.
    • “The Solo Adventurer’s Toolbox” by Paul Bimler: This resource provides a collection of solo play techniques, tables, and tools to enhance solo role-playing experiences. It offers prompts for generating plots, encounters, and exploring various genres.
    • “Four Against Darkness” by Ganesha Games: It’s a solo dungeon-crawling game where players control a party of four adventurers. It provides random dungeon generation, encounters, and character progression mechanics for solo play.

    These are just a few examples of the many solo play resources available on DriveThruRPG. You can explore the site further to find a wide range of rulebooks, supplements, adventures, and tools specifically designed for solo play in different RPG genres and systems.

  • Guide for Players

    Guide for Players

    1. Reasons to Play
    2. Playing an Adventure
    3. Creating a Good Character
    4. Naming your Character
    5. Generating your Charcater
    6. Maintaining Notes
    7. Playing at different levels
    8. Some Notes on Dwarves, Elves and Human Characters
      1. Description
      2. Ancestory
      3. Lifespan
      4. Attributes
      5. Society Relations
      6. Trade
      7. Food and Drink
      8. Relationships
    9. Playing Multiple Characters
    10. Playing as Children Characters
    11. Playing as Old Characters
    12. Playing a different Gender
    13. Playing a different Culture
    14. Feeding your Character
    15. Sustaining your Character in the Wild
    16. Levelling Up
    17. Loosing Gracefully
    18. How to Cheat to Win!
    19. Glossary
    20. Handling a Problem GM

    Reasons to Play

    Role-playing games (RPGs) offer a variety of benefits for players, including:

    • Imagination and creativity: RPGs provide a platform for players to unleash their imagination and creativity by creating unique characters, developing intricate stories, and solving challenging puzzles.
    • Social interaction: RPGs are a social activity that allow players to collaborate and engage with each other, build relationships, and form strong bonds.
    • Problem solving and critical thinking: RPGs require players to use their problem-solving and critical thinking skills to overcome obstacles, make decisions, and advance their characters.
    • Personal growth and development: RPGs allow players to explore different perspectives, experiences, and emotions, and can help players develop self-awareness, empathy, and emotional intelligence.
    • Escapism and stress relief: RPGs provide a temporary escape from reality and can serve as a source of stress relief by allowing players to immerse themselves in a different world.
    • Adventure and excitement: RPGs offer a sense of adventure and excitement as players explore new worlds, encounter unexpected challenges, and overcome obstacles.
    • Learning and education: RPGs can also serve as a source of learning and education, as players learn about different cultures, history, and mythology, and develop their critical thinking, problem-solving, and negotiation skills.

    Overall, playing RPGs can be a fun, engaging, and rewarding experience for players of all ages, and can provide a range of benefits that enhance personal growth and development.

    Playing an Adventure

    Adventures in role playing games can provide hours of fun and exciting entertainment. Whether you’re playing Dungeons & Dragons, Pathfinder, or any other type of game, the adventure should be the main focus. Here are some tips to help you get the most out of your adventure:

    1. Read the Adventure Briefly: Before starting an adventure, it’s important to have a good understanding of what you’re getting into. Take a few minutes to read through the brief overview of the adventure, so that you know what kind of story you’ll be telling and what kind of challenges you’ll face along the way. This can make it easier to plan ahead for potential obstacles and determine which characters will take point in certain encounters.
    2. Set Goals: When playing an adventure, it helps to have some overarching goals in mind before getting started. These goals should include short-term objectives such as gaining money, finding items or allies, and reaching certain locations as well as longer-term objectives like defeating powerful enemies or completing a quest line. Having goals lets your group know where they are heading and gives them something tangible to work towards throughout the game session.
    3. Create Characters: Creating characters is one of the most important parts of any role-playing game. This can take time but is worth investing in if you want your players to be fully immersed in their characters and stories. When creating characters try to keep them balanced by giving them both strengths and weaknesses that will make them interesting while also providing challenges they must overcome throughout their journey.
    4. Choose an Encounter: Once everyone has created their characters it’s time to decide which encounter they will face first. Encounters are often used as a way to introduce players to new situations or test their skills with puzzles or combat scenarios while also advancing the story line forward in some way. Depending on your group’s style of play, these encounters could range from simple social encounters with NPCs (non-player characters) all the way up to more involved battles with monsters or opponents that require careful planning and strategy for success.
    5. Roleplay: Roleplaying is key when running any type of game session, but especially when running an adventure game since it allows for more creative expression between players and further immerses them into their character roles within the story line being told through gameplay sessions . Encourage players to get into their character personalities by having conversations with NPCs or even describing how their character feels about certain situations within certain encounters . This will help create a more realistic atmosphere during gameplay sessions which can help make adventuring even more enjoyable for everyone involved!
    6. Track Progress: As your group makes its way through each encounter or location within an adventure it is important that everyone keeps track of where they are at all times so that no one gets lost or confused about what needs to be done next. A GM (Game Master) should always keep a master list of all completed encounters, current goals ,and other pertinent information during each gaming session so that everyone knows where they stand at all times . This will also help ensure that nothing gets overlooked during play which could lead to confusion down the line
    7. Have Fun: Above all else remember that role playing games are supposed to be fun so don’t forget this while running your adventures! Allow everyone involved time for banter between battles or moments where players can use creative thinking rather than just brute force when tackling obstacles throughout their journey . Doing this will ensure everyone has a great time while still progressing towards completion.

    Creating a Good Character

    Creating a great character in a role playing game is no easy task, and requires thought and planning. Character creation is one of the most important aspects of role playing games, as it allows players to bring their own ideas, values, and personalities to the game. Here are some tips and techniques for creating a great character in a role playing game.

    1. Establish Your Character’s Goals: Setting goals for your character will give you direction when choosing how to play them in the game. Think about what your character wants to achieve or accomplish during the course of the game, such as finding a magical item or defeating an enemy. Having a goal will help shape your decisions when choosing how your character will act or react in certain situations.
    2. Develop Your Character’s Background: Every great character has an origin story or background that explains why they are who they are. Think about where your character comes from and what experiences have shaped them into who they are today. Consider their family, friends, enemies, and any other important people in their life that have influenced them.
    3. Choose Your Character’s Attributes: Most role playing games have attributes that define characters such as strength, agility, intelligence, wisdom, etc., which determine how well characters can perform certain actions or tasks in the game. Make sure to choose attributes that make sense for your character’s backstory and goals so that you can maximize their effectiveness during the game.
    4. Select Your Character’s Class: In most role playing games there are different classes of characters with unique abilities and skills that can be used during gameplay such as fighter, wizard, thief etc., so decide which class best suits your character’s story and goals so you can use their special abilities effectively during the game.
    5. Pick Your Character’s Equipment: Once you have decided on which class of character you want to play it is time to choose their equipment such as weapons and armor which can drastically affect how effective they are in combat situations during the game so make sure to pick items that complement your character’s attributes and class abilities so they can perform at their best in battle situations
    6. Roleplay Your Character: The best way to bring your characters to life is by actually embodying them while playing through interactions with other players and NPCs. This can be done through dialogue choices or body language when speaking with other players or NPCs during gameplay giving them life beyond just stats on paper
    7. Practice Making Decisions: Making choices for our characters is one of the most important aspects of role playing games so practice making decisions based on what would make sense for our characters based on their backstory, attributes and goals rather than just choosing something because it seems like it would be more fun or beneficial for you

    By following these tips you can create an amazing character for any RPG with depth and personality that will be sure to stand out from all other players.

    Naming your Character

    Here’s some advice for players when naming characters in a role-playing game:

    Consider the character’s race, culture, and background: The character’s name should reflect their heritage, upbringing, and personality. For example, a dwarven character might have a name with a Gaelic or Nordic feel, while an elven character might have a more melodic and lyrical name.

    Match the name to the character’s appearance and personality: The name should give a sense of the character’s appearance and personality, such as their build, hair color, or attitude. A tough, muscular character might have a name that sounds rough and tough, while a wise, scholarly character might have a more dignified and learned name.

    • Make it memorable: A good character name should be easy to remember and distinctive, so that other players and the game master can easily identify the character and recall their name.
    • Avoid stereotypes: Try to avoid names that are too clichéd or stereotypical for the character’s race or background, such as “Gimli” for dwarves or “Legolas” for elves.
    • Avoid real-world references: Try to avoid using names from modern-day cultures, as they can break the suspension of disbelief in the game world.
    • Check the rules: Some game systems may have rules or guidelines for naming characters, so be sure to check with the game master before finalizing the character’s name.

    Remember that the most important thing is that the player likes the name and feels that it fits their character well. A great name can enhance the player’s enjoyment of the game and help bring the character to life.

    Generating your Charcater

    Your characteristics are the defining traits and abilities that make a role-playing game character unique. They can include physical attributes, personality traits, skills, and special abilities. Here’s how to generate them:

    • Start with the basics: Determine the character’s race, gender, age, and physical appearance, as these will provide the foundation for the character’s traits and abilities.
    • Determine attributes: Attributes are the character’s physical and mental abilities, such as strength, dexterity, intelligence, and charisma. Some game systems use a point-buy system, where players allocate a set number of points to their attributes, while others use random rolls.
    • Develop personality: Give the character a personality by determining their motivations, interests, quirks, and mannerisms. This will make the character more interesting and help the player role-play them effectively.
    • Choose skills and talents: Skills are the character’s learned abilities, such as combat, thievery, or magic. Talents are natural abilities, such as an affinity for animals or a gift for music. Players can choose skills and talents that reflect the character’s background and personality.
    • Determine special abilities: Depending on the game system, characters may have special abilities or powers, such as spells, supernatural abilities, or unique skills. These abilities should be chosen carefully, as they will play a big role in how the character interacts with the world and other characters.
    • Finalize the character: Review the character’s traits and abilities to ensure that they are balanced and make sense for the character’s race and background. Adjust as needed to achieve a well-rounded character that the player can enjoy playing.

    Note that the specific rules and methods for generating characteristics will depend on the game system and ruleset. Players should consult the game master for specific details and guidelines.

    Maintaining Notes

    Role-playing games are a great way to escape from the mundane and explore new worlds of adventure. But managing notes and records can be a daunting task for even the most experienced player. Keeping track of characters, enemies, items, maps, and other details can quickly become overwhelming. Fortunately, there are some simple methods and tips that can help you maintain notes and records in your RPG sessions.

    1. Keep a Journal: One of the simplest methods for keeping track of notes and records is to keep a journal specifically dedicated to your RPG gaming sessions. This journal should include any important information related to the game such as character backgrounds, enemy stats, storylines, maps, etc. You should also record any special events or decisions made during the game so you can refer back to them later on if needed. It’s also helpful to draw out maps of each area so you have a better visual representation of where your characters are at all times.
    2. Use Digital Tools: In addition to physical journals, there are also several digital tools available that can help with tracking RPG information such as character sheets and encounter logs. These tools allow players to quickly input data into an easily accessible format so they don’t have to worry about constantly writing down notes during play sessions or having multiple physical notebooks lying around their gaming table. Popular digital tools include Roll20, Tabletop Playground, Fantasy Grounds, BattleBards and more.
    3. Utilize Index Cards: Index cards are an excellent tool for tracking both large-scale game information (e.g., plot points) as well as small details (e.g., item descriptions). As you learn more about your characters’ stories or the world around them during gameplay simply jot down these details on individual index cards which can then be organized in categories or chronologically when needed for easy reference later on in the game session!
    4. Use Mind Maps: Mind mapping is another useful tool for organizing large amounts of information by representing it visually in a hierarchical diagram format. Mind maps are particularly useful for outlining complex story arcs or character development over time since they allow players to easily visualize how each element is connected within the greater context of their RPG narrative as well as recall key points quickly when needed during gameplay!
    5. Take Pictures: Taking pictures with your phone or camera can also be helpful for documenting important information that may otherwise get lost in all the notes you’re keeping track of throughout a session (e.g., maps). It’s also nice to have visual reminders of any unique locations/monsters/items encountered throughout your adventure which will help bring back memories later on!
    6. Ask Your GM: Finally, don’t forget that you have access to your GM (game master) at all times who can provide additional insight into any questions you may have about what happened during past sessions or give reminders when needed throughout gameplay! They may even know some tricks that work best with specific RPGs so don’t hesitate to ask them for their advice when it comes to managing notes & records!

    By following these simple tips & techniques players should find it much easier to keep track of all their RPG notes & records without feeling overwhelmed by too much information during play sessions! Keeping thorough records will not only make gaming more enjoyable but also provide valuable insight into one’s own storytelling process which is sure to enhance any role-playing experience.

    Playing at different levels

    RPGs provide an immersive and engaging experience for players. Whether you’re a newcomer or a veteran, playing your character successfully at different levels can be challenging. Here are some tips and techniques to help you get the most out of your game and make sure your character is successful at every level.

    1. Have a Plan: Planning ahead is essential to success in any role-playing game. Before beginning each session, take time to think about what your character’s goals are for that level and how you plan on achieving them. This will help ensure that your character is efficient and effective in each situation.
    2. Be Adaptable: No matter how well you plan, things don’t always go as expected in ole-playing games. Be prepared to adjust your strategy and tactics when needed to ensure that your character remains successful and on track with their goals.
    3. Know Your Character: It’s important to have an understanding of who your character is and how they interact with the world around them, especially at higher levels where the stakes are higher and more difficult challenges are presented. This will help you make better decisions when it comes to choosing strategies and tactics that will result in success for your character at any given level.
    4. Utilize Your Resources: role-playing games often provide players with useful resources such as maps, equipment, or special abilities that can be used to further their characters’ goals at different levels of play. Make sure to use these resources whenever possible; they can make all the difference between success or failure for your character at any given level of play.
    5. Practice Role Playing: At higher levels of play it is especially important for players to practice their role playing skills in order to accurately represent their characters in the game world. Practice dialogue and decision making which will help you create an engaging experience for all involved in the game session as well as give you a better understanding of how best to use the resources available to progress through the various levels of play successfully with your character .
    6. Pay Attention To Detail: Details matter when it comes to role playing games; paying attention to small details such as NPC reactions or environmental changes can give you an edge over other players by providing clues on how best to move forward in the game world with your character; this is especially true when it comes to higher levels of play where even small decisions can have large consequences on game progression .
    7. Avoid Overconfidence: It’s easy for players, particularly those who have been playing longer than others, to become overconfident which can lead them into making poor decisions while playing their characters at higher levels of play; this often leads to failure rather than success so it’s important for players not let overconfidence get in the way of making sound judgement calls while engaging with the game world .
    8. Have Fun: Above all else, remember that role playing games are meant for fun. Don’t take yourself too seriously or forget why you started playing in the first place; if you keep having fun then chances are good that both you and your character will remain successful throughout all levels of play.

    Some Notes on Dwarves, Elves and Human Characters

    Description

    Dwarves: Dwarves are a race of short, stocky humanoids with long beards and a fondness for mining and crafting. They are known for their strength, resilience, and hardiness. Dwarves have an affinity for the earth and its creatures, and they are often found living in or near mountains. They are also known for their skill in engineering and smithing, as well as their love of gold and gems. Dwarves tend to be gruff but loyal, and they value honor above all else.

    Elves: Elves are a race of tall, slender humanoids with pointed ears and a love of nature. They are known for their agility, grace, and magical aptitude. Elves have an affinity for the natural world, and they often live in forests or other wild places. They are also known for their skill in archery and swordsmanship, as well as their love of music and art. Elves tend to be wise but aloof, and they value beauty above all else.

    Humans: Humans are a race of diverse humanoids with varied appearances and abilities. They are known for their adaptability, creativity, and ambition. Humans have an affinity for technology and progress, and they often live in cities or other urban areas. They are also known for their skill in diplomacy and trade, as well as their love of knowledge. Humans tend to be ambitious but compassionate, and they value freedom above all else.

    Ancestory

    The common ancestor between dwarves, elves and humans is the race of beings known as the Elder Races. These were a group of powerful, immortal beings that existed before the dawn of recorded history. They were said to have been created by the gods and were responsible for shaping the world as we know it today. The Elder Races included giants, dragons, trolls, orcs, goblins, and many other creatures. They also included dwarves, elves and humans. The Elder Races are believed to have been wiped out in a great war long ago, but their legacy lives on in the races they left behind.

    Lifespan

    Dwarves: Dwarves typically live for about 350 years, although some have been known to live up to 500 years.

    Elves: Elves can live for thousands of years, with some living up to 10,000 years.

    Humans: Humans typically live for around 70-80 years, although some have been known to live up to 120 years.

    Dwarves and elves live much longer than humans because they are immortal. They do not age or die of natural causes, and can only be killed by violence or disease. Elves are said to have a lifespan of up to several thousand years, while dwarves can live for hundreds of years. This is due to their magical nature, which grants them a longer life span than humans. Additionally, they have access to powerful healing magic that can help them recover from injuries and illnesses more quickly than humans.

    Attributes

    Dwarves: Dwarves are a proud and hardworking race, known for their strength and resilience. They value honor, loyalty, and tradition, and have a strong sense of community. They are also known for their skill in crafting weapons and armor, as well as their love of gold and gems. Dwarves tend to be more practical than other races, preferring to focus on the task at hand rather than worrying about the future.

    Elves: Elves are a graceful and magical race, known for their beauty and intelligence. They value knowledge, artistry, and nature, and have a deep connection with the natural world. Elves tend to be more spiritual than other races, often looking to the stars for guidance. They are also known for their skill in archery and swordsmanship.

    Humans: Humans are a diverse race, known for their adaptability and ambition. They value progress, exploration, and innovation, often pushing boundaries in order to achieve their goals. Humans tend to be more individualistic than other races, often striving to make their own mark on the world. They are also known for their skill in diplomacy and trade.

    Society Relations

    Society relations between dwarves, elves, and humans vary depending on the setting. In some settings, they are friendly and cooperative, while in others they may be hostile or even at war.

    Generally speaking, dwarves and elves tend to have a more neutral relationship with humans than with each other. Dwarves often view humans as untrustworthy and unreliable, while elves may view them as too short-sighted and reckless. Humans, on the other hand, may view both dwarves and elves as strange or mysterious creatures that are difficult to understand. In some settings, there is a great deal of intermingling between the three races, while in others they remain largely separate.

    In general, dwarves, elves, and humans do not fight each other. However, there have been instances in fantasy literature and role-playing games where these races have clashed. For example In J.R.R. Tolkien’s The Lord of the Rings trilogy, for example, dwarves and elves are often at odds with one another due to their different cultures and beliefs. In some cases, humans have also been involved in conflicts between dwarves and elves.

    In a fantasy role-playing game, dwarves, elves, and humans are usually all playable races that need to interact with one another in various ways. While it is possible for these races to come into conflict with one another, it is not a common occurrence and is usually the result of a misunderstanding or miscommunication between the two sides.

    Trade

    The way that dwarves, elves, and humans communicate with each other depends on the context. In thefantasy setting, they may be able to understand each other’s languages, while in others they may need to rely on translators or magical means of communication. In a more modern setting, they would likely communicate through a common language such as English or another widely-spoken language.

    Trading between dwarves, elves, and humans can take many forms. Generally, it involves the exchange of goods and services for mutual benefit.

    One common form of trading is bartering. This involves exchanging goods or services without the use of money. For example, a dwarf might offer to craft a weapon in exchange for a bag of grain from an elf.

    Another form of trading is through the use of currency. This involves exchanging goods or services for money. For example, an elf might offer to sell a magical potion to a human in exchange for gold coins.

    In addition to these methods, trading can also involve the exchange of knowledge and information. For example, an elf might offer to teach a human about magical spells in exchange for knowledge about farming techniques from a dwarf.

    Finally, trading can also involve the exchange of favors or services. For example, a human might offer to help a dwarf build a bridge in exchange for assistance with hunting from an elf.

    Dwarves, elves, and humans can live together in harmony by respecting each other’s cultures and beliefs. They can learn to appreciate each other’s differences and work together to create a better world.

    One way for dwarves, elves, and humans to live together is through trade. Dwarves are known for their craftsmanship and skill in metalworking, while elves are renowned for their magical abilities. Humans can benefit from both of these skills by trading goods with the two races. This could lead to a mutually beneficial relationship between the three races.

    Another way for dwarves, elves, and humans to live together is through shared cultural activities. They could come together to celebrate holidays or festivals that are important to all three races. This would help foster understanding and appreciation of each other’s cultures.

    Finally, dwarves, elves, and humans could work together on projects that benefit all three races. For example, they could collaborate on building roads or bridges that connect their respective lands. This would make it easier for them to travel between each other’s territories and promote peace between the three races.

    By respecting each other’s cultures and beliefs, trading goods with one another, celebrating shared holidays or festivals, and working together on projects that benefit all three races, dwarves, elves, and humans can live together in harmony.

    Food and Drink

    Dwarves: Dwarves typically eat hearty, filling meals that are high in protein and carbohydrates. Common dishes include stews, soups, roasted meats, root vegetables, breads, and cheeses. They also enjoy beer, ale, mead, and other alcoholic beverages.

    Elves: Elves prefer light meals that are high in fruits and vegetables. Common dishes include salads, stir-fries, grilled fish or poultry, steamed vegetables, and fresh fruit. They also enjoy wine and herbal teas.

    Humans: Humans have a wide variety of dietary preferences depending on their culture and location. Common dishes include pasta dishes, sandwiches, burgers, tacos, curries, stir-fries, roasted meats or vegetables, soups and stews. They also enjoy beer, wine, spirits and other alcoholic beverages.

    Relationships

    Dwarves, elves and humans can have relationships and marry. In fantasy literature and role-playing games, such as Dungeons & Dragons, it is common for characters of different races to form relationships and even marry. In some settings, interracial marriages are accepted and even encouraged. In other settings, they may be frowned upon or even forbidden.

    In some cases, the relationship between a dwarf and an elf or a human may be seen as taboo due to cultural differences or religious beliefs. For example, in Tolkien’s Middle-earth setting, elves and dwarves are often portrayed as having a strained relationship due to their different views on life and death. However, there are examples of successful relationships between members of these races in the books.

    In other settings, such as the Forgotten Realms setting of Dungeons & Dragons, interracial relationships are more accepted. In this setting, there are many examples of successful marriages between dwarves and elves or humans. These marriages often involve both partners embracing each other’s culture and beliefs in order to create a strong bond between them.

    Ultimately, whether or not dwarves, elves and humans can have relationships and marry depends on the setting in which they exist. In some settings it is accepted while in others it may be frowned upon or even forbidden.

    Dwarves, elves and humans cannot interbreed. They are different species and therefore cannot produce viable offspring. Even if they could, the resulting children would likely be sterile due to the genetic incompatibilities between the species.

    Playing Multiple Characters

    Playing multiple characters in a role-playing game can be a fun and exciting way to explore the world of your game. It can also be a challenging task if you don’t know what you’re doing. There are many techniques and tips that you can use to make sure your multiple characters are successful and enjoyable to play. Here are some of the best tips for playing multiple characters in a role-playing game.

    1. Create Interesting Backstories: One of the most important steps in playing multiple characters is creating interesting and unique backstories for each character. This will help give them depth and make them more engaging for players to explore. Take time to flesh out each character’s history, motivations, goals, and relationships with other NPCs. This will help make your characters more believable and engaging for your players.
    2. Give Each Character Their Own Goals: Another great tip when playing multiple characters is to give each one their own story arc or goals that they are trying to achieve during the course of the game. This will give them a sense of purpose as well as giving the players something to strive towards as they play through their adventures with these characters.
    3. Focus on Different Character Strengths: When playing multiple characters, it’s important to focus on their individual strengths instead of having them all be good at the same things. For example, if you have two rogues, have one specialize in stealth while the other specializes in lockpicking or pickpocketing instead of having both be experts at both skillsets. This will make each character unique and provide more interesting gameplay for everyone involved.
    4. Don’t Overlap Roles: It can be tempting when playing multiple characters to overlap roles so that everyone has something important to do during an encounter or adventure but try not to do this too often as it can lead to frustration from players who feel like their character isn’t contributing enough or isn’t being given enough attention by the GM. Let each character shine in their own way by focusing on different roles during encounters instead of overlapping them all together too much.
    5. Give Each Character Space To Grow: Finally, when playing multiple characters it is important to remember that they all need space to grow over time so don’t force them into a single narrative arc without allowing them room for development over time through experiences with NPCs, side quests, etc.. Letting each character grow naturally over time will help make them more interesting and engaging for players in the long-run which should help keep everyone invested in the overall story being told throughout the course of your game sessions together.

    Playing as Children Characters

    Here are tricks and tips for playing a child character:

    1. Research the age group: Before you start playing a child character, it is important to research the age group you are playing. This will help you understand the character’s motivations and behavior better.
    2. Understand the character’s motivations: Children often have different motivations than adults, so it is important to understand what drives your character. Think about what they want out of life and how they go about achieving it.
    3. Roleplay appropriately: When roleplaying a child character, it is important to remember that they are still children and should act accordingly. Don’t forget to use appropriate language and mannerisms for their age group.
    4. Be creative: Children often have a unique way of looking at the world, so don’t be afraid to be creative with your character’s actions and dialogue. This can add an extra layer of depth to your roleplaying experience.
    5. Have fun: Above all else, remember to have fun with your character! Playing a child can be a great way to explore new ideas and perspectives in your roleplaying game, so don’t be afraid to experiment and enjoy yourself.

    Playing as Old Characters

    Here are tricks and tips for playing an Old character:

    1. Research the setting: Before you start playing an old character, it’s important to research the setting and the time period in which your character is living. This will help you understand the culture, customs, and values of the time period and give you a better understanding of how your character should act.
    2. Develop a backstory: Creating a detailed backstory for your character can help you get into their mindset and understand their motivations. Think about where they came from, what their life was like before they became an adventurer, and how they ended up in their current situation.
    3. Consider age-related traits: Old characters often have different physical and mental traits than younger characters. Consider how age might affect your character’s strength, agility, wisdom, and other attributes. You may also want to think about how age has affected their outlook on life and how they interact with others.
    4. Roleplay accordingly: When roleplaying an old character, it’s important to remember that they are not as spry or energetic as younger characters. They may move more slowly or take longer to process information. They may also be more set in their ways or have difficulty adapting to new situations. Keep these things in mind when roleplaying your character so that you can accurately portray them.
    5. Have fun: Playing an old character can be a lot of fun! Don’t be afraid to explore different aspects of your character’s personality or try out new ideas for roleplaying them. With some creativity and imagination, you can create a unique and memorable old character that will bring something special to your game!

    Playing a different Gender

    Here are tricks and tips for playing a different gender character:

    1. Research: Before you start playing a character of a different gender, it is important to do some research on the gender you are playing. This will help you understand the nuances of the gender and how it affects the way your character interacts with others.
    2. Respect: It is important to remember that when playing a character of a different gender, you should always respect the gender and its associated traits. Avoid making jokes or comments that could be seen as offensive or disrespectful.
    3. Listen: When playing a character of a different gender, it is important to listen to what other players have to say about their characters and experiences. This will help you better understand how your character should interact with them and how they might react to certain situations.
    4. Empathy: When playing a character of a different gender, it is important to try and put yourself in their shoes and think about how they might feel in certain situations. This will help you better roleplay your character and make them more believable.
    5. Be Open-Minded: When playing a character of a different gender, it is important to be open-minded and willing to learn new things about the gender and its associated traits. This will help you create an interesting and believable character that other players can relate to.

    Playing a different Culture

    Hare are some tricks and tips for playing a character of a different ethnic or cultural background:

    1. Research: Before you begin playing a character of a different ethnic or cultural background, it is important to do your research. Learn about the culture, language, and history of the group you are playing. This will help you create a more authentic and believable character.
    2. Respect: Respect the culture and beliefs of the group you are playing. Do not make assumptions or stereotypes about them. Be mindful of how your character interacts with other characters from different backgrounds.
    3. Listen: Listen to what other players have to say about their characters’ backgrounds and experiences. This will help you understand how they view their own culture and how they interact with others from different backgrounds.
    4. Ask Questions: If there is something you don’t understand or need clarification on, don’t be afraid to ask questions. This will help ensure that everyone is on the same page and that everyone is comfortable with the game play.
    5. Embrace Differences: Embrace the differences between your character and those of other players in the game. This will help create an interesting dynamic between characters and can lead to some great role-playing opportunities.

    Feeding your Character

    The success of a Game often rests on the player’s ability to provide their character with the right kind of nourishment. Feeding characters is essential for players to progress and ultimately succeed in their mission.

    Food is one of the most important resources, as it provides a character with energy, health, and sometimes even special abilities. Without proper nutrition, characters can become weak and susceptible to illness or injury. It’s important for players to ensure that their character is properly fed throughout the campaign. Here are some tips for feeding characters:

    1. Choose the Right Foods: Different foods offer different benefits to characters. For instance, some foods may provide more energy than others, while others may increase health points or grant special abilities. Players should be sure to choose foods that best suit their character’s needs during particular points in the game.
    2. Monitor Eating Habits: Players should keep an eye on how much their character eats throughout the game, as eating too much or too little can have detrimental effects on the character’s performance and progress. Monitoring eating habits can also help players identify if their character has any dietary needs or allergies that must be taken into account when selecting food items.
    3. Don’t Overlook Local Cuisine: As players explore new regions within the world, they should take advantage of local cuisine and specialty dishes that may provide unique benefits specific to that region or culture within the game world. These dishes can provide valuable boosts to a character’s stats as well as offer a great opportunity for exploration within the game.
    4. Use Potions Wisely: Potions are powerful tools for any player, as these concoctions can quickly restore health and energy points when needed most during battles or difficult sections of gameplay. However, these potions are best used strategically so as not to drain resources when unnecessary and should never be used as a substitute for regular nutrition from meals or snacks.
    5. Supplement with Supplements – Supplements such as vitamins can often offer additional boosts to a character’s stats without requiring them to consume large amounts of food items throughout the session. These supplements are particularly useful when long sessions occur where there might not be enough time for frequent meals.

    By following these tips, players will be able to ensure that their characters have access to proper nutrition throughout the sessions and ensure they remain healthy and strong enough to face any challenge presented by the game.

    Sustaining your Character in the Wild

    Hunting, killing, cooking and eating animals can be a rewarding activity for players. Through the process of hunting, killing and consuming animals, characters can gain rewards that may not otherwise be available to them. They can also gain an understanding of the natural world and the circle of life that sustains it. In this section, we will take a look at the basics of hunting, killing, cooking and eating animals in the game.

    Hunting is an important part of any session. It allows players to gain access to food and other resources that would otherwise be unavailable or difficult to obtain. Hunting can be done with a variety of weapons including bows, crossbows and spears. Depending on the game world’s rules and regulations, some animals may require special permits or licenses before they can legally be hunted in certain areas.

    Once an animal has been successfully hunted it must then be killed humanely so as not to cause unnecessary suffering to the animal in question. This is often done by using a bow or crossbow as they are more accurate than spears and can cause less damage to the animal’s body upon impact. After an animal has been killed it must then be skinned so that its hide and meat can be used for other purposes such as food or clothing.

    Cooking is another important part of hunting and killing animals for role-playing games as it allows players to turn raw meat into edible food items that provide them with energy and sustenance during their adventures. Cooking over a campfire is usually sufficient for most meats but some tougher cuts may require roasting on an open fire in order to tenderize them sufficiently before they are consumed. Additionally, spices or herbs may also be added during cooking in order to enhance flavour or add additional nutritional value depending on the type of meal being prepared.

    Finally, after all the hard work put into hunting, killing and cooking animals comes the reward: consuming them. Eating wild game provides players with nourishment that would otherwise not be available if they were relying solely on scavenged items such as berries or nuts for sustenance while out exploring the game world. Of course, it’s important to make sure any meat consumed is cooked thoroughly in order to avoid any potential health risks associated with undercooked meat products such as food poisoning.

    All in all, hunting, killing, cooking and eating animals can be rewarding experience for players that should not be overlooked when out exploring the world. Not only does it provide access to resources otherwise unavailable but also provides an insight into nature itself while providing nourishment during extended periods away from civilization.

    Levelling Up

    RPGs offer an immersive and engaging experience for players of all ages and skill levels. Leveling up in RPGs is an exciting part of the game, as it rewards players with new skills and abilities to explore. Here are some tips on how to successfully level up in a RPG:

    1. Understand the rules: Before you start playing, make sure you understand the rules of the game. Read through them carefully and take notes if necessary. Understanding the rules will help you make informed decisions during gameplay and give you an advantage when it comes to leveling up.
    2. Know your character: Knowing your character’s strengths and weaknesses will help you make better decisions during gameplay, allowing you to level up faster. Spend some time getting familiar with your character’s abilities, stats, equipment, etc., so that you can choose actions that are most beneficial for your character’s growth.
    3. Take on challenges: Challenge yourself by taking on tasks or quests that are outside of your comfort zone or require more effort than usual. This will help you gain experience points which can then be used to level up your character faster than normal.
    4. Prepare for battle: If a battle is looming in the near future, prepare for it as best as possible by reading through battle strategies or consulting with other players who have already played through similar scenarios before. Also make sure to plan out your characters’ actions in advance so that they can act quickly and efficiently when combat begins.
    5. Maximize rewards: Make sure to take advantage of any bonuses or rewards available during gameplay such as bonus XP points or item drops from monsters slain during battles. This can allow your character to level up much faster than normal and give them an edge over their opponents during battles.
    6. Practice makes perfect: Practice makes perfect when it comes to RPGs. The more you practice playing with your characters, the better you’ll become at making decisions that will help them level up faster and become stronger over time. Set aside some time each day or week to practice playing with different characters or scenarios so that you can master their strategies and become a better player overall!

    7 Have fun. Above all else, remember that RPGs are meant to be fun. Don’t get too caught up in trying to reach the highest levels as quickly as possible but instead enjoy every moment of the journey along the way. It doesn’t matter how quickly you reach a certain level; what matters is that you have fun while doing it.

    Loosing Gracefully

    Playing a tabletop roleplaying game can be an extremely rewarding experience, but it can also be challenging. When you lose gracefully in a tabletop roleplaying game, you show respect to the other players, while still having fun and learning from the experience. Here are some tips and techniques on how to lose gracefully in a tabletop roleplaying game:

    1. Acknowledge Your Loss: The first step to losing gracefully is to acknowledge your loss. Don’t try to deny it or make excuses for why you lost. Instead, accept that you were not able to win this time around, and move on to the next game or challenge.
    2. Be Positive: Even though you may feel disappointed about the loss, try not to show it too much. Keep your emotions in check and stay positive throughout the process. You don’t want your negative energy to drag down the whole group, so keep a cheerful attitude even if you don’t win this time around.
    3. Learn from Your Mistakes: After losing gracefully, take some time to reflect on what went wrong during the game so that you can improve for future games or challenges. Consider what strategies worked well and which didn’t work as well as expected, and make mental notes of any adjustments that could help you do better next time.
    4. Congratulate The Winner: Showing respect towards those who have won is an important part of being able to lose gracefully in a tabletop roleplaying game. Take some time after the game has ended to congratulate the winner(s) on their victory, even if it was at your expense – it will show them that you are mature enough to handle losses like an adult.
    5. Move On To The Next Game: It is important not to dwell too much on losses in a tabletop roleplaying game – instead, use them as learning experiences and move on quickly to the next challenge! This will help ensure that everyone stays engaged with the activity instead of getting bogged down by disappointment from previous games or challenges that were not won.

    These are just some of many tips for losing gracefully in a tabletop roleplaying game! Remember that every experience – whether win or lose – can be used as an opportunity for growth and development, so use each one as an opportunity for personal growth.

    How to Cheat to Win!

    Tabletop role-playing games can be great fun, but if you want to win, you need to know how to cheat. Cheating in these games is not always easy, and there are certain techniques that can help you stay one step ahead of your opponents. This guide will provide you with some tips and tricks on how to cheat and win at table top role-playing games.

    1. Know the Rules: Before you can start cheating at a tabletop role-playing game, you need to become familiar with the rules. Make sure you understand how each rule works, as well as any exceptions or special cases that might apply. This will give you an advantage when it comes time to start cheating, as it will make it easier for you to identify and exploit any loopholes or exploitations of the rules that could give you an edge.
    2. Keep an Eye Out for Mistakes: Everyone makes mistakes while playing a tabletop role-playing game, so keep your eyes open and look for any errors or miscalculations made by your opponent(s). If they make a mistake that gives you an advantage, take full advantage of it!
    3. Be Strategic: In order to win at a table top role playing game, it’s important to have a good strategy in place before the game even starts. Think about which characters or items would help your team most during the game and try to acquire them early on in order to gain an edge over your opponents. This is especially important if there are limited resources available during the game – try to acquire them first before your opponents do!
    4. Manipulate Dice Rolls: Many tabletop role-playing games involve dice rolls, so it’s important to know how to manipulate them in order to get better results for yourself and/or worse results for your opponents. One way of doing this is by using loaded dice – these are dice where one or more sides have been weighted so they roll higher numbers more often than other sides (e.g., a six-sided die with two sides weighted so they roll higher numbers). Another way of manipulating dice rolls is by using magnets – magnets can be used on regular dice in order to influence their outcome when rolled (e.g., by placing a magnet under the die so it rolls higher numbers).
    5. Take Advantage of Your Opponents’ Mistakes: As mentioned above, everyone makes mistakes while playing a tabletop role-playing game – use these mistakes against your opponents whenever possible! If they make a mistake that gives you an advantage (e.g., forgetting about certain rules or special abilities), take full advantage of it.
    6. Stack Decks & Use Multiple Characters: Stacking decks refers to having multiple characters involved in the same team/adventure – this allows players more options when dealing with different situations as they’ll have multiple characters who can fulfill different roles within the group (e.g., one character might be better suited for combat while another might be better suited for diplomacy). This can give players an advantage over their opponents who only have one set character/persona/avatar within their team/adventure party (as they won’t be able to switch between characters depending on what situation arises). Additionally, having multiple characters also allows players more flexibility when deciding what actions each character should take – as there are now multiple characters involved in the adventure party instead of just one!

    7 Use Metagaming Strategies: Metagaming is when players use knowledge from outside sources (i.e., knowledge not derived from within the game environment itself) in order to gain an advantage over their opponents – this could include researching strategies online before playing, reading rule books thoroughly before deciding on strategies during playtime etc… Metagaming can give players a huge advantage over their opponents if used correctly!

    8 Know When To Quit: Finally – remember that winning isn’t everything; sometimes having fun is just as important as winning! Knowing when it’s time quit is just as important as knowing how to cheat – don’t push yourself too hard or else risk ruining everyone else’s experience (including yours!).

    By following these tips and tricks on how to cheat and win at table top role-playing games, you should be able increase your chances of victory significantly – good luck.

    Glossary

    • Alignment: A character’s moral and ethical standing, typically represented as lawful, neutral, or chaotic, and good, neutral, or evil.

    Armor Class (AC): A numerical value representing a character’s defensive abilities, the higher the AC, the less likely a character is to be hit by an attack.

    • Attribute: Characteristic that defines a character’s physical and mental abilities such as strength, dexterity, intelligence, and wisdom.
    • Campaign: A series of interconnected adventures and quests that form a cohesive storyline.
    • Character: A player-created protagonist in the game world.
    • Class: A character’s profession or calling, such as wizard, fighter, rogue, or cleric, each with its own unique skills and abilities.
    • Critical Hit: An attack that deals additional damage, usually triggered by a natural 20 on the attack roll.
    • Experience Points (XP): A numerical representation of a character’s progress, earned by overcoming challenges and completing quests.
    • Game Master (GM): The person responsible for managing the game world, creating and controlling non-player characters (NPCs), and interpreting the rules of the game.
    • Hit Points (HP): A measure of a character’s health and well-being, reduced by damage and reduced to zero when a character is killed.
    • Initiative: A roll to determine the order of combat, typically based on a character’s dexterity score.
    • Level: A measure of a character’s experience and power, often determining a character’s access to skills and abilities.
    • Magic Item: An item imbued with magical properties, often providing bonuses to a character’s attributes or abilities.
    • Monster: A hostile non-player character, typically encountered in dungeons or on the battlefield.
    • NPC: Non-Player Character, a character controlled by the Dungeon Master, such as shopkeepers, quest givers, and other non-player characters.
    • Race: The species of a character, such as human, elf, dwarf, or halfling.

    Save: A roll to determine a character’s success or failure at a task, typically based on the character’s attributes and skills.

    • Skill: A special ability or proficiency that a character has developed, such as stealth, perception, or athletics.
    • Spell: A magical ability that a character can use, often consuming spell slots and requiring a casting time.
    • Stat: Short for attribute, a numerical representation of a character’s physical and mental abilities.
    • Turn: A segment of time in combat, during which a character can take a single action.
    • Weapon: An item used to deal damage in combat, such as a sword, bow, or staff.

    Handling a Problem GM

    Role-playing games are an enjoyable pastime for many people. They provide a means of escape from reality and an outlet for creativity. However, playing such games isn’t without its challenges. One of the most common issues faced in role-playing games is the presence of personality problems and differences of opinion between players and Game Masters (GM). These issues can range from mild disagreements to full-blown arguments, which can often derail the game and create a negative atmosphere.

    Fortunately, there are several techniques that can be employed to help players and GMs alike handle personality problems and differences of opinion in role-playing games. The following tips will provide guidance on how to manage these issues so that everyone involved can have a more enjoyable experience.

    1. Respect each other: The first step in handling personality problems and differences of opinion is to show respect for each other’s opinions and ideas. This includes listening carefully to what others have to say, being open minded, and trying not to criticize or belittle anyone’s point of view. In addition, it is important for both players and GMs to remember that they are all there to enjoy themselves; disagreements should be dealt with in a respectful manner so as not to ruin the fun for everyone else involved.
    2. Establish ground rules: Establishing ground rules before a game begins can be helpful in preventing disagreements from occurring in the first place. These rules should include expectations about behavior (such as no name calling or personal attacks) as well as guidelines on how disagreements should be addressed (such as using “I statements” rather than blaming others). It is also important for everyone involved to agree upon a resolution process in case conflicts do arise during play.
    3. Focus on communication: Communication is key when it comes to resolving personality problems and differences of opinion between players and GMs in role-playing games. It is essential that everyone involved make an effort to understand each other’s point of view before jumping into a heated argument or debate. Additionally, it can be helpful if everyone takes turns voicing their opinions so that all parties are given equal attention during discussions.
    4. Be flexible: Flexibility is another important element when dealing with disagreements between players and GMs in role-playing games. Rather than insisting on one particular solution or course of action, it may be beneficial for all parties involved if they allow some room for compromise or alternative solutions so that everyone can move forward together without feeling frustrated or resentful towards one another.
    5. Step away from the game: If tensions begin to rise during play, it may be helpful if those involved take some time away from the game itself so they can cool off before attempting to resolve any issues that have arisen. This will give them time to reflect on their behavior before continuing with play again, allowing them all an opportunity to come back together with fresh perspectives free from any negative emotions they may have been feeling before taking their break.

    Overall, handling personality problems and differences of opinion between players and GMs in role-playing games requires patience, understanding, respect, communication skills, flexibility, and sometimes even a break from play itself! By following these tips outlined above, you will be well on your way towards creating an enjoyable atmosphere where everyone involved can express themselves without fear of judgement or criticism from others at the table.

  • Guide for Game Masters

    Guide for Game Masters

    Guidance, Tips & Techniques for Game Masters.

    1. Theory & Practice
    2. Elements
    3. Creating a Scenario
    4. Statistics and Chance
    5. Combat
    6. How to Fight Monsters
    7. How to Avoid a Monsters
    8. Magic
    9. Successful Game Play
    10. Game Equipment
    11. Running an Enjoyable Game
      1. What Is Power in Role Playing Games?
      2. Responsibility
    12. The GM is Always Right?
    13. Running a Safe RPG
      1. Safety Tips for Players
      2. Techniques for Creating a Safe Environment:
    14. Campaigns, Episode and Scenes
      1. Game Campaigns
      2. Episodes and Scenes
    15. Complexity & Difficulty
      1. Tips for Establishing the Right Level of Difficulty
      2. Tips for Keeping Things Simple
    16. Session Duration, Content and Continuity
    17. Continuity for New Players or Players who have Missed Sessions
      1. New Player Strategies
      2. Missing Player Strategies
      3. Conclusion
    18. Bringing NPCs to Life
    19. Wrangling Monsters and Animals
    20. Why use Monsters ?
    21. Handling Treasure, Rewards and Experience for your Players
    22. Handling the Death of Characters.
      1. Character Death
      2. Introducing New Characters
      3. Conclusion
    23. Mixing Up Combat and Conflict Resolution
    24. Handling the Players Choices
    25. Handling the Killing
    26. Adapting Material
    27. Handling Cultural Appropriation
    28. The Legacy of OSR Fantasy
    29. Working with the OSR Races
      1. Dwarves
      2. Halflings
      3. Elves
    30. Handling the Depiction of Villians
    31. Breaking out of Fantasy Norms
    32. Handling the Legacy
    33. Handling the Barbarian
    34. Handling the Horror
    35. Handling Dark
    36. Designing a Charcater Sheet
    37. Creating Map
    38. Creating a Dungeon
    39. Handling NSFW content
    40. Handling Adult Content
      1. Establishing Ground Rules
      2. Be Respectful of Players’ Boundaries
      3. Use Descriptive Language
      4. Keep Conversations Appropriate
      5. Conclusion
    41. Handling the Cultural Sensativities
    42. Handling Unconcious Bias
    43. Handling Diversity and Inclusion
    44. Handling Race
    45. Handling White Privilege
    46. Making Players Laugh
    47. Playing with your Family
    48. Glossary
    49. Owning the Guide
    50. Summary
    51. About

    Theory & Practice

    Role-play theory is a critical component of any role-playing game. It helps the players to better understand the rules and the world in which they are playing. Through role-play, players can develop their characters’ personalities, motivations, and stories while working together to create an immersive gaming experience.

    Role-playing theory is based on the idea that players should think of themselves as actors in a play. This means that each player takes on a role within the game’s universe, creating a character with its own identity, motivations, and objectives. The goal is to act out this character in an entertaining and realistic way so as to immerse oneself in the game’s world. This can be accomplished through dialogues between characters, careful use of props or costumes, and creative improvisation from each player.

    To facilitate this type of role-play, it is important for players to create their characters with care. This means understanding his or her background, motivations, personality and goals before entering the game world. Each character should have its own unique traits – both positive and negative – that will help define its actions within the game. It is also beneficial for players to consider how their characters might interact with other characters in different situations or scenarios.

    An important part of role-play theory is understanding how the group works together as a team. Players should strive to collaborate with each other to create a cohesive story that progresses over time. This requires communication between all participants regarding objectives, plans of action, and potential conflicts they may face along the way. It also necessitates trust between members as well as respect for each other’s ideas – even if they differ from one’s own – so that everyone can contribute equally towards achieving their common goal(s).

    In terms of practical application, there are several techniques that can be utilized by players during a role-playing game session:

    1. Utilize props or costumes – When playing out scenes in a role-playing game it can be helpful to use props or costumes to make them more believable for both yourself and your fellow players. These can range from simple items like hats or scarves up to more elaborate costuming depending on what you have access to or what you feel comfortable wearing (if any).
    2. Practice improvisation – Improvisation is an important skill when role-playing as it allows you to react quickly and realistically in situations you may not have planned out beforehand (or even imagined). It also encourages creativity as you think on your feet during conversations with other characters or when exploring areas you come across while adventuring together.
    3. Work together – As mentioned earlier it’s essential that all participants work together towards achieving their common goal(s). This requires communication between members discussing objectives, plans of action and potential conflicts they may face along the way so everyone knows what’s going on at all times – even if someone isn’t directly involved in certain scenes being played out at any given moment (e.g., if two people are discussing something privately then everyone else should still be aware of what’s happening).
    4. Facilitate cooperation – Finally it’s important for players not only cooperate but also encourage cooperation amongst each other while playing out scenes during sessions too – this could involve helping someone else out if they’re stuck on something (e.g., providing advice/suggestions), offering support when dealing with difficult/emotional situations etc.. Even just simply listening attentively without interjecting unnecessary commentary can help keep things flowing smoothly too!

    Both Role-play theory and practice are essential components of any successful role-playing game experience. By utilizing these techniques effectively players can create believable worlds inhabited by interesting characters who interact realistically with each other while working towards common goals – ultimately ensuring an enjoyable gaming experience for everyone involved.

    Elements

    Role playing games (RPGs) are a type of game that allows players to take on the role of a character and make decisions that affect the outcome of the game. Generally, RPGs involve elements such as character creation, combat, exploration, and story progression.

    Character creation is an important element of RPG gameplay. Players create their characters by selecting attributes such as race, class, gender, and skills. This allows players to customize their character to ensure they are well-suited for the game’s objectives.

    Combat is another key element in RPG gameplay. Combat typically involves turn-based or real-time battles against computer-controlled or player-controlled opponents. Players must use their characters’ unique abilities, weapons, and items to defeat enemies and progress through the game.

    Exploration is also an important aspect of RPGs. Players explore various locations in search of loot and useful items that will help them progress through the game. They can also interact with non-playable characters (NPCs) and NPCs may provide information or give quests that further progress the story and gameplay.

    Finally, story progression is a major factor in RPG games. Typically, players must complete objectives such as defeating villains or completing quests to advance through different stages of the game’s narrative arc. This helps keep players engaged in the story and motivates them to complete tasks that will help them reach the climax of the game’s plotline.

    Overall, role playing games allow players to take on a character role and make decisions that affect their success in a virtual world. Character creation gives players control over how their characters look and fight while exploration encourages them to explore new locations for loot or information while progressing through a compelling story line keeps them engaged throughout their journey.

    Creating a Scenario

    Creating adventures and scenarios for role-playing games can be an enjoyable process that brings hours of entertainment for both yourself and those around you! Crafting compelling stories and creating interesting challenges that challenge the players, while still allowing them to have fun, is the key to a successful game. In this article, we will discuss some tips for creating adventures and scenarios.

    Before you start creating an adventure or scenario, it is important to decide what type of game you want to play. Do you want combat-focused adventures or ones that focus on exploration? Do you want something light-hearted and humorous or something more mysterious and dark? This decision will help determine the type of story you tell and the challenges your players face.

    Once you have chosen your style of game, decide what type of setting it will take place in. Will it take place in a traditional fantasy world, such as one from Tolkien’s Middle Earth? Or will it take place in a more modern setting like a post-apocalyptic wasteland? The setting should be tailored to the type of story you want to tell; if it’s a light-hearted adventure, then consider having an enchanted forest or a magical kingdom as your backdrop. If it’s more serious in tone, then consider having a ruined city or an ancient temple as your setting.

    Next, decide who your main antagonists are going to be. Antagonists are the villains of any story; they provide obstacles that your players must overcome in order to progress through the adventure or scenario. Will they be monsters like trolls or dragons? Or will they be humanoids like bandits or necromancers? Think carefully about the type of antagonist that would make sense for the story; if there are no monsters present then why would bandits show up?

    Once you have decided on who your antagonists are going to be, think about how they will interact with the players. Will they be friendly towards them at first only to turn hostile when provoked? Or are they out right hostile from the start due to some past event? Thinking about how each antagonist interacts with the characters can add depth to them and make them feel more real; this also adds complexity and challenge when it comes time for the players to face off against them.

    Finally, create interesting encounters for your players by deciding on what types of monsters they will face as well as other non-combat challenges such as puzzles or traps that must be solved in order for them to progress further into their adventure or scenario. Try mixing different types of encounters together so that there is always something new for each session; this keeps things fresh for both you and your players alike.

    With these tips in mind, go forth and craft intriguing stories with engaging characters.

    Statistics and Chance

    Statistics and chance play a large role in the outcome of a role-playing game. Statistics typically refer to the numerical values assigned to a character that determine their attributes, such as strength, intelligence, dexterity and charisma. These statistics are used to determine the success of actions taken by the character during the game. Chance is also a factor in role-playing games, as it determines whether or not an action will succeed or fail based on a dice roll or other random event. Players must use their knowledge of statistics and probability in order to make informed decisions about their characters’ actions and be successful in the game. Additionally, players must also consider how their characters’ statistics interact with each other on a given turn in order to maximize their chance of success.

    The statistics of a character are determined at the beginning of the game and typically do not change throughout the course of play, unless special items are obtained or spells are cast. These statistics determine the success of certain tasks such as attacking an enemy, picking a lock, or negotiating a deal. Each statistic has its own associated dice roll, and when attempting to complete an action, the player needs to roll higher than the predetermined number in order to succeed. The higher the character’s statistic is in comparison to that predetermined number, the better chance they have of completing their task successfully.

    Chance also plays a role in role-playing games, as it can determine successes and failures regardless of a character’s statistics. This can be represented through dice rolls or other random events that occur throughout play. For example, if a player attempts to pick a lock but fails to roll higher than their Dexterity statistic on their dice roll, they may still succeed if they roll a “critical hit” on their second attempt at opening the lock. Other random events like NPC reactions or environmental factors such as weather can also affect outcomes in unpredictable ways.

    Players must use their knowledge of statistics and chance in order to make informed decisions about how best to use their characters’ abilities within the game. By understanding how these two factors interact with one another and affect outcomes, players can plan ahead for potential successes and failures based on probability and increase their chances of succeeding during play. Additionally, players should also consider how their character’s statistics interact with each other on any given turn in order to maximize their chance of success. For example, if a character has high Strength but low Dexterity then it might be beneficial for them to focus more heavily on physical attacks rather than attempting to pick locks or using finesse-based tactics.

    In conclusion, statistics and chance both have important roles in role-playing games as they determine successes and failures for characters throughout play. By understanding how these two factors interact with one another and affect outcomes, players can plan ahead for potential successes and failures based on probability and increase their chances of succeeding during play. Additionally, players should also consider how their characters’ statistics interact with each other on any given turn in order to maximize their chance of success.

    Combat

    Role playing games are a fun and engaging way to use your imagination and create your own adventures. Combat is an integral part of any role playing game, as it adds excitement and challenge to the experience. It’s important to understand the basics of combat theory and practice in order to make sure you are getting the most out of your gaming experience. This article will cover some key concepts in combat theory and practice for role playing games.

    1. Initiative: At the start of combat each player rolls a 20-sided die to determine who goes first in combat (higher roll goes first).
    2. Action Points: Each character has three action points per turn which can be used for movement or attacking/defending against opponents.
    3. Attack Roll: To attack an opponent players must roll a 20-sided die and add any modifiers from their stats or equipment to see if they hit their target (roll higher than the target’s armor class).
    4. Damage Roll: If an attack is successful then players must roll damage based on the type of weapon they are using (dice size determined by weapon type).

    The first concept to understand is what is referred to as “initiative”. Initiative is simply the order in which players take their turns during combat encounters. The player with the highest initiative goes first, followed by the others in descending order until all players have had a turn. Initiative can be determined by many factors such as character level, weapons used, or even a roll of the dice. It’s important to keep track of initiative so that players know when it’s their turn to act in combat.

    Once initiative has been established, it’s time for players to take action during their turns. There are several different types of actions available, but the most common are attacking, defending, casting spells or using items or abilities, and moving around the battlefield. Each type of action will require different rolls or checks depending on what type of action is being taken, but all actions will require at least one type of roll or check in order for them to be successful. For example, if a player is attempting to attack an enemy they will need to make an attack roll based on their character’s stats as well as any modifiers from weapons or abilities they may possess.

    Another important concept related to combat theory and practice is what is known as “hit points” (HP). Hit points represent how much damage a character can take before they are defeated in battle. When a character takes damage from an attack or ability they lose hit points and when they have no hit points left they are considered defeated and must retreat from battle or be forced out by other means such as death effects or incapacitation effects from spells or abilities. It’s important for players to manage their hit points carefully so that they don’t put themselves in too much danger while still being able to do damage during battle encounters.

    Additionally, it’s important for players to understand how armor works when it comes to combat theory and practice for role playing games. Armor provides protection against attacks by reducing the amount of damage taken from physical attacks such as swords and bows but does not protect against magical attacks such as fireballs or lightning bolts unless specifically stated otherwise by its description or ruleset governing its use within the game world itself . Armor can also provide additional benefits such as increased movement speed depending on its weight class which can help characters get around battles quickly if needed (lightweight armors) or provide additional defense against physical attacks if needed (heavyweight armors).

    Finally, it’s important for players to understand how conditions can affect combat theory and practice within role playing games . Conditions can be either beneficial (such as gaining an extra attack each round) or detrimental (such as taking extra damage from certain types of attacks) depending on what type of condition is applied during combat encounters . It’s important for players to pay attention both beneficial conditions that can help them succeed in combat encounters but also detrimental conditions that might hinder them if not handled correctly .

    In conclusion, understanding basic concepts related Combat within role playing games will ensure that players get the most out of their gaming experiences. By understanding initiatives, hit points, armor, & conditions, players will be able better prepare themselves against enemies & hazards while making sure they still have fun during battles . With this knowledge, palyers should feel more confident when entering into any kind of battle encounter & ultimately enjoy the game.

    How to Fight Monsters

    Combat between Humans and NPC can easy be handed by the Combat Mechanics. Monsters can be a more of problem.

    1. Analyze the Monster: Before engaging in battle, it is important to assess the monster’s strengths and weaknesses. Characters should consider the type of attack that will be most effective against a particular monster, as well as its abilities, resistances, and vulnerabilities.
    2. Choose an Appropriate Weapon: Each monster is likely to have a different set of weaknesses and resistance to certain types of weapons, so it’s important to choose the right one for the job. Depending on the situation, characters may also want to consider using magical attacks or specialized weapons such as bows and arrows or throwing stars.
    3. Establish a Strategy: A battle plan should be established before engaging in combat with a monster. Characters should decide how they will approach the fight as well as who will take what role and when they will use special abilities or attacks.
    4. Take Cover: When possible, characters should take cover behind objects or in other safe locations that can provide protection from the monster’s attacks and reduce exposure to danger.
    5. Stay Mobile: Remaining mobile in battle can help characters avoid damage from enemy attacks and increase their chances of success by allowing them to flank their opponents or gain an advantageous position during combat.
    6. Use Special Abilities: Many monsters have special abilities that can be used against them such as elemental weaknesses or immunities that need to be taken into account when planning a strategy for fighting them. Using special abilities can give characters an edge over their opponents during combat and provide an opportunity for victory in difficult battles.

    How to Avoid a Monsters

    If in doubt, avoid the Monsters..

    1. Determine the monster’s motivation: Monsters often have a purpose, such as protecting something or guarding an area. If players can figure out the purpose of the monster, they may be able to find a way to work around it, such as finding a way to get what it is protecting without having to fight it.
    2. Try Diplomacy: Diplomacy is a great way for players to try and talk their way out of a fight. Players can attempt to reason with the monster or offer it something in exchange for allowing them safe passage.
    3. Bribe or Negotiate: Negotiating with monsters is another option that players may be able to use in order to avoid having to fight them. This could involve offering up food, magic items or money in exchange for safe passage.
    4. Use Stealth: Stealth is one of the best ways for players to avoid having to fight monsters in role playing games. Players can use stealthy tactics, such as sneaking around the monster or using stealth techniques like disguise and illusion magic, in order to make their way past the monster undetected.
    5. Find an Alternate Route: If all else fails, players may be able to find an alternate route that allows them to bypass the monster completely and avoid having to fight it altogether.

    Magic

    Magic is an essential part of any fantasy role playing game. It is a powerful force that can be used for good or ill, but it must be handled with great care. Magic can be a source of great power and potential, but it also carries with it great risks. In order to use magic responsibly and safely, players need to understand its fundamentals and how to properly apply them in-game. This guide will provide a brief overview of magic theory and practice in role playing games, as well as tips on how to best use magic in-game.

    What Is Magic?: At its most basic level, magic is the manipulation of energy in order to create desired effects or outcomes. In the context of role playing games, this energy often takes the form of mana or arcane power that can be used to cast spells and other magical effects. Magic typically comes from two sources: natural (or supernatural) forces outside the caster’s control; or from within the caster’s own essence (usually through mental discipline, meditation, and/or ritual).

    • Types of Magic: In role playing games, there are usually three types of magic: divine (or holy) magic; arcane (or wizard) magic; and psionic (or mental) magic. Divine magic typically draws its power from gods or other higher powers and tends to focus on healing, protection, and enhancement. Arcane magic is more focused on manipulation and destruction spells such as fireballs, lightning bolts, etc. Psionic magic draws its power from the caster’s own mental discipline and focuses on telepathy and mind control.
    • Casting Spells: Casting spells requires knowledge, skill, concentration, and mana (or other forms of magical energy). Every spell has a number of components including verbal components (words), somatic components (gestures), material components (ingredients), focus components (tools), divine focus components (holy symbols), etc. Different spells may also require different levels of mana expenditure depending on their complexity. The more complex the spell is, the more mana will be required to cast it successfully. The caster must also maintain concentration throughout the casting process or risk losing control over the spell’s effects.
    • Managing Mana: Mana management is an important part of using magical abilities effectively in-game. Mana can come in many forms such as crystals or potions that restore lost mana points when consumed; special items that regenerate mana over time; special artifacts with limited uses that grant temporary bonuses or extra amounts of mana; etc. As with all resources in a role playing game environment, managing mana efficiently will allow players to use their magical abilities more effectively in-game while minimizing wastefulness or mismanagement of resources which could lead to dire consequences down the road if not managed properly..
    • Risks Of Using Magic: Using magic carries with it certain risks that must be taken into consideration before casting any spell or using any magical ability in-game. For example: using too much magical energy can cause physical exhaustion; casting too many powerful spells at once can overload your body’s natural defenses resulting in physical injury; casting powerful spells without proper preparation may lead to unintended consequences such as summoning dangerous creatures from other planes; etc. It is important for players to keep these risks in mind when using their magical abilities so they can prepare accordingly before attempting any type of spellcasting or magical effect..

    In Summary, Magic is an essential part of any fantasy role playing game environment but it must also be handled responsibly by both players and GMs alike if they want their game sessions to remain fun yet safe for everyone involved.

    This section has provided an overview of some basic principles behind using magical abilities effectively within this type of gaming environment as well as some tips on how best to manage your character’s resources while still getting maximum enjoyment out of your game sessions.

    Successful Game Play

    Successful game play in a role playing game requires a great deal of strategy and skill. Players must keep their characters alive and make wise decisions during each encounter in order to progress through the game. In addition, players must be able to manage their resources, as well as develop strategies for combat and exploration.

    The first step to successful game play is character creation. While each game differs, many games feature a character creation process where players can customize the appearance and abilities of their characters. This process helps give players a sense of ownership over their characters and allows them to create a backstory that will shape their character’s journey throughout the game.

    Once characters are created, players must learn the rules of the game. Reading through the rulebook or watching tutorial videos can help players gain an understanding of how to play the game effectively. Knowing what actions have which effects on characters or enemies is essential for making proper decisions during gameplay.

    When playing an RPG, players must pay attention to their resources such as health and mana points, equipment, gold and items that can be used during combat or exploration. Resource management is important for success in any RPG because it allows players to make sure they have enough resources to survive combat encounters, heal injured characters or purchase necessary items from shops and vendors. Players should also be aware of how much gold they have left after completing an encounter and consider whether they need to save it for later use or spend it on necessary items or equipment upgrades.

    It is also important for players to develop strategies for both combat encounters and exploration sessions. During combat encounters, players should pay attention to enemy weaknesses, think about which abilities are best suited against certain enemies and use special items or abilities when necessary in order to defeat them efficiently while minimizing damage taken. When exploring dungeons or other areas of the game world, it is important for players to look out for hidden passages, traps or secret items that can give them an advantage later on in the game.

    Finally, successful RPG gamers should always be willing to experiment with different approaches when playing the game in order to find out what works best for them personally. Different strategies may work better depending on each individual situation so it is important for gamers to try different things out until they find something that works well for them personally which can help them progress further into the story with ease. Additionally, having fun while playing is equally as important as success; if you’re not having fun then you won’t enjoy your experience nearly as much.

    Game Equipment

    1. Dice: This is the most important piece of equipment for any role-playing game. Dice are used to generate random numbers and create an element of chance in the game. They usually come in sets that contain six-sided, eight-sided, ten-sided, twelve-sided, twenty-sided and sometimes even more. Cost: $5 – $20 depending on the set.
    2. Character Sheets: These sheets are used to track the progress of a player’s character throughout a game session and help them keep track of their stats, abilities and inventory. Cost: Free (usually provided by the game publisher).
    3. Maps & Tokens: Maps provide an easy way for players to visualize where their characters are located in a game world and can help facilitate combat or other encounters. Tokens can be used to represent characters or monsters on a map and can be made from anything from cardboard cutouts to metal coins or even plastic figures. Cost: Varies depending on what type of tokens you choose; maps can range from free (online versions) to $20+ for physical versions.
    4. Miniatures: These small figurines can be used to represent characters and monsters during combat encounters, helping players visualize how they’re positioned on a map or battlefield. Cost: Varies based on quality/quantity; anywhere from $10 – $50+ per set/figure.
    5. Rulebooks: Every role playing game requires at least one rulebook that outlines all the rules for playing the game as well as any expansions that may exist for it. Cost: Varies based on publisher; generally between $20 -$50+.

    Running an Enjoyable Game

    The Power of the Player in Role Playing Games..

    Role playing games (RPGs) are popular among gamers for a variety of reasons. These games allow players to assume the roles of characters and make decisions that shape their experience. As such, power within RPGs is a complex concept and can be interpreted in different ways. This section will explore the power dynamics of RPGs, from the perspective of both players and game masters (GMs). It will also provide tips and techniques for GMs to ensure their players have an enjoyable experience.

    What Is Power in Role Playing Games?

    When discussing power in RPGs, it is important to consider the different types of power at play. On one hand, there is the tangible form of power – such as an ability to roll dice or use special abilities – that is available to all players regardless of their character’s level or skillset. This type of power is usually determined by rules and mechanics within the game system being used. On the other hand, there is an intangible form of power that comes from the story being told within a game session. This type of power includes decisions and actions taken by both players and game masters that influence how a story unfolds over time.

    Players have control over their characters’ actions, decisions, and dialogue within a game session, which gives them some measure of control over how events unfold. However, as GMs have ultimate authority over what happens in-game, they ultimately have more control over how a story progresses than any single player does. In this sense, GMs have more tangible power than players do within RPGs.

    Responsibility

    As GMs are ultimately responsible for providing an enjoyable gaming experience for all players involved, it is important that they find ways to ensure everyone has an opportunity to express their creativity while also giving them enough guidance to keep things running smoothly.

    Here are some tips and techniques that can help with this:

    1. Use Your Players’ Ideas: Encourage your players to come up with ideas for locations or events during your game sessions. Not only will this make them feel more involved in your story but it also allows you as GM to create content on-the-fly if needed!
    2. Build Up Anticipation: Lead up to major plot points or boss battles with clues so your players get excited about what’s coming next! You can even create side quests that lead up to these plot points if you want to keep things interesting!
    3. Give Your Players Choices: Allow your players some freedom when it comes to decision-making so they can feel like their choices matter! Even if you have a predetermined outcome in mind for certain plot points, give your players multiple paths they can choose from so they feel like they still have control over what happens next!
    4. Provide Feedback: Give feedback on player actions during sessions so they know what worked well and what could use improvement next time around! This helps keep things running smoothly while also giving your players guidance on how best to approach future challenges!
    5. Be Flexible: Be willing to make changes on-the-fly if needed! Things don’t always go according to plan during RPG sessions so be prepared for anything! If something isn’t working out as expected then don’t be afraid to adjust accordingly in order to keep everyone engaged and having fun!
    6. Have Fun: Above all else remember that role playing games should be fun for everyone involved! Don’t take yourself too seriously as GM; instead enjoy telling stories with your friends while helping each other become better gamers along the way.

    In conclusion, it is clear that both players and GMs have different forms of power within role playing games; however, ultimately it is up to each individual group as well as each individual player/GM combination on how much control each person has when it comes down making decisions within a game session. It is important though for GMs especially, to think about ways they can ensure everyone feels like their ideas matter while still keeping things running smoothly.

    The GM is Always Right?

    The GM (Game Master) is the ultimate authority in any role-playing game. As such, it is important for the GM to be right about all of the decisions they make. Being right is not always easy though and can often come down to a matter of opinion. This article will provide some tips and techniques for GMs to ensure that they are always right when running a game.

    1. Know Your Rules: The most important thing a GM can do to ensure that they are always right is to know their rules inside and out. Every game has its own set of rules and it is up to the GM to ensure that they are familiar with them. This includes not only being aware of all of the rules, but also knowing how they interact with one another and being able to adapt them when necessary. Additionally, it is important to stay up-to-date on any new rules or rule changes that may have been implemented since the last time you ran a game.
    2. Understand Player Intentions: It is important for a GM to understand why players want certain things from the game. Knowing what players want from the game allows GMs to tailor their decisions accordingly and make sure that everyone gets what they want out of the experience. Additionally, understanding player intentions allows GMs to anticipate potential conflicts or issues before they arise and take steps to avoid them before they become problems in-game.
    3. Be Flexible: Sometimes, even when you think you know all of your rules, situations may arise where there isn’t an existing rule in place or one that covers it specifically enough for you as the GM to make a definitive ruling on it. In these cases, it’s important for a GM to be flexible and willing to adjust or create new rules on the fly as needed in order to ensure fairness in-game and provide players with an enjoyable experience overall.
    4. Stick To Your Guns: As much as flexibility is important for a GM, so too is sticking with your guns when necessary; if you’ve made a ruling or decision about something, then stick with it no matter how much pushback you may get from players trying to challenge your ruling or persuade you into changing your mind about something mid-game (unless doing so would be detrimental or potentially unfair). Being consistent in rulings helps maintain order during games; plus it shows players that you take your role seriously as well as respect their efforts in playing by your rules/guidelines/etc..
    5. Take Player Feedback Into Account: Lastly, while ultimately a Game Master should always have final say over any decisions made during their games; taking into account constructive feedback given by players can help ensure fairness within games as well as provide new ideas/perspectives that could benefit everyone involved when making future rulings or decisions during games (which could also end up helping save time too). Ultimately though, be sure that any feedback taken into account does not compromise your own vision/goals for running games either nor undermine your authority either; but rather use it moreso as an added bonus/tool in helping fine-tune things over time if possible instead whenever possible..

    Being right all of the time isn’t easy—especially when running role-playing games—but following these tips can help ensure that Game Masters remain consistent with their rulings while also taking into account player feedback whenever possible too: know your rules inside and out; understand player intentions; stay flexible; stick with your guns when necessary; take constructive feedback into account where appropriate too whenever possible also.. Ultimately though, being firm yet fair should remain at top priority whenever making decisions during game sessions so as not only make sure everyone remains happy but also maintain order during gameplay too.

    Running a Safe RPG

    Role-playing games (RPGs) have been a part of the gaming community for decades. They are often viewed as a great way for gamers to immerse themselves in a fictional world and create an experience that is unique to them. However, there are some safety concerns that come with playing RPGs. This article will offer techniques and tips for GMs (Game Masters) on how to make RPGs safer for players.

    Safety Tips for Players

    The first step in making sure that all players feel safe while playing an RPG is to create an environment where everyone is respected and can express themselves without fear of judgment or ridicule. This means setting expectations at the start of the game and making it clear that any kind of offensive language or behavior will not be tolerated. Additionally, it is important to remind players that they should be comfortable speaking up if they feel uncomfortable at any point during the game.

    It is also important to create boundaries between players so that everyone feels comfortable with their level of interaction with one another. For example, some people might want to keep physical contact limited to handshakes or high-fives, while others may prefer no physical contact at all. It is important for GMs to be aware of these boundaries and respect them accordingly.

    GMs should also make sure that the rules of the game are clearly understood by all players before the game begins. This will help ensure that everyone is on the same page when it comes to how certain situations should be handled while playing, as well as how conflicts should be resolved outside of game play if needed.

    Finally, it is important for GMs to re-evaluate safety protocols regularly throughout the course of the game in order to ensure that everyone remains comfortable with their level of interaction with one another. It is also beneficial for GMs to provide a safe space where players can discuss any issues or concerns they may have before continuing with game play.

    Techniques for Creating a Safe Environment:

    GMs have a variety of tools at their disposal when it comes to creating a safe environment for their RPG sessions. One such tool is using an established code of conduct which outlines expectations from each player in regards to acceptable behaviors and language use during play sessions, as well as guidelines on how conflicts should be handled both inside and outside of gameplay if necessary. This code can also include consequences for violating these expectations in order to ensure accountability among all participants involved in the RPG session(s).

    Another technique that can help create a safe environment is having pre-game conversations with players before each session begins in order to discuss any topics or issues they may want addressed prior to starting playtime. This can help set expectations right away and provide an opportunity for players who may have questions or concerns about certain aspects of the game before getting started. Pre-game conversations can also help reinforce positive behaviors so that everyone feels like they’re on equal footing when engaging in roleplay activities.

    Additionally, it can be helpful for GMs who are running multiple sessions over time (e.g., campaigns)to check in regularly with their participants about how things are going and whether any changes need made going forward in order ensure safety standards remain consistent throughout multiple sessions over time . Finally, GMs should always strive towards providing clear communication during gameplay so there’s no confusion about what’s expected from each participant during each session . This helps keep everyone aware about what’s expected from them at all times.

    All in all, role-playing games can provide gamers with an exciting way to escape from reality into a fictional world where they can learn more about themselves while having fun with friends.

    However, it’s important for GMs who are running RPGs understand what steps need taken in order ensure a safe experience for all involved parties. By setting clear expectations, providing pre-game conversations, enforcing codes of conduct, regularly checking-in, and providing clear communication during gameplay, GMs can help create an environment where everyone feels respected, comfortable, and secure when playing RPGs together.

    Campaigns, Episode and Scenes

    Game Masters (GM) are responsible for running the game campaigns, episodes, and scenes of a role playing game. Running an effective role playing game is an important skill for a GM to have, as it can make or break the gaming experience. This section provides some tips and techniques for GMs on how to effectively handle game campaigns, episodes and scenes.

    Game Campaigns

    A game campaign is a long-term story arc that consists of multiple episodes and scenes. Game campaigns require careful planning in order to be successful. Here are some tips for GMs on how to effectively manage game campaigns:

    1. Have a clear direction: Before beginning the campaign, it is important for the GM to have a clear understanding of where they want the story to go. This should include a list of key plot points and goals that the players must reach in order to progress through the campaign. Without this knowledge, it can be difficult for players to stay focused and motivated throughout the campaign.
    2. Introduce new characters and locations gradually: It is important not to overwhelm players with too many new characters or locations at once. Instead, introduce them gradually as they become relevant in the story arc so that players can better remember who they are and where they are located.
    3. Encourage player input: Players should be encouraged to give their input on the direction of the story arc so that they feel more invested in it. When possible, try to incorporate their ideas into your plans as this will make them more interested in helping out with plot development when needed.
    4. Keep track of progress: Keeping track of progress made throughout a campaign can help ensure that all plot points have been addressed before moving on to another episode or scene. Keeping an organized record of completed objectives will also help prevent confusion during later episodes or scenes when revisiting past information becomes necessary.

    Episodes and Scenes

    Episodes and scenes are individual parts of a larger game campaign that each focus on different aspects of the overall story arc such as character development, plot advancement, or worldbuilding elements like new locations or NPCs (Non-Player Characters). Here’s how GMs can effectively handle these smaller segments within their campaigns:

    1. Establish objectives: Every episode or scene should have a set goal that needs to be reached by its conclusion in order for it to be deemed successful by both players and GMs alike. Establishing these objectives ahead of time will help ensure that everyone involved knows what needs to be accomplished during each session which can reduce confusion during gameplay sessions later on down the line.
    2. Develop NPCs: Developing interesting NPCs (Non-Player Characters) can add an extra layer of depth to any episode or scene as they provide additional sources of conflict, plot developments, clues/hints related towards solving puzzles/mysteries, etc… When creating NPCs it’s important not just give them generic “stock” personalities but instead take time developing them using traits from other characters as well as their own unique quirks/traits so that each one is memorable in its own way..
    3. Keep track of events: Keeping track events throughout each episode/scene is essential for maintaining continuity between sessions without having players rely solely on their memories regarding past events/details which could lead them getting confused down the line if too much time has passed since last playing out certain plot points.. Utilizing tools such as timelines/recaps during sessions between breaks/intermissions can help keep everyone up-to-date with what has transpired thus far while providing a reference point when needed..
    4. Introduce surprises : Introducing surprises during episodes/scenes adds excitement and unpredictability which helps keep things interesting while also helping keep motivate players who may become bored if things become too predictable over time . Surprises do not necessarily have to be related directly towards advancing plot developments but instead could simply revolve around unexpected encounters with unexpected NPCs , new locations , etc.

    Running effective role playing games requires skill from both GMs and players alike. By following these tips & techniques, GMs can ensure they are properly handling game campaigns, episodes, & scenes while helping making sure everyone involved stays engaged & excited about their gaming experiences along the way.

    Complexity & Difficulty

    As a game master (GM), you are responsible for creating an engaging and enjoyable gaming experience for your players. This means that you must consider the levels of difficulty and complexity of the game. You need to ensure that the game’s challenges are neither too easy nor too hard, and that the rules and mechanics are not overly complicated or difficult to understand. This article will provide you with some tips and techniques on how to handle levels of difficulty and complexity in a role-playing game.

    Tips for Establishing the Right Level of Difficulty

    1. Know Your Players: Every group of players is different, so it is important to get to know your players before setting any levels of difficulty or complexity. You should understand their interests, their gaming experiences, and their level of skill when it comes to playing RPGs. Knowing your players will help you create a gaming experience that is both challenging and enjoyable for everyone involved.
    2. Start Slow: When introducing a new RPG system or campaign setting, it is best to start off slow with relatively easy challenges and simple mechanics. This will give your players time to get used to the new system before ramping up the difficulty level as they gain more experience in playing the game.
    3. Provide Options: When designing encounters or adventures, it is important to provide your players with multiple options for overcoming challenges or solving problems. This can allow them to choose a path that suits their skills or interests while still providing an appropriate level of difficulty and complexity for them as they progress through the story or campaign setting.
    4. Offer Feedback: As your players become more experienced with the RPG system, offer them feedback on their performance in order to gauge if they are ready for more challenging content or complex rulesets at higher levels of play. This can help you ensure that the game remains engaging without becoming too difficult or overwhelming for any one player in particular.
    5. Use Your Best Judgment: Ultimately, as a GM it is up to you to decide what level of difficulty and complexity is appropriate for each encounter or adventure based on your group’s experience level with RPGs in general as well as any specific preferences they may have when playing this particular system or setting. Use all available information about your players when making these decisions in order to ensure an enjoyable experience for everyone involved!

    Tips for Keeping Things Simple

    1. Keep Rules Minimalistic: When introducing a new RPG system, try not to overwhelm your players by giving them too many rules at once; instead focus on only those rules which are absolutely necessary for gameplay at its most basic level (i.e., character creation, combat resolution). Once they have become familiar with this core set of rules then you can introduce additional elements such as magic systems, special abilities, etc., but don’t forget that less is usually more when it comes to keeping things simple!
    2. Emphasize Storytelling Over Mechanics: While mechanics are important when running an RPG session, remember that storytelling should always be at its heart; focus on drawing out interesting plot points from characters’ backstories rather than getting bogged down in complex rule sets which may be difficult (or even impossible!) for some players to understand fully right away
    3. Focus on Important Details: Don’t feel like you have to include every detail about every location visited during gameplay; instead focus on those details which are most relevant–especially those which can help move along plot points–and leave out anything that doesn’t contribute directly towards advancing the story
    4. Use Visual Aids: Visual aids such as maps, diagrams, character sheets etc., can be extremely useful when explaining complex concepts such as character abilities/powers/items etc., so make sure you use these whenever possible! Not only do visual aids make things easier for everyone involved but they also add something extra special (and often quite fun!) into the mix!
    5. Don’t Be Afraid To Ask For Clarification: If there is ever any confusion over certain rulesets or mechanics then don’t hesitate in asking other experienced members of your gaming group (or even online forums)for clarification; this way everyone involved can stay on track without having anyone feeling overwhelmed by what could potentially be seen as overly complex rulesets!

    As GMs it is our responsibility not only create engaging stories but also make sure our games remain accessible yet challenging enough so that everyone involved has an enjoyable time playing together no matter their individual skill levels with RPGs in general–this means carefully managing levels of difficulty/complexity within our games so no one player ever feels outmatched by his/her opponents nor overwhelmed by overly complicated rule sets.

    Session Duration, Content and Continuity

    Role playing games offer an immersive and collaborative way to enjoy stories with friends. Players create characters, explore a fantasy world, and engage in exciting adventures. As with any form of entertainment, the success of a role playing game depends on the quality of the experience. To make sure that your gaming session is enjoyable for everyone involved, it is important to consider its duration, content, and continuity.

    Duration: When planning a role playing game session, it is important to determine how long it should last. Generally speaking, a session should last at least two hours but no longer than four hours. This time frame allows for players to get into the flow of the story without feeling overwhelmed or exhausted. It also allows the Game Master (GM) to move through different plot points while still allowing players time to strategize or explore their character’s actions.

    Content: The content of your role playing game should be tailored to both the players and the GM. As such, it is important to spend some time discussing expectations before starting a gaming session. Once you have established what sort of content everyone is comfortable with – whether it be combat-heavy or dialogue-heavy – you can then begin constructing an appropriate story arc that will span several sessions. This will not only help maintain continuity but also provide players with an ongoing sense of purpose as they progress through each stage of the adventure.

    Continuity: In order for a role playing game to remain engaging for its participants, there must be a sense of continuity across multiple sessions. This can be achieved by having returning characters appear in different scenarios or expanding upon existing plot threads from previous episodes. NPCs (non-player characters) can also be used as narrative devices in order to further develop certain elements of your story world and introduce new plot points throughout each gaming session as needed.

    Techniques & Tips: To ensure that each gaming session runs smoothly and all participants are having fun, there are several techniques and tips that can help maximize its duration, content, and continuity:

    • Start each session with a recap – Before beginning a new episode or adventure arc, take some time to remind everyone where they left off in the previous installment so they don’t become lost in the story line;
    • Include small goals – To keep players engaged throughout each gaming session, include smaller tasks or objectives that they can work towards; this will help them stay focused on their character’s journey while still making progress with their overall mission;
    • Plan ahead – As mentioned before it is important for both GMs and players alike to plan ahead for upcoming sessions in order to ensure that there is always something new and exciting happening;
    • Be flexible – Role playing games are meant to be fun but sometimes things don’t always go as planned so remember that it’s ok to deviate from your original plan if necessary;
    • Communicate – Make sure everyone involved in your game communicates openly about what they expect from each other so no one feels left out or frustrated;
    • Encourage creativity – Role playing games give you a unique opportunity for creative expression so encourage everyone involved in your game session to think outside the box when coming up with solutions or strategies;
    • Have fun – Above all else remember that role playing games are meant to be enjoyed so make sure you take some time during each session just have fun!

    By following these tips and techniques while planning out your next role playing game session you can ensure that everyone involved has an enjoyable experience while providing them with an engaging narrative arc that lasts multiple episodes!

    Continuity for New Players or Players who have Missed Sessions

    Roleplaying games (RPGs) offer a unique and engaging way to bring players together to tell stories and have adventures. As the Game Master (GM), it is your responsibility to create an enjoyable experience for all involved. When a new player joins, or a player misses a session, it can be difficult for the GM to handle the gameplay in order to ensure that everyone has a good time. This article will offer some tips and techniques for handling gameplay when new players or missing players come into the mix.

    New Player Strategies

    When welcoming a new player into your RPG group, there are several strategies you can employ in order to help them get up to speed quickly. The first step is introducing them to the other players and giving them an overview of what they can expect from the game. It’s important to make sure they understand the rules of your system and any house rules you might have established, as well as providing any necessary character creation materials.

    One useful technique is to provide an “elevator pitch” of your campaign world so that they have an idea of what’s going on in the story before they dive in too deep. This can help give them context so that they don’t feel lost when playing their character. Additionally, you may want to provide some background information about their character so that they have an idea of who their character is and how they fit into the world at large before starting play.

    Another strategy for helping new players acclimate quickly is having them take on a simple task or side quest during their first session in order for them to get used to how things work without feeling overwhelmed by too much at once. You may also want to give them individual attention during this session so that they feel comfortable asking questions if needed.

    Missing Player Strategies

    When a player misses a game session due to real-life commitments, there are several strategies you can employ in order to keep the game moving forward without leaving out anyone’s story arc or progress within the campaign world. The first step is informing all players who missed out on what happened during their absence so that no plot points or details get forgotten or overlooked when play resumes with that missing player present again.

    It’s also important for you as GM to consider how much time passes within the story when someone misses a session; if it’s been weeks or months since your last game session then it may not make sense for things not have changed significantly within your campaign world since then; therefore, you should adjust accordingly when crafting plot points or introducing new elements into your story arcs while still ensuring continuity with what was already established before this absent player rejoined play again.

    If needed, you may want to provide an abridged version of events during individual conversations before play resumes with everyone present again; this allows everyone involved (including yourself) more freedom in deciding which plot points were most important and what needs resolving once play resumes again with all parties present. Additionally, it helps ensure that any important information won’t be forgotten while allowing the game momentum not be disrupted unnecessarily if possible due its pacing being kept consistent despite someone’s absence from particular sessions of playtime..

    Conclusion

    Handling gameplay when welcoming new players or accommodating missing ones can be challenging for any GM; however, by employing certain strategies such as providing overviews of your campaign world and offering individual attention during initial sessions as well as abridging events when necessary after someone’s absence from particular sessions, handling RPG gameplay with these circumstances becomes much easier and more enjoyable for everyone involved!

    Bringing NPCs to Life

    Creating an engaging and believable Non-Player Character (NPC) is essential for any role playing game. These characters can provide important story hooks, information, and even quests. Players will respond more positively to the game and its story if they feel like the NPCs are real characters, not just cardboard cutouts.

    Here are some tips and techniques to help bring NPCs to life in your role playing game.

    1. Create Flaws: A character with flaws will be more believable than a perfect one. Give your NPCs weaknesses, doubts, quirks, and other traits that make them unique and add depth to their personalities. This will make them stand out from the crowd of other generic NPCs that may inhabit your world.
    2. Give Them Goals: No one is a blank slate; everyone has ambitions, dreams, and goals they strive for. Give your NPCs their own goals—short-term or long-term—that they’re actively pursuing or trying to achieve in some way. This will give the players something tangible to interact with when dealing with these characters as well as making them feel like real people who have lives outside of the party’s interactions with them.
    3. Provide Backgrounds: All people have histories that shaped who they are today; it’s no different for NPCs in role playing games. Give each NPC a background story that explains their current situation and why they may be aiding or hindering the players in some way. This backstory can be as simple or complex as you wish but should provide enough information so players can understand why an NPC may act a certain way in certain situations or why they may be motivated by certain things in the game world.
    4. Establish Connections: It’s important for each NPC to have connections—whether it’s family, friends, rivals, or enemies—to further bring them to life within the game world. These relationships give them more depth as people rather than just stock characters who exist only in relation to the player group’s goals and objectives within the game world itself.
    5. Develop Personalities: Every character should have its own unique personality; this includes both PCs (player characters) as well as NPCs (non-player characters). This can range from being shy or outgoing all the way up to aggressive or passive depending on how you want each character to interact with others within the game world itself and how you wish them to be perceived by players when interacting with them during encounters throughout your game’s sessions/adventures/campaigns etc.. This can also help inform how these characters react when presented with certain decisions/choices within your sessions/campaigns etc..
    6. Use Visual Cues: If you have access to visual aids such as artwork or miniatures then use these tools whenever possible when introducing new characters into your sessions/campaigns etc.. By using visuals such as images/artwork of what an NPC looks like it helps create an image of this character within players minds which makes them easier for players to remember rather than just relying on text descriptions alone which often times may become forgotten quickly after being read due simply because there was nothing else provided besides said textual descriptions of said character(s). It also helps make these non player characters feel more real as if they were actually standing right there amongst everyone else during encounters rather than just being “words on paper” so-to-speak which would otherwise take away from any sort of immersion factor present within your sessions/campaigns etc..
    7. Allow For Variation In Interactions: When interacting with each NPC allow for variations in how they respond based upon how different PCs might approach each situation differently even if those approaches are essentially doing similar things overall (e.g., two PCs might ask an NPC for information but one might do so politely while another might do so aggressively). The responses given by said NPC should vary based upon which approach was chosen since no two responses should ever really be exactly identical regardless of any similarities between approaches taken by said PCs when interacting with said non player character(s). By allowing for variations such as this it helps keep interactions feeling fresh between repeated encounters between PCs and respective NPcs even if those same encounters occur multiple times over throughout different parts of a campaign etc..
    8. Keep Dialogue Interesting Yet Relevant To Your Session/Campaign Etc.: All dialogue should always remain interesting yet relevant at all times throughout any session/campaign etc.. Dialogue should never seem forced nor too contrived since said dialogue should always flow naturally even when presented with circumstances that aren’t necessarily natural per se (e..g., being presented with questions about events that don’t actually exist within your session/campaign etc.). Any dialogue presented should always remain relevant and interesting at all times regardless of whatever circumstance arises during any given encounter between PCs & respective NPcs during a session/campaign etc…
    9. Make Changes Over Time As Needed: As time passes throughout your session/campaign etc., don’t shy away from making changes to existing non player character(s) whenever need be — whether these changes are subtle or drastic does not matter since all changes made should still remain true & consistent overall at all times throughout any given session/campaign etc.. Any changes made over time can range from changing up dialogue options available when interacting with said NPcs all the way up towards having entire backstories completely overhauled depending upon whatever circumstance arises during said session/campaign etc…
    10. Have Fun With It!: Last but certainly not least – Have fun! The most important thing about creating believable & engaging Non Player Characters is enjoying yourself while doing so! Don’t worry too much about getting everything perfect right out of gate – take some risks here & there while creating each individual character – sometimes taking risks pays off big time! After all – without having fun none of this would really matter anyways now would it?

    Wrangling Monsters and Animals

    The ability to bring monsters and animals to life for players of a role-playing game is a key element in creating an engaging and immersive experience. If done well, monsters and animals can provide a memorable and unique challenge to the players. Here are some tips and techniques for doing just that.

    1. Start With A Concept: Having a clear concept in mind before you start designing your creatures is essential. It’s important to think of ways to make them unique and interesting, while still staying true to the genre of the game. Consider their physical features, abilities, weaknesses, habitat, diet, behavior, etc., as these will all help shape the creature and give it life.
    2. Give Them Character: Every creature should have some sort of personality that makes them feel alive in the game world. This can be as simple as having them react differently when approached by different characters or by having them interact with other creatures in the game world. You can also give them goals or motivations which will help shape their behavior and make them more believable.
    3. Make Them Memorable: It’s important that your monsters stand out from one another so that the players will remember each one distinctly. Consider giving each monster or animal a unique name or look that sets it apart from others in its species or group. This way, when the players encounter these creatures again they’ll remember who they are and what they’re capable of doing.
    4. Give Them Purpose: Each creature should serve a purpose within the game world; otherwise they may feel like filler to fill space rather than integral parts of the story being told through gameplay. Consider what tasks your creatures can help fulfill or what obstacles they can present for your players so that every encounter feels meaningful rather than just another distraction from progressing through the story being told through gameplay.
    5. Utilize Visuals: Visuals help bring monsters alive for players by providing visual cues about how powerful or intimidating they might be before an encounter has even started; this helps to set expectations right away so that nothing comes as too much of a surprise during encounters with these creatures later on in the game session. Consider adding visual effects such as glowing eyes or spines when enemies appear on screen so that they appear more menacing while still being visually distinct from other beasts roaming around in your virtual world.
    6. Make Use Of Audio Effects: Audio effects can really add life to your monsters by giving them realistic sounds such as growls, roars, snarls, clattering claws etc.. which make it easier for players to imagine what kind of character they are dealing with before actually coming face-to-face with it during gameplay sessions; this also helps build tension and anticipation before an encounter even starts which helps create an engaging gaming experience for everyone involved!
    7. Offer Variety: Variety is key when it comes to bringing monsters and animals to life; each should have its own strengths and weaknesses which make it distinct from others within its species or group; this helps ensure no two encounters with same type of monster ever feel like same thing over again when playing through your RPG sessions!
    8. Keep It Balanced: It’s important not to make all enemies too powerful; having some weaker enemies mixed in throughout will keep things fresh while still presenting challenges for players within your RPG sessions! Additionally consider making use of various enemy types; mix things up by including bosses which require specific strategies to defeat alongside regular enemies which require different tactics during battle!
    9. Adjust Difficulty Based On Player Skill Level : Not all players have same level of skill when playing RPGs so be sure adjust difficulty accordingly based off player skill levels; this way no matter how experienced player is they should still have enjoyable gaming session without feeling overwhelmed! Additionally consider adding optional boss fights at end of levels where player must defeat stronger versions enemy if looking extra challenge!
    10. Have Fun With It. Don’t forget most importantly have fun while creating monsters animals bring life RPG sessions; don’t take yourself too seriously try come up with original ideas push boundaries keep things interesting both you yourself players involved!

    Why use Monsters ?

    Monsters are an essential part of a fantasy role playing game. They provide an exciting and challenging element to the game, as well as offering players a unique opportunity to interact with fantastical creatures that they wouldn’t normally encounter in their day-to-day lives. Monsters offer a wide range of potential benefits, from providing a sense of danger and excitement to giving players opportunities to learn new skills, explore new environments, and interact with interesting characters.

    In order to understand the importance of monsters in a fantasy role playing game, it is necessary to first consider what makes them so interesting. Monsters can come in all shapes and sizes, from magical creatures like dragons and unicorns, to more mundane beasts like goblins and orcs. They can live in forests or dungeons, on mountaintops or in underground lairs. No matter where they call home, these creatures offer players a chance to face off against something that is different from them. This difference can be used as a way for players to explore their own identity by seeing how their own character responds when faced with something unknown or dangerous.

    The presence of monsters also offers players the chance to confront their fears and push themselves beyond their comfort zone. This process can provide invaluable character development opportunities for both player and character alike. Facing one’s fears is an essential part of growing up, and being able to do so within the safety of a fantasy game can be extremely beneficial for those who might not have access to similar experiences in real life.

    In addition to offering players an opportunity for character growth and exploration, monsters are also important because they provide exciting combat encounters that help keep the game interesting. Fighting monsters is often more complex than simply attacking them head-on; there may be puzzles or traps hidden within their lairs that need solving before engaging them in battle, or certain strategies may be required in order for success. These encounters allow players to test their wits while developing their combat skills as well, making them even more rewarding than traditional battles against human opponents.

    Finally, monsters allow for exploration into different cultures and mythologies which can often bring fresh perspectives into the game world. Different cultures have different beliefs about monsters which can lead to intriguing stories about why these creatures inhabit certain places or why they behave the way they do stories that would otherwise remain untold if not for the presence of these mythical beings within the game world.

    Monsters are an integral part of any fantasy role playing game, offering both important story elements as well as providing unique opportunities for character growth and development through combat encounters and exploration into different mythologies. Monsters play an invaluable role in creating memorable gaming experiences.

    Handling Treasure, Rewards and Experience for your Players

    Treasure, rewards and experience are essential aspects of many role playing games. Good treasure, rewards and experience help to motivate players and create an engaging, enjoyable gaming experience. In this article, we will discuss some techniques and tips for GMs to use when designing treasure, rewards and experience for their RPG players.

    We will cover topics such as how to create interesting treasure loot, the importance of rewarding players in different ways, how to provide meaningful experiences for players that are both fun and rewarding, and tips for making sure the rewards fit the game world.

    1. Creating Interesting Treasure Loot: Creating interesting treasure loot is an important part of designing a good RPG experience. It’s important to remember that not all treasure is created equal; different types of loot can have different effects on the story or game mechanics. For example, magical items can often be powerful game changers while mundane items can add flavor or depth to the game world. When creating loot it’s important to consider how it will affect the story or gameplay in meaningful ways. When designing loot it can also be helpful to think outside the box; rather than just providing traditional items like gold or weapons why not provide something more unique or special? This could be anything from a powerful artifact that grants special abilities, an ancient scroll with clues about a lost city, or even a magical item created by a powerful wizard. The possibilities are almost endless!
    2. Rewarding Players in Different Ways: It’s also important for GMs to think about different ways they can reward their players beyond just providing them with physical loot or gold coins. Experience points are one way of rewarding players for their accomplishments in-game; these points can then be used by players to upgrade their characters’ skills or abilities. Additionally GMs should also consider rewarding their players with other non-material rewards such as recognition from NPCs, access to special locations or information that could help progress their character’s story arc, etc. Non-material rewards can often be more meaningful than physical loot as they provide context and depth to the game world which helps increase player engagement and motivation.
    3. Providing Meaningful Experiences: Providing meaningful experiences is another important aspect of designing a good RPG experience; these experiences should be both fun and rewarding for your players. When designing these experiences it’s important to consider what your players enjoy most about playing RPGs; do they prefer combat encounters? Storytelling? Exploration? Social interaction? Crafting items? Once you know what type of activities your players enjoy you can then create relevant experiences that will engage them and keep them motivated throughout the game session. Additionally it’s also important for GMs to remember that not all experiences have to focus on combat; there should also be plenty of opportunities for exploration, problem solving, social interaction etc. These activities provide opportunities for character development which helps keep your player’s engaged with their character’s story arc in between fights which helps make the overall gaming experience more enjoyable and immersive.
    4. Making Sure Rewards Fit The Game World: Lastly when designing rewards it’s important for GMs to make sure they fit within the context of their game world; this means considering things like setting appropriate difficulty levels based on player characters level of power/skill as well as considering what type of loot would make sense within the context of your game world (i.e., magical items from a fantasy game should look/function differently than tech items from a sci-fi based setting). Additionally it can also be helpful for GMs to think about how much “power creep” they want within their game world; this refers to making sure new rewards don’t outshine older ones so that characters don’t become too overpowered too quickly which might lead them feeling unchallenged during later parts of the campaign/story arc.

    In conclusion, treasure, rewards and experiences are essential aspects of many RPGs which help keep players engaged while playing through long campaigns/story arcs. As such it’s important for GM’s design interesting treasures/rewards as well as meaningful experiences tailored towards what their players enjoy most while making sure they fit within the context of their game world so characters don’t become too overpowered too quickly.

    Handling the Death of Characters.

    The death of characters in a role-playing game can be a difficult and emotionally charged topic. It is important for Game Masters to handle these situations with care, as player emotions can be easily affected. Even when players expect a character’s death, it can still cause strong feelings of attachment and loss for them. Therefore, it is important to equip GMs with the tools they need to handle character deaths in a respectful and tactful manner. This article provides tips and techniques for GMs on how to handle the death of characters in an RPG, as well as suggestions on how to introduce new characters into the campaign without causing distress or disruption.

    Character Death

    When it comes to character death in an RPG, it is best for GMs to plan ahead. They should think carefully about the consequences of character death before introducing any dangerous situations into their games. This will help ensure that players are mentally prepared for any potential losses they may experience during play. GMs should also discuss with their players what they would prefer when it comes to character death – some players may be more comfortable with permanent death while others may prefer resurrections or reincarnations of their characters.

    When a character does die, GMs should take special care in how they handle the situation so that all involved feel respected and supported. It is important for GMs to show empathy towards their players’ grief and make sure that their reactions are appropriate for their ages and sensitivities. This could involve having a private discussion with each player afterwards where they can express their emotions without being judged or embarrassed in front of the other players. Alternatively, if all players are comfortable discussing their reactions together then this could be done as a group activity instead.

    It is also important that GMs give their players time to process the death before moving on with the campaign. A good strategy is to end the session after any major events have occurred so that everyone has time away from the game before continuing play again. The length of this break will depend on each individual group – some may only need a few days while others may require several weeks before they can comfortably return to playing again.

    Introducing New Characters

    Introducing new characters after someone has experienced loss can be tricky because there is often an emotional investment attached to existing characters that isn’t necessarily present when creating new ones from scratch. Therefore, it is important for GMs to make sure that no one feels pressured into creating a replacement if they don’t want one – allow each player enough time and space before deciding if they want another character or not, and respect whatever decision they come up with even if it doesn’t fit into your pre-planned story arc.

    When introducing new characters, GMs should focus on making them unique individuals rather than simply being replacements for lost ones by giving them different backstories, personalities, motivations etc.. This will help ensure that there isn’t an uncomfortable comparison between old/new characters which could cause further distress amongst those who have experienced loss during play. Similarly, avoid introducing too many new characters at once – spread out who you introduce over several sessions so everyone has time adjusting to each one individually instead of feeling overwhelmed by multiple additions at once.

    Finally, don’t forget about those who haven’t experienced loss during play either – give them equal attention when introducing new characters so no one feels left out or neglected during these times of transition within your group dynamic!

    Conclusion

    The death of characters in an RPG can be emotionally tough but necessary sometimes depending on what kind of game you are running; however, it is important for GMs to approach these situations with tact and sensitivity towards all involved parties so everyone feels respected and supported throughout this difficult period of transition within your gaming group dynamic! By discussing potential consequences beforehand as well as taking special care when handling character deaths as well as introducing new ones afterwards then you will hopefully find yourself able to navigate through these emotional waters successfully!

    Mixing Up Combat and Conflict Resolution

    There are sveral basic types of Combat systems within the RPG.

    1. Dice-Based Combat: This type of combat system relies on dice rolls to determine the success or failure of a character’s actions. Pros: Quick and easy to learn, allows for random elements that can add tension and excitement to a fight, can be adapted easily to different genres. Cons: Can be seen as too luck-based, can become repetitive and boring if not mixed up with other systems. Tips: Introduce different types of dice for different actions and modifiers, mix up the outcomes by introducing narrative elements such as environmental factors or character backgrounds, add in special abilities that require additional rolls for more strategic play.
    2. Card-Based Combat: This type of combat system uses cards to represent different actions and modifiers that can be used to influence the outcome of a fight. Pros: Easily adaptable to any genre, great for introducing new elements or special abilities without having to create an entire new system, gives players more control over their characters’ fate than other systems. Cons: Can be difficult to learn at first, can become repetitive if not mixed up with other systems. Tips: Introduce card draws for magical effects or special abilities, combine with dice rolls for physical attacks for a more varied experience, use cards as prompts for role playing opportunities.
    3. Turn-Based Tactical Combat: This type of combat system focuses on positioning and strategy as players take turns making moves in a more strategic manner than in other systems. Pros: Great for recreating classic battles from literature or film, allows players to think strategically about how they approach their opponent’s forces, encourages cooperative play between allies. Cons: Can be complicated and time consuming if not used correctly, may not fit all genres or gaming styles Tips: Introduce rules that encourage creative thinking such as bonus action points based on successful maneuvers or bonuses when characters cooperate with each other during battle.
    4. Social Interaction System: This type of conflict resolution system relies on diplomacy, negotiation, and persuasion to achieve objectives without resorting to physical violence. Pros : Allows players to explore a wide range of story possibilities without relying on combat encounters; encourages creative solutions; rewards characters who have high social skills while still providing challenges even for those who do not have the same level of social aptitude; great way to introduce role playing opportunities without relying on dice rolls or card draws . Cons : Can sometimes feel like it is missing out on the excitement of physical confrontations; requires players who are comfortable with role playing large amounts of dialogue ; can take longer than other forms of conflict resolution .Tips : Introduce obstacles that must be overcome through negotiation such as locked doors or traps that require inventive solutions ; incorporate environmental factors such as weather conditions which could influence the outcome ; encourage players to use their character’s backgrounds and motivations when negotiating solutions .

    As a GM, there are many ways to adapt and mix up existing combat and conflict resolution systems within the game. By introducing new elements or combining existing ones with other genres or game play styles, the GM can create entirely unique experiences that challenge their players’ creativity and engage them in new ways.

    For example, the GM can combine elements of card-based deck building games with traditional turn-based tactical combat in order to create new strategies and opportunities for player interaction.

    Likewise, they could introduce social elements into a physical based game by having characters make persuasive speeches or attempts at diplomacy prior to engaging in physical conflicts.

    In addition to mixing up existing systems, the GM can also create entirely new ones by combining different elements from different types of game play and role playing genres.

    Players could use dice rolls for physical attacks in a tactical combat game but also add in card draws for magical effects or special abilities.

    The GM could also introduce a skill-based system which requires characters to use their skills in order to succeed in their task.

    Furthermore, the GM could use a combination of dice rolls and card draws as well as introducing different types of narrative elements such as character backgrounds or environmental factors which could influence the outcome of a conflict resolution attempt.

    Overall, there are many ways that GM can adapt and mix up existing combat and conflict resolution systems within the game. By introducing new elements or combining existing ones with other genres or game play styles, players can create entirely unique experiences that challenge their creativity and engage them in new ways.

    Handling the Players Choices

    Role playing games have long been seen as a great way for players to explore choices and make decisions that have an impact on their characters’ lives. As a Game Master (GM), it can be difficult to navigate the complexities of player’s choices, but doing so is an important part of creating an engaging and meaningful role-playing experience. This article will provide some tips and techniques on how to handle the choices of players in role playing games.

    First and foremost, it’s important to set clear expectations at the start of the game. It’s essential that both the GM and players understand what kind of game they are playing, what kind of behavior is expected, and what are acceptable moral choices. This can help prevent any misunderstandings or arguments that could potentially arise later on. Additionally, it’s often useful to provide examples or scenarios that illustrate how different moral choices might play out in the game.

    Once the expectations have been established, it’s important for the GM to pay attention to how players are making their choices. If a player seems to be making decisions that don’t fit with the established expectations or just don’t make sense in terms of character motivation, then it is up to the GM to guide them back onto a more sensible path. It may be necessary for the GM to explain why certain decisions may not be acceptable or why certain consequences may arise from certain decisions. This can help ensure that players stay on track with respect to their character development as well as staying within bounds with respect to game rules and expectations.

    Another important aspect of handling player’s choices is allowing them some degree of flexibility when it comes to decision making. While it is important for players to obey established rules, there should also be room for creativity and individual decision-making within those parameters. For instance, if a player wants their character to perform an act that isn’t explicitly forbidden by game rules but which could still have serious consequences, then it can be helpful for the GM to discuss this with them before allowing them proceed with their choice. This allows both parties involved (the player and GM) to come up with mutually agreeable solutions before implementing any permanent changes within the game world or character development paths.

    Finally, one key technique when handling player’s choices is providing feedback after each decision has been made by a player. It can be helpful for both parties involved if there is an opportunity for discussion about why certain decisions were made as well as potential repercussions for those decisions afterwards. Additionally, feedback allows all participants in a role playing game session an opportunity for further growth and development as they navigate through difficult situations together rather than having all changes made unilaterally by one party (usually the GM).

    In conclusion, handling the choices of players in role playing games can be tricky but rewarding if done properly by a knowledgeable GM who understands both their own responsibility as well as their responsibility towards helping create an enjoyable experience for all involved participants. By setting clear expectations at the outset, paying attention during gameplay sessions, providing flexibility when appropriate, and offering constructive feedback afterwards; a skilled Game Master can ensure that everyone involved has a fulfilling experience while exploring interesting moral dilemmas within their chosen gaming world!

    Handling the Killing

    In role-playing games, players are often tasked with killing monsters and NPCs (non-player characters). While this is often integral to the game’s story, it can be difficult for Game Masters (GMs) to handle the moral implications of killing within a game. It is important to consider the potential psychological impacts of killing on players, particularly younger or more sensitive players. This article will provide GMs with techniques and tips for handling the morality of killing monsters and NPCs in role-playing games.

    1. Setting up expectations: Before beginning a role-playing game, it is important to set expectations with your players about the moral implications of killing. Discuss with them why their characters may have to kill certain creatures or characters and what that means for their character’s moral development. This helps ensure that everyone is on the same page when it comes time for certain characters or monsters to be killed. It also allows you to gauge how comfortable each player is with playing out potentially violent scenes.
    2. Establishing rules: It is also important to establish clear rules surrounding violence in your game. For instance, you may decide that all violence must be strictly consensual between players, meaning that no one can force another player into engaging in violent acts against their will. You can also set rules limiting how much violence can take place in a single session or setting parameters around what weapons are acceptable for use against NPCs or monsters. Establishing these rules will help ensure that players understand their boundaries when it comes to engaging in potentially morally questionable acts within the game world.
    3. Providing alternatives: When possible, offer non-violent options for resolving conflicts between characters and NPCS or monsters. For example, instead of having a player character fight a monster directly, you could allow them to negotiate with it or find another way around it without resorting to violence (e.g., using stealth). This allows players the opportunity to use their problem solving skills without having to resort to violence as a first option. It also gives them more agency over how they interact with other creatures within the game world, which may help minimize any potential moral discomfort they may feel about engaging in potentially violent acts against other creatures or characters within the game world.
    4. Encouraging thoughtful discussion: After particularly intense scenes involving violence between characters and NPCS/monsters, encourage your players to discuss their feelings towards what happened during the session (e.g., how they feel about being forced into killing another creature). This can help facilitate understanding between team members by allowing them all an opportunity to express their feelings on any moral issues they faced during gameplay without fear of judgment from others. Providing an outlet for discussing these issues can also help minimize any negative psychological impacts caused by having faced such morally ambiguous decisions during gameplay.
    5. Allowing consequences: When possible, allow consequences for actions taken by players who engage in violent acts against NPCs/monsters throughout gameplay (e.g., allowing NPCs/monsters or other playable characters react negatively towards them based on their actions). This allows for more realistic outcomes based on character choices and encourages thoughtful decision making amongst all members of the party when faced with difficult choices involving potentially morally ambiguous situations within the game world .
    6. Allowing redemption arcs: Allow your players opportunities for redemption after engaging in morally questionable actions during gameplay (e..g., providing narrative arcs where they are able to make up for past transgressions through heroic deeds). This provides an emotional payoff while still addressing some of the more difficult aspects of handling morality during role-play gaming sessions and allows players an outlet through which they can explore how their past decisions impacted others within the game world while still maintaining a sense of heroism throughout gameplay .

    Handling morality when dealing with killer NPCs/monsters can be challenging but there are several techniques and tips GMs can employ when running role-playing games which focus heavily on this type of content . By setting expectations early on, establishing clear rules, providing alternative solutions, encouraging thoughtful discussion, allowing consequences, and allowing redemption arcs, GMs can create an environment which handles morality effectively while still preserving a sense of fun within their gaming sessions.

    Adapting Material

    One of the most enjoyable aspects of playing a role-playing game is creating and running scenarios. With the vast array of gaming systems available, it can be daunting to come up with original scenarios or adapt existing ones. Fortunately, there are some tips and techniques that Game Masters (GMs) can use to adapt other game system scenarios for use in their own role-playing game (RPG). This article will discuss some of these methods and provide advice on how to make an RPG scenario that is both engaging and entertaining for players.

    1. Choose Your Scenario Wisely: When selecting a scenario from another game system, it’s important for GMs to choose something that fits their own RPG’s setting and style. It should also be appropriate for the skill level of the players. If the GM isn’t familiar with the source material, they should read or play through the scenario before attempting to adapt it. This will help them get a better understanding of its structure and plot points before beginning their own version.
    2. Identify What You Want to Adapt: Once you’ve figured out what elements you want to adapt from another game system’s scenario, it’s time to start thinking about how you can incorporate them into your own RPG setting. Start by breaking down the elements into smaller parts that you can work with more easily. For example, if you want to include a sequence where a group of characters must sneak past guards in order to reach their objective, consider which NPCs will fill those roles and how they might act differently in your world compared to the original game system’s version.
    3. Adjust Your Scenario According To Your Ruleset: When adapting another game system’s scenario for your RPG, it’s important to take your own ruleset into account. Make sure that any mechanics that are used in the original scenario are compatible with your ruleset or can be modified accordingly without disrupting gameplay too much. Keep in mind that if some mechanics need major adjustments, then it might be better to just create your own version instead of trying to force something into place that doesn’t fit properly with your ruleset.
    4. Focus On Storytelling: No matter what type of RPG you’re playing, storytelling should always be at its core. When adapting another game system’s scenario for your own RPG, focus on making sure there is an interesting story at play—one that engages players and encourages them to become invested in their characters and the world around them. Consider adding unique twists and turns as well as unexpected developments so as not to make things too predictable for players who have played through the original version before.
    5. Create Challenging Encounters And Puzzles: Encounters with enemies or puzzles should never be too easy or too hard; having a good balance is key when designing a fun and challenging scenario for players. When adapting encounters from another game system’s scenario, determine which monsters or NPCs would work best in your own setting given its style and atmosphere as well as any limitations imposed by mechanical or narrative constraints such as time limits or limited resources available on either side of combat encounters. Additionally, if puzzles are included in the original scenario think about ways they could be modified slightly while still keeping their core idea intact so they remain interesting even after multiple playthroughs by different groups of players.
    6. Be Flexible And Open To Change: As with all games involving player decisions, no two playthroughs will ever be alike; this is especially true when adapting another game system’s scenarios for use in an RPG setting since each group may handle situations differently than others have done before them due to their individual playing styles and preferences. As such, GMs should strive towards being flexible when running adapted scenarios so they can accommodate changes on-the-fly if needed—such as when player decisions lead them off track from where they were expected go—and still deliver an enjoyable experience regardless of how things turn out in comparison to what was originally planned out beforehand..

    Adapting other game systems’ scenarios for use in RPGs can seem daunting at first but with some planning and forethought GMs can create engaging stories tailored specifically towards their group’s playing style while still staying true enough to the source material so fans won’t feel like something essential has been lost along the way During this process it’s important not forget why people play RPGs: because they’re fun! Keep this goal at front-of-mind when designing adapted scenarios so everyone involved enjoys themselves every step along way!

    Handling Cultural Appropriation

    Cultural appropriation in game settings can be a difficult issue to navigate. As a GM, it is important to be aware of the potential for cultural appropriation and take steps to ensure that it does not occur.

    First, it is important to be aware of the cultures represented in your game setting. Research the cultures and their customs, beliefs, and values so that you can accurately portray them in your game. This will help you avoid any potential issues with cultural appropriation.

    Second, make sure that all players are aware of the potential for cultural appropriation and are respectful of other cultures. If a player is not familiar with a culture or its customs, encourage them to do research before introducing elements from that culture into the game.

    Third, if a player does introduce elements from another culture into the game, make sure they are doing so respectfully and accurately. If there is any doubt about whether something is appropriate or not, discuss it with the player before allowing it in the game.

    Finally, if an issue of cultural appropriation does arise in your game setting, address it immediately and take steps to rectify it. This could include removing any offensive elements from the game or discussing why certain elements may be inappropriate with all players involved. It is also important to apologize for any offense caused by cultural appropriation and take steps to ensure that it does not happen again in future games.

    The Legacy of OSR Fantasy

    The fantasy role playing genre is one that has grown in popularity since its inception in the mid-1970s. It draws heavily upon the works of several authors, most notably J.R.R Tolkien, Robert E. Howard and H.P Lovecraft, who have had a profound influence on the development of the genre as we know it today.

    J.R.R Tolkien is widely considered to be the father of modern fantasy and his works are often credited with creating the entire fantasy genre as we know it today. His most famous work, The Lord of the Rings, helped to set the standard for what a fantasy world should look like, with its detailed landscapes and mythological creatures. He also popularized many of the tropes that would become commonplace in fantasy role playing games such as magical weapons and items, elves, dwarves and orcs as playable characters and a quest for a great evil to be vanquished.

    Robert E Howard was another influential author whose contribution to fantasy role playing games cannot be overlooked. His creation of Conan the Barbarian provided players with an iconic hero to emulate while adventuring in their own campaigns. He also wrote stories that featured fantastical creatures such as giants, dragons and other monsters which would later become staples of modern day role playing games like Dungeons & Dragons (D&D).

    Finally, H.P Lovecraft’s influence on the fantasy role playing genre is undeniable thanks to his dark and eerie stories featuring cosmic horrors from beyond our realm of understanding that have been adapted into various RPG settings over time. His works have inspired many game masters to create their own unique campaigns featuring alien creatures or ancient gods seeking revenge on humanity for disturbing their slumber eons ago.. These elements provide players with an exciting challenge when trying to survive in such an unpredictable world where no one can predict what will happen next or how they will even survive at all!

    In conclusion, J.R.R Tolkien, Robert E Howard and H P Lovecraft are all influential authors who have had a lasting impact on the fantasy role playing genre over time through their works which provided players with iconic heroes and villains while also introducing fantastical creatures that they could use when creating their own campaigns or scenarios within existing ones. Their contributions are invaluable to anyone looking to explore these worlds or create their own adventures within them!

    Though these authors have had a positive influence on the fantasy role playing genre, there are some potential negative impacts that should be taken into consideration.

    One of the most common issues is the lack of diversity in characters and stories, as these authors focused mainly on white, male protagonists in their works. This can lead to a lack of representation for other demographics such as women, people of color or members of the LGBTQ+ community.

    Additionally, many of their stories focus heavily on European-style mythology and folklore which can be seen as exclusionary to players from other cultures who do not have access to these stories or cannot relate to them.

    Finally, some of their works contain elements that can be seen as offensive or inappropriate when viewed through a modern lens such as casual racism or misogyny which can lead to an uncomfortable atmosphere for players.

    Working with the OSR Races

    Races in RPGs are sometimes portrayed as using outdated social stereotypes and cliches in social media. Stereotypes and cliches have lead player to believe that these races shoudl be used ort aren’t capable of being taken seriously used as characters.

    Dwarves

    Dwarves are a race of short, stocky humanoids that can be found in many fantasy settings. They are typically described as being hard-working and industrious people who excel at crafting items out of stone or metal such as weapons and armor. Dwarves have a strong sense of honor and respect for tradition, but they also have a fondness for gold which can lead them astray if left unchecked.

    Dwarves tend to live in mountain ranges or underground caves where they mine for precious metals and stones to create their crafts with. They also tend to be quite good at engineering complex systems such as machines or fortifications due to their natural affinity for building things. Dwarven culture is often centered around clans which may hold grudges against other clans over past wrongs committed against them by members of that clan.

    Halflings

    Halflings are small humanoids that resemble humans except they only reach up to 3 feet tall at most and have large feet compared to their body size. Halflings enjoy a peaceful life filled with simple pleasures like good food, music, games, stories, and friendship although they can be quite brave when threatened or pushed into a corner. Halflings are often seen as the “good guys” in many stories since they tend to keep out of trouble by avoiding conflict whenever possible while still being loyal companions when it comes time to fight for what’s right.

    Halflings usually live near farms where they work hard but also get plenty of time for leisure activities like fishing or playing games with friends on the weekends. They tend to travel far less than other races due to their size which makes it difficult for them to cross terrain that would otherwise be easy for larger creatures like humans or elves to traverse through without any trouble at all.

    Elves

    Elves are a magical race of creatures found in many fantasy worlds. Elves are typically described as being tall, slender and beautiful with pointed ears, and often have magical powers. In some stories, they are wise and powerful beings, while in others they are mischievous tricksters. They can be found living in forests or underground and usually have a deep respect for nature.

    The most common type of elf is the High Elf, who is usually depicted as noble and wise. They often possess magical powers such as spell casting or the ability to communicate with animals. High Elves may also be skilled warriors who use their magical abilities to help protect their lands from danger. Dark Elves are another type of elf which tend to be more sinister in nature and often use their magical powers for evil purposes.

    Genetic determinism is a concept in fantasy literature which suggests that the traits of a character are predetermined by their genetics. This means that a person’s race, class, gender, and even magical abilities are determined by their biological makeup. This concept has been used in fantasy literature for centuries, and is perpetuated in RPGs with many campaigns featuring characters whose destinies are determined by their bloodlines or ancestry.

    This concept of genetic determinism reinforces certain stereotypes and can be seen as problematic, as it implies that certain races or genders are more likely to possess certain traits. For example, some stories portray elves as being predisposed to magical abilities or dwarves being predisposed to engineering skills. Such depictions can be seen as reinforcing negative stereotypes about certain races or genders and can have a damaging effect on readers’ perceptions of these groups.

    In order to avoid perpetuating such stereotypes in fantasy games, the GM should strive to create diverse characters and ensure that all characters have an equal opportunity to contribute and participate in the story. They should also take care not to make assumptions about characters based on their race or gender, but instead focus on creating compelling characters with unique personalities and strengths that can be applied across any situation they encounter. Furthermore, authors should consider how their stories may be interpreted by readers from different backgrounds and strive to create stories that are inclusive and respectful of all individuals regardless of their race or gender.

    For example Using elves in an RPG can perpetuate damaging stereotypes and perpetuate racism. This is because elves are often associated with harmful racial tropes (were fair-skinned and light-eyed) and stereotypes (such as being magical, exotic, and having supernatural powers). These stereotypes can make players feel excluded or unwelcome if they do not fit the players viewpoint.

    To avoid perpetuating negative stereotypes, it’s important to create a diverse cast that represent a variety of races, genders, body types, and abilities. It’s also important to create storylines that demonstrate their diversity and complexity as characters. It’s also important to ensure that the game narrative does not perpetuate any dangerous generalizations about groups of people. Lastly, it’s important to provide players with resources to learn more about the history of cultures in order to gain a deeper understanding and appreciation for them.

    It is still socially acceptable to use Dwarves and Halflings in RPGs. However, there are some viewpoints that must be taken into consideration when using these characters.

    First, there is a concern that these characters are often portrayed in a stereotypical manner that perpetuates negative stereotypes of marginalized populations. These stereotypes may include assuming all Dwarves are gruff miners and all Halflings are sneaky thieves with a penchant for mischief. This can be seen as disrespectful and insensitive to the real-life minorities these characters represent.

    Second, many people view the use of these characters as outdated or “fantasy-esque” which can be off-putting for some players. This can lead to an exclusionary atmosphere in which some players may not feel welcome or accepted if they do not identify with these characters.

    To best handle this issue, it is important for the game master to be aware of the potential issues around using Dwarves and Halflings in their RPG and make sure to create an inclusive environment at their table where all players feel comfortable expressing themselves.

    Additionally, game masters should strive to create unique and nuanced characterizations instead of relying on outdated stereotypes when creating NPCs or PC backgrounds.

    Finally, game masters should also consider including new races or alternatives as options for players who do not wish to identify with those characters specifically.

    Handling the Depiction of Villians

    Racism is unfortunately prevalent in many fantasy settings, and it can be hard for a GM to handle it in a respectful and sensitive manner.

    One way to do this is to make sure that any evil races or individuals are not based on anti-black, anti-Semitic or Orientalist stereotypes. For example, instead of creating an evil race based on a cultural stereotype, consider creating an original race with its own unique characteristics and backstory. Additionally, try to avoid using racial slurs or language that could be seen as offensive when describing these races or individuals.

    Another way to handle racism in your game is to make sure that the good races and individuals represent diversity. Avoid making all of the good characters white or creating a “white saviour” narrative in which a white character saves the day for people of color. Instead, make sure there are characters from different backgrounds and cultures who can all contribute to the story in meaningful ways.

    Finally, it’s important to recognize when racism is present in your game and address it directly. If a player uses language that could be seen as offensive, take the time to explain why this kind of language isn’t acceptable and encourage them to use more respectful language in the future. This will help create an inclusive environment where all players feel safe and respected.

    Breaking out of Fantasy Norms

    Reducing European-style mythology and folklore biases in fantasy settings can be achieved by diversifying the sources of inspiration for game masters to draw from. One way to do this is by exploring the mythology and folklore of other cultures from around the world, such as those from Asia, Africa, the Americas or Oceania. By including these cultures in their campaigns, game masters can help to create a richer and more diverse experience for players that is more reflective of our multicultural world.

    One way to get started is by researching the mythology and folklore of a particular culture that interests you. This can be done by reading books on the subject, watching documentaries or even talking with people who are knowledgeable about it. Additionally, there are many online resources available which can provide detailed information on different mythologies and folklores from around the world. Once you have gathered enough information, you can begin to incorporate elements into your campaign that draw upon these sources of inspiration.

    Another way to reduce European-styles in fantasy settings is by creating original characters and stories rather than relying solely on pre-existing ones. This allows game masters to create unique experiences for their players that are tailored specifically to their interests or preferences. Game masters should also strive to create inclusive environments in their campaigns where all players feel welcome regardless of race, gender identity or background.

    Finally, game masters should consider using alternate rules systems when running their campaigns if they wish to reduce European-style mythology and folklore in their settings. There are many non-traditional role playing systems which offer exciting new ways for players to explore alternate worlds without being restricted by traditional conventions or expectations.

    In conclusion, reducing European-style mythology and folklore in fantasy settings requires game masters to take an active role in diversifying the sources of inspiration they use when creating their own campaigns.

    By researching different mythologies and folklores from around the world as well as creating original characters and stories, game masters can help build an inclusive gaming environment that reflects our multicultural society while still providing an exciting experience for their players.

    Additionally, experimenting with alternative rules systems can help foster a more imaginative environment where creativity is encouraged over simply following pre-established conventions.

    Handling the Legacy

    J.R.R. Tolkien’s works have had a profound influence on the fantasy RPG genre. Tolkien’s works provided a template for many of the tropes and conventions that are now commonplace in fantasy RPGs, such as races like elves, dwarves, and orcs; magical items like rings of power; and fantastical creatures like hobbits, and of course wizards.

    To provide drop-in replacements for these staples, the GM can draw upon other sources of inspiration from mythology, folklore, and literature.

    For example;

    • Instead of Rings of Power, designers could create artifacts with similar properties based on Norse mythology (e.g., Odin’s Ring) or Arthurian legend (e.g., Excalibur).
    • Instead of hobbits, designers could create small humanoid races based on fairy tales (e.g., gnomes) or Native American legends (e.g., little people).
    • Instead of wizards, designers could create powerful spellcasters based on Greek mythology (e.g., sorcerers) or Hinduism (e.g., rishis).
    • Instead of orcs, designers could create monstrous races based on Chinese mythology (e.g., ogres) or African folklore (e.g., trolls).

    By drawing upon these other sources of inspiration, game designers can create unique and interesting settings that still capture the spirit and feel of Tolkien’s works without relying too heavily on them. This allows players to experience something new while still being able to recognize familiar elements from their favorite fantasy stories.

    Handling the Barbarian

    Robert E. Howard is an influential figure in the fantasy role playing genre. He has been hailed as one of the founding fathers of modern fantasy and as a major contributor to the development of the genre. Howard’s works, most notably his Conan stories, have had an immense impact on fantasy role playing games. Howard is credited for creating the archetypal barbarian hero – a strong, independent warrior who fights against overwhelming odds and goes on daring adventures. His influence can be seen in many other game series.

    Howard’s barbarian heroes are often characterized by their physical strength, courage, independence and lack of social convention. They are not afraid to stand up against injustice and they often rely on their own strength and skill rather than magic or technology. They are also usually portrayed as flawed individuals – they may be selfish or impulsive but still remain sympathetic characters due to their nobility or loyalty. Therefore, replacing barbarian heroes can be a difficult task due to their iconic status in fantasy role playing games.

    One way to provide drop-in replacements for barbarian heroes is to diversify the playable character options available in games. This could include offering more racially diverse characters with similar qualities as those found in Howard’s works – such as strength and courage – but with different cultural backgrounds or experiences that add depth and complexity to their stories. For example, a black character could be given a unique weapon style or fighting techniques that reflect their culture or heritage instead of relying on generic fantasy tropes. This would allow players to explore new perspectives while still delving into the iconic tropes associated with classic barbarian heroes created by Robert E. Howard.

    In addition to diversifying playable characters, another way to provide drop-in replacements for white barbarian heroes is by creating new settings that reflect different cultures and ethnicities within the game world itself. This could involve adding locations based on non-European mythologies or introducing NPCs from different cultures who could act as allies or rivals for the player character. This would allow players to explore different cultures while staying immersed in the core themes of heroic adventure found in Howard’s works – providing an opportunity for players from all backgrounds to identify with these classic heroic figures without having them limited by skin color alone.

    Overall, Robert E. Howard has had an immense impact on the fantasy role playing genre and his iconic characters remain an important part of many popular fantasy games today.

    However, it is important for game designers and developers to take steps towards creating more diverse character options so that all players feel represented within these games – regardless of their skin color or cultural background – while still being able to enjoy classic heroic adventures inspired by Robert E. Howard’s works.

    Handling the Horror

    H.P Lovecraft was a horror fiction writer who is credited with creating the Cosmic Horror genre. His works focused on themes of cosmicism, which explores the idea of a universe that is indifferent to humanity and filled with forces that are beyond human comprehension. His stories focus on protagonists facing these forces and their inability to comprehend them, often leading to madness or death.

    Lovecraft’s works have heavily influenced the fantasy role playing genre, particularly when it comes to providing players with a sense of dread and unease in the face of the unknown.

    Lovecraft’s influence can be seen in many different aspects of fantasy role playing games. For example, his works often feature mysterious beings or creatures that are unknowable and incomprehensible, such as his most famous creation, Cthulhu. This has been adapted into many role playing games as mysterious monsters or villains whose motives remain unclear, providing players with a sense of dread and mystery as they attempt to uncover their secrets.

    Additionally, his stories often contain strange settings and locations which have been used in games to create interesting landscapes for players to explore and discover secrets within.

    Furthermore, his works often feature characters driven mad by the knowledge they uncover during their explorations, providing an interesting dynamic for players who must make decisions in spite of potentially dire consequences.

    When it comes to providing drop-in replacements for the cosmic horror elements in fantasy role playing games, there are several options available.

    One option is to replace Lovecraftian threats with more traditional monsters from mythology or folklore such as dragons or giants. This can provide players with a similar sense of dread while keeping things more grounded in familiar mythological concepts rather than strange alien entities from beyond our realm of understanding.

    Additionally, one could replace the unknowable cosmic horrors with more tangible threats such as cults or political organizations that seek power over others through nefarious means or even powerful magical artifacts with dangerous effects when mishandled.

    In conclusion, H.P Lovecraft has had a major influence on fantasy role playing games by introducing themes of cosmicism and terror at the face of unknowable horrors from beyond our realm of understanding. When it comes to providing drop-in replacements for the cosmic horror elements in these games there are several options available including using traditional monsters from mythology or folklore as well as more tangible threats such as cults or powerful magical artifacts that can be mishandled by players at their own peril.

    Handling Dark

    The prefix “dark” has a variety of negative connotations. It is often associated with feelings of fear, danger, and mystery. It can also be used to describe something that is sinister, evil, or immoral. Additionally, it can be used to describe something that is depressing, gloomy, or oppressive. In some cases, it can even be used to describe something that is mysterious or unknown. Finally, it can be used to describe something that is hidden or secretive.

    1. Dark Magic: A type of magic that is often associated with evil and darkness, such as necromancy, curses, and other dark arts.
    2. Dark Arts: A type of magic that is used for malicious purposes, such as summoning demons or creating undead creatures.
    3. Dark Rituals: Rituals that are performed to summon dark forces or to gain power from them.
    4. Dark Creatures: Creatures that are associated with darkness, such as vampires, werewolves, and other monsters.
    5. Dark Places: Locations where dark forces are known to dwell, such as haunted houses or cursed forests.
    6. Dark Items: Items that have been imbued with dark powers, such as cursed weapons or artifacts of evil origin.
    7. Dark Spells: Spells that are used to cause harm or manipulate others for nefarious purposes.

    In role-playing games, the prefix “dark” typically refers to a character or setting that is characterized by a dark and sinister atmosphere. This could include characters with a mysterious or evil nature, settings that are full of danger and despair, or stories that explore themes of death, suffering, and corruption. Therefore the prefix “dark” can have a variety of negative connotations when used to describe characters or NPCs. It can imply that the character is evil, sinister, or untrustworthy. It can also suggest that the character is mysterious and unpredictable, which can be intimidating to players.

    Additionally, it can give the impression that the character is dangerous and violent, which could lead to players feeling unsafe or uncomfortable. Finally, it could be interpreted as a sign of darkness in terms of morality or mental health, which could be off-putting for some player.

    Consider using the following instead:

    1. Gloomy: This word implies a sense of foreboding and dread, and can be used to describe a setting or atmosphere that is oppressive and filled with fear.
    2. Shadowy: This word implies a sense of mystery and secrecy, and can be used to describe a setting or atmosphere that is shrouded in darkness and secrets.
    3. Sinister: This word implies a sense of danger and evil, and can be used to describe a setting or atmosphere that is filled with malice and danger.
    4. Eerie: This word implies a sense of unease and strangeness, and can be used to describe a setting or atmosphere that is unsettling and strange.
    5. Macabre: This word implies a sense of death and decay, and can be used to describe a setting or atmosphere that is morbidly dark and disturbing.

    Designing a Charcater Sheet

    Designing character sheets for a role-playing game (RPG) is an important part of the game design process. Character sheets provide players with a way to keep track of their characters’ stats, abilities, and other important information. They also serve as a reference point for the GM when running the game.

    When designing character sheets, there are several key elements to consider. The first is the layout of the sheet. It should be easy to read and understand, with all relevant information clearly visible. The second is the content of the sheet; it should include all necessary information about the character, such as their stats, abilities, equipment, and background. Finally, it should be visually appealing; this will help players stay engaged with their characters and make them more likely to use the sheet during play.

    The first step in designing a character sheet is to decide on its layout. This will depend on the type of RPG being played and how much information needs to be included on the sheet. For example, if playing a tabletop RPG such as hen a grid-based layout may be best as it allows for easy tracking of stats and abilities, Otherwsie a more traditional form-based layout may be better suited as it allows for more detailed descriptions of characters’ backgrounds and equipment.

    Once you have decided on a layout for your character sheet, you can begin adding content. This should include all relevant information about the character such as their stats (e.g., Strength, Dexterity), abilities (e.g., spells or special attacks), equipment (e.g., weapons or armor), and background (e.g., race or class). It is also important to include any rules specific to your game system; this will help players understand how their characters interact with the world around them and make sure they are following all applicable rules during play.

    Finally, you should make sure that your character sheet is visually appealing; this will help players stay engaged with their characters and make them more likely to use the sheet during play. This can be done by using attractive fonts and colors that match your game’s theme or setting; adding artwork or illustrations that represent your characters; or including other visual elements such as borders or frames that draw attention to important sections of the sheet.

    Designing character sheets for an RPG can seem daunting at first but following these steps will ensure that your sheets are both functional and visually appealing. By taking into account factors such as layout, content, and visuals when designing your sheets you can create an effective tool that will help players keep track of their characters’ stats and abilities while also making them more engaged in your game.

    Creating Map

    Designing and drawing a map for a role-playing game (RPG) can be an exciting and rewarding experience. It is also a great way to add depth and realism to your game. A well-designed map can help players visualize the world they are exploring, as well as provide them with clues about the environment and its inhabitants. In this article, we will discuss the steps necessary to design and draw a map for an RPG.

    The first step in designing a map for an RPG is to decide on the type of map you want to create. Do you want a top-down view of the world, or do you prefer an isometric view? Do you want to include details such as roads, rivers, mountains, forests, etc.? Once you have decided on the type of map you want to create, it is time to start sketching out your ideas.

    When sketching out your ideas, it is important to keep in mind the scale of your map. If your game takes place in a large area such as a continent or world, then you will need to draw your map at a larger scale than if it takes place in a small area such as a city or town. This will help ensure that all of the features on your map are accurately represented. Additionally, when sketching out your ideas it is important to consider how much detail you want to include in each area of the map. For example, if you are creating a top-down view of an entire continent then you may not need to include every single road or river that exists within that continent. However, if you are creating an isometric view of a city then it may be important to include every street and alleyway within that city.

    Once you have sketched out your ideas it is time to begin drawing your map. When drawing your map it is important to use graph paper so that all of the features line up correctly and look neat and organized. Additionally, when drawing your map it is important to use symbols or icons for different types of terrain such as forests, mountains, rivers, etc., so that players can easily identify these features when looking at the map. Additionally, when drawing your map it is important to label each feature so that players know what they are looking at when they look at the map.

    Finally, once you have finished drawing your map it is time to add color and texture. Adding color and texture can help bring life and realism into your game world by making it look more vibrant and alive. Additionally, adding color can also help players distinguish between different types of terrain such as forests from deserts or mountains from plains. When adding color and texture it is important not to go overboard as too much color can make the map look cluttered and confusing.

    In conclusion, designing and drawing a map for an RPG can be both fun and rewarding experience if done correctly. By following these steps outlined above – deciding on the type of map; sketching out ideas; drawing with graph paper; labeling features; adding color and texture – players will be able create maps that are both visually appealing and informative for their games.

    Creating a Dungeon

    Designing and drawing a dungeon map should be a fun and creative process. It can also be a daunting task, especially if you’re new to the concept. To help you get started, here is a step-by-step guide on how to design and draw a dungeon map in detail.

    1. Brainstorm Ideas: Before you start designing your dungeon map, it’s important to brainstorm ideas for what type of dungeon you want to create. Think about the theme of your dungeon, the size, the layout, and any other details that will help bring your vision to life.
    2. Sketch Out Your Map: Once you have an idea of what type of dungeon you want to create, it’s time to start sketching out your map. Start by drawing a basic outline of the area and then add details such as walls, doors, stairs, and other features as needed. Don’t worry about making it perfect at this stage; just focus on getting your ideas down on paper.
    3. Add Details: Now that you have a basic outline of your dungeon map sketched out, it’s time to start adding more details. Think about what type of monsters or creatures might inhabit the area and where they might be located within the map. Also consider adding items such as treasure chests or traps that players may encounter during their exploration of the dungeon.
    4. Finalize Your Map: Once you have all of your ideas sketched out on paper, it’s time to finalize your map by adding color and texture. Use colored pencils or markers to add depth and detail to your map and make sure everything looks cohesive with one another. You can also use textures such as stone or wood grain to give your map an extra layer of realism.
    5. Test Your Map: Before you consider your dungeon map complete, it’s important to test it out first by playing through it yourself or having someone else play through it with you. This will help ensure that all of the elements are balanced correctly and that there are no major flaws in the design that could potentially ruin the experience for players who explore it later on down the line.
    6. Make Adjustments: After testing out your dungeon map, take some time to make any necessary adjustments based on feedback from yourself or others who played through it with you. This could include anything from changing monster placement or adjusting trap locations in order to make them more challenging for players who explore them later on down the line.
    7. Final Touches: Finally, once all adjustments have been made and everything looks good with your dungeon map design, it’s time for some final touches such as labeling rooms or adding small details like furniture pieces or decorations that will help bring life into each area within the dungeon itself.

    By following these steps when designing and drawing a dungeon map in detail, you should be able to create an immersive experience for players who explore it later on down the line.

    Handling NSFW content

    Role playing games (RPGs) can often be a source of joy and entertainment for many players. However, some players may take things too far and incorporate elements into their game that are not appropriate for all audiences. This is commonly referred to as Not Safe For Work (NSFW) content. It is important for Game Masters (GMs) to be aware of this potential issue and take steps to prevent it from occurring in the game.

    First and foremost, it is important for GMs to set clear expectations for players at the start of a game session. Make sure that everyone understands the type of content that is acceptable and unacceptable, so that everyone knows what is expected of them before the game begins. Additionally, it is important to be aware of different player preferences when setting boundaries for in-game content. Some players may have different comfort levels with certain topics than others, so it is important to establish clear expectations that respect everyone’s comfort level.

    If NSFW content does occur during a game session, GMs should address the issue right away. It is important to be direct but respectful when addressing this type of situation. Explain why the content was inappropriate and remind the players of what types of behavior are expected in the game. Additionally, politely explain why certain topics may not be appropriate for all players in attendance.

    GMs should also consider ways to discourage NSFW content from occurring in the first place. This can include setting limits on character descriptions or tasking individual players with moderating conversations between other players during their turn at the table. Additionally, GMs can create house rules that specifically address inappropriate behavior or language during game sessions, as well as introducing consequences such as removing a player from a session if they do not adhere to these rules.

    Finally, it is important for GMs to take breaks throughout the game session if necessary. When conversations begin to get too heated or topics become too mature for some players’ comfort levels, taking a break can help reset everyone’s attitude and remind them about expected behaviors during a game session.

    Overall, NSFW content can be an issue in any RPG setting if not addressed properly by GMs. By setting clear expectations at the start of each game session and taking proactive measures throughout the course of play, GMs can help ensure that all players feel comfortable during their gaming experience while still allowing room for interesting stories and roleplay opportunities within their games.

    Handling Adult Content

    When it comes to running a role-playing game, one of the most important things that GMs must keep in mind is how to handle adult or over 18 content. As a GM, you have a responsibility to ensure that all players involved in the game are comfortable with the material being presented and that it is done in a way that is respectful and appropriate. This article will provide some tips and techniques on how to handle adult or over 18 content when running a role-playing game.

    Establishing Ground Rules

    The first step in handling adult or over 18 content is to establish ground rules with all of your players. When setting up these rules, it is important to make sure everyone participating understands them and agrees on them. This could include anything from discussing what types of content are acceptable for the game, specifying what language should not be used, or even setting up an age limit for players at the table.

    It’s also important to make sure everyone knows what will happen if someone breaks these rules (e.g., they may be asked to leave the table). This way, everyone knows where they stand before the game begins, so there are no surprises during playtime.

    Be Respectful of Players’ Boundaries

    Once you have established ground rules with your players, it’s important to remember that everyone has different comfort levels when it comes to adult or over 18 content. As a GM, it’s important to be respectful of each player’s boundaries and make sure they feel comfortable with any material being presented during playtime. If something makes someone uncomfortable, don’t hesitate to take a break or change topics altogether.

    It’s also important for GMs to set boundaries for themselves as well; if something makes you uncomfortable, don’t hesitate to stop presenting it right away. It can be difficult for some players to speak up about their discomfort if they feel like their opinion isn’t being heard; by setting boundaries for yourself as well as your players, you can create an environment where everyone feels respected and safe from potential harm or distress caused by inappropriate material.

    Use Descriptive Language

    When presenting adult or over 18 content during playtime, it can be helpful to use descriptive language rather than explicit language when describing actions and events in your story. For example, rather than saying “they had sex,” you could say “they shared an intimate moment together.” This helps keep the focus on the story rather than on gratuitous details about what happened between two characters—which can help ensure that everyone remains comfortable throughout playtime.

    ### Utilize Alternatives

    If certain aspects of your story contain adult or over 18 content but you don’t want those elements included in your game session due to its sensitive nature or because some of your players may not be comfortable with certain topics being discussed openly at the table—you can utilize alternatives such as handouts or online resources for those who want more information about those parts of your story without having them explicitly discussed at the table during playtime.

    Keep Conversations Appropriate

    Finally, when discussing adult or over 18 topics at the gaming table—it’s important for GMs and players alike to remain respectful and mindful of each other’s boundaries while keeping conversations appropriate and focused on relevant aspects of their stories rather than getting sidetracked into inappropriate conversations which could make some people uncomfortable during playtime (e.g., discussing real world political issues).

    Conclusion

    In conclusion, handling adult or over 18 content when running a role-playing game can be tricky but is essential in order for all participating parties involved in the game session feel comfortable with any material being presented during playtime.

    By establishing ground rules before beginning playtime, respecting each other’s boundaries, using descriptive language when needed, utilizing alternatives such as handouts or online resources when necessary—and keeping conversations appropriate—GMs can ensure that their games remain enjoyable experiences for all involved without fear of anyone feeling uncomfortable due inappropriate material being presented at any point during gameplay.

    Handling the Cultural Sensativities

    As a Gamemaster (GM), handling the cultural sensitivities of some players when using magic and dealing with supernatural elements in roleplaying games can be challenging. It’s important to keep in mind that many players come from a variety of backgrounds, and may have strong personal views about the use of magic and supernatural elements. To ensure everyone has a positive gaming experience, it is important for you to take into consideration the cultural beliefs, values, and customs of your players when designing your game. Here are some tips and techniques for handling cultural sensitivities in roleplaying games.

    1. Respect Your Players: First and foremost, it is essential to respect the beliefs and values of your players. This means setting aside any personal prejudices or biases you may have regarding certain cultures or religion systems, so that everyone can enjoy the game without feeling judged or uncomfortable.
    2. Educate Yourself: Before beginning a game where magic or supernatural elements are involved, be sure to educate yourself on the cultural beliefs surrounding these topics in different cultures. This will help you better understand which aspects of your game might be insensitive to certain players and help you design more respectful experiences for everyone involved.
    3. Communicate with Your Players: Open communication is key when it comes to handling cultural sensitivities in roleplaying games. Talk to your players about their beliefs, values, and customs so that you can tailor the game accordingly. Ask questions such as “What kind of magical elements do you feel comfortable having in this game?” or “Are there any topics related to religion or culture that we should avoid discussing during our sessions?” Doing so will help create an environment where everyone feels respected and valued while playing together.
    4. Set Ground Rules: Establishing ground rules prior to starting the game is another important step towards creating a positive gaming experience for all involved parties. Discuss with your players what type of language they feel comfortable using during sessions (i.e., avoiding phrases like “witchcraft” or “voodoo”) as well as any other topics they would prefer not being discussed at all (such as politics). Doing so will help create an atmosphere where everyone feels safe expressing themselves without fear of judgement or ridicule from other players.
    5. Be Tolerant: As GM, it is also important to be tolerant if one player has different views than another regarding certain aspects related to magical or supernatural elements in the game world – such as different gods being worshipped by characters from different cultures within your world – even if those views don’t match yours personally . It is vital for all participants involved in the session to treat each other with respect no matter what their religious background may be; this includes not only how they treat each other verbally but also how they act out their characters in-game while dealing with magical/supernatural elements found within the world they inhabit together .
    6. Handle Complaints Proactively: It is not uncommon for some players to be uncomfortable discussing certain topics related to magic or religion during roleplaying games sessions; this could lead them feeling isolated if their opinions are not taken into consideration by GMs who don’t understand their feelings on these matters . To prevent this type of situation from occurring , make sure that all participants know that complaints are welcome at any time during a session without fear of judgement – allowing them space to express any concerns they may have about how certain aspects within a game make them feel. This helps create an atmosphere where everyone feels comfortable voicing their opinion without fear of being silenced by someone else’s ideas on what should/shouldn’t be done during playtime .
    7. Be Flexible : Lastly, it is important for GMs to remember that there are no set rules when it comes to dealing with cultural sensitivities in roleplaying games; every group is unique and therefore requires different approaches depending on its composition . As a result, try not to get too attachedt o one particular way of doing things; instead , remain flexible and willing to adapt based on feedback received from your players . This way you will always have a fair andr espectful gaming environment for everyone involved.

    Handling Unconcious Bias

    Role playing games (RPGs) are a popular form of entertainment that many people enjoy. Players get to step into the shoes of characters in a fantasy world and explore new places, interact with interesting characters, and experience thrilling adventures. However, when playing RPGs, it is important to be aware of unconscious bias that may arise among players. Unconscious bias is defined as “prejudice or stereotypes that form without conscious awareness or intention” and can lead to an unfair playing environment. As the Game Master (GM) or Dungeon Master (DM), it is your responsibility to ensure that all players are treated fairly and feel comfortable during the game. In this article we will discuss some tips and techniques for handling unconscious bias in RPG games.

    1. Understand the Types of Unconscious Bias: The first step towards creating an inclusive RPG environment is to understand the types of unconscious bias that may arise during play. Some common types of unconscious bias include gender, racial, cultural, religious, age-related, physical ability-related, and class-related biases. It is important for GMs to be aware of these biases so they can recognize them when they arise and take action as needed.
    2. Create an Inclusive Environment: Creating an inclusive environment from the start helps set the tone for future RPG sessions. GMs should strive to create a safe space where all players feel comfortable expressing themselves without fear of judgment or discrimination. This can be done by establishing ground rules before play begins so all players understand what is expected of them during the game. It is also important to encourage respect among players by discouraging any inappropriate language or behavior that could be seen as offensive or discriminatory towards others.
    3. Encourage Role Playing Over Character Stats: Many RPGs rely heavily on character stats such as experience points, levels, proficiency bonuses, etc., which can lead to competitive gameplay where players focus more on power than role playing their characters. To avoid this type of situation, GMs should encourage role playing over character stats by providing rewards for creative role playing rather than completing certain tasks or achieving certain levels in the game quickly. This will help create a more collaborative atmosphere where everyone works together towards a common goal instead of competing against each other for personal gain or recognition.
    4. Allow Players To Create Their Own Characters: Allowing players to create their own unique characters helps ensure that no one feels excluded due to their race, gender identity, religion etc.. When creating their own characters, players have more control over their character’s appearance and backstory which allows them to better express themselves through their character while avoiding any potential stereotypes associated with pre-made characters from rulebooks or other sources outside the game session itself . Furthermore , allowing players to create their own characters also encourages creativity among all participants which helps keep everyone engaged throughout the game session .
    5. Be Flexible With Rules: As GMs it’s important not only enforce rules but also be flexible with them when necessary. For example, if one player has physical limitations due combat situations , you should allow them alternatives such as using an online dice roller instead . Similarly , if one player has difficulty understanding certain rules , you should be patient with them and explain things clearly until they understand . Lastly , being flexible with rules also means allowing each player to customize certain elements within reason in order enable them better roleplay their character such as adjusting armor bonuses based on what type armor they have chosen . Allowing this level customization encourages creativity while still maintaining fairness amongst all participants .
    6. Encourage Player Interactions: Encouraging player interactions helps foster collaboration between participants while also creating a more relaxed atmosphere which allows everyone at ease while playing . GMs should encourage conversations amongst participants while promoting cooperative problem solving instead competition between different groups within party members . This could include providing incentives for working together such as bonus experience points which will help keep everyone motivated throughout entire gaming session . Additionally , encouraging player interactions during breaks will help break up long stretches periods silence which can make some uncomfortable uneasy during play sessions .
    7. Include Diverse NPCs & Non-Player Characters: Including diverse NPCs & non-player characters (NPCs) in your game sessions helps represent different perspectives from around world thus making everyone feel included represented within gaming environment . For example , including female NPCs in fantasy worlds dominated by men not only promotes gender equality but may also open up possibilities new storylines which could benefit entire gaming group in end . Similarly , including NPCs belonging different races cultures religion backgrounds will help each participant gain insight into other cultures customs beliefs thus creating unique experiences within same RPG setting without having leave comfort home .. Additionally , including diverse NPCs & non-player characters can provide inspiration new creations amongst participating gamers who might use these NPCs models when designing their own original creations down line ..

    It is important for Game Masters and Dungeon Masters to be aware of unconscious biases when running RPG games so they can ensure all players have a fair chance at enjoying their time at the table together. By understanding different types of unconscious bias and creating an inclusive environment from the start along with encouraging roleplaying over character stats; allowing players to create their own unique characters; being flexible with rules; encouraging player interactions; and including diverse NPCs & non-player characters into game sessions – GMs can go a long way towards making sure all participants have positive experiences every time they come together for a gaming session!

    Handling Diversity and Inclusion

    Diversity and inclusion are important components of any role-playing game, as they ensure that all players feel welcomed and respected in the game. This is especially true for games that take place online, as the virtual environment can often make it difficult for players to connect with each other in meaningful ways. As a GM, it is your responsibility to create an inclusive and safe space for players to come together and enjoy the game. In this article, we will discuss some tips and techniques for handling diversity and inclusion in role-playing games. We will cover topics such as setting expectations, creating character backgrounds, fostering an inclusive environment, and more. By following these tips and techniques, you can help ensure that your game is a safe and enjoyable space for everyone involved.

    1. Tips for Setting Expectations: One of the most important things you can do as a GM when it comes to handling diversity and inclusion in role-playing games is to set clear expectations from the beginning. Make sure you have a discussion with all of your players about what behaviors are expected of them while playing the game, such as respecting each other’s beliefs or opinions and refraining from making any offensive or hurtful remarks. Additionally, make sure everyone understands that they should not be punished or excluded because of their gender identity or sexual orientation. Make sure these expectations are clearly communicated so that everyone feels safe participating in the game.
    2. Creating Character Backgrounds: When creating characters for a role-playing game, it is important to consider diversity in their backgrounds. This can be done by creating characters with different religions, cultures, races or sexual orientations than those playing the game. This ensures that each character has a unique story behind them which helps to make them more interesting during play sessions. Additionally, having characters from different backgrounds helps create an atmosphere where everyone’s beliefs are respected during playtime.
    3. Fostering an Inclusive Environment: As mentioned above, it is important that all players feel welcome in a role-playing game setting regardless of their background or beliefs. To foster an inclusive environment for all players involved in the game, encourage conversations about diverse topics such as race, gender identity or sexuality during playtime so that everyone feels comfortable discussing these matters openly without fear of judgement or exclusion. Additionally, try to recognize individual differences among players when possible so that no one feels left out because of who they are or what they believe in.
    4. Encouraging Respectful Discussions: It is also important to ensure that when discussions arise involving sensitive topics such as religion or politics during gameplay sessions they remain respectful at all times between players—no matter what side they may stand on concerning said topic(s). If tensions start rising between certain individuals due to disagreements on certain subjects then remind them politely but firmly about the expectations set at the beginning of gameplay sessions regarding respect towards one another’s beliefs regardless if those beliefs differ from their own—and if necessary take appropriate action (i.e., suspending/ending gameplay session) if tensions continue rising after gentle reminders have been issued regarding respect towards others’ beliefs/opinions/backgrounds during playtime sessions were discussed at beginning of gameplay session(s).
    5. Providing Support When Needed: Finally—and most importantly—make sure you provide support when needed by being available as a GM to talk with any player who may need someone to talk with regarding issues they may be experiencing related to their gender identity/sexual orientation/religious affiliation/etc… This support could involve checking up on how they are doing every now & then; providing advice if asked; ensuring safety & security amongst others; etc… It could also mean simply listening & validating feelings without offering solutions (unless asked). Providing support like this shows your commitment towards fostering an inclusive environment within your gaming community & further ensures respect amongst players regardless of differences amongst them (e.g., gender identity/sexual orientation/religious affiliation/etc).

    In conclusion, diversity and inclusion are essential components of any role-playing game—especially those taking place online—as it allows all players involved feeling welcomed & respected within said gaming community regardless of differences between them (e.g., gender identity/sexual orientation/religious affiliation/etc…). As a GM it is your responsibility to create an atmosphere where everyone feels comfortable expressing themselves freely without fear judgement or exclusion due to who they are & what they believe in; thus making sure expectations regarding respect towards one another’s beliefs were discussed at beginning of gameplay session(s) is paramount here; additionally encouraging conversations about diverse topics such as race; providing support when needed; creating character backgrounds which reflect said diversity amongst others can also help foster said atmosphere within gaming community too.

    Handling Race

    Role playing games are a popular form of entertainment that allow players to explore an imaginative world and become characters of their own creation. While these games can be incredibly immersive and enjoyable, they can also be potential sources of discomfort and offense if handled poorly. Since RPGs involve players creating characters that may have different races, cultures, and backgrounds, it is important for game masters (GMs) to consider how to handle these topics in a responsible manner. This article will discuss some tips and techniques for GMs on how to handle race in a role playing game.

    1. Establish Ground Rules: The first step in creating a safe and respectful environment for your players is establishing ground rules regarding race. This should include setting expectations for appropriate language and behavior as well as clear consequences for any violations of these rules. Additionally, you should provide resources or references for players who wish to learn more about the cultures or backgrounds of the races they are playing. This will help ensure that players can create authentic and respectful characters while avoiding stereotypes or offensive material.
    2. Discourage Stereotypes: Stereotypes can be damaging and often contribute to racism in our society. As such, it should be discouraged among your players when role playing their characters. Instead, encourage them to focus on creating dynamic characters who have unique personalities based on their experiences rather than relying on stereotypes or generalizations about their race or culture. Additionally, make sure to provide feedback when players do use stereotypes in order to discourage this type of behavior going forward.
    3. Emphasize Inclusivity: In order to ensure everyone feels respected and welcome in your game, it is important to emphasize inclusivity among the players by making sure all races are represented equally within the game world. This could mean allowing all types of races as playable characters or including NPCs that represent a variety of cultures or backgrounds in your story line. Additionally, be sure not to exclude certain races from events or rewards; instead try to create equitable opportunities for all players regardless of their character’s race or background.
    4. Be Open To Discussion: Race is an important topic that cannot simply be ignored when running an RPG; instead it should be discussed openly with your players so they understand why it is important not only in the game but also in our society at large. Encourage thoughtful discussion around issues related to race such as privilege, prejudice, representation, etc., so that everyone can learn more about each other’s perspective while understanding how these issues play out both inside and outside of the game world. 5 . Acknowledge Your Privilege: As a GM you may have certain privileges based on your race that other players may not have access to; therefore it is important for you to recognize this privilege and use your power responsibly when handling sensitive topics like race within the game world . Be aware that other people may interpret things differently than you do due to their own experiences with racism; therefore try not to make assumptions about what would make sense for another person’s character based on your own perspective . Additionally , if someone does raise an issue with something you said , take responsibility for any mistake you made rather than trying to explain away why it wasn’t wrong . 6 . Encourage Diversity Of Thought: As previously mentioned , discussions around race can often lead people down different paths depending on their perspectives ; therefore , it is important as a GM to encourage diversity of thought among your players rather than forcing them into one particular way of thinking . Try not discussing specific topics until everyone has had time to express their views , then follow up with questions related back each person’s opinion so everyone can feel heard . Additionally , make sure no one person dominates the conversation ; instead try breaking people into smaller groups so everyone has an opportunity share their thoughts without feeling overwhelmed by others .

    Handling race effectively within a role playing game requires careful consideration from both GMs and players alike . Following these tips will help create an environment where everyone feels respected and valued regardless of their background or culture. Ultimately, understanding how racism works both inside and outside the gaming world will help lead towards greater acceptance between all types of people both real life scenarios as well as virtual ones.

    Handling White Privilege

    White privilege is an issue that has become increasingly important to discuss in the context of role playing games. White privilege is defined as “the advantages and resources that white people enjoy solely because of their skin color” and can be seen in many aspects of our society. It can manifest itself in everything from housing and job opportunities to access to healthcare and education. In role playing games, white privilege can manifest itself as an unbalanced power dynamic between players or NPCs, where certain characters may have access to more powerful items, spells, or abilities than others simply because they are white. This can lead to a feeling of unfairness among players and can disrupt the overall flow of the game.

    As a Game Master (GM), it is your responsibility to ensure that everyone at the table feels safe and respected, regardless of their skin color. One way to do this is through setting expectations with your players prior to play beginning. Make sure everyone understands what type of behavior will be tolerated at the table, including any language related to race or ethnicity. Additionally, you should make sure everyone knows what expectations there are for character creation: all characters should have equal amounts of power and resources regardless of race or ethnicity.

    Additionally, when creating NPCs for your game world, make sure you are consciously considering how each character’s racial background impacts their story arc or place in the world. Do not use stereotypes when creating NPC personalities or story arcs; instead, try to create nuanced characters with unique motivations that reflect the diversity present in our society today. Additionally, avoid using language that implies racial stereotyping when speaking about NPCs in-game; this includes words like “shady” or “sketchy” when referring to non-white characters as these terms often carry negative connotations related to race or ethnicity.

    When running encounters during play sessions, it is important that you consider how a character’s race might impact their experience within them. For example, if a group of adventurers are entering a city guarded by a group of soldiers who may not be friendly towards those who look different than them (e.g., those with darker skin tones), consider giving the players options on how they want to approach the situation (e.g., sneaking past guards unnoticed). This allows players who feel uncomfortable role-playing being treated differently due to their skin color an opportunity to still progress through the encounter without having to engage directly with any prejudice that might exist within it.

    In addition, make sure all player characters have equal access to items and abilities throughout play sessions; this means avoiding situations where white protagonists may have access to more powerful items than non-white protagonists simply because one race is seen as superior over another within the context of your game world. This type of unequal representation can create feelings of resentment among players who may feel like their group was unfairly treated due solely based on their skin color; this also applies vice versa if non-white protagonists are given more powerful items than white protagonists simply because they are non-white within the context of your game world (i.e., reverse racism).

    Finally, it is important for GMs to be aware that even if they do not actively promote white privilege during play sessions there may still be subtle ways in which it manifests itself within your game world through language used by NPCs or other aspects such as how certain races/ethnicities are portrayed within descriptions and story arcs presented throughout play sessions themselves – so it is important for GMs pay close attention during these moments so as not inadvertently promote ideas related white privilege without meaning too!

    By taking steps such as setting up expectations prior to play beginning and being mindful about unequal representation when creating and running encounters during play sessions GMs can go a long way towards ensuring everyone at the table feels respected regardless of their skin color while also making sure no one feels like they were unfairly treated due solely based on their race/ethnicity – ultimately leading towards more enjoyable gaming experiences for all involved.

    ## Handling Mixed Age Goups

    Mixed age groups can be an exciting and rewarding experience when it comes to role-playing games. However, managing different age groups can be a challenge for any GM. This article will provide some tips and techniques to help GMs handle mixed age group play in role-playing games.

    First and foremost, the GM should establish clear expectations of the game before it begins. When working with mixed age groups, setting boundaries is essential. It is important to define the style of play, as well as any rules or restrictions that need to be followed. Establishing these expectations ahead of time can help make sure everyone is on the same page and reduces potential conflicts during gameplay.

    When running a game with mixed ages, the GM should focus on creating a story that will appeal to all players regardless of their age or level of experience. A story should have elements that are both appropriate for younger players and engaging enough for older players. The best stories will have something for everyone and allow each player to find their own way through the adventure. By creating an immersive story, the GM can draw all players into the game regardless of their age or experience level.

    The GM should also consider how they will tailor their game mechanics for each group’s level of experience. For example, younger players may need more guidance with basic mechanics such as character creation, while older players may require more complex tasks or problems to solve during gameplay. It is important that the GM adjusts the difficulty level accordingly so that all players feel challenged but not overwhelmed by the game’s mechanics.

    The GM should also take into account how they will manage different levels of maturity among different player groups when it comes to playing out certain scenarios in role-playing games. A good rule of thumb is to only include scenarios that are appropriate for all participants in order to avoid uncomfortable or inappropriate situations arising during play sessions.

    Finally, communication is key when running games with mixed ages groups. The GM should strive to create an open dialogue between themselves and all players before, during, and after each session so that everyone feels included in the game regardless of their background or experience level. Taking time out between sessions to discuss what worked well during previous sessions and what could be improved upon can also help ensure everyone has a positive gaming experience no matter what their age group may be.

    By following these tips and techniques, GMs can create an enjoyable gaming experience for mixed ages groups no matter what type of role-playing game they are playing. With these strategies in mind, anyone can manage a successful gaming session with different ages playing together harmoniously.

    Making Players Laugh

    Making players laugh in a role-playing game (RPG) can be a tricky task! It requires a combination of creativity, improvisation, and understanding of the players’ personalities. However, with the right approach, it is possible to create an enjoyable experience for everyone involved. Here are some tips on how to make players laugh in an RPG:

    1. Use humor to lighten the mood: Humor is one of the best ways to make players laugh in an RPG. It can help break up tense moments and provide a much-needed break from the serious nature of the game. Try to use jokes that are appropriate for the situation and that don’t take away from the story or immersion of the game.
    2. Incorporate physical comedy: Physical comedy can be a great way to get players laughing in an RPG. This could include having characters perform silly actions or making exaggerated facial expressions. You could also have NPCs do something unexpected or outrageous, such as suddenly bursting into song or dance.
    3. Create humorous NPCs: Non-player characters (NPCs) can be used to inject some humor into your game. You could create NPCs with funny personalities or quirks that will make players chuckle when they interact with them. For example, you could have an NPC who is overly dramatic or one who speaks in a strange accent or dialect.
    4. Make use of puns: Puns are always a great way to get people laughing in an RPG setting. They can be used to add some levity to conversations between characters and NPCs, as well as provide some comic relief during intense moments in the game. Just make sure not to overdo it – too many puns can quickly become tiresome!
    5. Play off player’s personalities: One of the best ways to make players laugh in an RPG is by playing off their individual personalities and interests. If you know what makes each player tick, you can tailor your jokes and gags accordingly so that everyone gets a good laugh out of it. This will also help foster a sense of camaraderie among your group as they share in each other’s laughter and fun experiences together.
    6. Encourage role-playing: Role-playing is one of the most important aspects of any RPG, and it can also be used as a tool for getting players laughing together. Encourage your players to get into character and act out their roles with enthusiasm – this will often lead to some hilarious situations that everyone will enjoy!
    7. Keep things lighthearted: Finally, remember that RPGs are supposed to be fun! Don’t take yourself too seriously when running your game – if something doesn’t go according to plan, don’t worry about it too much and just move on with a smile on your face! Keeping things lighthearted will help ensure that everyone has a good time while playing your game – including you!

    By following these tips, you should be able to make your players laughwithout too much difficulty.. Just remember that humor is subjective – what might seem funny to one person might not be so amusing for another – so try not to take offense if someone doesn’t find your jokes particularly funny!

    Playing with your Family

    RPGs, are a great way to bring your family together and have a fun time. They can be as simple or complex as you make them, depending on the age of your players, and can provide hours of entertainment for all involved.

    Before you start playing an RPG with your family, it is important to decide what kind of game you want to play. There are many different types of RPGs available today.You will need to pick the one that best suits your family’s interests and experience level.

    Once you have decided what game you will be playing, it is time to assemble the necessary materials. Depending on the type of game you choose, this could include books and manuals related to the game world; maps and other visual aids; dice; character sheets; pencils and erasers; etc. Make sure everyone has all the materials they need before beginning play so that no one is left out or confused about how to move forward in the game.

    The next step is character creation. This is often the most exciting part of playing an RPG for many people since it allows them to create a unique person or creature that they can then control in-game. Each player should create their own character using a combination of their own ideas and those found in the game’s manual or rulebook. ] Once all characters are created, it’s time for everyone to introduce themselves in-game and get ready for action,

    Once everyone knows who they are playing and what they want out of the adventure, it’s time to set up a world for them to explore. This can include anything from creating detailed settings with NPCs (non-player characters) acting out predetermined storylines or being open-ended enough so that players can choose their own paths through exploration and experimentation with different aspects of gameplay. No matter what type of world you decide on creating though, make sure there are plenty of opportunities for players to interact with each other as well as with non-player characters within this environment so that everyone feels included and engaged throughout the entire experience.

    Combat is when players fight against opponents using weapons as well as spells and other special abilities in order to gain victory over enemies threatening their lives or mission objectives. Combat should always be balanced so that no one player has an advantage over another due simply luck factors like dice rolls or random number generators. Additionally, make sure everyone understands how combat works before engaging in any battles so no one gets left behind while others progress faster than they do due lack knowledge regarding how certain aspects work within this realm gameplay mechanics.

    Encourage each player to take on their character’s persona both inside and outside combat scenarios by speaking in first person perspective whenever possible while also ensuring all participants remain respectful towards each other even when engaging heated debates between different sides or scenarios within gameplay sessions themselves – this helps keep things lighthearted while also teaching proper communication skills needed later on life when dealing real-life disagreements between family members too!

    Playing role-playing games with your family can be a great way to bond together while also learning important life lessons along the way – such as problem solving strategies by thinking outside box during challenging moments within these gaming sessions – but only if done correctly. Remember keep it simple. Families should find themselves able enjoy hours upon hours worth entertaining role-playing experiences together without feeling overwhelmed from complexity.

    Glossary

    • Alignment: A moral and ethical alignment system used in many RPGs, where characters are classified as Lawful, Neutral, or Chaotic, and Good, Neutral, or Evil.
    • Deus Ex Machina: A plot device used to resolve a conflict with a sudden, unexpected intervention from an outside force.
    • Encounter: A random or planned event or confrontation between characters and NPCs in the game world.
    • Experience Points (XP): A reward system used to track character progression and level advancement, earned through completing quests and defeating enemies.
    • Feat: A special ability or skill a character can use in game, often requiring specific conditions to be met.
    • Game Master (GM): The person who creates and runs the game world, controlling the non-player characters (NPCs), setting the scene, and refereeing player actions.
    • House Rules: A set of custom rules created by the DM and players to modify or enhance gameplay.
    • Metagaming: The use of out-of-character knowledge or information to inform in-game decisions.
    • Non-Player Character (NPC): A character controlled by the DM, rather than a player.
    • Save: A mechanic used in RPGs to prevent character death or failure, allowing a character to roll to avoid a negative outcome.
    • Session: A single play session of an RPG, usually lasting several hours.
    • Skill Check: A dice roll used to determine success or failure in attempting a skill or task.
    • Tabletop RPG: A role-playing game played with physical materials, such as dice, miniatures, and character sheets, rather than digital or video-based.

    Owning the Guide

    As the GM, you bring a unique your own perspective and creativity to the game, and have likely honed your skills through years of experience. It is your rulebook and should serve as a comprehensive guide to helping you get your players immersed in the world you’ve created.

    Begin by introducing the world and its inhabitants. Provide background information on the various races, cultures, and factions that exist within the world. Outline the laws and customs of this society, and describe the magic and technology that is available to the characters.

    Next, provide a detailed explanation of character creation. Explain how players can choose their characters’ races, classes, abilities, and attributes. Also provide information on character advancement and how players can increase their characters’ skills and abilities over time.

    Once the characters are created, provide a comprehensive guide on the mechanics of the game. Explain how combat, skill checks, and other actions are performed, and describe any special rules that apply to different scenarios. Also provide a comprehensive list of magic spells and items, and explain how they can be used.

    Finally, include information on the world’s history, geography, and key locations. Describe the political and economic landscape, and explain the different factions that exist within the world. This information can be used to create adventures, provide context for role-playing, and set the stage for the players’ journey through the Forgotten Realms.

    Your take on the rulebook should be written in an easy-to-understand style, with clear explanations and examples. Including illustrations, maps, and examples of in-game scenarios can help to bring the world to life for players and make it easier for them to understand the rules.

    By providing a comprehensive guide to the world, characters, and mechanics of the game, you can ensure that players have everything they need to fully immerse themselves in the Forgotten Realms and embark on their own journey through this fantastical world.

    Summary

    Summary of advise for the GM;

    1. Set clear expectations: Establish the rules and objectives of the game with the players before beginning.
    2. Establish a consistent tone: Decide what themes, tone, and content will be present in the game and make sure it is consistent throughout.
    3. Make sure all players are involved: Create storylines that involve all participants and check in regularly to ensure everyone is engaged and having fun.
    4. Prepare for unexpected events: Have a plan for how you will handle any unexpected events that might arise during play.
    5. Encourage creative thinking: Give players freedom to make decisions within their characters’ abilities and allow them to explore different possibilities within the game world.
    6. Encourage collaboration: Foster an environment where players can work together as a team to solve problems or overcome obstacles presented in the game world.
    7. Be flexible: Be ready to adapt your plans if necessary based on feedback from your players or changes in gameplay dynamics as they progress through the storyarcs of your game world.
    8. Have fun: Above all else, enjoy yourself while playing, and make sure your players have fun too.

    About

    The Author has been an avid role-player for the past 45 years. They began there career as a Game Master (GM) when they was just a teenager, captivated by stories and adventures of tabletop gaming. Over the course of their career, they has become a popular GM’s in the local gaming community, renowned for her ability to craft intricate stories and unique locations. The Author is passionate about giving back to the gaming community that she loves so much, offering free advice or assistance whenever possible to those looking to improve their GM skills. They also spends time mentoring new role-players, helping them find their place in this exciting world and create memorable adventures for themselves and their players.

    This role-playing guide is intended for ages 8 and up. While younger children may be able to understand and participate in a role playing game, it is recommended that parental discretion be used when allowing children under the age of 8 to play. The content of a role playing game may not be suitable for all ages, so before allowing younger children to participate, please ensure that the content and themes are appropriate for the age group.

    This role-playing guide is provided “as is” without warranty of any kind, either expressed or implied. In no event shall [Your Name or Organization] be liable for any damages arising from the use of this guide. The use of this role-playing game book is intended for entertainment purposes only and should not be used as a substitute for professional advice. The information contained herein may not be appropriate for all ages and should not be used by anyone under the age of 18 without the explicit permission and supervision of a parent or guardian.

    The Use of this guide requires parental discretion, as some content may not be suitable for all ages. [Your Name or Organization] will not be held liable for any damages arising from the use of this book by minors without the explicit permission and supervision of a parent or guardian.

    Copyright [Year] [Your Name or Organization]. Licensed under the Creative Commons Attribution 4.0 International License. To view a copy of this license, visit http://creativecommons.org/licenses/by/4.0/

    You are free to:

    • Share: copy and redistribute the material in any medium or format
    • Adapt: remix, transform, and build upon the material
    • Attribution: You must give appropriate credit, provide a link to the license, and indicate if changes were made. You may do so in any reasonable manner, but not in any way that suggests the licensor endorses you or your use.
    • No additional restrictions — You may not apply legal terms or technological measures that legally restrict others from doing anything the license permits.
    • The licensor [Your Name or Organization] cannot revoke these freedoms as long as you follow the license terms.
  • List RPG

    List RPG

    This blog provides a barebones generic Fantasy RPG that uses as simple journey to destination structure that is built using lists.

    The intent is for the GM to either to quickly pre-plan the adventure end to end, or roll for / select options during the games session. The game mechanics are left to the GM to decide, based on the available materials (Dice, Card, Pencil and Paper), time, preferences, player and their experience..

    GM Materials

    The general structure for a role-playing game (RPG) adventure module goes something like this:

    1. Introduction: Start with an overview of the adventure module. Briefly describe the setting, the primary goal, and the challenges that the players will face. Provide any necessary background information to help the players understand the situation.
    2. Background: Provide additional information on the setting, including any important factions, locations, or NPCs (non-player characters) that will play a role in the adventure. This section should also include any relevant rules or mechanics that will come into play during the adventure.
    3. Objectives: Outline the main objectives of the adventure. This might include retrieving an important item, defeating a powerful enemy, or discovering a hidden location. Be sure to provide clear and concise instructions on what the players need to do to achieve their goals.
    4. Encounters: Break the adventure down into a series of encounters, each of which presents a challenge for the players to overcome. This might include combat encounters, puzzles to solve, or social interactions with NPCs. Each encounter should be designed to advance the story and help the players achieve their objectives.
    5. Rewards: Provide appropriate rewards for the players as they progress through the adventure. This might include treasure, experience points, or other benefits that will help the players advance their characters.
    6. Conclusion: Wrap up the adventure with a satisfying conclusion. This might involve defeating a final boss, achieving the primary objective, or discovering a surprising twist in the story. Be sure to tie up any loose ends and provide closure for the players.
    7. Appendices: Include any additional resources or information that the players may find helpful. This might include maps, character sheets, or additional background information on the setting or NPCs.

    The structure is just a general guide, and you can modify it to fit the needs of your specific adventure.

    Introduction

    Enter the Game

    Welcome to the world of [insert your RPG name here]! In this game, you will take on the role of a character who will embark on a grand adventure in a fantastical world filled with danger and wonder.

    You will create your character by choosing their class, and abilities, and then guide them through a series of challenges and quests as they gain experience, level up, and become more powerful.

    The game will be guided by a Game Master (GM) who will narrate the story, control the non-player characters, and facilitate with their chosen game mechanics. Together, you and the GM will create a collaborative story filled with excitement, suspense, and unexpected twists and turns.

    Whether you choose to be a noble knight, a crafty rogue, a powerful wizard, or any other type of character, the fate of the world is in your hands. Are you ready to embark on an epic journey of adventure and heroism?

    The game begins now!

    Backgrounds

    Set the Background

    Here are s list of common fantasy RPG background settings. Pick one or combine two for a different experience.

    1. Medieval Kingdom: A classic setting with knights, castles, and lords ruling over the realm.
    2. Dark Fantasy: A bleak and grim setting with horrors lurking around every corner and moral ambiguity at every turn.
    3. High Fantasy: A world filled with magic and wonder, where ancient artifacts and powerful beings shape the course of history.
    4. Steampunk: A world where magic and technology blend together to create a unique and inventive society.
    5. Gothic Horror: A setting of dark castles, haunted forests, and twisted creatures of the night.
    6. Mythic Greece: A world inspired by the mythology of ancient Greece, filled with gods, heroes, and epic quests.
    7. Pirate Adventure: A world of high seas and swashbuckling adventure, where players can captain their own ship and seek out treasure.
    8. Wild West: A fantasy setting inspired by the American Old West, with magic and monsters adding a supernatural twist to the genre.
    9. Post Apocalypse: A futuristic world where society has collapses, advanced technology has failed and artificial intelligence has changed the very nature of society.
    10. Arabian Nights: A world inspired by the tales of the Thousand and One Nights, filled with genies, flying carpets, and epic adventures in the desert.

    Objectives

    Set the Objective

    The player characters are adventurers or heroes, they need to be motivated with meaningful and challenging objectives to start their journey. Here’s a list of objectives or adventure hooks. Combining two or more may make their journey and destination much more interesting.

    1. Rescue Mission: The players are tasked with rescuing someone who has been captured or kidnapped by an enemy or hostile force.
    2. Retrieve an Artifact: The players must recover a valuable and powerful artifact that has been lost, stolen, or hidden away.
    3. Escort Mission: The players are tasked with escorting an important NPC or valuable cargo across a dangerous or treacherous landscape.
    4. Investigate a Mystery: The players must investigate a mystery or solve a puzzle, such as a murder or disappearance, to uncover the truth behind a strange occurrence.
    5. Stop a Threat: The players must stop a dangerous threat, such as a bandit gang, a monster terrorizing a village, or a mad scientist conducting dangerous experiments.
    6. Clear a Dungeon: The players must clear a dungeon or other location of monsters, traps, and obstacles to claim a valuable reward or uncover a hidden secret.
    7. Deliver a Message: The players are tasked with delivering an important message or package to a far-off location, facing danger and obstacles along the way.
    8. Retrieve a Person: The players must locate and retrieve a specific person who has gone missing, such as a lost child, a runaway spouse, or an important witness.
    9. Investigate a Curse: The players must investigate a curse or supernatural phenomenon that is plaguing a town or region, discovering the source and finding a way to lift it.
    10. Help an Ally: The players must help an ally or friend who is in trouble, such as aiding a wounded soldier, saving a family member, or rescuing a mentor.
    11. Discover a Lost City: The players must discover a lost city, ruin, or other ancient location that is rumoured to hold great power or treasure.
    12. Stop a Conspiracy: The players must uncover and stop a conspiracy or plot that threatens to disrupt the balance of power or plunge the world into chaos.

    Note: You can adjust the quest hooks to fit the setting and theme of your adventure. Also, you can add more quest hooks or modify them as you see fit.

    Non-Player Characters

    The adventurers will meet and interact with the GM’s Non-Player characters. Here’s a List of typical NPCs to start off with:

    1. Grizzled Veteran: An experienced warrior or adventurer who has seen their fair share of battles and is willing to share their knowledge and expertise with the players.
    2. Shady Merchant: A merchant or trader who deals in illegal or forbidden goods and services, such as drugs, stolen items, or smuggling.
    3. Wise Elder: An elderly person who possesses great wisdom and knowledge, and can offer guidance or advice to the players.
    4. Arrogant Noble: A wealthy and entitled noble who looks down on those beneath them and expects to be treated with respect and deference.
    5. Skilled Artisan: An artisan or craftsman who possesses great skill and talent in their trade, and may be able to create or repair valuable items for the players.
    6. Ambitious Politician: A politician or public figure who is driven by ambition and is willing to do whatever it takes to achieve their goals, including manipulating and betraying others.
    7. Devoted Priest: A religious figure who is devoted to their faith and may offer spiritual guidance or healing to the players.
    8. Mysterious Stranger: A mysterious and enigmatic figure who seems to know more than they are letting on, and may be either an ally or an enemy.
    9. Jovial Entertainer: An entertainer or performer who is skilled at entertaining crowds and lifting people’s spirits, and may offer distraction or respite from the stresses of adventuring.
    10. Cunning Thief: A skilled thief or rogue who is adept at stealing, sneaking, and avoiding detection, and may be able to offer valuable skills or services to the players.
    11. Nervous Scholar: A scholar or academic who possesses great knowledge and expertise in a specific field, but may be nervous or anxious in social situations.
    12. Stubborn Farmer: A farmer or rural worker who is hardworking and stubborn, but may have valuable knowledge of the local terrain and natural resources.

    You can adjust the NPCs to fit the setting and theme of your adventure. Also, you can add more NPCs or modify them as you see fit.

    Encounters & Events

    No journey is without event in this world, here’s a list of random encounter list for a journey through the land:

    1. Ambush – The players are ambushed by bandits, wild animals, or hostile creatures.
    2. Natural Obstacle – The players encounter a natural obstacle such as a river, ravine, or rocky outcropping that must be navigated.
    3. Mysterious Structure – The players stumble upon a mysterious structure such as an ancient ruin, abandoned fortress, or strange monument.
    4. Weather Event – The players encounter a weather event such as a blizzard, sandstorm, or torrential downpour that hampers their progress.
    5. Lost Traveler – The players encounter a lost traveler who may provide valuable information or ask for assistance.
    6. Roadblock – The players come across a roadblock such as a fallen tree, landslide, or collapsed bridge that must be cleared.
    7. Non-Hostile Encounter – The players encounter a non-hostile creature such as a herd of grazing animals, a friendly traveler, or a group of hunters.
    8. Hidden Cache – The players discover a hidden cache of supplies, weapons, or treasure.
    9. Dangerous Terrain – The players must navigate dangerous terrain such as a steep cliff, treacherous mountain pass, or unstable bog.
    10. Strange Phenomenon – The players encounter a strange phenomenon such as a glowing fog, eerie silence, or mysterious aura.
    11. Quest Hook – The players encounter an NPC who provides a quest or mission that will lead them to their next destination.
    12. Random Thoughts – Make on up from the first thing that comes to mind.

    You can adjust the encounters to fit the setting and theme of your adventure. Also, you can add more encounters or modify them as you see fit. It is best to use the journey as an opportunity to build skills, and promote team work with low level challenges, rather than seek to annihilate them before they reach their destination.

    Found Objects

    Culture and people come and go and loose or leave thing in the world. Here’s a list of objects that could be provided to the adventurers at the beginning, or found on the journey:

    1. A rusty sword or other weapon, left behind by a long-dead warrior.
    2. A discarded backpack or other piece of equipment, lost by a previous adventurer.
    3. A strange rock or crystal, with mystical properties that could be harnessed for magical spells.
    4. A pile of bones or a skeleton, perhaps the remains of a creature or adventurer who met a gruesome end.
    5. A hidden cache of treasure, buried or secreted away by a previous adventurer or bandit.
    6. A well-preserved ancient artifact, unearthed by erosion or shifting terrain.
    7. A cluster of mushrooms or other edible plants, providing a much-needed source of food in the wilderness.
    8. A mysterious stone circle or other ancient monument, whose purpose or significance has been lost to time.
    9. A discarded map or parchment, perhaps revealing the location of a hidden treasure or secret dungeon.
    10. A broken piece of machinery or other advanced technology, left behind by an advanced civilization.
    11. A small stream or pool, offering a refreshing drink or the chance to catch fish for food.
    12. A gnarled and ancient tree, whose bark or wood may have mystical properties or offer shelter from the elements.

    Note: You can adjust the objects to fit the setting and theme of your adventure. Also, you can add more objects or modify them as you see fit.

    Food and Drink

    Your adventurers need to eat every day to keep their strength and moral up. Here is list of food and drink that you could buy, cook (or steal):

    1. Hardtack and Water: A staple ration for long journeys, consisting of dry, hard bread and water.
    2. Roasted Meat and Ale: A hearty meal of roasted meat and a mug of ale, perfect for a night around the campfire.
    3. Fresh Fruits and Juices: A refreshing and healthy option, providing natural sugars and vitamins.
    4. Stale Bread and Sour Wine: A less-than-ideal meal, consisting of dry, stale bread and a sour wine.
    5. Spicy Stew and Cider: A warming meal, consisting of a hearty stew spiced with herbs and a mug of cider.
    6. Cheese and Mead: A simple but satisfying meal, consisting of cheese and a mug of mead, a honey-based alcoholic drink.
    7. Bland Porridge and Water: A basic meal of bland porridge and water, providing sustenance without much flavor.
    8. Fresh Fish and Wine: A delicious and healthy option, consisting of freshly caught fish and a glass of wine.
    9. Savory Pie and Ale: A filling and flavorful option, consisting of a savory meat pie and a mug of ale.
    10. Sweet Pastries and Tea: A sweet and indulgent option, consisting of pastries filled with fruits or sweet cream and a cup of tea.
    11. Smoked Meat and Whiskey: A hearty and flavorful option, consisting of smoked meat and a glass of whiskey.
    12. Exotic Spices and Herbal Tea: An unusual and flavorful option, consisting of exotic spices and an herbal tea infusion.

    Note: You can adjust the food and drink options to fit the setting and theme of your adventure. Also, you can add more options or modify them as you see fit.

    Foraging and Game

    If the adventurers can’t buy food, or have run out on your journey, then they are going to have to find or hunt for it. Here a list for foraging and game items:

    1. Berries: A patch of wild berries, providing a sweet and nutritious snack.
    2. Rabbits: A small game animal, providing a source of meat and fur.
    3. Nuts: A grove of nut trees, providing a rich and flavorful snack.
    4. Squirrels: A small game animal, providing a source of meat and fur.
    5. Mushrooms: A cluster of edible mushrooms, providing a savory and nutritious addition to meals.
    6. Pheasants: A game bird, providing a source of meat and feathers.
    7. Wild Greens: A patch of edible greens, providing a healthy addition to meals.
    8. Deer: A large game animal, providing a source of meat and hides.
    9. Fish: A stream or pond teeming with fish, providing a source of protein.
    10. Wild Boar: A large game animal, providing a source of meat and tusks.
    11. Roots: A patch of edible roots, providing a starchy and filling addition to meals.
    12. Wolves: A predator, providing a source of danger and excitement for skilled hunters.

    Note: You can adjust the foraging and game options to fit the setting and theme of your adventure. Also, you can add more options or modify them as you see fit. The GM can take the opportunity to further challenge the adventurers with poisons and a dangerous animal encounters.

    Random Events

    The adventurers journey may be long (and boring), so here’s a few random events that the GM could use in the game to spice up the journey. Combining two or more events may lead to more difficult challenges:

    1. Natural Disaster: A natural disaster such as a tornado, earthquake, or flood occurs.
    2. Encounter with a Rival: The party encounters a rival group or individual, who may be friendly or hostile.
    3. Discovery: The party discovers a new location, item, or information that could be useful to their goals.
    4. Traps or Obstacles: The party encounters a trap or obstacle that they must overcome to continue on their journey.
    5. Theft: The party’s supplies or equipment are stolen or misplaced, requiring them to find or replace them.
    6. Assistance from Strangers: The party receives assistance from strangers, who may offer food, shelter, or useful information.
    7. Betrayal: One of the party members is betrayed by a trusted ally, resulting in a difficult situation.
    8. Magical Effect: A magical effect occurs in the area, potentially causing unexpected consequences.
    9. Illness or Injury: One or more party members become ill or injured, requiring medical attention or rest.
    10. Mysterious Happening: Something strange or mysterious occurs, potentially leading to a new quest or adventure.
    11. Enemy Attack: The party is attacked by an enemy or group of enemies, requiring them to defend themselves.
    12. Beneficial Event: The party experiences a positive or beneficial event, such as finding a cache of treasure or a powerful magical item.

    Note: You can adjust the events to fit the setting and theme of your adventure, and you can add more options or modify them as you see fit. Additionally, the GM could include more specific details or options for each event to add more depth and complexity to the random events.

    Weird Encounters

    As a adventurers descending deeper into the fantasy world, somethings make not make any sense. Here’s a list of weird encounters to unsettle the adventurers:

    1. A group of goblins are seen performing a play about a giant cheese wheel that fell from the sky and destroyed their village.
    2. The party comes across a lone tree with a face carved into the trunk. It greets the party and offers them some of its fruit.
    3. The sound of a beautiful voice leads the party to a clearing, where they find a tree growing upside down. The tree is singing a beautiful song.
    4. A group of chickens are walking down the road wearing boots and hats. They do not appear to be scared of the party.
    5. The party sees a man riding a giant snail. He introduces himself as the king of the snails and invites the party to his castle.
    6. A group of squirrels are seen performing a ritual dance around a pile of acorns. They invite the party to join in the dance.
    7. A talking deer asks the party to help him find his missing antlers, which were stolen by a mischievous group of goblins.
    8. A group of small, humanoid creatures with mushrooms growing out of their heads approach the party. They offer the party a feast of strange, delicious mushrooms.
    9. A giant frog wearing a crown and carrying a scepter hops up to the party and demands that they kneel before him.
    10. The party sees a group of creatures that look like walking, talking cabbages. They are having a heated argument about who is the best dancer.
    11. The party comes across a field of flowers that all have eyes. They follow the party’s movements with their gazes.
    12. The party sees a group of creatures made entirely out of water. They are singing a hauntingly beautiful song.
    13. A man with a fish head introduces himself as the king of the river. He invites the party to his underwater palace.
    14. The party sees a group of creatures made entirely out of fire. They dance and flicker in the wind.
    15. A friendly ghost offers to lead the party through a dangerous area. It warns them that it can only stay in this realm for a short time.
    16. The party sees a group of creatures made entirely out of ice. They slide and glide across the landscape, leaving trails of frost in their wake.
    17. The party comes across a strange, twisted tree with a door in its trunk. The door opens and a gnome invites the party in for tea.
    18. The party sees a group of creatures made entirely out of sand. They shimmer and sparkle in the sunlight.
    19. A giant rabbit with a pocket watch hops by the party. It is late for an important date and is too busy to talk.
    20. The party comes across a group of sentient trees that are having a heated debate about the merits of different types of sunlight.

    Note: As with any table of this sort, you can modify the encounters to suit your game world and your players’ preferences. Additionally, you can add more detail to each encounter and use them as the basis for larger adventures or sub-quests.

    Sinister Events

    As the journey progresses, strange thing may happen and sinister events unfold. Here’s a list of sinister events that may threaten the adventurers and test their resolve:

    1. A thick fog rolls in, obscuring visibility and causing strange noises to echo through the area.
    2. The party comes across a group of people wearing masks and performing a bizarre ritual around a fire.
    3. A sudden earthquake shakes the ground, causing cracks to form and revealing strange, otherworldly creatures.
    4. A twisted, gnarled tree reaches out with grasping branches and seems to be trying to grab the party.
    5. The party encounters a group of cultists who are sacrificing a creature to a dark deity.
    6. The moon turns blood red and strange, eldritch creatures begin to appear.
    7. The party finds a strange, ancient artifact that begins to hum and pulse with an otherworldly energy.
    8. The party comes across a village that is entirely deserted except for a single, sinister figure watching from a distance.
    9. The sky turns black as night, even though it’s daytime, and the party hears the sound of flapping wings in the distance.
    10. A group of strange, mutated animals emerge from the shadows and begin to attack the party.
    11. The party discovers a hidden laboratory where an insane scientist has been conducting experiments on living creatures.
    12. A ghostly figure appears before the party and tells them that they must complete a dangerous task in order to free themselves from a curse.
    13. The party finds themselves in a twisted, otherworldly version of their surroundings, where everything is distorted and dangerous.
    14. A mysterious figure appears before the party and offers them a deal that seems too good to be true.
    15. The party comes across a group of people who have been possessed by dark forces and are attacking each other in a frenzy.
    16. Strange, otherworldly music begins to fill the air, causing the party to feel disoriented and afraid.
    17. The party comes across a house that is seemingly alive, with walls that shift and rooms that move.
    18. A group of shadowy figures emerge from the darkness, intent on capturing the party for some unknown purpose.
    19. The party discovers a hidden portal to another dimension, which seems to be filled with strange and dangerous creatures.
    20. A mysterious voice begins to speak directly into the party’s minds, warning them of an impending danger that they must stop at all costs.

    This is just a starting point, and you can modify the encounters to fit your game world and your players’ preferences. Additionally, you can use these encounters as the basis for larger adventures or quests, or combine them to create a longer campaign filled with weird and sinister events.

    Destinations

    Every journey ends. The adventures tired an exhausted by the encounters and events on the journey and have reached their destination. As a strong unified team, they must now work together and face the last ultimate challenge to meet objective and fulfil their quest.

    Here are some typical destinations, along with a brief description and the challenge they present:

    1. The Lost City Under water City – Deep beneath the ocean lies the fabled city of Atlantis, long forgotten by the surface world. The challenge is to explore the city and uncover its secrets, while also avoiding dangerous sea creatures and traps left behind by its ancient inhabitants.
    2. The Dark Forest – This dense and foreboding forest is home to all manner of sinister creatures, including trolls, goblins, and dark elves. The challenge is to navigate the forest and avoid its many dangers, while also searching for a powerful artifact said to be hidden deep within its heart.
    3. The Frozen Wasteland – In the far north lies a frozen wasteland, home to ice giants, frost dragons, and other dangerous creatures. The challenge is to survive the harsh environment, gather resources, and explore ancient ruins in search of lost treasure.
    4. The Underworld – This subterranean realm is ruled by demons, undead, and other foul creatures. The challenge is to navigate its treacherous tunnels, avoid traps and ambushes, and defeat the powerful demon lords who rule over it.
    5. The Floating City – This mysterious city floats high in the clouds, accessible only by airship or magical means. The challenge is to explore the city and uncover its secrets, while also dealing with the political intrigues and rival factions that vie for control.
    6. The Elemental Plane – Each of the four elements – earth, air, fire, and water – has its own plane of existence. The challenge is to explore these planes and harness the power of the elements to defeat powerful elemental lords and their minions.
    7. The Shadow Realm – This dark and twisted mirror of the real world is home to shadow creatures and evil spirits. The challenge is to navigate its shifting landscape and defeat the shadow lord who seeks to extend his influence into the real world.
    8. The Celestial Palace – High above the clouds lies the Celestial Palace, home to the gods themselves. The challenge is to gain access to the palace, navigate its many chambers and challenges, and win the favor of the gods.
    9. The Timeless Library – This ancient and mystical library contains knowledge from across time and space. The challenge is to navigate its labyrinthine halls and find the specific tome or artifact needed to solve a particular quest or problem.
    10. The Crystal Caves – Deep beneath the earth lies a network of crystal caves, filled with glittering treasures and dangerous monsters. The challenge is to navigate the twisting tunnels and defeat the powerful crystal dragon who hoards the greatest treasure of them all.
    11. The Forbidden Island – This isolated and uncharted island is said to be cursed by ancient gods. The challenge is to explore its rugged terrain, uncover its secrets, and confront the powerful priestesses who maintain the curse.
    12. The Living Dungeon – This dungeon is alive and constantly evolving, with traps and monsters that shift and change from room to room. The challenge is to navigate the dungeon’s ever-changing maze, defeat its guardians, and reach the treasure at the heart of the maze.

    Here are few more destinations with weird or sinister twists that may be used to challenge the adventurers further.:

    1. The Black Tower: This ominous tower looms over the landscape, shrouded in dark magic. The challenge for the adventurers is to penetrate its defenses and reach the top, where an evil sorcerer resides.
    2. The Lost City of the Dead: Hidden in a desolate wasteland, this ancient city is said to be cursed. The challenge for the adventurers is to navigate its twisted streets and discover the secrets that lie within, all while avoiding the undead guardians that roam its ruined halls.
    3. The Bloodwood: This dark forest is said to be inhabited by malevolent spirits and ancient curses. The challenge for the adventurers is to survive its twisted paths and uncover the dark power that lurks at its heart.
    4. The Hollow Mountains: These eerie peaks are home to a forgotten civilization, rumored to have been destroyed by a terrible curse. The challenge for the adventurers is to delve deep into the mountains and discover the secrets of their ancient civilization.
    5. The Sunken City: This ancient metropolis was once a hub of trade and culture, but now lies at the bottom of the sea. The challenge for the adventurers is to brave the depths and uncover the lost treasures of this underwater world, all while avoiding the Kraken and other dangers that lurk within.
    6. The Dark Moon: This mysterious satellite of the planet is shrouded in darkness and magic. The challenge for the adventurers is to find a way to reach its surface, where ancient ruins and powerful magic await. But the journey is perilous, as the moon is home to dangerous god-like creatures and powerful sorcerers who will stop at nothing to protect their secrets.

    The GM can decide to present the adventurers with impossible task which they are unlikely to succeed. Here are more destinations with difficult or no-win scenarios:

    1. The Underworld – A dark, cavernous realm ruled by a cruel and powerful demon lord. The players must navigate a maze of treacherous tunnels and face off against hordes of demonic minions to reach the demon lord’s throne room. However, once they arrive, they discover that defeating him means taking his place as ruler of the Underworld, forever binding their souls to this infernal realm.
    2. The Dreamworld – A realm of pure imagination and fantasy, created by a powerful dreamweaver. The players must venture into this realm to retrieve a powerful artifact, but find themselves constantly pursued by the dreamweaver’s nightmares and illusions. They must overcome their own fears and doubts to succeed, but doing so will require them to sacrifice a cherished memory or aspect of themselves.
    3. The Celestial Realm – A realm of radiant light and beauty, inhabited by powerful angels and divine beings. The players must seek the aid of these beings to stop a powerful evil from spreading across the land. However, they soon discover that the Celestial Realm is a place of strict order and obedience, and that the beings here demand complete loyalty and servitude. If the players refuse, they will be cast out of the Celestial Realm forever.
    4. The Labyrinth – A vast, twisting maze that shifts and changes constantly. The players must navigate this labyrinth to reach the treasure at its heart, but they find themselves pursued by a monstrous minotaur that hunts them relentlessly. If they manage to defeat the minotaur, they discover that the treasure is cursed, and that it will grant them immense power at the cost of their sanity.
    5. The Abyss – A bottomless pit that leads to an infinite, alien realm of chaos and madness. The players must venture into this abyss to retrieve a powerful artifact, but the constant exposure to the abyss’s twisted energies begins to warp their minds and bodies. If they do manage to retrieve the artifact, they will find that it is a sentient, malevolent entity that seeks to use their bodies as vessels to escape the abyss and wreak havoc on the world.
    6. The Island of the Dead – An eerie, mist-shrouded island that is said to be the gateway to the afterlife. The players must venture here to retrieve the soul of a loved one or ally, but they soon discover that the island is inhabited by vengeful spirits and undead creatures. If they manage to retrieve the soul, they must fight their way back through the island’s horrors to escape, but doing so will require them to make a sacrifice of their own life force or soul.

    Boss Level

    The GM can, additionally, decide to present the adventurers with the Major Villain to over come at the destination. Here’s a list of major boss level type villains (and their hidden weaknesses) to thwart the adventurers:

    1. The Dark Sorcerer: A powerful mage who has spent years studying the forbidden arts of magic. He wields immense power and can control the elements themselves. His power is tied to a hidden talisman that, if destroyed, weakens him.
    2. The Corrupted King: A once great ruler who was corrupted by dark magic. He rules his kingdom with an iron fist and has amassed an army of undead soldiers. His power comes from a cursed crown that, if removed, weakens him.
    3. The Demon Lord: A demonic entity who seeks to destroy all life. He commands an army of demons and can control the minds of his enemies. His power is tied to a forbidden artifact that, if destroyed, weakens him.
    4. The Lich Queen: A powerful necromancer who has achieved immortality through dark magic. She commands an army of undead and can drain the life force of her enemies. Her power is tied to a hidden phylactery that, if destroyed, weakens her.
    5. The Dragon Overlord: A massive dragon who has enslaved an entire kingdom. He breathes fire and can fly, making him a formidable foe. His power comes from a magical amulet that, if stolen, weakens him.
    6. The Vampire Lord: An ancient vampire who has lived for centuries. He can control the minds of his victims and drain their blood to sustain himself. His power is tied to a hidden coffin that, if destroyed, weakens him.
    7. The Titan King: A colossal giant who rules over a race of giants. He wields a massive hammer and can cause earthquakes with his steps. His power is tied to a magical gemstone that, if shattered, weakens him.
    8. The Witch Queen: A cunning sorceress who has made a pact with dark forces. She can summon demons and cast powerful spells. Her power is tied to a hidden ritual that, if disrupted, weakens her.
    9. The Warlord: A ruthless conqueror who has amassed a massive army. He wields a massive sword and has no mercy for his enemies. His power comes from his loyal followers, who can be turned against him if convinced.
    10. The Shadow Master: A mysterious figure who can control the shadows themselves. He can move through walls and attack from the shadows. His power is tied to a hidden artifact that, if exposed to light, weakens him.
    11. The Cult Leader: A charismatic leader who has convinced his followers to worship dark gods. He can summon demons and control the minds of his enemies. His power is tied to a hidden altar that, if destroyed, weakens him.
    12. The Undead Empress: A powerful undead sorceress who seeks to conquer the world. She commands an army of undead soldiers and can summon ghosts to do her bidding. Her power is tied to a hidden tomb that, if opened, weakens her.

    Some Boss level Villains are Monsters are too powerful to defeat, The adventurers must trick, outsmart, avoid or escape to see them to get to the conclusion pf the game. Here is a list that can be adapted as needed.

    1. The Leviathan – A massive sea serpent that can swallow ships whole and controls the ocean currents. It cannot be defeated in battle, but players can try to outsmart it or find a way to divert its attention.
    2. The Behemoth – A colossal beast that can trample entire cities and withstand any physical attack. Its only weakness is its slow speed, and players must flee and outmaneuver it to survive.
    3. The Chimera – A creature with multiple heads, each with a different breath weapon and ability. It cannot be killed, but players can find a way to neutralize its heads or distract it long enough to escape.
    4. The Hydra – A agile serpent-like monster with multiple regenerating heads that make it virtually invincible. Players must find a way to cut off all its heads simultaneously or avoid it altogether.
    5. The Roc – A massive bird of prey with razor-sharp talons and the ability to create strong gusts of wind. It cannot be defeated, but players can try to lure it away or find a way to ground it.
    6. The Juggernaut – A massive slow witted golem made of indestructible metal that can crush anything in its path. Its only weakness is its slow speed, and players must avoid it or find a way to slow it down.

    Rewards for Heroes

    At the end of the journey and with their objective met, the surviving adventures are heroes. They started their journey to solve a problem or for personal gain. The GM should evaluate their performance and decide on the level of reward. Here’s a list of small rewards that are found or won, or allowed to be kept from the game, in reparation for their many troubles:

    1. A magical item of great power and potential.
    2. A rare and valuable material or resource.
    3. A powerful ally or companion for the party.
    4. A safe haven or base of operations.
    5. A treasure trove of gold, jewels, and other riches.
    6. A valuable piece of information or knowledge.
    7. An invitation to join a powerful and influential organization.
    8. A boon or blessing from a powerful deity or supernatural being.
    9. A rare and exotic creature or mount.
    10. A powerful weapon or piece of armour.
    11. A magical spell or ritual of great power.
    12. A title or noble rank within a kingdom or society.
    13. A powerful and loyal group of followers or henchmen.
    14. A piece of land or property of significant value.
    15. A map or guide to a hidden or lost location.
    16. A rare and powerful artifact or relic.
    17. A powerful and rare mount or vehicle.
    18. A powerful and mysterious mentor or teacher.
    19. A valuable and rare trade or craft skill.
    20. A special or unique ability or power.

    Conclusions

    At journey end, the unexpected may happen. Here is list of plot twists and conclusions for our Heroes. These are optional and for the GM to develop. They can be used a hooks into another game.

    1. The heroes successfully defeat the evil villain and save the world from destruction.
    2. The heroes fail to stop the villain, but they are able to save a few lives and prevent complete disaster.
    3. The heroes discover that the villain was actually working for a greater evil and the true battle has yet to be fought.
    4. The heroes are betrayed by one of their own and must confront them before continuing on their mission.
    5. The heroes realize that the true enemy was not who they thought it was and must change their strategy.
    6. The heroes uncover a conspiracy that reaches the highest levels of power and must decide whether to confront it head-on or work from the shadows.
    7. The heroes are hailed as heroes by the people they have saved and are given great rewards and recognition.
    8. The heroes must sacrifice one of their own in order to achieve their mission.
    9. The heroes must make a difficult moral decision that will have consequences for their future.
    10. The heroes discover a powerful artifact that can change the course of the world, but must keep it from falling into the wrong hands.
    11. The heroes must choose between their own personal interests and the greater good.
    12. The heroes are forced to make a temporary alliance with their enemies in order to stop a common threat.
    13. The heroes realize that they have been played all along and must confront the true puppet master behind the scenes.
    14. The heroes must navigate a treacherous political landscape in order to achieve their goals.
    15. The heroes face a moral dilemma that challenges their very beliefs and values.
    16. The heroes are forced to make a difficult decision that results in the death of a beloved NPC.
    17. The heroes discover that the villain was not evil, but misguided, and must help them see the error of their ways.
    18. The heroes are caught in a deadly trap and must use all their skills and ingenuity to escape.
    19. The heroes discover a hidden location that contains powerful secrets and knowledge.
    20. The heroes must face the consequences of their actions and decide how to make amends for their mistakes.

    Reference Tables

    The provided are examples, the GM is encouraged to creates additional list or tables for the game. These can be bought off the shelf, re-used from existing adventures or rule books or generated online.

    1. Random Encounter Table: A table used to determine the chance of encountering different types of creatures or NPCs in a given area.
    2. Treasure Table: A table used to determine the type and amount of treasure that might be found in a given location.
    3. Magic Item Table: A table used to randomly determine the type and properties of a magical item found in a treasure hoard or other location.
    4. Weather Table: A table used to determine the type of weather conditions in a given area, such as rain, snow, or thunderstorms.
    5. NPC Personality Traits Table: A table used to randomly determine the personality traits of NPCs encountered during gameplay.
    6. Skill Check Difficulty Table: A table used to determine the difficulty of a given skill check, such as picking a lock or sneaking past guards.
    7. Hazard Table: A table used to determine the chance of encountering hazards or obstacles in a given location, such as traps or difficult terrain.
    8. Quest Hook Table: A table used to provide players with potential story hooks or quests to pursue during gameplay.
    9. Random Event Table: A table used to determine the occurrence of random events during gameplay, such as sudden earthquakes or meteor showers.
    10. Faction Relationship Table: A table used to determine the current relationship between the players’ faction and other factions or organizations in the game world.
    11. Critical Hit or Failure Table: A table used to determine the effects of a critical hit or critical failure during combat.
    12. Travel Time Table: A table used to determine the amount of time required to travel between different locations on a map, taking into account terrain and other factors.

    Note: This is just a sample list of possible tables that you might find in an RPG. The specific tables used will vary depending on the system and setting of the game.

    Principles

    Here some principles for the fantasy game that may assist GM in structuring outcomes for their Players.

    1. Immersion: The game should provide an immersive experience that transports players into a fantastical world where they can explore, interact, and create their own stories.
    2. Exploration: The game should encourage exploration of the world, whether through uncovering hidden secrets, discovering new locations, or meeting new characters.
    3. Character development: The game should allow players to develop their characters over time, building skills, abilities, and relationships as they progress through the story.
    4. Risk and reward: The game should balance risk and reward, offering players challenging encounters that come with the potential for valuable loot or experience points.
    5. Player agency: The game should provide players with agency over their characters’ actions, allowing them to make meaningful choices that impact the story and their relationships with other characters.
    6. Strategy and tactics: The game should require strategic thinking and tactical decision-making in combat encounters, allowing players to use their skills and abilities to gain an advantage over their enemies.
    7. Worldbuilding: The game should have a richly detailed and consistent world that provides context for the story and allows players to learn and discover new things about the world and its inhabitants.
    8. Narrative: The game should have a compelling narrative that engages players emotionally and intellectually, driving them to explore the world and develop their characters.
    9. Collaboration: The game should encourage collaboration and teamwork among players, whether through party-based combat encounters or through non-combat challenges that require different characters to work together.
    10. Fairness: The game should be fair and balanced, providing players with a consistent and predictable set of rules that allow them to make informed decisions and engage with the world in a meaningful way.

    Narratives

    Here are some possible narratives for the game for the GM to structure the game or a campaign of sessions.

    1. “The Dark Lord’s Return”: The ancient evil that was thought to be vanquished has returned, and the players must gather powerful artifacts and allies to defeat the Dark Lord and his minions before they plunge the world into eternal darkness.
    2. “The Lost City”: Legends tell of a once-great city that disappeared from the face of the earth, leaving behind only ruins and forgotten secrets. The players must uncover the truth behind the city’s disappearance and the mysterious forces that still guard its treasures.
    3. “The Dragon’s Curse”: A powerful dragon has laid a curse on the kingdom, causing crops to wither and die, and bringing famine and suffering to the people. The players must track down the dragon and find a way to break the curse before it’s too late.
    4. “The Feywild”: The players are transported to a magical realm of faeries and sprites, where they must navigate the whimsical and dangerous landscape, negotiate with the capricious fey lords, and unravel a web of ancient prophecies and rivalries.
    5. “The Time Warp”: A powerful wizard’s experiment has gone awry, trapping the players in a time loop that forces them to relive the same day over and over again. They must use their knowledge of past and future events to solve puzzles, overcome challenges, and break the wizard’s spell.
    6. “The Underworld”: The players descend into the dark, cavernous depths of the earth, where they must battle demons, undead, and other horrors to find a lost artifact that can save their world from destruction.
    7. “The Elemental Crystals”: Four powerful elemental crystals have been scattered across the land, and the players must find them and use them to stop a rampaging elemental force that threatens to destroy everything in its path.
    8. “The Necromancer’s Tower”: A powerful necromancer has taken up residence in a forbidding tower, from which he sends his undead minions to terrorize the surrounding countryside. The players must infiltrate the tower, confront the necromancer, and put an end to his foul schemes.
    9. “The Oracle’s Prophecy”: An ancient oracle has foretold a great cataclysm that will soon befall the world, and the players must decipher her cryptic messages and undertake a perilous journey to prevent the disaster from coming to pass.
    10. “The Pirate’s Curse”: The players find themselves caught up in a struggle for a cursed treasure that has driven many a pirate to madness and death. They must navigate treacherous seas, battle rival pirate crews, and overcome the curse’s dark power to claim the treasure for themselves.
  • OSR: Character Stats

    OSR: Character Stats

    In OSR, character stats refer to the numerical values that represent a character’s abilities and skills. These stats are typically determined by rolling dice and applying modifiers based on the character’s race, class, and other factors.

    The most common stats found in OSR games include:

    1. Strength (STR): Measures a character’s physical power and ability to carry heavy objects, perform feats of strength, and deal more damage in combat.
    2. Dexterity (DEX): Represents a character’s agility, reflexes, and hand-eye coordination. It influences actions like dodging attacks, picking locks, and using ranged weapons.
    3. Constitution (CON): Reflects a character’s overall health, stamina, and resistance to diseases, toxins, and fatigue. It affects hit points (a measure of how much damage a character can withstand before being defeated).
    4. Intelligence (INT): Measures a character’s mental acuity, memory, and reasoning abilities. It can influence skills such as magic use, knowledge checks, and problem-solving.
    5. Wisdom (WIS): Represents a character’s intuition, perception, and common sense. It can affect skills like perception, tracking, and resisting mind-affecting effects.
    6. Charisma (CHA): Reflects a character’s personal magnetism, charm, and leadership qualities. It can influence interactions with NPCs (non-player characters), reaction rolls, and certain social skills.

    In traditional OSR games, these stats are typically determined through dice rolls, commonly using 3d6 (rolling three six-sided dice) for each stat. The rolled values are then modified based on the character’s race, class, and other factors, such as magic items or temporary effects.

    These stats form the foundation for various in-game actions, determining a character’s capabilities, strengths, and weaknesses. They provide a framework for players to make decisions and resolve challenges within the game world.

    Example code for generating a OSR character stats in Visual Basic .NET:

    Dim Strength As Integer
    Dim Dexterity As Integer
    Dim Constitution As Integer
    Dim Intelligence As Integer
    Dim Wisdom As Integer
    Dim Charisma As Integer
    
    Randomize()
    
    Strength = Int((18 - 8 + 1) * Rnd() + 8)
    Dexterity = Int((18 - 8 + 1) * Rnd() + 8)
    Constitution = Int((18 - 8 + 1) * Rnd() + 8)
    Intelligence = Int((18 - 8 + 1) * Rnd() + 8)
    Wisdom = Int((18 - 8 + 1) * Rnd() + 8)
    Charisma = Int((18 - 8 + 1) * Rnd() + 8)
    
    MsgBox("Strength: " & Strength & vbCrLf & _
            "Dexterity: " & Dexterity & vbCrLf & _
            "Constitution: " & Constitution & vbCrLf & _
            "Intelligence: " & Intelligence & vbCrLf & _
            "Wisdom: " & Wisdom & vbCrLf & _
            "Charisma: " & Charisma)
    

    This code uses the Randomize function and the Rnd function to generate random numbers for the character’s stats. The code then displays the generated stats using a MsgBox.

    This is a very basic example and does not take into account any specific rules or characteristics of different OSR races or classes.

    Here’s an another example of code, this time in python, that generates stats for common character classes in a hypothetical OSR game:

    import random
    
    def roll_stat():
        return sum(sorted(random.randint(1, 6) for _ in range(3))[1:])
    
    def generate_stats():
        stats = {}
        stats['STR'] = roll_stat()
        stats['DEX'] = roll_stat()
        stats['CON'] = roll_stat()
        stats['INT'] = roll_stat()
        stats['WIS'] = roll_stat()
        stats['CHA'] = roll_stat()
        return stats
    
    def generate_stats_for_class(character_class):
        class_stats = {
            'fighter': {'STR': 15, 'DEX': 12, 'CON': 13, 'INT': 9, 'WIS': 8, 'CHA': 10},
            'rogue': {'STR': 12, 'DEX': 15, 'CON': 11, 'INT': 10, 'WIS': 8, 'CHA': 13},
            'wizard': {'STR': 9, 'DEX': 12, 'CON': 10, 'INT': 15, 'WIS': 8, 'CHA': 11}
        }
        base_stats = class_stats.get(character_class.lower())
        if not base_stats:
            return None
        
        stats = generate_stats()
        for stat, value in base_stats.items():
            stats[stat] = max(value, stats[stat])
        
        return stats
    
    # Example usage
    character_class = 'fighter'
    stats = generate_stats_for_class(character_class)
    if stats:
        print(f"Stats for a {character_class}: {stats}")
    else:
        print(f"Invalid character class: {character_class}")

    In this code, the roll_stat() function generates a random stat value by rolling three six-sided dice and summing the second and third highest values. The generate_stats() function calls roll_stat() for each stat and returns a dictionary of the generated stats.

    The generate_stats_for_class()`function takes a character class as input and retrieves the base stats for that class from a predefined dictionary.

    It then generates the remaining stats using generate_stats() and ensures that each stat is at least as high as its base value.

    Finally, it returns the complete set of stats for the given class.

    You can modify the class_stats dictionary to include more character classes and their respective base stat values.